Advertisement
Quick Links
R730 Access Point
Quick Setup Guide
This Quick Setup Guide provides step-by-step instructions on
how to install and begin using your Ruckus R730 Dual-Band
802.11ax Multimedia Wi-Fi Access Point (AP). After
completing the steps described in this guide, you will be able
to place the R730 at your site and provide wireless access to
users.
NOTE: R730 is supported in these SmartZone releases:
3.6.1, 3.6.2, 5.1 (native)
R730 is supported in these ZoneDirecor releases: 10.1.2,
10.3 (native)
NOTE: R730 is
not supported in SmartZone release 5.0 or
ZoneDirector 10.2. Customers with R730 APs will not be
able to upgrade to SmartZone 5.0 or ZoneDirector 10.2.
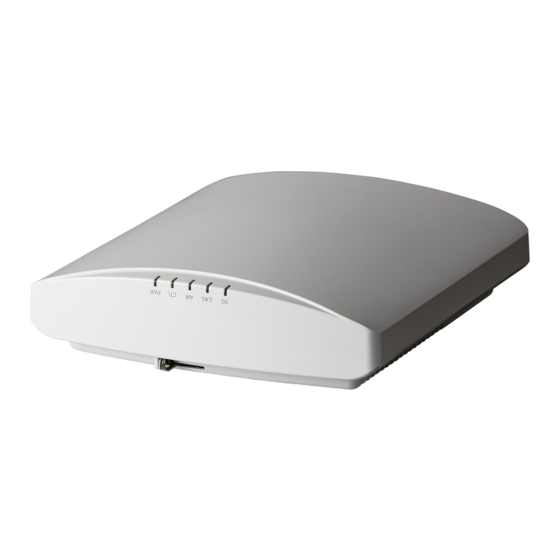
FIGURE 1 R730 - top
This Guide in Other Languages
• 请从以下网站获得该指南的简体中文版
support.ruckuswireless.com.
• Vous trouverez la version française de ce guide à l'adresse
suivante https://support.ruckuswireless.com.
• このガイドの日本語版は
https://
でご覧ください。
support.ruckuswireless.com
• 이 가이드의 한국어 버전은 웹 사이트
support.ruckuswireless.com) 에서 확인하시기 바랍니다.
©
Copyright
2018 ARRIS Enterprises LLC. All rights reserved.
Published March 2018, Part Number 800-71616-001 Rev A
• Veja a versão em português (Brasil) deste guia em
support.ruckuswireless.com.
• Puede ver la versión en español (América Latina) de esta
guía en
https://support.ruckuswireless.com.
Before You Begin
Before deploying Ruckus products, please check for the latest
software and the release documentation.
• Release Notes and other user documentation are available
at http://support.ruckuswireless.com/documents.
• Software upgrades are available at
support.ruckuswireless.com/software.
• Open source information is available at
opensource.ruckuswireless.com.
• Software license and limited warranty information are
available at http://support.ruckuswireless.com/warranty.
Package Contents
A complete R730 installation package includes all of the items
listed below:
• R730 Access Point
• Service Level Agreement/Limited Warranty Statement
• Declaration of Conformity
• Regulatory Statement
• Ruckus Access Point Getting Started Guide
• AP Cloud Management Insert
• This Quick Setup Guide
Step 1: Collecting Setup Requirements,
Hardware, and Tools
• Admin PC (computer with an Ethernet port and Wi-Fi
adapter)
• Cat 5e (or better) Ethernet cable
• Ruckus Wireless 48VDC power adapter (sold separately) --
OR--
• 802.3at-compliant Power over Ethernet (PoE) switch or PoE
injector
https://
NOTE: The PoE switch port must run link layer discovery
protocol (LLDP) power over Ethernet/MDI (PoE+) in order
for the R730 to operate in full-power mode. This may
require enabling both LLDP and Power via MDI (dot3) on
the switch, if available.
(https://
https://
NOTE: If powered by 802.3at PoE, note that the feature
set is reduced, as follows:
– 4x4 + 4x4 chain operation mode (reduced from 8x8
+ 4x4 under full power)
– USB port power reduced to 0.5W
Optional hardware and tools:
• Customer-supplied small padlock with a 3.5mm (0.14") or
smaller shackle diameter, used to fasten the AP to the
secure mounting bracket or the T-bar bracket.
http://
• Customer-ordered Ruckus Wireless 902-0120-0000 secure
mounting bracket kit:
http://
– If you are mounting the AP on a flat surface using the
secure mounting bracket kit, then you need an electric
drill with 4.75mm (3/16") drill bits.
– If you are mounting the AP on a pipe or pole using the
secure mounting bracket kit, then you will also need a
38.1mm to 63.5mm (1.5" to 2.5") pipe or pole, two pole
clamps, and hand tools to tighten the clamps.
Step 2: Connecting Your Computer to the AP
1. Using an Ethernet cable, connect your computer's
network port to the 5 Gbps PoE In port on the AP (A in
the Figure below).
2. Using a DC power adapter (sold separately), connect the
AP 48V DC port (B in the Figure below) to a convenient
and protected power source.
NOTE: Alternatively, connect the 5G POE In port to a
PoE injector or switch for both power and network
connectivity.
FIGURE 2 AP Ports
Page 1 of 4
Advertisement

Related Manuals for Arris Ruckus R730


Summary of Contents for Arris Ruckus R730
- Page 1 • Customer-ordered Ruckus Wireless 902-0120-0000 secure This Quick Setup Guide provides step-by-step instructions on support.ruckuswireless.com/software. mounting bracket kit: how to install and begin using your Ruckus R730 Dual-Band 802.11ax Multimedia Wi-Fi Access Point (AP). After • Open source information is available at http:// –...
- Page 2 AP. 8. Repeat for each Wireless # (Wireless LAN Number) interface that you want to enable. © Copyright 2018 ARRIS Enterprises LLC. All rights reserved. Page 2 of 4 Published March 2018, Part Number 800-71616-001 Rev A...
- Page 3 When you are done, the AP is mounted. ARRIS, the ARRIS logo, Ruckus, Ruckus Wireless, the Ruckus logo, and the Big Dog design are trademarks of ARRIS International plc and/or its Mounting on a Flat Surface affiliates. All other trademarks are the property of their respective owners.
- Page 4 © Copyright 2018 ARRIS Enterprises LLC. All rights reserved. Page 4 of 4 Published March 2018, Part Number 800-71616-001 Rev A...
Need help?
Do you have a question about the Ruckus R730 and is the answer not in the manual?
Questions and answers