
Related Manuals for Panasonic KX-TCD400RUB


Summary of Contents for Panasonic KX-TCD400RUB
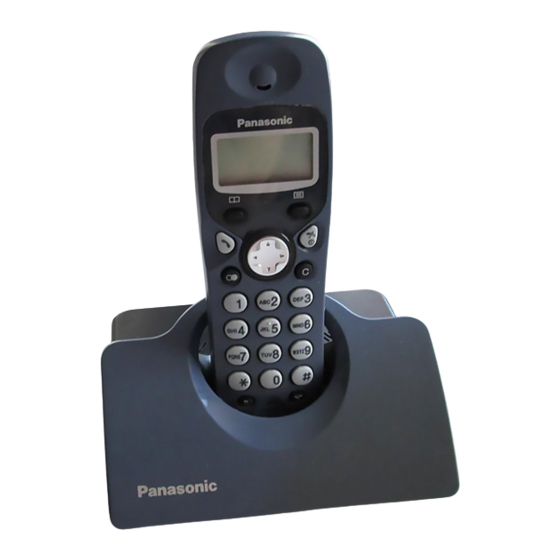
- Page 1 Telephone Equipment KX-TCD400RUB KX-TCD400RUC KX-TCD400RUF KX-A140RUB KX-A140RUC KX-A140RUF Digital Cordless Phone Black Version Dark Blue Version Light Purple Version (for Russia) ©...
-
Page 2: Table Of Contents
KX-TCD400RU B / KX-TCD400R UC / KX-TCD400R UF / KX-A140RU B / KX-A140RU C / KX-A140RUF CONTENTS Page Page 1 ABOUT LEAD FREE SOLDER (PbF: Pb free) 11 TROUBLESHOOTING GUIDE 2 FOR SERVICE TECHNICIANS 3 CAUTION 4 BATTERY 12 CHECK PROCEDURE (BASE UNIT) 5 LOCATION OF CONTROLS 13 CHECK PROCEDURE (HANDSET) 6 SETTINGS... - Page 3 KX-TCD400RU B / KX-TCD400R UC / KX-TCD400R UF / KX-A140RU B / KX-A140RU C / KX-A140RUF 32 TERMINAL GUIDE OF THE ICs, TRANSISTORS AND DIODES 26 EEPROM LAYOUT (BASE UNIT) 33 REPLACEMENT PARTS LIST 27 EEPROM LAYOUT (HANDSET) 28 HOW TO REPLACE FLAT PACKAGE IC 34 SCHEMATIC DIAGRAM (BASE UNIT) 35 SCHEMATIC DIAGRAM (HANDSET) 36 CIRCUIT BOARD (BASE UNIT)
-
Page 4: About Lead Free Solder (Pbf: Pb Free)
KX-TCD400RU B / KX-TCD400R UC / KX-TCD400R UF / KX-A140RU B / KX-A140RU C / KX-A140RUF 1 ABOUT LEAD FREE SOLDER (PbF: Pb free) Note: Caution · · · · 1.1. Suggested PbF Solder... - Page 5 KX-TCD400RU B / KX-TCD400R UC / KX-TCD400R UF / KX-A140RU B / KX-A140RU C / KX-A140RUF 1.2. How to recognize that Pb Free solder is used 1.2.1. Base Unit PCB Marked (Component View) J102 J103 J104 J105 J101 TP84 TP82 TP187 CHARGE CHARGE+...
- Page 6 KX-TCD400RU B / KX-TCD400R UC / KX-TCD400R UF / KX-A140RU B / KX-A140RU C / KX-A140RUF 1.2.2. Handset PCB Marked (Component View) TALK REDIAL BOOK LEFT DOWN RIGHT PROG POWER Marked (Flow Solder Side View) Note:...
-
Page 7: For Service Technicians
KX-TCD400RU B / KX-TCD400R UC / KX-TCD400R UF / KX-A140RU B / KX-A140RU C / KX-A140RUF 2 FOR SERVICE TECHNICIANS When repairing, the following precautions will help prevent recurring malfunctions. 3 CAUTION... -
Page 8: Battery
KX-TCD400RU B / KX-TCD400R UC / KX-TCD400R UF / KX-A140RU B / KX-A140RU C / KX-A140RUF 4 BATTERY 4.1. Battery Installation · 4.2. Battery Charge Please charge the batteries for about 7 hours before initial use. Note for Service:... - Page 9 4.4. Replacing the Batteries Charge new batteries for approximately 7 hours before initial use. (The telephone line cord must not be connected to the telephone socket at this time). · · · Please use only Panasonic P03P(Ni-MH) or P03H(Ni-Cd) batteries.
-
Page 10: Location Of Controls
KX-TCD400RU B / KX-TCD400R UC / KX-TCD400R UF / KX-A140RU B / KX-A140RU C / KX-A140RUF 5 LOCATION OF CONTROLS 5.1. Base Unit 5.2. Handset... -
Page 11: Settings
KX-TCD400RU B / KX-TCD400R UC / KX-TCD400R UF / KX-A140RU B / KX-A140RU C / KX-A140RUF 6 SETTINGS 6.1. Connection 1 2 3, 4 · 6.2. Symbols Used in This Service Manual... - Page 12 KX-TCD400RU B / KX-TCD400R UC / KX-TCD400R UF / KX-A140RU B / KX-A140RU C / KX-A140RUF 6.3. PIN Code 6.3.1. Base Unit · For Service Hint: 6.3.2. Handset · For Service Hint:...
- Page 13 KX-TCD400RU B / KX-TCD400R UC / KX-TCD400R UF / KX-A140RU B / KX-A140RU C / KX-A140RUF 6.3.3. Reset Base Unit PIN to Default (0000) -When There is NO Handset Registered- 6.3.3.1. Symptom 6.3.3.2. Thinkable Situation · · · 6.3.3.3. Remedy <Preparation>...
- Page 14 KX-TCD400RU B / KX-TCD400R UC / KX-TCD400R UF / KX-A140RU B / KX-A140RU C / KX-A140RUF 6.4. Reset 6.4.1. Base Unit · · Base Unit Initial Settings Function Initial Setting Remarks (selectable options) 6.4.2. Handset · ·...
- Page 15 KX-TCD400RU B / KX-TCD400R UC / KX-TCD400R UF / KX-A140RU B / KX-A140RU C / KX-A140RUF Handset Initial Settings Function Initial Setting Remarks (selectable options) 6.5. Key Lock When the key lock is on, emergency calls cannot be made until key lock is cancelled. ·...
- Page 16 KX-TCD400RU B / KX-TCD400R UC / KX-TCD400R UF / KX-A140RU B / KX-A140RU C / KX-A140RUF 6.8. Call BAR On/Off (Call Prohibition On/Off) · · · Handset Display 6.9. Selecting the Display Language · · → → → → → →...
- Page 17 KX-TCD400RU B / KX-TCD400R UC / KX-TCD400R UF / KX-A140RU B / KX-A140RU C / KX-A140RUF 6.11. Select Flash Timing · · For Service Hint: Flash Time setting 6.12. Automatic Route Selection 6.12.1. Storing the Carrier Code(s) · · 6.12.2. Storing the Area Code(s) ·...
- Page 18 KX-TCD400RU B / KX-TCD400R UC / KX-TCD400R UF / KX-A140RU B / KX-A140RU C / KX-A140RUF 6.12.3. Relate the Area Code(s) to the Carrier Code(s) · · · 6.12.4. Automatic Route Selection On/Off · ·...
-
Page 19: Display
KX-TCD400RU B / KX-TCD400R UC / KX-TCD400R UF / KX-A140RU B / KX-A140RU C / KX-A140RUF 6.13. Summary of Programmable Functions These operations need to be done with the Handset near the base unit. Press . Press until the arrow points to , then press PIN Code 7 DISPLAY... - Page 20 KX-TCD400RU B / KX-TCD400R UC / KX-TCD400R UF / KX-A140RU B / KX-A140RU C / KX-A140RUF 7.2. Before Requesting Help (Troubleshooting) Turn the power OFF then ON (Handset) / Disconnect then connect the AC adaptor (Base Unit). Cross Reference: Power On/Off Call BAR On/Off (Call Prohibition On/Off) Key Lock...
-
Page 21: Operations
KX-TCD400RU B / KX-TCD400R UC / KX-TCD400R UF / KX-A140RU B / KX-A140RU C / KX-A140RUF 8 OPERATIONS 8.1. Power On/Off 8.2. Making a Call CLEAR 8.3. Answering a Call · HOLD 8.4. Setting the Clock/Date ·... - Page 22 KX-TCD400RU B / KX-TCD400R UC / KX-TCD400R UF / KX-A140RU B / KX-A140RU C / KX-A140RUF 8.5. Phonebook 8.5.1. Storing a Caller Information · RIGHT LEFT CLEAR...
- Page 23 KX-TCD400RU B / KX-TCD400R UC / KX-TCD400R UF / KX-A140RU B / KX-A140RU C / KX-A140RUF · 8.5.2. Storing the Phone Number into the Phonebook When Pre-dialling · CLEAR...
- Page 24 KX-TCD400RU B / KX-TCD400R UC / KX-TCD400R UF / KX-A140RU B / KX-A140RU C / KX-A140RUF 8.5.3. Storing the Number from the Redial List into the Phonebook · RIGHT LEFT CLEAR 8.5.4. Hot Key (: Speed Dial) ·...
-
Page 25: Disassembly Instructions
KX-TCD400RU B / KX-TCD400R UC / KX-TCD400R UF / KX-A140RU B / KX-A140RU C / KX-A140RUF 9 DISASSEMBLY INSTRUCTIONS 9.1. Base Unit... - Page 26 KX-TCD400RU B / KX-TCD400R UC / KX-TCD400R UF / KX-A140RU B / KX-A140RU C / KX-A140RUF 9.2. Handset...
-
Page 27: Assembly Instructions
KX-TCD400RU B / KX-TCD400R UC / KX-TCD400R UF / KX-A140RU B / KX-A140RU C / KX-A140RUF 10 ASSEMBLY INSTRUCTIONS 10.1. Warning When Constructing the Base Unit CHG terminal is properly fit in the cabinet. CHG terminal comes out of rib by pulling black lead wire when opening the cabinet and turning the PCB over. -
Page 28: Troubleshooting Guide
KX-TCD400RU B / KX-TCD400R UC / KX-TCD400R UF / KX-A140RU B / KX-A140RU C / KX-A140RUF 11 TROUBLESHOOTING GUIDE Flow Chart Cross Reference: Check Power Bell Reception Check Battery Charge Check Link Check Handset Transmission Check Handset Reception SIGNAL ROUTE... - Page 29 KX-TCD400RU B / KX-TCD400R UC / KX-TCD400R UF / KX-A140RU B / KX-A140RU C / KX-A140RUF 11.1. Check Power 11.1.1. Base Unit Cross Reference Note: Power Supply Circuit 11.1.2. Handset Cross Reference Note: Power Supply Circuit/Reset Circuit...
- Page 30 KX-TCD400RU B / KX-TCD400R UC / KX-TCD400R UF / KX-A140RU B / KX-A140RU C / KX-A140RUF 11.2. Check Battery Charge 11.2.1. Base Unit Cross Reference: Charge Circuit 11.2.2. Handset Cross Reference: Note: Check Power Charge Circuit...
- Page 31 KX-TCD400RU B / KX-TCD400R UC / KX-TCD400R UF / KX-A140RU B / KX-A140RU C / KX-A140RUF 11.3. Check Link 11.3.1. Base Unit Cross Reference: Power Supply Circuit Adjustment...
- Page 32 KX-TCD400RU B / KX-TCD400R UC / KX-TCD400R UF / KX-A140RU B / KX-A140RU C / KX-A140RUF 11.3.2. Handset Cross Reference Power Supply Circuit Adjustment...
- Page 33 KX-TCD400RU B / KX-TCD400R UC / KX-TCD400R UF / KX-A140RU B / KX-A140RU C / KX-A140RUF 11.4. Check Handset Transmission Cross Reference: SIGNAL ROUTE 11.5. Check Handset Reception Cross Reference: HOW TO CHECK THE HANDSET SPEAKER SIGNAL ROUTE...
- Page 34 KX-TCD400RU B / KX-TCD400R UC / KX-TCD400R UF / KX-A140RU B / KX-A140RU C / KX-A140RUF 11.6. Bell Reception 11.6.1. Base Unit Note: 11.6.2. Handset Cross Reference: Note: Telephone Line Interface Check Link...
-
Page 35: Check Procedure (Base Unit)
KX-TCD400RU B / KX-TCD400R UC / KX-TCD400R UF / KX-A140RU B / KX-A140RU C / KX-A140RUF 12 CHECK PROCEDURE (BASE UNIT) 12.1. Preparation 12.1.1. Equipment Required · · · · · 12.1.2. JIGs and PC · · · Batch file 12.2. -
Page 36: Check Procedure (Handset)
KX-TCD400RU B / KX-TCD400R UC / KX-TCD400R UF / KX-A140RU B / KX-A140RU C / KX-A140RUF 13 CHECK PROCEDURE (HANDSET) 13.1. Preparation 13.1.1. Equipment Required · · · · · 13.1.2. JIGs and PC · · · Batch file 13.2. PC Setting 13.2.1. -
Page 37: Adjustments (Base Unit)
KX-TCD400RU B / KX-TCD400R UC / KX-TCD400R UF / KX-A140RU B / KX-A140RU C / KX-A140RUF 14 ADJUSTMENTS (BASE UNIT) J (L J (L Adjustment 14.1. Adjustment Ω... - Page 38 KX-TCD400RU B / KX-TCD400R UC / KX-TCD400R UF / KX-A140RU B / KX-A140RU C / KX-A140RUF · · · · ·...
- Page 39 KX-TCD400RU B / KX-TCD400R UC / KX-TCD400R UF / KX-A140RU B / KX-A140RU C / KX-A140RUF · · · Ω · · · · · · · · Ω · · · · · Ω Note: PC Setting Adjustment Standard (Base Unit)
- Page 40 14.2. Adjustment Standard (Base Unit) When connecting the Simulator Equipments for checking, please refer to below. 14.2.1. Component View AF Volt Meter Tel Simulator DECT tester CMD60 (N) (O) (H) (I) (J) (K) (L) AF Generator JMP2 JMP6 JMP5 JMP7 A201 JMP8 RLY1...
- Page 41 14.2.2. Flow Solder Side View Digital Volt Meter (D) (E) (F) (G) 12Ω/2W (H) (N) (O) Digital Digital To PC (JIG) Volt Meter Volt Meter J105 J101 TP84 TP82 TP187 CHARGE+ CHARGE TP97 TP50 TP45 TP188 TP91 Frequency Counter TP89 TP40 TP39 TP101...
-
Page 42: Adjustments (Handset)
KX-TCD400RU B / KX-TCD400R UC / KX-TCD400R UF / KX-A140RU B / KX-A140RU C / KX-A140RUF 15 ADJUSTMENTS (HANDSET) If your unit have below symptoms, adjust or confirm each item using remedy column from the table. Symptom Remedy The movement of Battery Low indicator is wrong. Make confirmation in item (A)~(C), (F)~(G) The handset does not respond to a call from base unit. - Page 43 KX-TCD400RU B / KX-TCD400R UC / KX-TCD400R UF / KX-A140RU B / KX-A140RU C / KX-A140RUF Items Adjustment Procedure* Check or Point Replace Parts (H)* BBIC Clock Adjusment TP19 1. Execute the command "conttx". IC1,L3,C57, IC3,X1,C16, 2. Adjust the frequency of TP19 executing thecommand "setfreq 00 xx (where xx is the value)"...
- Page 44 KX-TCD400RU B / KX-TCD400R UC / KX-TCD400R UF / KX-A140RU B / KX-A140RU C / KX-A140RUF Items Adjustment Procedure* Check or Point Replace Parts (O)* Receive Audio Check TP15 1. Configure the DECT tester (CMD60) as follows; IC1,C12,C31, and Confirmation R17,R20,C10, <Setting>...
- Page 45 15.2. Adjustment Standard (Handset) When connecting the Simulator Equipments for checking, please refer to below. (F) (G) 2.20V ~ 2.40V TP16 TP12 TP13 TP17 TP14 TP19 AF SG DECT TESTER CMD60 TP18 TP10 Digital DECT tester Volt Meter CMD60 AF Volt Meter Oscilloscope DECT TESTER CMD60 Digital...
-
Page 46: Rf Specification
KX-TCD400RU B / KX-TCD400R UC / KX-TCD400R UF / KX-A140RU B / KX-A140RU C / KX-A140RUF 16 RF SPECIFICATION 16.1. Base Unit Item Value Refer to -. * Remarks TX Power More than 20 dBm ~ 25 dBm Adjustment (H) Modulation 340 kHz/div ~ 402 kHz/div Adjustment (I) -
Page 47: Frequency Table (Mhz)
KX-TCD400RU B / KX-TCD400R UC / KX-TCD400R UF / KX-A140RU B / KX-A140RU C / KX-A140RUF 18 FREQUENCY TABLE (MHz) BASE UNIT HANDSET Channel No Transmit Frequency Receive Frequency Transmit Frequency Receive Frequency 1897.344 1897.344 1897.344 1897.344 1895.616 1895.616 1895.616 1895.616 1893.888 1893.888... -
Page 48: Block Diagram (Base Unit)
ADPCM RSSI Front End Codec Filter SYRI Interface SYEN HOOK RF Module DTXAF Bell/Caller ID DTXAF Interface Limit CHARGE XTAL Register CONTACT 10.368 BBIC VUNREG 4.0V to AC Adaptor Reg. EEPROM 4.0V 2.65V Reg. 2.65V KX-TCD400RUB/RUC/RUF BLOCK DIAGRAM (BASE UNIT) -
Page 49: Circuit Operation (Base Unit)
KX-TCD400RU B / KX-TCD400R UC / KX-TCD400R UF / KX-A140RU B / KX-A140RU C / KX-A140RUF 20 CIRCUIT OPERATION (BASE UNIT) 20.1. Outline Base Unit consists of the following ICs as shown in BLOCK DIAGRAM (BASE UNIT) (P.48). · DECT BBIC (Base Band IC): IC2 −... - Page 50 KX-TCD400RU B / KX-TCD400R UC / KX-TCD400R UF / KX-A140RU B / KX-A140RU C / KX-A140RUF 20.2. Power Supply Circuit The power is supplied to the DECT BBIC, RF Module, EEPROM, Relay Coil, LED and Charge Contact from AC Adaptor (+6V) as shown in Fig.101.
- Page 51 KX-TCD400RU B / KX-TCD400R UC / KX-TCD400R UF / KX-A140RU B / KX-A140RU C / KX-A140RUF 20.3. Telephone Line Interface <Function> · Bell signal detection · ON/OFF hook circuit · Audio circuits Bell signal detection: In the standby mode, Q2 is open to cut the DC loop current and decrease the ring load. When ring voltage appears at the TP3 (A) and TP40 (B) leads (when the telephone rings), the signal is transferred as follows;...
-
Page 52: Block Diagram (Handset)
KX-TCD400RU B / KX-TCD400R UC / KX-TCD400R UF / KX-A140RU B / KX-A140RU C / KX-A140RUF 21 BLOCK DIAGRAM (HANDSET) Speech Burst RXDA Decoding Decoding EARPIECE TXDA Burst Speech Encoding Encoding Module RSSI ADPCM SYRI Codec Interface Analog SYEN Filter Front XTAL CHARGE... -
Page 53: Circuit Operation (Handset)
KX-TCD400RU B / KX-TCD400R UC / KX-TCD400R UF / KX-A140RU B / KX-A140RU C / KX-A140RUF 22 CIRCUIT OPERATION (HANDSET) 22.1. Outline Handset consists of the following ICs as shown in BLOCK DIAGRAM (HANDSET) (P.52). · DECT BBIC (Base Band IC): IC1 −... -
Page 54: Signal Route
KX-TCD400RU B / KX-TCD400R UC / KX-TCD400R UF / KX-A140RU B / KX-A140RU C / KX-A140RUF 23 SIGNAL ROUTE... -
Page 55: Cpu Data (Base Unit)
KX-TCD400RU B / KX-TCD400R UC / KX-TCD400R UF / KX-A140RU B / KX-A140RU C / KX-A140RUF 24 CPU DATA (BASE UNIT) 24.1. IC2 (BBIC) - Page 56 KX-TCD400RU B / KX-TCD400R UC / KX-TCD400R UF / KX-A140RU B / KX-A140RU C / KX-A140RUF Note: I_PU; Internal Pull-Up, I_PD; Internal Pull-Down...
-
Page 57: Cpu Data (Handset)
KX-TCD400RU B / KX-TCD400R UC / KX-TCD400R UF / KX-A140RU B / KX-A140RU C / KX-A140RUF 25 CPU DATA (HANDSET) 25.1. IC1 (BBIC) - Page 58 KX-TCD400RU B / KX-TCD400R UC / KX-TCD400R UF / KX-A140RU B / KX-A140RU C / KX-A140RUF...
- Page 59 KX-TCD400RU B / KX-TCD400R UC / KX-TCD400R UF / KX-A140RU B / KX-A140RU C / KX-A140RUF 26 EEPROM LAYOUT (BASE UNIT) 26.1. Scope The purpose of this section is to describe the layout of the EEPROM (IC1) for the KX-TCD400 Base Unit. The EEPROM contains hardware, software, and user specific parameters.
- Page 60 KX-TCD400RU B / KX-TCD400R UC / KX-TCD400R UF / KX-A140RU B / KX-A140RU C / KX-A140RUF 26.3.2. Switch Control Address Default Name Country Type Description Setting 26.3.3. Flash Time setting Address Default Name Country Type Description Setting 26.3.4. BsUiTask settings Address Default Name...
- Page 61 KX-TCD400RU B / KX-TCD400R UC / KX-TCD400R UF / KX-A140RU B / KX-A140RU C / KX-A140RUF 27 EEPROM LAYOUT (HANDSET) 27.1. Scope The purpose of this section is to describe “layout of the EEPROM (IC2) KX-A140 Handset”. The EEPROM contains hardware, software, and user specific parameters. Some parameters are set during production of the handset e.g.
- Page 62 KX-TCD400RU B / KX-TCD400R UC / KX-TCD400R UF / KX-A140RU B / KX-A140RU C / KX-A140RUF Address Default Name Country Type Description Setting 27.3.3. Battery Parameters Address Default Name Type Description 27.3.4. Default Audio-Parameters Address Default Name Country Type Description Setting...
- Page 63 KX-TCD400RU B / KX-TCD400R UC / KX-TCD400R UF / KX-A140RU B / KX-A140RU C / KX-A140RUF 27.3.5. VolumeSetting Second Block Address Default Name Country Type Description Setting...
- Page 64 KX-TCD400RU B / KX-TCD400R UC / KX-TCD400R UF / KX-A140RU B / KX-A140RU C / KX-A140RUF 28 HOW TO REPLACE FLAT 28.3. Modification Procedure of Bridge PACKAGE IC 1. Add a small amount of solder to the bridged pins. 28.1. Preparation 2.
- Page 65 KX-TCD400RU B / KX-TCD400R UC / KX-TCD400R UF / KX-A140RU B / KX-A140RU C / KX-A140RUF 29 CABINET AND ELECTRICAL PARTS LOCATION (BASE UNIT)
- Page 66 KX-TCD400RU B / KX-TCD400R UC / KX-TCD400R UF / KX-A140RU B / KX-A140RU C / KX-A140RUF 30 CABINET AND ELECTRICAL PARTS LOCATION (HANDSET)
- Page 67 KX-TCD400RU B / KX-TCD400R UC / KX-TCD400R UF / KX-A140RU B / KX-A140RU C / KX-A140RUF 31 ACCESSORIES AND PACKING MATERIALS...
- Page 68 KX-TCD400RU B / KX-TCD400R UC / KX-TCD400R UF / KX-A140RU B / KX-A140RU C / KX-A140RUF 32 TERMINAL GUIDE OF THE ICs, TRANSISTORS AND DIODES 32.1. Base Unit 32.2. Handset...
- Page 69 (for ABS-HB ERJ3GEYJ330 TCD400RUB)(for KX-TCD400RUC) ERJ3GEYJ101 PQKM10586Y1 CABINET BODY (for ABS-HB ERJ3GEYJ221 TCD400RUF) ERJ1WYJ330 PQGT15982Z NAME PLATE (for KX-TCD400RUB) ERJ1WYJ330 PQGT15981Z NAME PLATE (for KX-TCD400RUC) ERJ3GEY0R00 PQGT15649Z NAME PLATE (for KX-TCD400RUF) ERJ3GEYJ565 5.6M PQJT10203Z TERMINAL ERJ3GEYJ184 180K PQKE10356Z1 GUIDE, CHARGE TERMINAL CASE...
- Page 70 33.2. Handset ERJ3GEYJ103 33.2.1. Cabinet and Electrical Parts ERJ3GEYJ390 ERJ3GEYJ390 Ref. Part No. Part Name & Description Remarks PQ4R10XJ000 ERJ3GEYJ181 PQGP10225Z2 PANEL, LCD (for KX-TCD400RUB) AS-HB ERJ3GEYJ181 (for KX-TCD400RUC) ERJ3GEYJ565 5.6M PQGP10225Z1 PANEL, LCD (for KX-TCD400RUF) AS-HB ERJ3GEYJ184 180K PQKM10587Z3 CABINET...
- Page 71 KX-TCD400RU B / KX-TCD400R UC / KX-TCD400R UF / KX-A140RU B / KX-A140RU C / KX-A140RUF Ref. Part No. Part Name & Description Remarks Ref. Part No. Part Name & Description Remarks ERJ3GEYJ222 2.2K PQPP10084Z PROTECTION COVER (for Handset) ERJ8BQJR30 PQPK13979Z GIFT BOX ERJ3GEYJ560...
- Page 72 KX-TCD400RU B / KX-TCD400R UC / KX-TCD400R UF / KX-A140RU B / KX-A140RU C / KX-A140RUF 33.5. Memo...
- Page 73 KX-TCD400RU B / KX-TCD400R UC / KX-TCD400R UF / KX-A140RU B / KX-A140RU C / KX-A140RUF 34 SCHEMATIC DIAGRAM (BASE UNIT) LINE VOL TAGE 60V DC +60V DC ON-HOOK TP39 +10V DC OFF-HOOK JMP1 OV ON-HOOK +0.7V DC OFF-HOOK TP45 100K TP40 JMP2...
- Page 74 43 R2 45:VBACK/P1.5 SYEN (11) 8 SYCL 44 R1 46:VSS(DSPCLK) RXDA 9 SYDA 47:P1.4(TONE) RXDSG RXDA 10 SYEN DRON RX-DATA 48 VDD 4.7u H (12) (13) 10.368MHZ burst 428 s 406 s +2.65V peak +3.1V KX-TCD400RUB/RUC/RUF SCHEMATIC DIAGRAM (BASE UNIT)
- Page 75 KX-TCD400RU B / KX-TCD400R UC / KX-TCD400R UF / KX-A140RU B / KX-A140RU C / KX-A140RUF 35 SCHEMATIC DIAGRAM (HANDSET) Frequency 324KHz 4.3V 4.1V DC TP14 47uH 2.4V BATTERY+ BATTERY- 3.3K 2.65V 10uH CHARGE+ CHARGE- 10uH ’BATT’ K0.1 TP12 ’SDA’ K0.1 ’SCL’...
- Page 76 KX-TCD400RU B / KX-TCD400R UC / KX-TCD400R UF / KX-A140RU B / KX-A140RU C / KX-A140RUF TP11 K0.1 R5 330 C4 K0.1 R7 330 R1 2.2K K0.1 K0.1 (24) K0.1 R17 0 K0.1 1 SP+ 2 SP- R20 0 TP16 TP17 (25) (26)
- Page 77 34 33 32 31 30 29 JMP4 JMP3 JMP1 A202 B C E 11 12 1314 15 16 17 LED1 Bell LED Q8 Collector Bell Bell (BBIC: 44) (2.65V) (BBIC: 27) (BBIC: 26) KX-TCD400RUB/RUC/RUF CIRCUIT BOARD (BASE UNIT) Component View...
- Page 78 RF Clock CHARGE - (10.368MHz) CHARGE+ J103 J104 J102 J101 J105 TP84 TP82 TP187 CHARGE CHARGE+ TP97 TP50 TP45 TP188 TP91 TP89 TP40 TP39 TP90 TP101 Q9 Output Q9 Input (4V) (5.5V) KX-TCD400RUB/RUC/RUF CIRCUIT BOARD (BASE UNIT) Flow Solder Side View...
- Page 79 37 CIRCUIT BOARD (HANDSET) 37.1. Component View TP12 TP14 RF Clock (BBIC: 27) (2.65V) (TP3) (4V) (BBIC: 23 10.368 MHz) TP16 TP12 TP13 TP17 TP14 TP19 TP18 TP10 TP2: SP+ TP1: SP- (BBIC: 41) (BBIC: 42) KX-A140RUB/RUC/RUF CIRCUIT BOARD (HANDSET) Component View...
- Page 80 37.2. Flow Solder Side View TALK REDIAL BOOK LEFT DOWN RIGHT PROG POWER KX-A140RUB/RUC/RUF CIRCUIT BOARD (HANDSET) Flow Solder Side View...
- Page 81 KX-TCD400RU B / KX-TCD400R UC / KX-TCD400R UF / KX-A140RU B / KX-A140RU C / KX-A140RUF KXTCD400RUB KXTCD400RUC KXTCD400RUF KXA140RUB KXA140RUC KXA140RUF...