Husqvarna 524LK Operator's Manual
Hide thumbs
Also See for 524LK:
- Operator's manual (82 pages) ,
- Operator's manual (76 pages) ,
- Operator's manual (176 pages)
Table of Contents
Advertisement
Quick Links
Advertisement
Table of Contents

Related Manuals for Husqvarna 524LK


Summary of Contents for Husqvarna 524LK
- Page 1 524LK Operator's manual 2-24...
-
Page 2: Table Of Contents
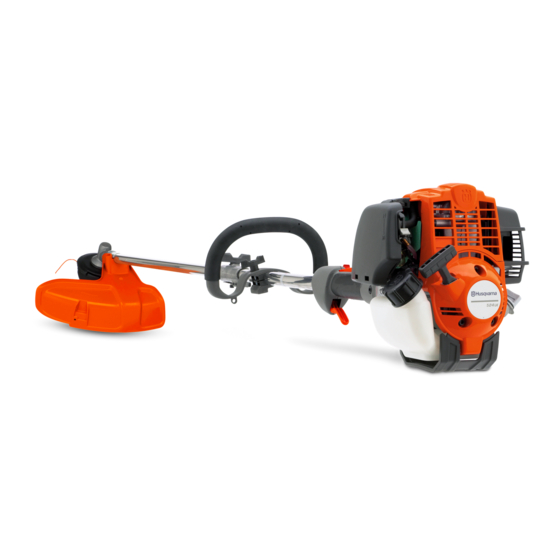
Contents Introduction..............2 Troubleshooting............20 Safety................4 Transportation and storage...........20 Safety instructions for maintenance......10 Technical data.............. 21 Assembly..............11 Accessories..............22 Operation..............12 EC Declaration of Conformity........24 Maintenance..............15 Introduction Product description Intended use The product is a grass trimmer with a combustion The product is used with a trimmer head to cut grass. - Page 3 Product overview 1. Trimmer head 17. Drive disc 2. Bevel gear 18. Hex key 3. Grease filler cap 19. Locking pin 4. Cutting attachment guard 20. Shaft coupling 5. Shaft 21. Operator's manual 6. Loop Handle Symbols on the product 7.
-
Page 4: Safety
Read the operator's manual carefully and The arrows show the limit for the handle make sure that you understand the position. instructions before you use this product. This product complies with applicable EC Directives. Air purge bulb. Use a protective helmet in locations where objects can fall on you. - Page 5 • Under no circumstances may the design of the a risk of serious personal injury. Therefore remove product be modified without the permission of the the spark plug cap when the product is not under manufacturer. Never use a product that has been close supervision.
- Page 6 else may attempt to remove the cut material while • Use approved hearing protection that provides the engine is running or the cutting equipment is adequate noise reduction. Long-term exposure to rotating, as this can result in serious injury. The noise can result in permanent hearing impairment.
- Page 7 • Keep first aid equipment close at hand. 1. Push the throttle trigger lockout (A) and make sure that the throttle control is released (B). Safety devices on the product WARNING: Read the warning instructions that follow before you use the product.
- Page 8 4. Make sure that the throttle control and throttle trigger To do a check of the cutting attachment guard lockout move freely and that the return springs WARNING: operate correctly. Do not use a cutting attachment without an approved and correctly attached cutting attachment guard.
- Page 9 2. Do a visual check for deformation and damage for b) Make sure that the spark arrestor mesh is example, cracks. attached correctly. 3. Make sure that the vibration damping units are attached correctly. To attach and remove the locknut To do a check of the muffler WARNING: Stop the engine, use...
-
Page 10: Safety Instructions For Maintenance
Cutting equipment • The length of the trimmer line is important. A longer trimmer line requires greater engine power than a Select correct cutting equipment and do maintenance on shorter trimmer line of the same diameter. the cutting equipment to: •... -
Page 11: Assembly
drum, otherwise the product will generate harmful vibration. WARNING: A faulty cutting attachment may increase the risk of accidents. • Only use cutting attachments with the guards we Accessories on page 22 . recommend. Refer to WARNING: Make sure that the trimmer cord is wound tightly and evenly around the Assembly Introduction... -
Page 12: Operation
To disassemble the two-piece shaft 2. Put the cutting attachment guard onto the fitting on the shaft. 1. Turn the knob 3 turns or more to loosen the 3. Attach with the bolt (L). coupling. 2. Push and hold the button (C). 3. - Page 13 Speak to an approved service agent to select the correct engine oil. • If Husqvarna 4-stroke oil is not available, use a 4- stroke oil of good quality with minimum API SG rating. The recommended viscosity class is SAE 10W-40.
- Page 14 2. Clean the area around the fuel tank cap. 3. Push the air purge bulb until fuel starts to fill the air purge bulb. 3. Remove the fuel tank cap slowly to release the pressure. 4. Fill the fuel tank. CAUTION: Make sure that there is not too much fuel in the fuel tank.
-
Page 15: Maintenance
To stop the product To cut the grass 1. Make sure that the trimmer line is parallel to the • Move the stop switch to the stop position to stop the ground when you cut the grass. engine. 2. Do not push the trimmer head to the ground. This can cause damage to the product. - Page 16 13 . 9. Install the oil filler cap and tighten it fully. To adjust the idle speed Your Husqvarna product is made to specifications that decrease harmful emissions. 1. Make sure that the air filter is clean and the air filter cover is attached before you adjust the idle speed.
- Page 17 b) Clean the spark arrester screen if it is blocked. hot, which can cause damage to the Clean weekly if your product has a catalytic product. converter. Clean monthly if your product does not To examine the spark plug have a catalytic converter. CAUTION: Always use the recommended spark plug type.
- Page 18 The air filter oil can cause skin irritation. 5. If the grease level is too low fill the bevel gear with Husqvarna bevel gear grease. Fill slowly and turn 1. Put the foam air filter in a plastic bag. the drive shaft as you apply the bevel gear grease, 2.
- Page 19 To lubricate the Make sure that the bevel gear is filled correctly with grease, see bevel gear on page 18 . If not, use Husqvarna bevel gear grease. Clean or replace the spark arrestor mesh on the muffler (only applies to mufflers without a catalytic converter).
-
Page 20: Troubleshooting
Troubleshooting The engine does not start Check Possible cause Procedure Stop switch. The stop switch is in the stop position. Set the stop switch to the start position. Starter pawls. The starter pawls cannot move freely. Remove the starter cover and clean around the starter pawls. -
Page 21: Technical Data
Technical data Technical data 524LK Engine Cylinder displacement, cm Idle speed, rpm 3100 Maximum engine power acc. to ISO 8893, kW/hp @ rpm 0.7/7000 Catalytic converter muffler Speed of output shaft, rpm 8300 Ignition system Spark plug NGK CMR5H Electrode gap, mm... -
Page 22: Accessories
These combinations have been evaluated by power heads have been evaluated to ANSI B175.3-2013 Underwriters Laboratories Inc. (UL) and are Grass Trimmers and Brushcutters Safety Requirements. consequently UL listed. 524LK Approved accessories Type Cutting attachment guard, art. no. Blade shaft thread M10 Plastic blades Tricut Ø... - Page 23 Approved attachments Use with Trimmer attachment TA850 524LK Extension attachment EX850 524LK Cultivator attachment CA230 524LK Blower attachment BA101 524LK Bristle brush attachment BR600 524LK Dethatcher attachment DT600 524LK Brushcutter attachment BCA850-24 524LK Saw attachment PAX1100 524LK Saw attachment PAX730 524LK 1309 - 004 - 23.03.2021...
-
Page 24: Ec Declaration Of Conformity
EC Declaration of Conformity Husqvarna AB, SE-561 82 Huskvarna, Sweden, tel: +46-36-146500, declares that the brushcutter Husqvarna 524LK with serial numbers dating from 2016 and onwards (the year is clearly stated on the rating plate, followed by the serial number), comply with the requirements of the COUNCIL’S DIRECTIVE:... - Page 25 1309 - 004 - 23.03.2021...
- Page 26 1309 - 004 - 23.03.2021...
- Page 27 1309 - 004 - 23.03.2021...
- Page 28 Original instructions 114246826 2021-03-25...