Canon SELPHY DS810 Photo Printing Manual
Compact photo printer
Hide thumbs
Also See for SELPHY DS810:
- User manual (82 pages) ,
- Service manual (44 pages) ,
- Photo printing manual (108 pages)
Table of Contents
Advertisement
Advertisement
Table of Contents

Related Manuals for Canon SELPHY DS810


Summary of Contents for Canon SELPHY DS810
- Page 1 Photo Printing Guide QA7-3584-V02...
- Page 2 • “SD card” and “miniSD Card” are trademarks of SD Association. • “IrDA Feature Trademark” is owned by the Infrared Data Association and used under license therefrom. • “Bluetooth” is a trademark of Bluetooth SIG, Inc., U.S.A and are licensed to Canon Inc. ©...
-
Page 3: Table Of Contents
Printing Photographs Directly from a Digital Camera...45 Printing Photographs Directly from a PictBridge Compliant Device ...45 Printing Photographs Directly from a Canon Bubble Jet Direct Compatible Digital Camera...50 Printing Photographs from a Wireless Communication Device...51 Setting the Page Size, Media Type, and Layout When Printing from a Mobile Phone or a PDA ...51... -
Page 4: Step
Instructions that, if ignored, could result in personal injury or material damage caused by incorrect operation of the equipment. These must be observed for safe operation. Also read the Safety Precautions. Observe the warnings and cautions to avoid personal injury or damage to the printer. -
Page 5: Easy Setup Instructions
Easy Setup Instructions Unpack the Printer Check that all the following items are in the box. If anything is missing or is damaged, contact a Canon service representative. Documentation and Setup Software & User’s Guide CD-ROM Ink Tank BCI-16 Color... -
Page 6: Preparing The Printer
Press the POWER button. The printer will initialize. Note If you leave the printer more than five minutes without using any button on the operation panel, the LCD goes into sleep mode automatically. Press the OK button to turn on the LCD again. -
Page 7: Installing The Print Head
Select the display language. (1) Press the buttons to select the language you want to display on the LCD. (2) Press the OK button. Note If you accidentally changed the languages, see “Language selection” on page 44 to select your language. Installing the Print Head Easy Setup Instructions Slide the Cover Open Switch... - Page 8 Easy Setup Instructions Print Head Nozzles Take the Print Head from its package and remove the protective cap. Dispose of the protective cap. There might be some transparent or light blue ink on the inside of the bag the Print Head comes in, or the inside of the protective cap this has no effect on print quality.
-
Page 9: Installing An Ink Tank
Installing an Ink Tank • For safety reasons, store an Ink Tank out of the reach of small children. • Do not drop or shake an Ink Tank as this may cause the ink to leak out and stain your clothes and hands. -
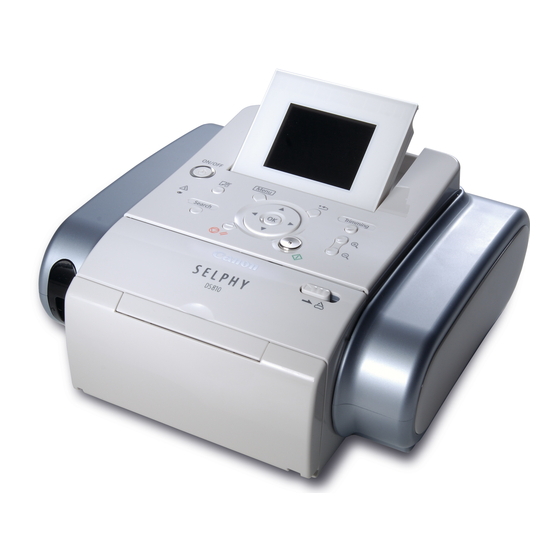
Page 10: Printer Parts And Their Functions
Auto Sheet Feeder Load paper here. * The Bluetooth unit is not available to some regions due to the law or the regulations of the countries. For details, contact a Canon service representative. LCD Monitor Displays menus, setting items, and photos for printing. -
Page 11: Operation Panel
Allows you to make a selection. For example, selecting a photo to be printed, selecting a menu item or other settings. Also, press to resume printing once an error has been resolved. The printer will then initialize ready for printing. Printer Parts and Their Functions... -
Page 12: Inside The Printer
Move to the left if ink smudges or the printed surface is stained. See “Inappropriate paper type used” on page 79. USB Port Connects the printer to a computer through a USB interface. Print Head Lock Lever Locks the Print Head into the Print Head Holder. -
Page 13: Menu Screen
DPOF print * Available only when inserting a memory card. Continue to next page Printer Parts and Their Functions You can view the photos in the memory card on the LCD and print them. See “Printing Photograph Displayed on the LCD—Photo Gallery”... - Page 14 Printer Parts and Their Functions Tool box Maintenance Nozzle check Cleaning Deep cleaning Manual head align Head alignment print Roller cleaning Bottom plate cleaning Device settings Print settings Wireless print settings Bluetooth settings* Other settings Language selection Reset setting Save settings Load settings * Available only when attaching the Bluetooth unit BU-20.
- Page 15 Printer Parts and Their Functions Print Menus in Print Studio Print studio provides you with the following print menus. Layout print Prints the specified photo in the specified layout. See “Printing Multiple Photos on One Sheet of Media—Layout Print” on page 35.
-
Page 16: Configure The Printer Settings
Sets the page size and layout to use when printing a photo from a device via an infrared or Bluetooth communication. See “Setting the Page Size, Media Type, and Layout When Printing from a Mobile Phone or a PDA” on page 51. Maintenance Displays the maintenance items below. Device settings Displays the setting items below for printer configuration. - Page 17 See “Reset setting” on page 44. Save settings Sets whether to save the settings you make on the Settings screen. Load settings Sets whether to call the settings you make on the Save settings screen. Printer Parts and Their Functions User’s Guide...
-
Page 18: Preparation When Using The Printer
This section describes the method to turn on/off the printer. Turning On the Printer Follow the procedure below to turn on the printer. Plug the Power Cord into the back of the printer and connect the other end to a power outlet. Press POWER to turn the printer on. -
Page 19: Using A Memory Card
Turn off the printer. (1) Turn off the printer by pressing the POWER button. Note Before unplugging the power cord, turn off the printer and ensure that the lamp has gone out. Using a Memory Card Let's take a look at different types of memory cards and how to insert and remove them. - Page 20 Preparation When Using the Printer Important • This printer supports images taken with a camera compatible with the Design rules for Camera File system, CIFF, Exif2.21 or earlier, JFIF, TIFF (Exif2.21 compliant) and DPOF (Ver. 1.00 compliant). • Photos stored in a memory card not supported by the digital camera may fail in loading or be damaged.
-
Page 21: Inserting A Memory Card
Inserting a Memory Card This printer is equipped with two Card Slots to meet various types of memory cards. Refer to the illustration below to find the Card Slot corresponds to your memory card. Check the card face and insert it gently until it reaches the bottom and the Indicator lamp turns on. -
Page 22: Removing A Memory Card
Removing a Memory Card Note If you use the printer connected to your computer, follow the instructions for removal of the memory card from the computer. For the procedure, refer to the Ensure that the Indicator lamp is not flashing, then remove the memory card. -
Page 23: Loading The Print Media
Prepare to load paper. (1) Slide the Cover Open Switch toward the right to open the Cover. (3) Close the Cover. Preparation When Using the Printer (2) Open the Paper Support. (2) Ensure that the Paper Thickness Lever is set to the right. -
Page 24: Load The Paper
Leave 12cm (4.7in) or more clear space at the back of the printer. (2) Align the paper with the right edge of the Auto Sheet Feeder and insert the paper until it is fully inserted. -
Page 25: Media Types For Card Direct Printing
PDA on sticker paper, select Stickers ×16 in the Wireless print settings screen. Note You may not be able to purchase some Canon brand papers depending on your country. Preparation When Using the Printer Page Size Load Limit [4"×6"... -
Page 26: Changing The Print Settings
Preparation When Using the Printer Changing the Print Settings This section explains the print settings you can set from the LCD and the buttons you should use to set them. To Change Print Setting This section describes the steps to change the print settings using the Effects setting as an example. - Page 27 “Media Types for Card Direct Printing” on page 23. • Print quality Standard...Gives priority to speed over quality when printing. High ...Gives priority to quality over speed when printing. Preparation When Using the Printer Press the buttons to display the selected item.
- Page 28 Preparation When Using the Printer • Border Bordered ...Prints with a border. Borderless ...Prints on the whole paper without a border. • Date/file no. No date/file no..Does not print the date the photo was taken. Print date only...Prints the date the photo was taken.
- Page 29 Color hue red +2/Color hue red +1/Color hue original/Color hue yellow +1/ Color hue yellow +2 • Effect No effects ... Prints a photo without any processing. Sepia... Prints a photo using sepia tones only. Simulate illustration... Prints a photo in the manner of an illustration. Preparation When Using the Printer...
-
Page 30: Printing From The Memory Card
Note Menu Screen The menu screen is displayed when the printer is turned on. Tool box is the only available menu at the moment. All menu options can be viewed when a memory card with stored photos is inserted into the Card Slot. - Page 31 Select Photo gallery. (1) Press the Menu button. (2) Use the Photo gallery. (3) Press the OK button. The stored photo is displayed on the LCD. Note The watch icon may appear when importing photos from a memory card. Select the photo to print. (1) Using the (2) Press the Print button.
-
Page 32: Start Printing
Specifying How Many Copies to Print for Each Photograph— Photo Print You can specify the number of copies to print for each photo. Prepare to print. See “Preparation When Using the Printer” on page 16. Select Photo print. (1) Press the Menu button. (2) Use the buttons to select Photo print and press the OK button. - Page 33 Specify the number of copies to print. (1) Use the buttons, select the photo you want to print. (3) Repeat steps (1) and (2) and specify the number of copies for each photo you want to print. (4) Press the OK button. The print confirmation screen is displayed.
-
Page 34: Other Useful Functions
Printing from the Memory Card Other Useful Functions You can print your favorite photo as a postcard or sticker using the following features. • “Searching for Photos with the Shooting Date—Search” on page 32 • “Printing a Specified Area—Trimming” on page 34 •... - Page 35 Specify a date range. • If you select One date only • If you select Select date range Notes • The date that you specified is displayed in the format that you set at the Date display setting. See “Date display” on page 43. •...
-
Page 36: Printing A Specified Area—Trimming
Stop/Reset button in the Trimming screen. Removing the memory card also cancels the trimming mode. • You cannot save the trimmed image to a memory card. Press the Trimming button on the operation panel. The printer is now in Trimming Mode. - Page 37 (w/lines)/Album (4/right)/Album (4/left)). ×2 Borderless Bordered Prepare to print. See “Preparation When Using the Printer” on page 16. Select Layout print. (1) Press the Menu button. (2) Use the buttons to select Print studio and then press the OK button.
- Page 38 Printing from the Memory Card Select the paste method. (1) Use the buttons to select the paste method and then press the OK button. Paste all All the photos in the memory card are pasted automatically in the selected layout. Print confirmation screen is displayed.
- Page 39 Printing Stickers from a Photo—Sticker Print You can print your favorite photo on the Canon Photo Stickers. Prepare to print. See “Preparation When Using the Printer” on page 16. Select Sticker print. (1) Press the Menu button. (2) Use the buttons to select Print studio from the menu screen and then press the OK button.
- Page 40 You can then select the hue you like from the sample and print a final copy. Prepare to print. See “Preparation When Using the Printer” on page 16. Select Color balance. (1) Press the Menu button.
- Page 41 Select a photo to print. (1) Use the buttons to display the photo you want to print. (2) Press the OK button. Note You can do... • You can zoom in/out on the photo on the LCD using the • See “Searching for Photos with the Shooting Date—Search” on page 32. •...
- Page 42 Printing from the Memory Card Note Depending on the paper you use, you may need to wait for a few minutes to let the colors settle. Wait until the colors of the sample photo settle, then select the number of the hue that you like.
- Page 43 Notes • This printer allows you to make the following DPOF settings: – Image format: CIFF, Exif (Tiff), and JFIF – Print type - Standard: The Photos for which you specified Standard using the DPOF function are printed.
- Page 44 Printing from the Memory Card Note You can do... • You can zoom in/out on the photo on the LCD using the • See “Searching for Photos with the Shooting Date—Search” on page 32. • See “Printing a Specified Area—Trimming” on page 34. Start printing.
-
Page 45: Changing The Other Settings
Changing the Other Settings This section explains the setting menu in the Device settings. Turn on the printer. Press the Menu button. buttons to select Tool box and then press the OK button. Use the Use the buttons to select Device settings and then press the OK button. - Page 46 Printing from the Memory Card Language selection You can change the language displayed on the LCD. buttons to select Language selection and then press the OK button. (1) Use the (2) Use the buttons to select a language and then press the OK button. Reset setting You can reset all settings, other than the display language and the Print Head position, to the initial state.
-
Page 47: Printing Photographs Directly From A Digital Camera
• Canon Bubble Jet Direct allows you to print photos from a Canon Bubble Jet Direct compatible (PictBridge incompatible) digital camera or digital video camcorder without a computer by simply connecting the digital camera or digital video camcorder to this printer. - Page 48 Perform necessary operations according to the instruction manual supplied with your device. (1) Ensure that the device is turned off. (2) Connect the camera to the printer using the USB cable (for connection to a computer) supplied with the device. Note Some types of the PictBridge compliant devices turn on automatically when connected to the printer.
- Page 49 If any setting cannot be made, the default setting explained above is used. Names of settings that are displayed on Canon PictBridge compliant devices are used in the description given below. Different names may be displayed on your device depending on the brand or model.
- Page 50 When you have selected D D efault (selections based on the printer setting), the printer operates based on the Settings screen. If you use a Canon PictBridge-compliant device, you can select V V IVID, N N R, VIVID+NR, or F F ace. (Note that these options cannot be selected for some models.)
- Page 51 Notes • Never disconnect the USB cable during printing. When disconnecting the USB cable between the product and printer, follow the device instructions given in the Instruction manual. • Controls of the digital camera cannot be used for the following: –...
-
Page 52: Printing Photographs Directly From A Canon Bubble Jet Direct Compatible Digital Camera
Printing Photographs Directly from a Canon Bubble Jet Direct Compatible Digital Camera The following is a list of media types that can be set on a Canon Bubble Jet Direct compatible digital camera or digital video camera (PictBridge incompatible) along with their limitations when connected to this printer. -
Page 53: Printing Photographs From A Wireless Communication Device
If you have a mobile phone or a PDA with an infrared port for wireless data transmission, you can print photos through a cordless connection with the printer. If the optional Bluetooth unit BU-20 is connected to the printer, you can also print photos through Bluetooth communication. -
Page 54: Setting Items
Free-cut stickers 1, 2, 3, 4 Printing on paper other than sticker: Bordered, x 2, x 4, x 8 Borderless, x 2, x 4, x 8 Note When printing on Canon Photo Stickers, make the settings as below. Page size Stickers Media type Layout Photo Plus Glossy Stickers ×16... -
Page 55: Performing Infrared Communication
See “Setting the Page Size, Media Type, and Layout When Printing from a Mobile Phone or a PDA” on page 51. Start Infrared Communication. (1) Oppose the infrared port of the mobile phone or the PDA to that of the printer at a distance of less than 7.9 inch (20 cm). Note The effective angle of the Infrared Port of the printer is about 10°... - Page 56 • Depending on your device, it may not print data stored in a memory card. • Depending on the size of a photo, it may take a while for this printer to start to print after starting the infrared transfer.
-
Page 57: Performing Bluetooth Communication
PDA with the optional Bluetooth unit BU-20. Note The printer cannot print data from a PC via a Bluetooth communication. Requirements for Bluetooth Communication The following requirements must be met when printing via a Bluetooth communication. -
Page 58: Set The Print Setting
For the procedure to print from your mobile phone or PDA, refer to the manual of your mobile phone or PDA. • When you select the device name, select the initial value “Canon DS810-1”. • If you are required to enter the passkey, enter the initial value “0000”. - Page 59 Select the device name of this printer displayed on the screen of the Bluetooth devices. When you set DS810-2, the printer name on the Bluetooth device is “Canon DS810-2”. The initial value is set to DS810-1. Selecting ON will disable searching and printing from Bluetooth devices.
-
Page 60: Printing With The Computer
• Before installing the driver, disable all anti-virus programs and automatically loading programs. • When installing the printer driver in Windows XP or Windows 2000, log on to the system as a member of the Administrators group. • Do not switch users during the installation process. - Page 61 There are two types of the printer driver installations: the Easy Install installation and the Custom Install installation. Select Easy Install in order to install application software, On-screen Manual and printer drivers. Select Custom Install in order to choose the options you would like to install. When the list of applications to install appears, verify the contents, click Install.
- Page 62 Connect your USB cable when the Printer Connection screen appears. (1) Connect one end of a USB cable to the computer, the other to the printer. (2) Turn the printer on. As the installation proceeds, the “Print Head Alignment Recommended” screen appears.
-
Page 63: Installing The Printer Driver—Macintosh
• Use Mac OS X v.10.2.x or later. Mac OS X v.10.3.x is recommended. • Do not remove or insert the USB cable during installation, as this may result in the computer or printer not operating normally. • Before installing the driver, disable all anti-virus programs and automatically loading programs. - Page 64 Move the cursor over items to display explanations of each application below. Read the License Agreement, then click Yes to continue. Installation will begin. Installation of the printer driver, On-screen Manuals, and applications will begin. Follow the on-screen instructions. in the other language than...
-
Page 65: How To View The On-Screen Manual
You can use the On-screen Manuals to obtain necessary information for printing from your computer. Install the following On-screen Manuals when you need to know how to print from your computer, printer driver setup, or how to use the supplied print application. - Page 66 Notes • To display the On-screen Manuals from the Start menu, Click on Start, select All Programs (or Programs), Canon SELPHY DS810 Manual and SELPHY DS810 On- screen Manual. • You can search what you want to look up by keywords. For more information, refer to User’s Guide...
-
Page 67: Printing Maintenance
It may solve the problem. See “Aligning the Print Head” on page 69. • If Ink Tank replacement does not resolve the problem, the Print Head may be worn out. Contact a Canon service representative. Printing Maintenance After Print Head Cleaning,... -
Page 68: Printing The Nozzle Check Pattern
Prepare to print. (1) Turn on the printer. See “Turning On the Printer” on page 16. (2) Load the supplied paper or Canon 4"×6"/ 101.6×152.4mm paper into the Paper Support. See “Loading Paper” on page 20. Print the Nozzle Check Pattern. -
Page 69: Select All A
Clean the Print Head if white stripes appear in the nozzle check pattern. Cleaning the Print Head consumes ink, so perform Cleaning only when necessary. Turn on the printer. See “Turning On the Printer” on page 16. Start Print Head Cleaning. (1) Press the Menu button. (2) Use the buttons to select Tool box and then press the OK button. -
Page 70: If The Problem Remains After Performing Print Head Cleaning Twice
Head Deep Cleaning, which is a more powerful process. Print Head Deep Cleaning consumes ink, so perform this procedure only when necessary. Turn on the printer. See “Turning On the Printer” on page 16. Start Print Head Deep Cleaning. (1) Press the Menu button. -
Page 71: Aligning The Print Head
Prepare to print. (1) Turn on the printer. See “Turning On the Printer” on page 16. (2) Load the supplied paper or Canon 4"×6"/ 101.6×152.4mm paper into the Paper Support. See “Loading Paper” on page 20. Print the Pattern. (1) Press the Menu button. -
Page 72: Align The Print Head
Printing a current setting of the Print Head position 1 Turn on the printer. See “Turning On the Printer” on page 16. 2 Load the supplied paper or Canon 4"×6"/ 101.6×152.4mm paper into the Paper Support. See “Loading Paper” on page 20. 3 Press the Menu button. -
Page 73: Replacing An Ink Tank
Replacing an Ink Tank When replacing an Ink Tank, check the model number very carefully. The printer will not print properly if the wrong Ink Tank is used. • Ink Tank: Replacing an Ink Tank When an Ink Tank runs out of ink, replace it using the following steps. - Page 74 • To maintain optimal print quality, use an Ink Tank within six months of its first use. • Once an Ink Tank has been used, do not remove it from the printer and leave it out in the open. This will cause the Ink Tank to dry out and the printer may not function properly if it is reinstalled.
-
Page 75: Resetting The Ink Counter
The low ink warning is only displayed properly if the ink counter is reset. Message Prompting Confirmation of Ink Tank Replacement If an Ink Tank is removed, the printer will output a message prompting you to confirm replacement of the Ink Tank at the start of the next print job. - Page 76 Printing Maintenance Low Ink Warning Display How to Display Low Ink Warning Correctly • Reset the ink counter every time you install a new Ink Tank. The ink counter cannot work correctly unless you synchronize it with the actual ink level. The ink counter can only be adjusted when it is reset at the time a new Ink Tank is installed.
-
Page 77: Troubleshooting
However, because printing is disabled once the waste ink absorber becomes completely full until the waste ink absorber is replaced, you are recommended to contact a Canon service representative as early as possible. (You will need to replace a particular part of the printer.) User’s Guide... - Page 78 Plug the printer back in and turn the printer back on after leaving it for a while. If the problem remains, contact a Canon service representative. Note Accompanied by Ink Tank icon with '?' Always be sure to reset the ink counter when you replace Ink Tank.
-
Page 79: Cannot See The Display Properly On The Lcd/Cannot See The Display On The Lcd
If post cards do not feed properly, even after correcting any paper curl, clean the Paper Feed Roller. 1. Ensure that the printer is turned on. 2. Load 3 sheets of Canon 4"×6"/101.6×152.4 mm paper with 3. Select Roller cleaning from the menu. 4. Select Yes, and press the OK button. -
Page 80: Printing Is Blurred/Colors Are Wrong/White Streaks Appear
• If the paper does not come out from the front of the printer or the back of the printer, or the paper tears and some of it is left in the printer, turn the printer off, then open the Cover and remove the piece of paper. -
Page 81: Printed Surface Is Scratched Or Ink Blots
4. Select Yes and press the OK button. If the problem remains after performing, repeat this procedure starting with step 1. If the problem remains, contact a Canon service representative. Important Check that your paper is loaded with the correct print side facing up. - Page 82 Troubleshooting Possible Cause Try This Curled paper used If all four corners or the printing surface of the paper is curled, the paper may become dirty or the paper may not feed properly. Use the paper after correcting paper curl as follows. (1)Face up the printing surface (2)Roll up the paper in a direction opposite to paper curl as the (3)Check the printing paper if paper curl is corrected within...
-
Page 83: Cannot Print Properly From The Digital Camera
* Hereafter, the digital still camera and digital video camcorder are collectively called a digital camera or camera. Notes • PictBridge or Canon Bubble Jet Direct compatible digital cameras can be connected to your printer for direct printing. • This section describes errors that are indicated on Canon brand PictBridge- or Bubble Jet Direct-compatible cameras. - Page 84 Continue. The waste ink absorber absorbs ink used during cleaning, for example. If this message appears, you will need to call for servicing to replace the absorber and to check the printer for proper operation. Wait until printing ends. The printer automatically starts printing the images from the camera after completing the current printing.
-
Page 85: Cannot Install The Printer Driver
Printer Port 3. Click Back on the displayed screen. Screen 4. Click Exit on the SELPHY DS810 screen, then remove the CD- 5. Turn the printer off. 6. Restart the computer. 7. Carefully follow the procedures described and reinstall the driver. -
Page 86: Cannot Print Properly Through Wireless Communication
Cannot Print Properly through Wireless Communication Possible Cause Try This The infrared Place the printer at a distance of 7.9 inch/20 cm from the mobile communication distance phone or the PDA. or the Infrared Port angle Ensure that the Infrared Ports are at a proper angle and there are is incorrect no obstacles between them. -
Page 87: Appendix
Do not attempt to use the product in any way not described in this manual. You may cause an electric shock/fire or damage the printer if you ignore any of these safety precautions. You may cause injury or damage the printer if you ignore any of these safety precautions. - Page 88 OPP (Object Push Profile) BIP (Basic Imaging Profile) 2.4GHz band Approx. 720kbps Supplied from the Direct Print Port on the printer DC 4.4V 5.25V 500mW (MAX) 5°C 35°C (41°F 95°F) 10%RH 90%RH (no condensation) 18.5 (W) × 47.5 (D) × 8.7 (H) mm 0.73 (W) ×...
-
Page 89: Specifications
Photo Printing Standard (PictBridge) PP-101 4"×6" borderless Approx. 63 seconds* * When printing a 5 megapixel image taken by certain Canon digital camera from PictBridge on default settings using Photo Paper Plus Glossy without border. Actual print speed may vary depending on image data, print mode, type of paper used and device that the printer is connected to. - Page 90 Photo Paper/Photo Stickers*), 5.4×8.6cm/Credit Card (Glossy Photo Paper Card Size) * Canon-brand sticker. Printing on this paper is available only when the Layout function on your camera has a 16-up option. See “Media Types for Card Direct Printing” on page 23.
- Page 91 Additional System Requirements for On-screen Manual Browser: Windows HTML Help Viewer Note: Microsoft ® Internet Explorer 5.0 or later must be installed. The On-screen Manual may not be displayed properly depending on your operating system or Internet Explorer version. We recommend that you keep your system up to date with Windows Update.
-
Page 92: Safety Precautions
Do not attempt to use printer in any way not described in this manual. You may cause an electric shock/fire or damage the printer if you ignore any of these safety precautions. Choosing a Location Do not place the printer close to flammable solvents such as alcohol or thinners. - Page 93 Should any foreign object (metal or liquid) fall into the printer, unplug the power cord and call for service. When installing or transporting this printer, do not incline it, lay it down on its side, or turn it upside down. Ink can leak.
-
Page 94: Regulatory Information
Do not make any changes or modifications to the equipment unless otherwise specified in the manual. If such changes or modifications should be made, you could be required to stop operation of the equipment. Canon U.S.A., Inc. One Canon Plaza... - Page 96 The following ink tank is compatible with this printer. For details on ink tank replacement, refer to “Replacing an Ink Tank” in this guide. QA7-3584-V02 XXXXXX ©CANON INC.2005 PRINTED IN THAILAND...
Need help?
Do you have a question about the SELPHY DS810 and is the answer not in the manual?
Questions and answers