Table of Contents
Advertisement
Quick Links
Quick Start Guide
Quick Start Guide
Be sure to install the software programs before connecting the scanner
to the computer!
Setup and Scanning
Check the Package Contents
Install the Software
Unlock the Scanning Unit
Connect the Scanner
Try Scanning
Try the Additional Features
Using the Scanner Buttons
Scanning Film (for CanoScan 3000F only)
2
p.
3
p.
4
p.
5
p.
6
p.
9
p.
10
p.
Advertisement
Table of Contents

Related Manuals for Canon CanoScan 3000


Summary of Contents for Canon CanoScan 3000
-
Page 1: Quick Start Guide
Quick Start Guide Quick Start Guide Be sure to install the software programs before connecting the scanner to the computer! Setup and Scanning Check the Package Contents Install the Software Unlock the Scanning Unit Connect the Scanner Try Scanning Try the Additional Features... - Page 2 • Consult the dealer or an experienced radio/TV technician for help. Use of shielded cable with the ferrite core provided with the scanner is required to comply with Class B limits Subpart B of Part 15 of the FCC rules.
-
Page 3: Arcsoft Photostudio
READ THIS GUIDE FIRST! Scanning Guide (HTML format manual) Refer to this guide when you have finished setting up the scanner according to the procedures in the Quick Start Guide. It describes how to utilize the scanner with the bundled software, and how to solve problems when they occur. -
Page 4: Check The Package Contents
It also works with the scanner buttons. ArcSoft PhotoStudio (30 MB) - Image Editing Program It allows you to load images from the scanner, edit and retouch them, and apply special effects and enhancements. ArcSoft PhotoBase (75 MB) - Photo Album Program It allows you to create and edit image albums, perform image searches and create slide shows. -
Page 5: Install The Software
Install the Software • With Windows XP/2000, you should log on with an administrator user name when you install or uninstall software programs. Turn the computer on. If the "Found New Hardware Wizard" or "Add New Hardware Wizard" appears, click [Cancel]. Place the CanoScan Setup Utility CD-ROM in the drive. -
Page 6: Unlock The Scanning Unit
Unlock the Scanning Unit • Unlock the scanning unit before connecting the scanner to the computer. If it is left locked, a malfunction or other problem may occur. CanoScan 3000F illustrations are shown when the procedures are the same for both the CanoScan 3000F and CanoScan 3000 models. -
Page 7: Connect The Scanner
Attach the supplied AC adapter to the scanner. AC Adapter • Only use the USB interface cable and the AC adapter provided with the scanner. Use of other cables or adapters may lead to a malfunction. • The scanner does not have a power switch. The power is activated as soon as the computer is turned on. -
Page 8: Try Scanning
Try Scanning The following steps explain how to scan with ArcSoft PhotoStudio. Place a photo or a picture on the document glass of the scanner by aligning its top edge with the alignment mark, and close the document cover. Select [Start], [Programs] or [All Programs], [ArcSoft PhotoStudio] and [PhotoStudio 5]. - Page 9 [Select Source], select your scanner model name and click the [Select] button. For CanoScan 3000F, in the [Select source] category, select [Platen]. (For CanoScan 3000, only [Platen] is available.) Select [Type of original]. You can select "Photo", "Magazine", "Newspaper" or "Document".
- Page 10 (close box) in the PhotoStudio window to close it. • If the scanner does not perform as described above, read the "Troubleshooting" section of the Scanning Guide (HTML format manual). • For details about the bundled software programs, read the Scanning Guide or the User’s Guide (PDF format manual) for each software program on the CanoScan Setup Utility CD-ROM.
-
Page 11: Using The Scanner Buttons
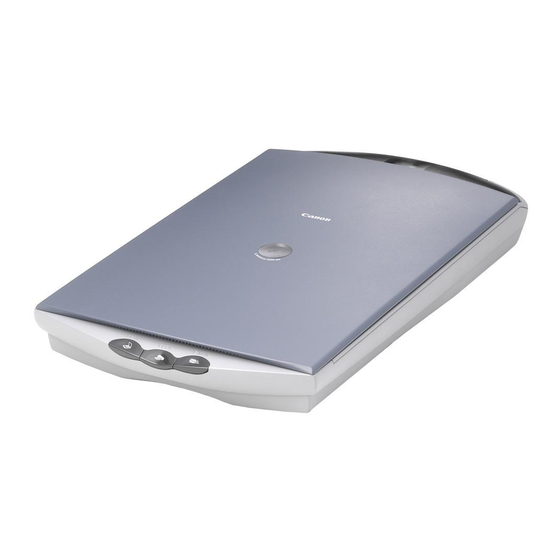
You can use the three convenient buttons on the front panel of the scanner to scan and perform related tasks easily with a single touch of the button. Place an item on the document glass of the scanner before pressing a button. -
Page 12: Positioning The Film
Scanning Film (for CanoScan 3000F only) You can scan 35 mm film (one frame of strip or slide at a time) with CanoScan 3000F. Positioning the Film Remove the protective sheet from the document cover. Slide the protective sheet up to remove it. When you finish scanning, replace the protective sheet by aligning it with the grooves in the document cover and sliding it downward into place. - Page 13 Place the loaded film guide in the correct position on the scanner's document glass. • The film guide has a calibration slot used by the scanner to calculate the color balance. The film cannot be scanned with the correct color balance if this slot is obstructed.
-
Page 14: Scanning Film
[Acquire]. ScanGear CS will start. If an error message appears, click the [File] menu, choose [Select Source], select your scanner model name and click the [Select] button. In the [Select source] category, select [Film]. In the [Type of original] category, select [Negative] or [Positive]. - Page 15 (close box) in the PhotoStudio window to close it. • If the scanner does not perform as described above, read the "Troubleshooting" section of the Scanning Guide (HTML format manual). • For details about the bundled software programs, read the Scanning Guide or the User’s Guide (PDF format manual) for each software program on the CanoScan Setup Utility CD-ROM.
-
Page 16: Specifications
• Before you upgrade to Windows XP from Windows 98/Me/2000, you must uninstall ScanGear CS and CanoScan Toolbox using the “Uninstall the Software” menu of the CanoScan Setup Utility CD-ROM. The scanner may not work if you upgrade to Windows XP with these programs still installed. After upgrading to Windows XP, reinstall ScanGear CS and CanoScan Toolbox according to the steps on page 3. -
Page 17: System Information
This form should be used to record the operating environment for the purchased scanner. If any problems occur with the scanner, you will need this information when you contact our Customer Support Help Desk. Be sure to record the information and store it in a safe location. - Page 18 Customer Care Center : 1-757-413-2848 http://www.usa.canon.com/consumer CANON CANADA INC. 6390 Dixie Road, Mississauga, Ontario L5T 1P7, Canada 1-800-OK CANON http://www.canon.ca CANON LATIN AMERICA, INC. 703 Waterford Way, Suite 400 Miami, Florida 33126, U.S.A. CANON MEXICANA, S. de R.L. de C.V.
Need help?
Do you have a question about the CanoScan 3000 and is the answer not in the manual?
Questions and answers