Cambridge Audio One+ User Manual
Micro stereo receiver
Hide thumbs
Also See for One+:
- Brochure & specs (2 pages) ,
- Technical specifications (2 pages) ,
- Manual (2 pages)
Table of Contents
Advertisement
Advertisement
Table of Contents

Related Manuals for Cambridge Audio One+


Summary of Contents for Cambridge Audio One+
- Page 1 Micro Stereo User’s manual Your music + our passion...
-
Page 2: Table Of Contents
This guide is designed to make installing and using this product as easy as possible. Information in this document has been carefully checked for accuracy at the time of printing; however, Cambridge Audio's policy is one of continuous improvement, therefore design and specifications are subject to change without prior notice. -
Page 3: Introduction
Introduction Thank you for purchasing your Cambridge Audio One+! We hope that you enjoy many years of listening pleasure from it. Like all Cambridge Audio products, One+ adheres to three core principles – stunning performance, ease of use and incredible value. -
Page 4: Important Safety Instructions
Important safety instructions For your own safety please read the following important safety instructions carefully before attempting to connect this unit to the mains power supply. They will also enable you to get the best performance from and prolong the life of the unit: 1. -
Page 5: Fcc Regulations
Energy-using Products (2005/32/EC) Directives when used and installed according to this instruction manual. For continued compliance only Cambridge Audio accessories should be used with this product and servicing must be referred to qualified service personnel. C-Tick mark This product meets the Australian Communications Authority’s Radio... - Page 6 Important safety instructions (continued) Ventilation IMPORTANT - The unit will become hot when in use. Do not stack multiple units on top of each other. Do not place in an enclosed area such as a bookcase or in a cabinet without sufficient ventilation.
-
Page 7: Limited Warranty
If your dealer is not equipped to perform the repair of your Cambridge Audio product, it can be returned by your dealer to Cambridge Audio or an authorised Cambridge Audio service agent. You will need to ship this product in either its original packaging or packaging affording an equal degree of protection. -
Page 8: Rear Panel Connections
Rear panel connections Power On/Off Switches the unit on or off. Note: It is advisable to switch the unit off if it will not be used for a long time. AC power socket Once you have completed all connections, plug the AC power cable into an appropriate mains socket then switch on. - Page 9 Loudspeaker terminals Connect to loudspeakers with an impedance of between 4-8ohms. For best audio performance we recommend using speakers from Cambridge Audio’s Sirocco range which have been designed in conjunction with One+. Please consult your dealer for details. DAB/FM antenna Tuner aerial for picking up radio signals.
-
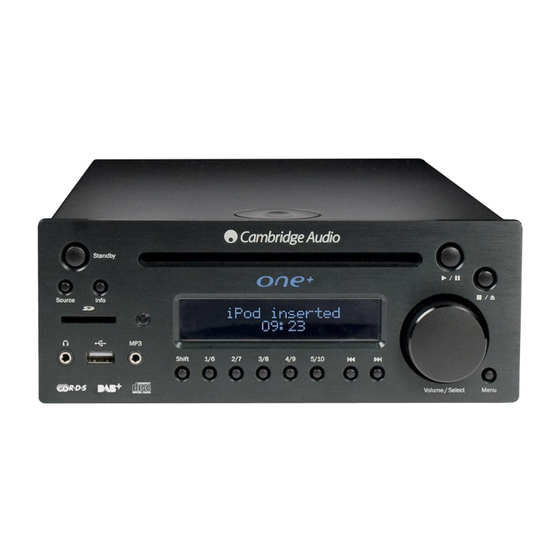
Page 10: Front Panel Controls
Front panel controls Standby/On Switches the unit between Standby mode (indicated by the time on the display) and on. Standby is a low power mode where the power consumption is less than 2 Watts. The unit may be left in Standby mode when not in use. Source Press to cycle through the available input sources (e.g iPod, CD, DAB, FM, USB, SD, Aux1/MP3, Aux2). -
Page 11: Remote Control
FM mode – RDS/RBDS (Radio Data System/Radio Broadcast Data System) station name, time/date, program type, audio mode, alarm status, sleep status and clock status. Note: RDS/RBDS information may not work if the FM signal is too weak or the station does not have any of these services available. -
Page 12: Remote Control
Front panel controls (continued) (Skip/Scan) Use for skipping between tracks during playback and also for menu/function adjustment. These buttons are also used to scroll through available stations in DAB/FM mode and for clock/alarm/sleep settings. For more information refer to 'Operating instructions'. Play/Pause Plays and pauses playback. - Page 13 Menu Press to cycle through and adjust balance, bass level, treble level and X–Bass using the volume buttons on the remote. Stereo Mono When listening to FM, press to alternate between 'Auto' and 'Mono' modes. In Auto mode, the One+ decodes a stereo signal if the signal strength is strong enough reverting to Mono for weak signals.
-
Page 14: Ipod Compatibility
Remote control (continued) Back Press to go back to previous menu setting on your iPod. Select Press to accept the item/function on the display. Mute Mutes the audio output on the unit. Press again to cancel mute. Album Up/Down Press to navigate albums on your SD memory card or USB memory stick. Also used in iPod mode as following section. -
Page 15: Connections
Connections DAB/FM external aerial (Optional) Back Press to go back to previous menu settings on your iPod. Loudspeaker Select Press to accept the item/function highlighted on the display menu on your iPod. Up/Down Press to navigate up/down on your iPod. DD30 dock Powered subwoofer Audio player/recorder (CD/DVD/Aux) - Page 16 Your music + our passion Micro Stereo User’s manual Mikro-Stereoanlage Bedienungsanleitung Micro chaîne Mode d'emploi Microcadena estéreo Manual del usuario Micro Stereo Manuale per l'utente Micro Stereo Gebruikershandleiding Mikro stereo Brugermanual Стереофоническая микросистема Руководство для пользователя...
-
Page 17: Active Subwoofer
Active subwoofer Connect to an active subwoofer using a standard RCA/phono cable. Aux 1 & 2 inputs For other sources such as the audio outputs of a DVD player, satellite/cable receiver etc. Tape output For connection to the recording inputs of a tape machine, CD-R recorder etc. -
Page 18: Fm Mode
Operating instructions Turning on for the first time After making the connections to your unit, activate your One+ by switching the Power button on the rear panel to 'On', then press the button on the front panel. When turning the unit on for the very first time, the unit will display ‘Insert iPod’ as this is the default mode. -
Page 19: Setting Presets In Dab Or Fm Modes
Operating instructions (continued) In FM mode, you can also press the Menu button which will first bring up a <Freq Select> menu item. This also allows you to scroll to and select any desired station if you know its frequency using the volume control. Setting presets in DAB or FM modes One+ can store up to 10 presets for each of the DAB and FM bands. -
Page 20: Setting The Alarm
Setting the alarm The Alarm function will turn on the unit at a chosen time. To set the alarm time: 1. Briefly press on your remote control. 'Alarm: DAB Pr 1' will appear on the front panel display. Use the buttons to select if you wish the alarm to wake you to DAB preset 1 or FM preset 1. -
Page 21: Repeat Function
Operating instructions (continued) Note: – One+ is not compatible with the Windows Media Audio lossless file format. – USB device and SD card should be in FAT (e.g. FAT16, FAT32) format. 1. Press the button to start playing from the beginning of the album/folder. 2. -
Page 22: Using An Ipod With The Supplied Dd30 Docking Station
Using an iPod with the supplied DD30 docking station One+ comes with the DD30 docking station for iPod. Connect the DD30 to the connector located at the rear and insert an appropriate iPod dock adaptor for your iPod. The DD30 is compatible with Apples standard dock adaptors, supplied with all new iPod. -
Page 23: Resetting The Unit
Operating instructions (continued) Resetting the unit A full reset of One+ can be performed by turning the unit on from the back panel whilst holding down the Standby/On button on the front panel. Note: Performing System Reset will erase all stored presets and other stored settings. Troubleshooting There is no power Ensure the AC power cord is connected securely. -
Page 24: Technical Specifications
The remote handset will not function Check the polarity and that the batteries have not expired. Ensure that nothing is blocking the remote sensor. Perform a System Reset. The unit does not pick up enough DAB stations. Check the aerial has strong signal. Re-orientate the aerial. - Page 25 Cambridge Audio is a brand of Audio Partnership Plc Registered Office: Gallery Court, Hankey Place, London SE1 4BB, United Kingdom Registered in England No. 2953313 www.cambridge-audio.com © 2009 Cambridge Audio Ltd...
Need help?
Do you have a question about the One+ and is the answer not in the manual?
Questions and answers