Table of Contents
Advertisement
Quick Links
Advertisement
Table of Contents

Related Manuals for Body Sculpture BT-2610E


Summary of Contents for Body Sculpture BT-2610E
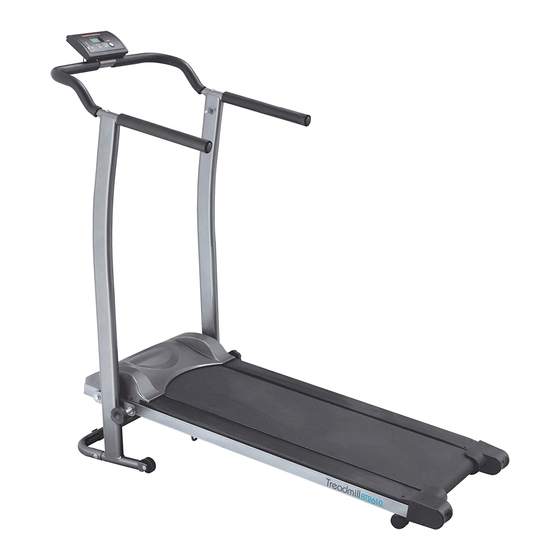
- Page 1 BT-2610E FOLDABLE TREADMILL www.body--sculpture.com...
- Page 3 Impor tant Safety Infor mation ¡¡¡¡¡¡¡ Exploded-View Assembly Drawing ¡¡¡¡¡¡ ..2 Parts List ¡¡¡¡¡¡¡¡¡¡¡¡¡¡¡¡¡¡ Assembly Instructions ¡¡¡¡¡¡¡¡¡¡¡¡ Exercise Instructions ¡ ¡¡¡¡¡¡¡¡¡¡¡¡ Troubleshooting ¡¡¡¡¡ ¡ ¡¡¡¡¡¡¡¡¡ Folding for Storage ¡¡¡¡¡¡¡¡¡¡ ¡¡ ¡¡ Exercise Computer...
- Page 4 Please keep this manual in a safe place for easy reference. 1. It is important to read this entire manual before assembling and using the equipment. Safe and effective use can only be achieved if the equipment is assembled, maintained and used properly.
- Page 6 NO:17 NO:4 NO:3 NO:6 Fixing Screv Bolt Cured Washer Bolt (M5*8mm) (M5*12mm) ( Φ6*Φ16*2 t) (M8*20mm) Phillips Head Screw Driver & Spanner NO:7 Washer ( Φ8*Φ19*2 t) NO:22 (φ8.2Xφ22.2X2t) Fixing Knob(1set) Allen Key S13 1PC PARTS LIST DESCRIPTION DESCRIPTION Main Frame Computer Fixing Screw(M5) Wheel Handlebar Grip(φ32*φ20*450)
- Page 7 STEP 1 Bolt each handle support to the main frame with an M8x20mm bolt (part 6) and a washer (part 7). Then take the two locking knobs (part5) and two washers (part 7) and pass each locking knob through the bracket on the handle support.
- Page 8 STEP 4 Take the computer console (part 20) and slide it onto the computer holder (part 19). Secure with two screws (part 17). STEP 5 Connect the computer sensor wires (part 30 and 31)
-
Page 9: Exercise Instructions
Using your TREADMILL will provide you with several benefits. It will improve your physical fitness, tone your muscles and, in conjunction with a calorie-controlled diet, help you lose weight. 1.The Warm Up Phase This stage helps get the blood flowing around the body and the muscles working properly. It will also reduce the risk of cramp and muscle injury. -
Page 10: The Cool Down Phase
3. The Cool Down Phase This stage is to let your cardio-vascular system and muscles wind down. This is a repeat of the warm-up phase. First, reduce your tempo and continue at this slower pace for approximately 5 minutes before you get off your Exercise Bike. -
Page 11: F O L D I N G F O R S T O R A Ge
Moving and Storing the Treadmill When the running board is in it's horizontal position fully slacken the locking knobs (part 5) and lift the mainframe to the vertical and locate in position using the fixing knob (part 22) situated on the upper right handle support (part 23).By tilting the treadmill towards you, it is now ready to be wheeled into the desired position. - Page 12 EXERCISE MONITOR INSTRUCTION MANUAL SPECIFICATIONS: TIME¡¡¡¡¡¡¡¡¡¡¡¡¡¡¡¡¡¡¡¡¡¡¡.¡..00:00 -99:59 SPEED(SPD)¡¡¡¡¡¡¡¡¡¡¡¡¡¡¡¡..¡0.0 -99.9KM/H (ML/H) DISTANCE(DIST)¡..¡¡¡¡¡¡¡¡¡¡¡¡¡¡...0.00 -99.99KM (ML) CALORIE(CAL)¡¡¡¡¡¡¡¡¡¡¡¡¡¡¡¡¡..¡0.0 -999.9KCAL ※ODOMETER(ODO)¡¡¡¡¡¡¡¡¡¡..¡¡¡¡..¡¡.0 -9999KM (ML) ※PULSE (PUL) ¡¡..............40~240BPM KEY FUNCTIONS: MODE(SELECT/RESET): This key lets you to select and lock on to a particular function you want. OPERATION PROCEDURES: 1.
- Page 15 COPYRIGHT c 2003 BY BODY SCULPTURE INTERNATIONAL EUROPE LTD. ALL RIGHTS RESERVED. UNAUTHORIZED DUPLICATION IS A VIOLATION OF LAW.
Need help?
Do you have a question about the BT-2610E and is the answer not in the manual?
Questions and answers