Axxess ASWC-1 Installation Manual
Steering wheel control interface
Hide thumbs
Also See for ASWC-1:
- Installation manual (48 pages) ,
- User manual (7 pages) ,
- Instructions (5 pages)
Table of Contents
Advertisement
Available languages
Available languages
INSTALLATION INSTRUCTIONS ASWC-1
ASWC-1
Axxess Steering Wheel Control
Interface Installation Manual
US. PAT. NOS. 8014920 and 8214105
Kit Features
• One Interface does it all - No additional interfaces needed
• Designed to be compatible with all major radio brands
• Auto detects vehicle type, radio connection, and presets controls
• Ability to dual assign steering wheel control buttons
• Can be manually programmed for most vehicles
• Memory retains settings even after battery disconnection
or interface removal
• Connection placements are all organized behind the radio
• Micro "B" USB updatable
interFace components
• ASWC-1 Interface • 12-pin harness with male 3.5mm
connector • Female 3.5mm connector with Brown and
Brown/White wires • 12k-ohm resistor
tools required
• Cutting tool • Crimping tool • Tape
METRA. THE WORLD'S BEST KITS.™
1-800-221-0932
metraonline.com
© COPYRIGHT 2004-2011 METRA ELECTRONICS CORPORATION
Advertisement
Chapters
Table of Contents

Related Manuals for Axxess ASWC-1


Summary of Contents for Axxess ASWC-1
- Page 1 INSTALLATION INSTRUCTIONS ASWC-1 ASWC-1 Axxess Steering Wheel Control Interface Installation Manual US. PAT. NOS. 8014920 and 8214105 Kit Features • One Interface does it all - No additional interfaces needed • Designed to be compatible with all major radio brands • Auto detects vehicle type, radio connection, and presets controls • Ability to dual assign steering wheel control buttons • Can be manually programmed for most vehicles • Memory retains settings even after battery disconnection or interface removal • Connection placements are all organized behind the radio • Micro “B” USB updatable interFace components • ASWC-1 Interface • 12-pin harness with male 3.5mm connector • Female 3.5mm connector with Brown and Brown/White wires • 12k-ohm resistor tools required • Cutting tool • Crimping tool • Tape METRA. THE WORLD’S BEST KITS.™...
-
Page 2: Table Of Contents
Table of Contents Preface ....................3 Overview – Introduction to the ASWC-1 Interface and Wiring Harness ....4-5 ASWC-1 – Section 1: Installation ..............6-7 – Section 2: Programming ..............8-9 – Section 3: Troublshooting Auto Detect Mode ..............10 Manual Programming ............10-13 Changing Radio Type ............13-14 Manual Radio Type Programming .........14-15 – Section 4: Remapping Remapping SWC Buttons ............16 Resetting Original SWC Settings ..........17 ASWC-1 Legend – Vehicle LED Feedback ..............18 – Radio LED Feedback ..............18-19... -
Page 3: Preface
Preface What you need to know before you begin 1) Know the correct year, make, and model of your vehicle. 2) Be sure that the radio you are installing is compatible with the Axxess steering wheel control (ASWC-1) interface (refer to the aftermarket radio owner’s manual). 3) Go to the Axxess website (axxessinterfaces.com) and click on the link entitled “ASWC-1 VEHICLE INSTRUCTIONS”, which is located on the right side of the screen in the middle. Once you put your vehicle information in, click the “SUBMIT” button. This will take you to another page, where you will then click on the link under the word “DOCUMENTS”. This will provide the vehicle specific instructions for your vehicle. Print this document so you have it with you in the vehicle during the install as it is the best, and most recent source of information. Note: Even though we have done extensive research and testing (to verify that the steering wheel control wires we list are correct) it is still your responsibility to verify the steering wheel control wires with a multimeter. -
Page 4: Overview
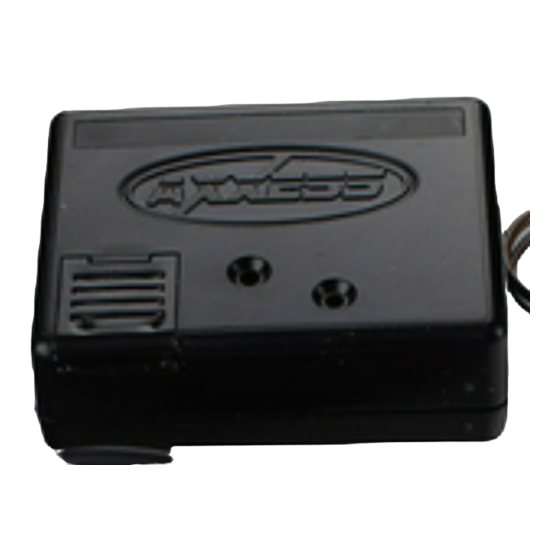
Overview Introduction to the ASWC-1 Interface and Wiring Harness On the top of the ASWC-1 interface there are three points of interest: 1) The Programming LED – Flashes rapidly when in auto detect mode, f lashes slowly in manual programming mode. 2) The Reset Button – Hold down button for 3 seconds to start auto detect mode; hold down longer then 10 seconds to start manual programming mode. 3) The Slide Cover (USB Port Cover) – Open this up to reveal the USB update port. Using a standard Micro “B” to USB cable or Metra’s USB-MINI-CAB update cable you can make sure you always have the latest updated inventory. USB Port Cover Reset Button Programming LED... - Page 5 Overview Below are the wire colors for the ASWC-1. Please visit the Axxess website at www.axxessinterface.com for detailed information on your specific vehicle and for what color wire(s) to use with the ASWC-1 interface. Pin-1 Pink Pin-8 Black/Green Pin-2 White/Green Pin-9 Red (tip of 3.5mm connector) Pin-3 Yellow/Green Pin-10 White (ring of 3.5mm Pin-4 Green/Orange connector) Pin-5 Gray/Red Pin-11 Gray/Blue Pin-6 Black Pin-7 Blue/Pink Pin-12 Red...
-
Page 6: Section 1: Installation
Section 1: Installation Once you have collected or printed out the information sheet on your particular vehicle from the Axxess website (www.axxessinterface.com) you’re ready to install the ASWC-1. Installing the ASWC-1 1) Connect the Black wire of the ASWC-1 to ground. You may use the same grounding point as the aftermarket radio. 2) Connect the Red wire of the ASWC-1 to a 12-volt accessory wire, one that turns “On” and “Off” with the ignition key. 3) Locate the correct SWC wire(s) in the vehicle’s radio primary or secondary harness as described in the vehicle information sheet found on the Axxess website. Connect the correct wire color(s) from the ASWC-1 to the steering wheel control wire(s) in the vehicle. Note: Metra recommends that the wire(s) are soldered for the best and most secure connection. T-Taps or scotch locks are not recommended due to the higher chance of an intermitted connection or change in resistive values. - Page 7 Section 1: Installation 4) If you are using an Eclipse, Kenwood, Metra OE, or a newer JVC radio, plug the included female 3.5mm connector with the Brown and Brown/White wires into the male 3.5mm connector of the ASWC-1 harness. • For Kenwood and select JVC: Connect the SWC wire (normally Blue/Yellow) to the Brown wire of the ASWC-1. Isolate and tape the Brown/White wire, it will not be used. Note: Some newer Kenwood radios will auto detect as a JVC. If this is the case, you can use a 12k-ohm resistor (included) in line between the Blue/Yellow and Brown wire of the female 3.5mm...
-
Page 8: Section 2: Programming
Section 2: Programming The ASWC-1 can be programmed in two ways. (1) It can do it by itself through Auto Detect Mode, or (2) it can be manually programmed in non-data vehicles. It is strongly recommend to start with the Auto Detect Mode first. Auto Detect Mode: Overview The ASWC-1 has the ability to auto detect certain vehicles and to know what aftermarket radio it is connected to. The vehicle info sheet from the Axxess website (www.axxessinterface.com) will indicate if your vehicle will likely be auto detected and what action, if any, is required by you for this process to take place. For the Auto Detect feature to work there are 3 possible actions, however only one action will be required by you depending on your vehicle: • Turn the ignition on and no other action is required. • Turn the ignition on, press and hold the “Volume Up” button on the steering wheel. --- Or --- • Turn the ignition on, press and release the “Volume Up” button repeatedly on the steering wheel. As stated before, only one of these actions will need to be done depending on your vehicle for the Auto Detect feature to work. Please refer to the vehicle info sheet provided on the Axxess website. Auto Detect Mode: Steps 1) Complete connections to the vehicle and the aftermarket radio. If this is the first time the ASWC-1 is being installed in a vehicle:... - Page 9 2) Turn the ignition on, the LED will flash once, then go out. 3) Hold down the reset button for 3 seconds and then release it. 4) Perform action required for your particular vehicle as noted in the vehicle info sheet. 5) After a couple of seconds the LED should stop flashing and not light up for 2 seconds. At this point do not push any buttons. 6) After the 2 seconds there will be a series of 7 Green flashes, some short and some long. 7) The LED will pause for another 2 seconds then flash Red up to 11 times (refer to ASWC-1 ledgend). 8) This is the end of the auto detection stage. If the ASWC-1 detected the vehicle and the radio successfully the LED will light up solid. 9) For vehicles with OE Bluetooth buttons please press “Hang up” or “Pick up” on your steering wheel control after the LED on the ASWC-1 goes solid. If the OE Bluetooth buttons are able to be used, the LED will go out after 3 seconds. Your OE Bluetooth buttons are now programmed to your aftermarket radios Bluetooth buttons (aftermarket radio must have Bluetooth capabilities). Tip: If the LED does not light up solid refer to the troubleshooting section.
-
Page 10: Section 3: Troublshooting
Section 3: Troubleshooting Auto Detect Mode So you tried the auto detect feature and at the end the LED did not stay solid “red”. Instead it started flashing, meaning that the ASWC-1 did not detect the vehicle. Follow these steps to determine what may have happened: 1) Verify that you have 12-volt accessory and a good ground to the ASWC-1. Sometimes the factory ground is not sufficient, a chassis ground is highly recommended. If your vehicle has a SWC reference ground wire, chassis ground that as well, along with your aftermarket radio. 2) Validate using the vehicle information sheet (Axxess website) that the correct steering wheel control wire(s), in the vehicle, were connected to the correct wire(s) to the ASWC-1. 3) Confirm that the 3.5mm connector is connected to your radio securely and in the correct location. 4) If using the female 3.5mm connector in Eclipse, Kenwood, select JVC, or Metra OE radios verify that the radio’s SWC wire is connected to the correct wire to the ASWC-1. Manual Programming Auto Detect Mode If your vehicle is not listed for auto detection by the ASWC-1 on the Axxess website, www.axxessinterface.com, you can manually program a non-data vehicle by the following steps (have ASWC-1 legend available). - Page 11 Please refer to the radio owner’s manual or wireless remote for specific commands that the radio will recognize. 1) Complete connections to the vehicle and to the aftermarket radio, make sure the 3.5mm connector is connected. If this is the first time the ASWC-1 is being installed in a vehicle: 2) Turn the ignition on; the LED will start flashing rapidly. 3) After 10 seconds the ASWC-1 will go into the LED feedback mode. After the series of LED flashes the LED will stay in a slow constant flash state. Go to step 4. --- Or --- If the ASWC-1 has been in a vehicle before: 2) Press and hold the reset button down for more then 10 seconds. 3) After the 10 seconds the LED will begin a slow constant flash.
- Page 12 (2) After the 18th button is programmed or skipped the LED will go back to the slow constant blink mode. Note: If at any time an error is made hold down the reset button on the ASWC-1 for 10 or more seconds. This will restart the manual programming. Go back to Step 4 and start again. 8) Press and hold the “Volume Down” button for 5 seconds till the LED starts to flash quickly.
-
Page 13: Changing Radio Type
Section 3: Troubleshooting 11) Then the LED will flash, up to 11 times, depending on what radio the ASWC-1 thinks it’s connected to. 12) Make sure the number of flashes match what radio you have installed. Refer to the Changing Radio Type section, pages 13-14. 13) If the LED flashes match the radio then hold down the “Volume Down” button until the LED goes solid red. 14) Programming for the vehicle and the radio is now complete. Test out the steering wheel control functions to make sure it works correctly. Changing Radio Type If the LED flashes do not match the radio you have connected, you must manually program the ASWC-1 to tell it what radio it is connected to. 1) To manually program the aftermarket radio, press and hold the “Volume Down” button on the steering wheel control until the LED goes solid red, then release “Volume Down”. 2) At this point Eclipse is programmed. If you are using an Eclipse radio go to step 3. If you are using a different radio go to step 4. 3) Press and hold “Volume Down” for 5 seconds. The LED will flash once then go solid red indicating the programming has finished. Go enjoy your radio. 4) If you have a different radio then Eclipse, press the Volume Up button again till the LED goes solid red, then release “Volume Up”. You have now programmed Kenwood. -
Page 14: Manual Radio Type Programming
Section 3: Troubleshooting 5) Here is the chart to show how many presses of the “Volume Up” button is needed for which radio you are trying to program: Eclipse Alpine Kenwood Visteon Valor Clarion “Type 1” 10 Clarion “Type 2” Sony and Dual 11 Metra OE Pioneer and Jensen 6) Once the radio manufacturer has been selected hold “Volume Down” for at least 5 seconds. The LED will flash the number of times which radio was selected then the LED will remain on to indicate the ASWC-1 has finished programming. Manual Radio Type Programming If only changing the radio type is needed then follow this procedure below. 1) Within the first 25 seconds of turning the key on, press and hold the car’s “Volume Down” button. 2) After 15 seconds of holding “Volume Down”, the ASWC-1’s red LED will go on. - Page 15 5) When the desired radio type has been reached, Press the “Volume Down” button. 6) The LED will go on and will remain on (approximately 3 seconds). The ASWC-1 is internally computing and storing this new information. 7) The LED will go “Off” indicating it is completed. Note: If at any time the user fails to press any button for a period of 10 seconds or more, this programing mode will abort.
-
Page 16: Section 4: Remapping
Section 4: Remapping Remapping the SWC (Steering Wheel Control) Buttons Once you have the ASWC-1 programmed you can then change the steering wheel control button assignment(s). Such as, programing the “Seek Up” button as a “Mute” function. Follow the steps below to remap the SWC buttons: 1) Ideally have the ASWC-1 visible, so you can see the LED flashes to confirm button recognition. 2) Turning “Off” the radio is recommended. 3) Within the first 20 seconds of turning the ignition on, press and hold down the “Volume Up” button for at least 20 seconds. 4) The LED will light up solid red. Release “Volume Up” and the LED will go out. “Volume Up” has now been programmed. 5) Follow the list in the Button Assignment section, page 19, to reference the order of what buttons need to be pressed and/or how to bypass a button. 6) After the last button is programmed on your steering wheel (you do not have to go through the whole list), hold down the “Volume Up” button for at least 10 seconds then the LED will go out. --- Or --- After the 18th button is programmed or skipped the LED will go out and the remapping is completed. -
Page 17: Resetting Original Swc Settings
Section 4: Remapping Resetting Orginal SWC Settings If for any reason after remapping the steering wheel controls you want to revert back to the original steering wheel control settings, follow these steps: 1) Within the first 20 seconds of turning the ignition on. Press and hold down the original “Volume Down” button (not the “Volume Down” button you just remapped) for at least 25 seconds. 2) The LED will turn on then release the “Volume Down” button and the LED will turn “Off”. 3) The original steering wheel control settings will be restored. -
Page 18: Aswc-1 Legend
ASWC-1 Legend For A and B: Short flashes represent the steering wheel control wire(s) that are not connected to the vehicle from the ASWC-1. Long flashes represent wire(s) that are connected to the vehicle. A. Vehicle LED Feedback (Indicated by Green LED) 1st LED flash is the White/Green wire on the ASWC-1 2nd LED flash is the Orange/Green wire on the ASWC-1 3rd LED flash is the Green/Orange wire on the ASWC-1 4th LED flash is the Gray/Red wire on the ASWC-1 5th LED flash is the Black/Green wire on the ASWC-1 6th LED flash is the Gray/Blue wire on the ASWC-1 7th LED flash is the Pink wire on the ASWC-1 B. Radio LED Feedback (Indicated by Red LED) 1st LED flash is for Eclipse 2nd LED flash is for Kenwood 3rd LED flash is for Clarion (“Type” 1) 4th LED flash is for Sony and Dual 5th LED flash is for JVC 6th LED flash is for Pioneer and Jensen 7th LED flash is for Alpine* 8th LED flash is for Visteon 9th LED flash is for Valor 10th LED flash is for Clarion (“Type” 2) 11th LED flash is for Metra OE... -
Page 19: Button Assignment (Remapping/Manual Programing)
ASWC-1 Legend *Note (section B): If the ASWC-1 flashes 7 times and you do not have an Alpine radio connected to it that means that the ASWC-1 did not see any radio connected. Verify the 3.5mm connector is connected to the SWC input on the radio. -
Page 20: Dual Assignment Instructions
Dual Assignment Instructions Note: Seek up and Seek down are already set to Preset up and Preset down for long press. 1) Turn on the ignition but do not start the vehicle. 2) Press and hold down the steering wheel button that you want to assign a long press function to, for about ten seconds until the LED rapidly flashes green. At this point release the button and the LED will go solid green. 3) Press and release the VOLUME UP button the number of times corresponding to the new button number you selected (see chart below). The green LED will blink rapidly when the VOLUME UP is pressed and back to solid green when released. (Caution, if more than ten seconds elapses between a VOLUME UP button press, this procedure will abort, and the LED will go off). Go to the next step when the VOLUME UP button has been pressed the desired number of times. 4) To store the long press button in memory, press the button that you assigned a long press button (the button held down in step 1). The LED will now go off indicating it has been stored. - Page 21 Dual Assignment Instructions Button Number New Button Action Not allowed Not allowed SEEK UP/NEXT SEEK DOWN/PREV MODE/SOURCE MUTE PRESET UP PRESET DOWN POWER 10 BAND 11 PLAY/ENTER 12 13 ON HOOK 14 OFF HOOK 15 FAN UP 16 FAN DOWN 17 TEMP UP 18 TEMP DOWN...
- Page 22 Notes...
- Page 23 Notes...
- Page 24 INSTALLATION INSTRUCTIONS ASWC-1 IMPORTANT WARNING This product includes instructions for installation which must be carefully followed. The instructions are worded in such a manner to assume that the installer is capable of completing these type of electronic installations. If you are unclear as to what you are instructed to do or believe that you do not understand the instructions so as to properly and safely complete the installation you should consult a technician who does have this knowledge and understanding. Failure to follow these instructions carefully and to install the interface as described could cause harm to the vehicle or to safety systems on the vehicle.
- Page 25 INSTRUCCIONES DE INSTALACIÓN ASWC-1 ASWC-1 Manual de instalación de la interfase de control en volante Axxess US. PAT. NOS. 8014920 and 8214105 CaraCterístiCas del kit • Una interfase hace todo - No se requieren interfases adicionales • Diseñado para ser compatible con todas las marcas principales de radios • Detecta automáticamente el tipo de vehículo, la conexión de radio y pre configura los controles • Posibilidad de asignar botones de control del volante de doble • Se puede programar manualmente en la mayoría de los vehículos • La memoria retiene la configuración incluso después de que se desconecte la batería o se elimine la interfase • Las conexiones están organizadas para quedar detrás del radio • Micro “B” USB actualizable Componentes de la interfaz • Interfase ASWC • Arnés de 12 pins con conector macho...
- Page 26 Indice Prefacio ..................... 3 Información general – Introducción a la interfase ASWC-1 y al arnés de cableado ....4-5 ASWC-1 – Sección 1: Instalación ..............6-7 – Sección 2: Programación ...............8-9 – Sección 3: Resolución de problemas Modo de detección automática ..........10 Programación manual ............10-13 Cambio de tipo de radio............13-14 Programación de tipo de radio manual .........14-15 – Sección 4: Remapeo Remapeo de botones SWC ............16 Restablecimiento de los ajustes originales de SWC ....17 Leyenda ASWC-1 – Retroalimentación LED del vehículo ..........18 – Retroalimentación LED del radio ..........18-19 – Asignación de botones (remapeo/programación manual) ....19 PRECAUCIÓN: Metra recomienda desconectar el terminal negativo de la batería...
-
Page 27: Prefacio
Prefacio Lo que debe saber antes de empezar 1) Conozca el año, marca y modelo correctos de su vehículo. 2) Asegúrese de que el radio que está instalando sea compatible con la interfase de control en volante Axxess (ASWC-1) (consulte el manual del propietario del radio de mercado secundario). 3) Ir a la página web de Axxess (axxessinterfaces.com) y haga clic en el enlace titulado “INSTRUCCIONES ASWC-1 Vehículo”, que se encuentra en el lado derecho de la pantalla en el centro. Una vez que usted pone su información del vehículo, haga clic en el botón “Enviar”. Esto te llevará a otra página, donde se haga clic en el enlace debajo de la palabra “documentos”. Esto proporcionará las instrucciones específicas del vehículo para su vehículo. Imprima este documento para que usted tiene con usted en el vehículo durante la instalación, ya que es la mejor y más reciente fuente de información. Nota: Aunque hemos llevado a cabo pruebas e investigación extensas (para verificar que los cables de control del volante, están enumeradas son correctas), sigue siendo responsabilidad suya verificar los cables del control en el volante con un multímetro. -
Page 28: Introducción A La Interfase Aswc-1 Y Al Arnés De Cableado
Overview Introducción a la interfase ASWC-1 y al arnés de cableado En la parte superior de la interfase ASWC-1 hay tres puntos de interés: 1) El foco LED de programación – Parpadea rápidamente cuando está en modo de detección automática, parpadea lentamente en el modo de programación manual. 2) El botón de restablecimiento – Mantenga presionado el botón durante 3 segundos para iniciar el modo de detección automática; manténgalo presionado más de 10 segundos para iniciar el modo de programación manual. 3) La cubierta deslizable (cubierta del puerto USB) – Ábrala para revelar el puerto de actualización mediante USB. Utilizando un estándar Micro “B” al cable USB o USB-MINI-CAB cable Metra actualización que puede asegurarse de que siempre dispone de la última actualización del inventario. Cubierta del puerto USB Botón de restablecimiento LED de programación... - Page 29 Overview A continuación se indican los colores de los cables para el ASWC-1. Visite el sitio web de Axxess en www.axxessinterface.com para obtener información detallada sobre su vehículo específico y para ver cuáles colores de cables usar con la interfase ASWC-1. Pin- 1 Rosa Pin- 8 Negro/Verde Pin- 2 Blanco/Verde Pin- 9 Rojo (punta de Pin- 3 Amarillo/Verde conector 3.5mm) Pin- 4 Verde/Anaranjado Pin- 10 Blanco (aro de Pin- 5 Gris/Rojo conector 3.5mm) Pin- 6 Negro...
-
Page 30: Sección 1: Instalación
Sección 1: Instalación Una vez que haya recolectado o impreso la hoja de información sobre su vehículo específico del sitio de Axxess (www.axxessinterface.com), está listo para instalar el ASWC-1. Instalación del ASWC-1 1) Conecte el cable Negro del ASWC-1 a tierra. Puede utilizar el mismo punto de aterrizado que el radio de mercado secundario. 2) Conecte el cable Rojo del ASWC-1 a un cable de accesorios de 12-volts que se encienda y se apague con la llave de ignición. 3) Localice los cables correctos del SWC en el arnés primario o secundario del vehículo como se describe en la hoja de información del vehículo que se encuentra en el sitio web de Axxess. Conecte los colores correctos de cable desde el ASWC-1 a los cables de control en el volante del vehículo. Nota: Metra recomienda que el o los cables se suelden para lograr la mejor conexión, y la más segura. No se recomienda el uso de conectores tipo “T-Tap”... - Page 31 Sección 1: Instalación • Para Kenwood y algunos JVC: Conecte el cable SWC (normalmente Azul/Amarillo) al cable Marrón del ASWC-1. Aísle y encinte el cable Marrón/Blanco, no se utilizará. Nota: Algunos de los radios Kenwood más nuevos se detectarán automáticamente como JVC. Si este es el caso, puede usar una resistencia de 12k ohmios (incluida) en línea entre el cable Azul/Amarillo y marrón del conector hembra...
-
Page 32: Sección 2: Programación
Sección 2: Programación El ASWC-1 puede programarse de dos maneras. (1) Puede hacerlo automáticamente mediante el modo de detección automática, o (2) puede programarse manualmente en vehículos que no cuentan con datos. Se recomienda empezar con el “Modo de detección automática” primero. Modo de detección automática: Información general El ASWC-1 tiene la capacidad de detectar automáticamente ciertos vehículos y de saber a cuál radio de mercado secundario está conectado. La hoja de información del vehículo del sitio web de Axxess (www.axxessinterface.com) indicará si su vehículo será detectado automáticamente y qué acción debe seguir usted para que este proceso se lleve a cabo. Para que la función de detección automática funcione, hay 3 posibles acciones. Sin embargo, solo se requiere una acción de su parte, dependiendo de su vehículo. • Encienda la ignición y no se requiere ninguna otra acción. • Encienda la ignición, presione y mantenga presionado el botón de subir volumen en el volante. --- O bien --- • Encienda la ignición, presione y suelte el botón de subir volumen en el volante. Como se explicó anteriormente, solo se necesitará una de estas acciones, dependiendo de su vehículo para que funcione la función de detección automática. Consulte la hoja de información del vehículo proporcionada en el sitio web Axxess. Modo de detección automática: Pasos 1) Realice las conexiones al vehículo y al radio de mercado secundario. - Page 33 3) Mantenga presionado el botón de restablecimiento durante 3 segundos y luego suéltelo. 4) Realice la acción requerida para su vehículo específico como se indica en la hoja de información del vehículo. 5) Después de un par de segundos, el foco LED debe dejar de parpadear y no iluminarse durante hasta 2 segundos. En este momento, no presione ningún botón. 6) Después de los 2 segundos, habrá una serie de 7 Verde parpadeos, algunos cortos y algunos largos. 7) El foco LED pausará durante otros 2 segundos y luego parpadeará Rojo hasta 11 veces (consulte la leyenda del ASWC-1). 8) Este es el final de la etapa de detección automática. Si el ASWC-1 detecta el vehículo y la radio con éxito, el LED se iluminará sólido. 9) Para vehículos con botones Bluetooth del fabricante original, presione “Colgar” o “Descolgar” en el control de su volante después de que el foco LED se haya iluminado sin parpadear. Si los botones de Bluetooth del fabricante de equipo original pueden utilizarse, el foco LED se apagará después de 3 segundos. Sus botones de Bluetooth del fabricante de equipo original ahora están programados para los botones Bluetooth de su radio de mercado secundario (el radio de mercado secundario debe ser compatible con Bluetooth). Consejo: Si el LED no se ilumina sólido consulte la sección de solución de problemas.
-
Page 34: Sección 3: Resolución De Problemas
Sección 3: Resolución de problemas Modo de detección automática Así que ya probó la función de detección automática y al final el foco LED no se quedó de color rojo sin parpadear. En lugar de ello, empezó a parpadear, lo que significa que el ASWC-1 no detectó el vehículo. Siga estos pasos para determinar qué puede haber ocurrido: 1) Verifique que tiene un accesorio de 12-volts y una buena tierra al ASWC-1. En ocasiones la tierra de fábrica no es suficiente, se recomienda ampliamente una tierra a chasís. Si su vehículo tiene un cable de tierra de referencia de SWC, póngalo a tierra también con el chasís, junto con su radio de mercado secundario. 2) Valide usando la hoja de información del vehículo (sitio web Axxess) que el o los cables de control en el volante del vehículo correctos se hayan conectado a el o los cables correctos del ASWC-1. 3) Confirme que el conector de 3.5mm esté conectado firmemente a su radio y que esté en el lugar correcto. 4) Si utiliza el conector hembra de 3.5mm en un radio Eclipse, Kenwood, algunos JVC o Metra OE, verifique que el cable SWC del radio esté conectado al cable correcto al ASWC-1. Programación manual del modo de detección automática Si su vehículo no está en la lista de detección automática del ASWC-1 en el sitio web Axxess, www.axxessinterface.com, puede programar manualmente un vehículo sin datos siguiendo estos pasos (tenga la leyenda ASWC-1 disponible). - Page 35 Consulte el manual del propietario del radio o el control remoto para ver los comandos específicos que el radio puede reconocer. 1) Realice las conexiones al vehículo y al radio de mercado secundario, asegúrese de que el conector de 3.5mm esté conectado. Si esta es la primera vez que se instala el ASWC-1 en un vehículo: 2) Encienda la ignición; el foco LED empezará a parpadear rápidamente. 3) Después de 10 segundos, el ASWC-1 entrará en modo de retroalimentación de LED. Después de que la serie de LED parpadee, el foco LED se quedará en un estado de parpadeo lento constante. Continúe con el paso 4. --- O bien --- Si el ASWC-1 ya se ha usado antes en otro vehículo: 2) Presione y mantenga presionado el botón de restablecimiento durante más de 10 segundos.
- Page 36 --- O bien --- (2) Después de que programe o se salte el botón número 18, el foco LED volverá al modo de parpadeo lento y constante. Nota: Si en cualquier momento se equivoca, mantenga presionado el botón de restablecimiento en el ASWC-1 durante 10 segundos o más. Esto reiniciará la programación manual. Vuelva al Paso 4 y empiece de nuevo. 8) Presione y mantenga presionado el botón de bajar volumen durante 5 segundos hasta que el foco LED empiece a parpadear rápidamente.
-
Page 37: Cambio De Tipo De Radio
Sección 3: Resolución de problemas que tiene instalado. Consulte la sección Cambiar el tipo de radio, en las páginas 13 y 14. 13) Si los parpadeos del foco LED corresponden al radio, mantenga presionado el botón de bajar volumen hasta que el foco LED se ilumine en color rojo sin parpadear. 14) La programación del vehículo y del radio ha finalizado. Pruebe las funciones del control en el volante para asegurarse de que funcionen correctamente. Cambio de tipo de radio Si el parpadeo del foco LED no corresponde al radio que tiene conectado, debe programar manualmente el ASWC-1 para indicar a cuál radio está conectado. 1) Para programar manualmente el radio de mercado secundario, presione y mantenga presionado el botón de bajar volumen en el control del volante hasta que el foco LED se quede en rojo sin parpadear, luego suelte el botón de bajar volumen. 2) En este momento, el Eclipse está programado. Si está utilizando un radio Eclipse, vaya al paso 3. Si está utilizando otro radio, vaya al paso 4. 3) Presione y mantenga presionado el botón de bajar volumen durante 5 segundos. El foco LED parpadeará una vez y luego se iluminará de color rojo sin parpadear, indicando que ha finalizado la programación. Disfrute de su radio. 4) Si su radio no es Eclipse, presione el botón de subir volumen de nuevo hasta que el foco LED se ilumine en rojo sin parpadear, luego suelte el botón de subir volumen. Ha programado el radio Kenwood. -
Page 38: Programación De Tipo De Radio Manual
Sección 3: Resolución de problemas 5) Esta tabla muestra cuántas veces es necesario presionar al botón de subir volumen para el radio que está tratando de programar: Eclipse Alpine Kenwood Visteon Valor Clarion “Tipo 1” 10 Clarion “Tipo 2” Sony and Dual 11 Metra OE Pioneer and Jensen 6) Una vez seleccionado el fabricante del radio, mantenga presionado el botón de bajar volumen cuando menos 5 segundos. El foco LED parpadeará el número de veces que el radio se haya seleccionado y luego el foco LED permanecerá encendido para indicar que el ASWC-1 ha terminado la programación. Programación de tipo de radio manual Si solo requiere cambiar el tipo de radio, siga el procedimiento indicado a continuación. 1) En los primeros 25 segundos después de abrir la llave, presione y mantenga presionado el botón de bajar volumen del auto. 2) Después de 15 segundos de presionar el botón de bajar volumen,... - Page 39 Sección 3: Resolución de problemas el foco LED rojo de ASWC-1 se encenderá. 3) Suelte el botón de bajar volumen y el foco LED se apagará. Ahora estamos en modo de programación de radio. 4) Presione y suelte el botón de subir volumen para el número de radio deseado (consulte la leyenda del ASWC-1). Por cada vez que presione, el foco LED rojo se encenderá y luego se apagará cuando lo suelte para retroalimentación. 5) Cuando llegue al tipo de radio deseado, presione el botón de bajar volumen. 6) El foco LED se encenderá y permanecerá encendido (aproximadamente 3 segundos). El ASWC-1 está realizando cálculos y almacenamiento interno de esta nueva información. 7) El foco LED se apagará, indicando que ha terminado. Nota: Si en cualquier momento el usuario no presiona ningún botón durante 10 segundos o más, este modo de programación...
-
Page 40: Sección 4: Remapeo
Sección 4: Remapeo Remapeo de los botones de SWC (control en el volante) Cuando ya tenga el ASWC-1 programado, puede cambiar las asignaciones de los botones del control en el volante. Por ejemplo, puede programar el botón “Buscar siguiente” como “Silencio”. Siga estos pasos para remapear los botones SWC: 1) Idealmente se recomienda tener el ASWC-1 visible, para que se pueda ver el parpadeo del foco LED para confirmar el reconocimiento de los botones. 2) Se recomienda apagar el radio. 3) Dentro de los primeros 20 segundos después de encender la ignición, presione y mantenga presionado el botón de subir volumen durante cuando menos 20 segundos. 4) El foco LED se iluminará en rojo sin parpadear. Suelte el botón de subir volumen y el foco LED se apagará. Con esto queda programado el botón de subir volumen. 5) Siga la lista en la sección de Asignación de botones, página 19, para consultar el orden de los botones que deben presionarse y/o cómo omitir un botón. 6) Después de programar el último botón del volante (no tiene que pasar por toda la lista), mantenga presionado el botón de aumentar volumen durante al menos 10 segundos y el foco LED se apagará. --- O bien --- Después de que programe o se salte el botón número 18, el foco se... -
Page 41: Restablecimiento De Los Ajustes Originales De Swc
Sección 4: Remapeo Restablecimiento de los ajustes originales de SWC Si por algún motivo después de remapear los controles del volante quiere volver a los ajustes originales del volante, siga estos pasos: 1) En los primeros 20 segundos después de encender la ignición Presione y mantenga presionado el botón original de bajar volumen (no el botón de bajar volumen que acaba de remapear) durante cuando menos 25 segundos. 2) El foco LED se encenderá; suelte el botón de bajar volumen y el foco LED se apagará. 3) Los ajustes originales del control del volante se restablecerán. -
Page 42: A. Retroalimentación Led Del Vehículo
ASWC-1 Leyenda Para A y B: Los parpadeos cortos representan el o los cables del control en el volante que no están conectados al vehículo desde el ASWC-1. Los parpadeos largos representan el o los cables que están conectados al vehículo. A. Retroalimentación LED del vehículo (Indicado por el LED Verde) El 1er parpadeo del foco LED es el cable Blanco/Verde del ASWC-1 El 2o parpadeo del foco LED es el cable Anaranjado/Verde del ASWC-1 El 3er parpadeo del foco LED es el cable Verde/Anaranjado del ASWC-1 El 4o parpadeo del foco LED es el cable Gris/Rojo del ASWC-1 El 5o parpadeo del foco LED es el cable Negro/Verde del ASWC-1 El 6o parpadeo del foco LED es el cable Gris/Azul del ASWC-1 El 7o parpadeo del foco LED es el cable Rosa del ASWC-1 B. Radio LED Feedback (Indicado por el LED Rojo) El 1er parpadeo del foco LED es para Eclipse El 2o parpadeo del foco LED es para Kenwood El 3er parpadeo del foco LED es para Clarion (“Tipo” 1) El 4o parpadeo del foco LED es para Sony y Dual El 5o parpadeo del foco LED es para JVC El 6o parpadeo del foco LED es para Pioneer y Jensen El 7o parpadeo del foco LED es para Alpine*... -
Page 43: Asignación De Botones (Remapeo/Programación Manual)
ASWC-1 Leyenda El 10o parpadeo del foco LED es para Clarion (“Tipo” 2) El 11vo parpadeo del foco LED es para Metra OE *Nota (sección B): Si el ASWC-1 parpadea 7 veces y no tiene un radio Alpine conectado a él, esto significa que el ASWC-1 no detectó ningún radio conectado. Verifique que el conector de 3.5mm esté conectado a la entrada de SWC en el radio. - Page 44 Instrucciones de asignación doble Nota: Busque y Busque hacia abajo ya están configurados a un máximo predefinido y predeterminado por mucho tiempo la prensa. 1) Apague el encendido, pero no arranque el vehículo. 2) Pulse y mantenga pulsado el botón del volante que desea asignar una función de pulsación larga para, durante unos diez segundos hasta que el LED parpadea rápidamente en verde. En este punto de desenganche el botón y el LED se van de color verde. 3) Pulse y suelte el botón SUBIR VOLUMEN el número de veces correspondiente al número nuevo botón seleccionado (ver tabla abajo). El LED verde parpadeará rápidamente cuando los botones SUBIR se presiona y de nuevo a verde fijo cuando se suelta. (Atención, si más de diez segundos transcurre entre un volumen de hasta pulsar el botón, este procedimiento se abortará y el LED se apaga). Ir a la siguiente etapa cuando el botón SUBIR VOLUMEN ha pulsado la deseada número de veces. 4) Para guardar el botón de pulsación larga en la memoria, pulse el botón que se ha asignado un botón de pulsación larga (el botón pulsado en el paso 1). Ahora el LED se apagará indicando que ha...
- Page 45 Instrucciones de asignación doble Botón Número Nuevo botón de acción No se permite No se permite BUSqUE UP/PRóxIMO BUSqUE ABAJO/PREVIO MODO/FUENTE SILENCIAR PRESET UP PRESET ABAJO POTENCIA 10 BANDA JUGAR/ENTRAR 12 13 EN GANCHO 14 APAGADO GANCHO VENTILADOR UP VENTILADOR ABAJO TEMPERATURA UP 18 TEMPERATURA ABAJO...
- Page 46 Notas...
- Page 47 Notas...
- Page 48 INSTRUCCIONES DE INSTALACIÓN ASWC-1 ADVERTENCIA IMPORTANTE Este producto incluye instrucciones de instalación que deben seguirse cuidadosamente. Dichas instrucciones están redactadas dando por supuesto que el instalador es capaz de completar estos tipos de instalaciones electrónicas. Si tiene dudas respecto de lo que se le indica que haga o cree que no comprende las instrucciones como para completar la instalación en forma adecuada y segura, debe consultar a un técnico que efectivamente tenga estos conocimientos y comprensión. Si no sigue estas instrucciones con cuidado y no instala la interfaz como se describe, podría provocar daños en el vehículo o en los sistemas de seguridad del vehículo. La interferencia con determinados sistemas de seguridad también podría provocar...
Need help?
Do you have a question about the ASWC-1 and is the answer not in the manual?
Questions and answers