Huawei FusionServer G5500 User Manual
Hide thumbs
Also See for FusionServer G5500:
- User manual (37 pages) ,
- Manual (59 pages) ,
- Manual (59 pages)

Related Manuals for Huawei FusionServer G5500


Summary of Contents for Huawei FusionServer G5500
- Page 1 FusionServer G5500 Server 1.0.0 User Guide Issue Date 2017-12-15 HUAWEI TECHNOLOGIES CO., LTD.
- Page 2 Notice The purchased products, services and features are stipulated by the contract made between Huawei and the customer. All or part of the products, services and features described in this document may not be within the purchase scope or the usage scope. Unless otherwise specified in the contract, all statements, information, and recommendations in this document are provided "AS IS"...
-
Page 3: About This Document
Indicates a potentially hazardous situation which, if not avoided, could result in death or serious injury. Indicates a potentially hazardous situation which, if not avoided, may result in minor or moderate injury. Issue 02 (2017-12-15) Huawei Proprietary and Confidential Copyright © Huawei Technologies Co., Ltd. - Page 4 Added information about G530 V2 and GP316. For details, see 4.4.4 Installing a G530 V2 4.4.3 Installing a GP316. Issue 01 (2017-11-01) The issue is the first official release. Issue 02 (2017-12-15) Huawei Proprietary and Confidential Copyright © Huawei Technologies Co., Ltd.
-
Page 5: Table Of Contents
4.3.3 Installing GP316 Components...........................54 4.3.4 Installing G530 V2 Components..........................55 4.4 Installing the Node................................55 4.4.1 Installing the GP608..............................55 4.4.2 Installing the G560..............................57 4.4.3 Installing a GP316..............................60 Issue 02 (2017-12-15) Huawei Proprietary and Confidential Copyright © Huawei Technologies Co., Ltd. - Page 6 6.1 Precautions..................................122 6.2 G560 Optional Part Installation..........................122 6.2.1 Hard Disk.................................122 6.2.2 CPU..................................124 6.2.3 DIMM..................................124 6.2.3.1 DIMM and CPU Compatibility..........................124 6.2.3.2 Memory Subsystem Architecture......................... 125 Issue 02 (2017-12-15) Huawei Proprietary and Confidential Copyright © Huawei Technologies Co., Ltd.
- Page 7 6.5.1 Riser Card Tray................................161 6.5.2 PCIe Card................................162 6.6 PSU..................................... 163 6.7 I/O Module................................. 166 6.7.1 Installing a PCIe Card..............................166 6.7.2 Installing an I/O Module............................167 6.8 Management Module..............................168 Issue 02 (2017-12-15) Huawei Proprietary and Confidential Copyright © Huawei Technologies Co., Ltd.
- Page 8 12.2 Product Configuration Resources..........................194 A How to Obtain Help.........................196 A.1 Preparations For Contacting Huawei.........................197 A.2 Contacting Huawei Technical Support........................197 A.3 Making Debugging Preparations..........................197 A.4 How to Use the Document............................197 A.5 How to Obtain Help from Website..........................197 A.6 Ways to Contact Huawei............................198...
-
Page 9: Overview
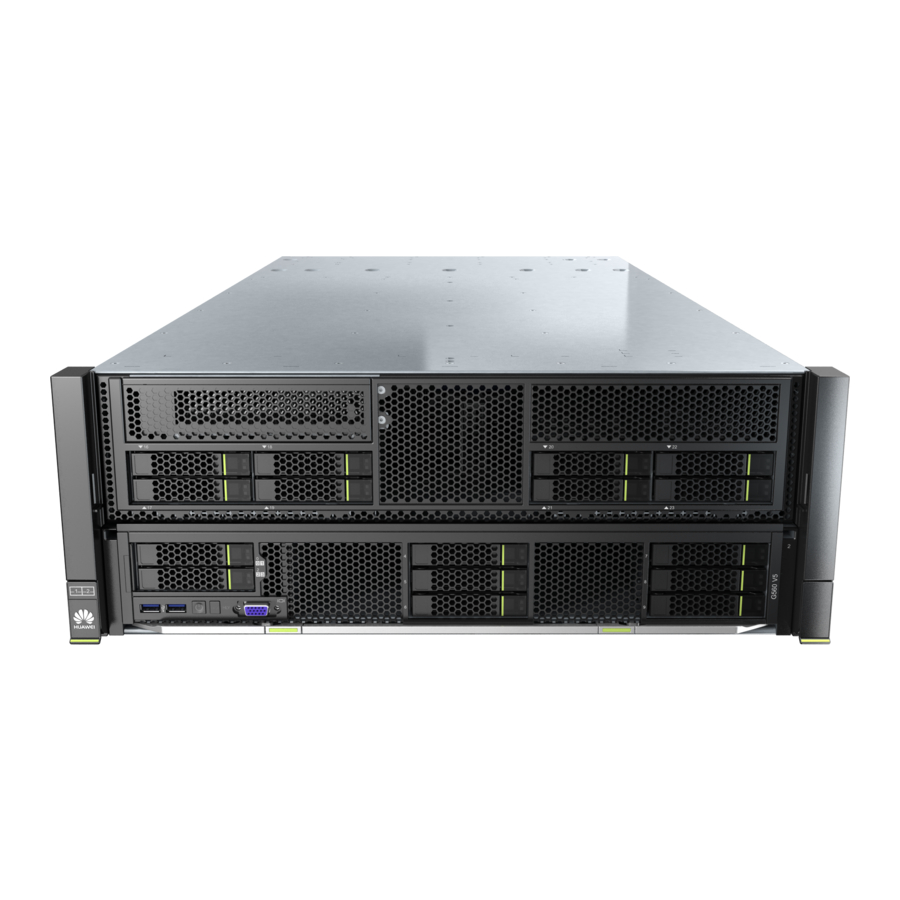
This document describes basic functions and components of the FusionServer G5500 server server. The FusionServer G5500 server (the G5500 for short) is a heterogeneous computing server developed by Huawei for applications including artificial intelligence (AI), high-performance computing (HPC), cloud computing, and big data processing. Its architecture has optimized to support deep learning training and reasoning and HPC. - Page 10 Each half-width compute node l The GP316s are installed in the two includes one G530 V2 and one upper slots of the chassis, corresponding GP316. to GP316-1 and GP316-2. Issue 02 (2017-12-15) Huawei Proprietary and Confidential Copyright © Huawei Technologies Co., Ltd.
-
Page 11: Components
2.2 Front Panel Components 2.3 Front Panel Indicators and Buttons 2.4 Rear Panel Components 2.5 Rear Panel Indicators and Ports 2.6 Hard Disk Slot Numbers 2.7 Mainboard Components Issue 02 (2017-12-15) Huawei Proprietary and Confidential Copyright © Huawei Technologies Co., Ltd. -
Page 12: Physical Structure
2.1 Physical Structure Figure 2-1 shows components of the G5500. Figure 2-1 G5500 components Chassis Management modules I/O modules Fan modules PSUs Figure 2-2 shows components of the G560. Issue 02 (2017-12-15) Huawei Proprietary and Confidential Copyright © Huawei Technologies Co., Ltd. - Page 13 SAS/SATA hard disk backplane TPM (optional) Supercapacitor (optional) BIOS battery Mainboard RAID controller card (optional) DIMMs CPUs Heat sinks Air ducts Mezzanine cards Figure 2-3 shows components of the GP608. Issue 02 (2017-12-15) Huawei Proprietary and Confidential Copyright © Huawei Technologies Co., Ltd.
- Page 14 Figure 2-3 GP608 components 3.5-inch hard disks GP608 case Hard disk backplanes PCIe board GPU cards GPU filler modules Figure 2-4 shows components of a G530 V2. Issue 02 (2017-12-15) Huawei Proprietary and Confidential Copyright © Huawei Technologies Co., Ltd.
- Page 15 Heat sinks RAID controller card (optional) Supercapacitor (reserved) TPM (optional) USB flash drive (optional) 2.5-inch hard disks DIMMs Air ducts Figure 2-5 shows components of a GP316. Issue 02 (2017-12-15) Huawei Proprietary and Confidential Copyright © Huawei Technologies Co., Ltd.
-
Page 16: Front Panel Components
For details about the supported components and their BOM numbers, see Server Compatibility Checker. 2.2 Front Panel Components Figure 2-6 shows front panel components of a full-width compute node. Issue 02 (2017-12-15) Huawei Proprietary and Confidential Copyright © Huawei Technologies Co., Ltd. - Page 17 Label plate Figure 2-7 shows front panel components of a half-width compute node. Figure 2-7 Front panel components of a half-width compute node Label plate USB 3.0 port Issue 02 (2017-12-15) Huawei Proprietary and Confidential Copyright © Huawei Technologies Co., Ltd.
- Page 18 Description SN ID (two digits), which is 21 fixedly. Material identification code (eight digits), that is, processing code. Vendor code (two digits). The code is 10 for Huawei and other value for outsourcing vendors. Year and month (two characters). The first character indicates the year. Digits 1 to 9 indicate 2001 to 2009, and letters A to Z indicate 2010 to 2035.
-
Page 19: Front Panel Indicators And Buttons
Figure 2-10 Front panel indicators and buttons of a half-width compute node 1 Power button/indicator 2 UID button/indicator 3 HLY indicator 4 2.5-inch hard disk fault indicator 5 2.5-inch hard disk activity indicator Issue 02 (2017-12-15) Huawei Proprietary and Confidential Copyright © Huawei Technologies Co., Ltd. - Page 20 You can press this button for less than 1 second to turn on or off the UID indicator. l You can hold down the UID button for 4 to 6 seconds to reset the iBMC. Issue 02 (2017-12-15) Huawei Proprietary and Confidential Copyright © Huawei Technologies Co., Ltd.
-
Page 21: Rear Panel Components
Steady yellow: The SSD is faulty or not detected. 2.4 Rear Panel Components Figure 2-11 shows the rear panel components of a server. Issue 02 (2017-12-15) Huawei Proprietary and Confidential Copyright © Huawei Technologies Co., Ltd. -
Page 22: Rear Panel Indicators And Ports
Figure 2-11 Rear panel components of a server Management module I/O module Fan module 2.5 Rear Panel Indicators and Ports Figure 2-12 shows the indicators on the rear panel of a server. Issue 02 (2017-12-15) Huawei Proprietary and Confidential Copyright © Huawei Technologies Co., Ltd. - Page 23 Off: The link status is down. Management module Steady green: The module is operating properly. power indicator Off: There is no power supply, or the module is faulty. Issue 02 (2017-12-15) Huawei Proprietary and Confidential Copyright © Huawei Technologies Co., Ltd.
- Page 24 Off: There is no power supply, or the module is faulty. Figure 2-13 shows the ports on the rear panel of a server. Issue 02 (2017-12-15) Huawei Proprietary and Confidential Copyright © Huawei Technologies Co., Ltd.
-
Page 25: Hard Disk Slot Numbers
Figure 2-14 Hard disk slot numbers of a full-width compute node Figure 2-15 shows hard disk slot numbers of a half-width compute node. Issue 02 (2017-12-15) Huawei Proprietary and Confidential Copyright © Huawei Technologies Co., Ltd. -
Page 26: Mainboard Components
Figure 2-15 Hard disk slot numbers of a half-width compute node Description Hard disk slot 0 Hard disk slot 2 2.7 Mainboard Components Figure 2-16 shows mainboard components of the G560. Issue 02 (2017-12-15) Huawei Proprietary and Confidential Copyright © Huawei Technologies Co., Ltd. - Page 27 11 User interface board connector 12 SAS/SATA hard disk backplane connector 13 RAID controller card connector 14 USB port Figure 2-17 shows PCIe board components of the GP608. Issue 02 (2017-12-15) Huawei Proprietary and Confidential Copyright © Huawei Technologies Co., Ltd.
- Page 28 18 PCIe slot 2 19 PCIe slot 1 20 PCIe switch 1 21 Backplane guide sleeve 22 Backplane power connector 23 Backplane signal connector 24 PCIe slot 4 Issue 02 (2017-12-15) Huawei Proprietary and Confidential Copyright © Huawei Technologies Co., Ltd.
- Page 29 11 Hard disk backplane connector 12 Hard disk tray 13 HLY indicator 14 UID button/indicator 15 Power button/indicator 16 USB 3.0 port Figure 2-19 shows PCIe board components of the GP316. Issue 02 (2017-12-15) Huawei Proprietary and Confidential Copyright © Huawei Technologies Co., Ltd.
-
Page 30: Pcie Slots
Slot Size Device Standard Width Number Bandwid Mezzanin CPU 1 PCIe 3.0 Two x16 Two x16 Port 3A Non- e card 1 (through standard PCIe device switch) Issue 02 (2017-12-15) Huawei Proprietary and Confidential Copyright © Huawei Technologies Co., Ltd. - Page 31 PCIe slot Channel 2 PCIe 3.0 Full- height mezzanine full-length card 1 dual-width card PCIe slot Channel 2 PCIe 3.0 Full- height mezzanine full-length card 1 dual-width card Issue 02 (2017-12-15) Huawei Proprietary and Confidential Copyright © Huawei Technologies Co., Ltd.
- Page 32 1 card mezzanine card 2 PCIe slot Channel 2 PCIe 3.0 Full- height mezzanine full-length card 1 or dual-width channel 1 card mezzanine card 2 Issue 02 (2017-12-15) Huawei Proprietary and Confidential Copyright © Huawei Technologies Co., Ltd.
- Page 33 PCIe slot 9 and I/O slot 1 are mutually exclusive and cannot be used at the same time. By default, I/O slot 1 is selected. I/O slot 2 is valid only in logical topology 2. PCIe cards in PCIe slots 1 to 9 require Huawei-customized brackets. Issue 02 (2017-12-15) Huawei Proprietary and Confidential...
- Page 34 PCIe 3.0 Port 2A Full- slot 2 height full-length single- width card Riser 1 CPU 2 PCIe 3.0 Port 2A Full- slot 3 height full-length single- width card Issue 02 (2017-12-15) Huawei Proprietary and Confidential Copyright © Huawei Technologies Co., Ltd.
- Page 35 Port 2A Half- slot 2 height half- length single- width card Riser 3 CPU 1 PCIe 3.0 Port 2A Half- slot 3 height half- length single- width card Issue 02 (2017-12-15) Huawei Proprietary and Confidential Copyright © Huawei Technologies Co., Ltd.
- Page 36 PCIe 3.0 Port 2A Half- slot height half- length single- width card I/O slot CPU 1 PCIe 3.0 Port 2A Half- height half- length single- width card Issue 02 (2017-12-15) Huawei Proprietary and Confidential Copyright © Huawei Technologies Co., Ltd.
-
Page 37: Dimm Slots
CPU 1 and CPU 2 1A1, 2A1, 1B1, 2B1, 1C1, 2C1, 1D1, 2D1, 1A2, 2A2, 1B2, 2B2, 1C2, 2C2, 1D2, 2D2, 1A3, 2A3, 1B3, 2B3, 1C3, 2C3, 1D3, 2D3 Issue 02 (2017-12-15) Huawei Proprietary and Confidential Copyright © Huawei Technologies Co., Ltd. - Page 38 2A1, 2B1, 2C1, 2D1, 2E1, 2F1 Unbalanced 1A1, 1A2, 1B1, 1C1, 1D1, 1E1, 2A1, 2B1, 2C1, 2D1, 2E1, 2F1 Unbalanced 1A1, 1A2, 1B1, 1C1, 1D1, 1E1, 2A1, 2A2, 2B1, 2C1, 2D1, 2E1, Issue 02 (2017-12-15) Huawei Proprietary and Confidential Copyright © Huawei Technologies Co., Ltd.
- Page 39 2D1, 2D2, 2E1, 2E2, 2F1 Balanced 1A1, 1A2, 1B1, 1B2, 1C1, 1C2, 2A1, 2A2, 2B1, 2B2, 2C1, 2C2, 1D1, 1D2, 1E1, 1E2, 1F1, 1F2 2D1, 2D2, 2E1, 2E2, 2F1, 2F2 Issue 02 (2017-12-15) Huawei Proprietary and Confidential Copyright © Huawei Technologies Co., Ltd.
-
Page 40: Basic Operations
3.1 Powering Off the Compute Node 3.2 Powering On the Compute Node 3.3 Removing the G560 3.4 Removing the GP608 3.5 Removing a G530 V2 3.6 Removing a GP316 3.7 Cover Issue 02 (2017-12-15) Huawei Proprietary and Confidential Copyright © Huawei Technologies Co., Ltd. -
Page 41: Powering Off The Compute Node
WebUI. For details about how to obtain the IP address of the management network port and how to operate the iBMC, see the FusionServer G5500 Server 1.0.0 iBMC User Guide. -
Page 42: Powering On The Compute Node
If PSUs are properly installed and not powered on, power on the compute node as follows: Connect the external power supply to PSUs. Then the compute node will power on with PSUs. Issue 02 (2017-12-15) Huawei Proprietary and Confidential Copyright © Huawei Technologies Co., Ltd. - Page 43 To log in to the iBMC WebUI of the G530 V2, see 5.5.1 Logging In to the iBMC WebUI. Choose Power > Power Control. The Power Control page is displayed, as shown in Figure 3-2. Issue 02 (2017-12-15) Huawei Proprietary and Confidential Copyright © Huawei Technologies Co., Ltd.
-
Page 44: Removing The G560
Step 2 Determine the position of the node. See Figure 3-3. The G560 is in the lower slot and the GP608 is in the upper slot. Figure 3-3 Node slots Issue 02 (2017-12-15) Huawei Proprietary and Confidential Copyright © Huawei Technologies Co., Ltd. -
Page 45: Removing The Gp608
GP608 and the lower layer G560 adopt dislocation design. Therefore, you must remove the G560 at the lower layer and then remove the GP608 at the upper layer. Issue 02 (2017-12-15) Huawei Proprietary and Confidential Copyright © Huawei Technologies Co., Ltd. - Page 46 A fully configured GP608 is too heavy for one person to carry. To ensure safety, the GP608 is automatically locked when it is pulled out halfway. It is recommended that the GP608 be removed by two persons. Issue 02 (2017-12-15) Huawei Proprietary and Confidential Copyright © Huawei Technologies Co., Ltd.
-
Page 47: Removing A G530 V2
G530 V2-1 and G530 V2-2. The GP316s are installed in the two upper slots of the chassis, corresponding to GP316-1 and GP316-2. Figure 3-7 Node slots Issue 02 (2017-12-15) Huawei Proprietary and Confidential Copyright © Huawei Technologies Co., Ltd. - Page 48 Close the ejector lever on the G530 V2. See (4) in Figure 3-8. Place the removed G530 V2 in an ESD bag. NOTICE An ESD bag can hold only one G530 V2. ----End Issue 02 (2017-12-15) Huawei Proprietary and Confidential Copyright © Huawei Technologies Co., Ltd.
-
Page 49: Removing A Gp316
Pull the GP316 out of the chassis. See (3) in Figure 3-9. Close the ejector lever on the GP316. See (4) in Figure 3-9. Place the removed GP316 in an ESD bag. Issue 02 (2017-12-15) Huawei Proprietary and Confidential Copyright © Huawei Technologies Co., Ltd. -
Page 50: Cover
Step 2 Align the bottom tabs of the cover with the U-shaped slots in the G560 case, and place the cover vertically on the G560. See (1) in Figure 3-11. Issue 02 (2017-12-15) Huawei Proprietary and Confidential Copyright © Huawei Technologies Co., Ltd. - Page 51 Step 2 Place the GP608 on the ESD floor. Step 3 Press the button on the cover and push the cover backwards until it cannot move. See (1) and (2) in Figure 3-12. Issue 02 (2017-12-15) Huawei Proprietary and Confidential Copyright © Huawei Technologies Co., Ltd.
- Page 52 Step 2 Align the bottom tabs of the cover with the U-shaped slots in the GP608 case, and place the cover vertically on the GP608. See (1) in Figure 3-13. Issue 02 (2017-12-15) Huawei Proprietary and Confidential Copyright © Huawei Technologies Co., Ltd.
- Page 53 Step 2 Place the G530 V2 on the ESD floor. Step 3 Press the button on the cover and push the cover backwards until it cannot move. See (1) and (2) in Figure 3-14. Issue 02 (2017-12-15) Huawei Proprietary and Confidential Copyright © Huawei Technologies Co., Ltd.
- Page 54 Step 2 Align the bottom tabs of the cover with the U-shaped slots in the G530 V2 case, and place the cover vertically on the G530 V2. See (1) in Figure 3-15. Figure 3-15 Installing the Cover of a G530 V2 Issue 02 (2017-12-15) Huawei Proprietary and Confidential Copyright © Huawei Technologies Co., Ltd.
- Page 55 Step 2 Align the bottom tabs of the cover with the U-shaped slots in the GP316 case, and place the cover vertically on the GP316. See (1) in Figure 3-17. Issue 02 (2017-12-15) Huawei Proprietary and Confidential Copyright © Huawei Technologies Co., Ltd.
- Page 56 Figure 3-17 Installing the Cover of a GP316 Step 3 Push the cover in the arrow direction until the cover clicks into place. See (2) in Figure 3-17. ----End Issue 02 (2017-12-15) Huawei Proprietary and Confidential Copyright © Huawei Technologies Co., Ltd.
-
Page 57: Setup
Setup About This Chapter 4.1 Installation Environment Requirements 4.2 Installing the Chassis 4.3 Installing Components 4.4 Installing the Node 4.5 Installing an I/O Module 4.6 Internal Cabling Issue 02 (2017-12-15) Huawei Proprietary and Confidential Copyright © Huawei Technologies Co., Ltd. -
Page 58: Installation Environment Requirements
Procedure Step 1 Determine the positions for installing the guide rails. Before installing guide rails, determine the positions for installing guide rails according to the configuration scheme. Issue 02 (2017-12-15) Huawei Proprietary and Confidential Copyright © Huawei Technologies Co., Ltd. - Page 59 8.7 mm (0.34 in.), and 9.2 mm (0.36 in.). Choose a dowel pin based on the size of the square holes on the mounting bar. Ensure that the diameter of a hole in the mounting bar is slightly greater than that of a dowel pin. Issue 02 (2017-12-15) Huawei Proprietary and Confidential Copyright © Huawei Technologies Co., Ltd.
- Page 60 Use a screwdriver to tighten two screws on the front and two screws on the rear of the guide rail. See (2) in Figure 4-3. Issue 02 (2017-12-15) Huawei Proprietary and Confidential Copyright © Huawei Technologies Co., Ltd.
- Page 61 Figure 4-4. Use a Phillips screwdriver to tighten the captive screws on the mounting ears to secure the chassis to the cabinet. See (2) in Figure 4-4. Issue 02 (2017-12-15) Huawei Proprietary and Confidential Copyright © Huawei Technologies Co., Ltd.
-
Page 62: Installing Components
Before installing and initializing the GP316, install its components as required, such as riser card trays or PCIe cards. For details, see 6.5 GP316 Optional Part Installation. Issue 02 (2017-12-15) Huawei Proprietary and Confidential Copyright © Huawei Technologies Co., Ltd. -
Page 63: Installing G530 V2 Components
ESD floor, as shown in Figure 4-5. Figure 4-5 Correct operation NOTE Do not take out a GP608 from its ESD bag if you do not install it immediately. Issue 02 (2017-12-15) Huawei Proprietary and Confidential Copyright © Huawei Technologies Co., Ltd. - Page 64 Hold the sheet metal plate at the rear end of the partition board to remove the partition board. See (5) in Figure 4-7. After the partition board is removed, release the air baffle. The air baffle automatically pops up. Issue 02 (2017-12-15) Huawei Proprietary and Confidential Copyright © Huawei Technologies Co., Ltd.
-
Page 65: Installing The G560
GP608 must be installed closely to the top chassis cover. Figure 4-9 Installing the GP608 Close the ejector levers on the GP608. See (2) in Figure 4-9. ----End 4.4.2 Installing the G560 Issue 02 (2017-12-15) Huawei Proprietary and Confidential Copyright © Huawei Technologies Co., Ltd. - Page 66 Take out the G560s from ESD bags and place them separately on the ESD floor, as shown in Figure 4-10. Figure 4-10 Correct operation NOTE Do not take out a G560 from its ESD bag if you do not install it immediately. Issue 02 (2017-12-15) Huawei Proprietary and Confidential Copyright © Huawei Technologies Co., Ltd.
- Page 67 Close the ejector levers on the G560. See (2) in Figure 4-12. Step 4 Check the indicator status after the G560 is powered on. For details, see 2.3 Front Panel Indicators and Buttons. ----End Issue 02 (2017-12-15) Huawei Proprietary and Confidential Copyright © Huawei Technologies Co., Ltd.
-
Page 68: Installing A Gp316
ESD floor, as shown in Figure 4-13. Figure 4-13 Correct operation NOTE Do not take out a GP316 from its ESD bag if you do not install it immediately. Issue 02 (2017-12-15) Huawei Proprietary and Confidential Copyright © Huawei Technologies Co., Ltd. - Page 69 G530 V2-1 and G530 V2-2. The GP316s are installed in the two upper slots of the chassis, corresponding to GP316-1 and GP316-2. Issue 02 (2017-12-15) Huawei Proprietary and Confidential Copyright © Huawei Technologies Co., Ltd.
- Page 70 Figure 4-17. Insert the GP316 horizontally into the chassis. See (3) in Figure 4-17. Note that the GP316 must be installed closely to the top chassis cover. Issue 02 (2017-12-15) Huawei Proprietary and Confidential Copyright © Huawei Technologies Co., Ltd.
-
Page 71: Installing A G530 V2
If there are multiple G530 V2 nodes, take them out from ESD bags and place them separately on the ESD floor, as shown in Figure 4-18. Figure 4-18 Correct operation Issue 02 (2017-12-15) Huawei Proprietary and Confidential Copyright © Huawei Technologies Co., Ltd. - Page 72 Press the unlock button on the G530 V2. See (1) in Figure 4-20. Figure 4-20 Install a G530 V2 Open the ejector lever on the G530 V2 completely. See (2) in Figure 4-20. Issue 02 (2017-12-15) Huawei Proprietary and Confidential Copyright © Huawei Technologies Co., Ltd.
-
Page 73: Installing An I/O Module
Module. 4.6 Internal Cabling 4.6.1 SAS Cable Table 4-2 Cable description Cable Description BOM Number SAS cable Connects the RAID 04052026 controller card to a mezzanine card. Issue 02 (2017-12-15) Huawei Proprietary and Confidential Copyright © Huawei Technologies Co., Ltd. -
Page 74: 8-Pin Power Cable
User Guide 4 Setup 4.6.2 8-Pin Power Cable Table 4-3 Cable description Cable Description BOM Number 8-pin power cable Connects a GPU card to the 04151201-002 PCIe board. Issue 02 (2017-12-15) Huawei Proprietary and Confidential Copyright © Huawei Technologies Co., Ltd. -
Page 75: Configuring The G5500
This topic describes how to configure the installed G530 V2 to support upper-layer services. 5.6 Configuring the PCIe Topologies This topic describes how to configure logical topologies for the G5500. Issue 02 (2017-12-15) Huawei Proprietary and Confidential Copyright © Huawei Technologies Co., Ltd. -
Page 76: Configuration Overview
Table 5-2 G560 default data User Description Default User Type User Login Name Password Status Method root An iBMC user. Huawei12#$ Administrat Enabled Remote ive User or local login Issue 02 (2017-12-15) Huawei Proprietary and Confidential Copyright © Huawei Technologies Co., Ltd. - Page 77 A user of the Telnet None System Locked Login system service. This User prohibite user must be enabled manually. Issue 02 (2017-12-15) Huawei Proprietary and Confidential Copyright © Huawei Technologies Co., Ltd.
- Page 78 Shell daemon (sshd). User or local The SSH protocol login allows a user to remotely log in to the host execution program, implementing secure management for the host. Issue 02 (2017-12-15) Huawei Proprietary and Confidential Copyright © Huawei Technologies Co., Ltd.
-
Page 79: Configuring The Management Module
Use PuTTY to log in to the management module over a serial port when you need to configure the server for the first time at a new site. Issue 02 (2017-12-15) Huawei Proprietary and Confidential Copyright © Huawei Technologies Co., Ltd. - Page 80 COMn indicates the number of a serial port, and its value is an integer. Step 4 In the navigation tree, choose Session. Step 5 Select Serial under Connection type, as shown in Figure 5-3. Issue 02 (2017-12-15) Huawei Proprietary and Confidential Copyright © Huawei Technologies Co., Ltd.
-
Page 81: Logging In To The Management Module Cli Through The Management Network Port
For details about the positions of the management network ports, see 2.5 Rear Panel Indicators and Ports. Prerequisites Conditions The G5500 has been powered on. Issue 02 (2017-12-15) Huawei Proprietary and Confidential Copyright © Huawei Technologies Co., Ltd. - Page 82 Log in to the management module CLI. On the client, double-click PuTTY.exe. The PuTTY Configuration window is displayed, as shown in Figure 5-5. Issue 02 (2017-12-15) Huawei Proprietary and Confidential Copyright © Huawei Technologies Co., Ltd.
- Page 83 If you trust this site, click Yes. The PuTTY window is displayed. – If the entered user name or password is incorrect during server login, PuTTY must be connected again. Enter the user name and password as prompted. Issue 02 (2017-12-15) Huawei Proprietary and Confidential Copyright © Huawei Technologies Co., Ltd.
-
Page 84: Logging In To The Management Module Cli Through The Management Ip Address Of The Server Node
If the iBMC version is earlier than 2.01, the Port Settings page is displayed. Enable HMM SSH NAT and set Port to 30022, as shown in Figure 5-6. Issue 02 (2017-12-15) Huawei Proprietary and Confidential Copyright © Huawei Technologies Co., Ltd. - Page 85 Figure 5-6 Enabling the transparent transmission function Log in to the management module CLI. On the client, double-click PuTTY.exe. The PuTTY Configuration window is displayed, as shown in Figure 5-7. Issue 02 (2017-12-15) Huawei Proprietary and Confidential Copyright © Huawei Technologies Co., Ltd.
- Page 86 Enter the user name and password as prompted. Run the following command to check that Product Name is MM510, which indicates that the transparent transmission function is configured successfully. Issue 02 (2017-12-15) Huawei Proprietary and Confidential Copyright © Huawei Technologies Co., Ltd.
-
Page 87: Checking The Management Module Health Status
-d health System in health state. ----End 5.3.3 Changing the Initial Management Module User Password Change the initial management module user password. Issue 02 (2017-12-15) Huawei Proprietary and Confidential Copyright © Huawei Technologies Co., Ltd. -
Page 88: Recovering The Default Management Module Configuration
If you forget the management module password or IP address, you can use the jumper restoration method to recover the default management module configuration. NOTICE This function is available only for personnel authorized by Huawei and Huawei technical support personnel. Procedure Step 1 Power off the management module and remove it from the chassis. -
Page 89: Configuring Basic Management Module Data
Specifies the gateway The value of this parameter is in the address of the network port data type of IPv4 and in the format of to be configured. xxx.xxx.xxx.xxx. Issue 02 (2017-12-15) Huawei Proprietary and Confidential Copyright © Huawei Technologies Co., Ltd. -
Page 90: Configuring The G560
Step 2 Configure other basic management module data. For details about how to configure other basic data for the management module, see the FusionServer G5500 Server 1.0.0 HMM Command Reference. ----End 5.4 Configuring the G560 This topic describes how to configure the installed G560 to support upper-layer services. - Page 91 Configure the basic input/ Configure the G560 BIOS settings, including the boot output system (BIOS). mode, BIOS password, and Preboot Execution Environment (PXE) options for network interface cards (NICs). Issue 02 (2017-12-15) Huawei Proprietary and Confidential Copyright © Huawei Technologies Co., Ltd.
-
Page 92: Logging In To The Ibmc Webui
G560 Documents Refer to the following documents during G560 configuration: FusionServer G5500 Server 1.0.0 iBMC User Guide HUAWEI V2&V3 Server RAID Controller Card User Guide HUAWEI Server Grantley Platform BIOS Parameter Reference HUAWEI Server OS Installation Guide Huawei Servers Troubleshooting 5.4.1 Logging In to the iBMC WebUI... - Page 93 Step 3 Connect the PC to the iBMC management network port using a network cable. Step 4 Open Internet Explorer, enter https://IP address of the iBMC management network port in the address box, and press Enter. Issue 02 (2017-12-15) Huawei Proprietary and Confidential Copyright © Huawei Technologies Co., Ltd.
- Page 94 Step 6 Log in to the iBMC using either of the following methods. Figure 5-10 iBMC login page Logging In to the iBMC as a Local User Issue 02 (2017-12-15) Huawei Proprietary and Confidential Copyright © Huawei Technologies Co., Ltd.
- Page 95 Automatic matching: If the option is selected, the system searches the local user list first. If a corresponding user is not found, the system searches the domain servers in the sequence displayed in the Domain drop-down list. Click Log In. Issue 02 (2017-12-15) Huawei Proprietary and Confidential Copyright © Huawei Technologies Co., Ltd.
-
Page 96: Configuring The Ibmc
You have obtained the iBMC IP address of the G560. Workflow Figure 5-11 iBMC configuration process 配置iBMC IP地址 Issue 02 (2017-12-15) Huawei Proprietary and Confidential Copyright © Huawei Technologies Co., Ltd. - Page 97 The page for changing the user password is displayed, as shown in Figure 5-13. Figure 5-13 Changing a user password Change the user password by following on-screen instructions. Issue 02 (2017-12-15) Huawei Proprietary and Confidential Copyright © Huawei Technologies Co., Ltd.
- Page 98 On the DNS page, configure the DNS. The DNS configuration page is displayed, as shown in Figure 5-15. Figure 5-15 DNS configuration Enter the IP address. Click Save. Issue 02 (2017-12-15) Huawei Proprietary and Confidential Copyright © Huawei Technologies Co., Ltd.
-
Page 99: Logging In To The Remote Virtual Console
For details, see 5.4.1 Logging In to the iBMC WebUI. Step 2 Choose Remote. The Remote page is displayed, as shown in Figure 5-16. Figure 5-16 Remote page Issue 02 (2017-12-15) Huawei Proprietary and Confidential Copyright © Huawei Technologies Co., Ltd. -
Page 100: Logging In To The Ibmc Cli
The IP addresses of the client network port and the management network port are on the same network segment. Prepare the following data before logging in to the iBMC CLI: IP address of the iBMC management network port Issue 02 (2017-12-15) Huawei Proprietary and Confidential Copyright © Huawei Technologies Co., Ltd. -
Page 101: Configuring Raid
Run the following command in the terminal tool to log in to the iBMC CLI: telnet ipaddress ----End 5.4.5 Configuring RAID This topic describes how to configure RAID. The G560 supports LSI SAS3108 and LSI SAS3008 RAID controller cards. Issue 02 (2017-12-15) Huawei Proprietary and Confidential Copyright © Huawei Technologies Co., Ltd. -
Page 102: Configuring The Bios
The LSI SAS3008 supports RAID 0 and 1. The LSI SAS3108 supports RAID 0, 1, 5, 6, 10, 50, and 60. For details, see the HUAWEI V2&V3 Server RAID Controller Card User Guide. 5.4.6 Configuring the BIOS This topic describes how to configure the basic input/output system (BIOS) for the G560. - Page 103 From a remote serial port, you can press F3 to go the boot manager screen for selecting a boot device. – Press F12 to boot from the network. Issue 02 (2017-12-15) Huawei Proprietary and Confidential Copyright © Huawei Technologies Co., Ltd.
- Page 104 Enter the administrator password. The server is locked after three consecutive failures with wrong passwords. You can restart the server to unlock it. Figure 5-20 Entering the password Issue 02 (2017-12-15) Huawei Proprietary and Confidential Copyright © Huawei Technologies Co., Ltd.
- Page 105 – Press F6 to move a boot option up. NOTE The server will boot in the order displayed. Press F10. The Exit Saving changes? dialog box is displayed. 12 Select Yes and press Enter. Issue 02 (2017-12-15) Huawei Proprietary and Confidential Copyright © Huawei Technologies Co., Ltd.
- Page 106 Figure 5-22. Figure 5-22 Boot Device Priority 14 Select PXE and press Enter. The PXE dialog box is displayed, as shown in Figure 5-23. Figure 5-23 PXE Issue 02 (2017-12-15) Huawei Proprietary and Confidential Copyright © Huawei Technologies Co., Ltd.
- Page 107 The current password of the system administrator is required before you change the password. The system will be locked if an incorrect password is entered three consecutive times. You can unlock the system by restarting it. Issue 02 (2017-12-15) Huawei Proprietary and Confidential Copyright © Huawei Technologies Co., Ltd.
-
Page 108: Installing An Os
This topic describes how to configure the installed G530 V2 to support upper-layer services. Configuration Process Figure 5-25 shows the initial configuration process for the G530 V2. Issue 02 (2017-12-15) Huawei Proprietary and Confidential Copyright © Huawei Technologies Co., Ltd. - Page 109 Configure the basic input/ Configure the G530 V2 BIOS settings, including the boot output system (BIOS). mode, BIOS password, and Preboot Execution Environment (PXE) options for network interface cards (NICs). Issue 02 (2017-12-15) Huawei Proprietary and Confidential Copyright © Huawei Technologies Co., Ltd.
-
Page 110: Logging In To The Ibmc Webui
G530 V2 Documents Refer to the following documents during G530 V2 configuration: FusionServer G5500 Server 1.0.0 iBMC User Guide HUAWEI V5 Server RAID Controller Card User Guide HUAWEI Server Grantley Platform BIOS Parameter Reference HUAWEI Server OS Installation Guide Huawei Servers Troubleshooting 5.5.1 Logging In to the iBMC WebUI... - Page 111 Mozilla Firefox 39.0/54.0 JRE 1.7 U45 JRE 1.8 U45 JRE 1.8 U144 MAC X v10.7 Safari 8.0 JRE 1.7 U45 JRE 1.8 U45 Mozilla Firefox 39.0/54.0 JRE 1.8 U144 Issue 02 (2017-12-15) Huawei Proprietary and Confidential Copyright © Huawei Technologies Co., Ltd.
- Page 112 Java security level to a smaller value. This reduces user security. Perform this operation with caution. Figure 5-26 Security caution Step 6 Log in to the iBMC using either of the following methods. Issue 02 (2017-12-15) Huawei Proprietary and Confidential Copyright © Huawei Technologies Co., Ltd.
- Page 113 – A domain controller exists on the network, a user domain has been created on the domain controller, and the Lightweight Directory Access Protocol (LDAP) users who belong to the user domain have also been created. Issue 02 (2017-12-15) Huawei Proprietary and Confidential Copyright © Huawei Technologies Co., Ltd.
-
Page 114: Configuring The Ibmc
To ensure system security, change your initial password at your first login and change the password periodically. Impact on the System This operation has no adverse impact on the system. Prerequisites Conditions The G530 V2 is powered on. Issue 02 (2017-12-15) Huawei Proprietary and Confidential Copyright © Huawei Technologies Co., Ltd. - Page 115 On the iBMC WebUI, choose Configuration on the menu bar, and click the Local Users tab in the right pane. The Local Users page is displayed, as shown in Figure 5-29. Issue 02 (2017-12-15) Huawei Proprietary and Confidential Copyright © Huawei Technologies Co., Ltd.
- Page 116 On the iBMC WebUI, choose Configuration on the menu bar, choose Network in the navigation tree, and select IP Address in the right pane. The IP Address page is displayed, as shown in Figure 5-31. Issue 02 (2017-12-15) Huawei Proprietary and Confidential Copyright © Huawei Technologies Co., Ltd.
-
Page 117: Logging In To The Remote Virtual Console
5.5.3 Logging In to the Remote Virtual Console Log in to the remote virtual console of the iBMC through the iBMC WebUI. Prepare the following data before logging in to the remote virtual console: Issue 02 (2017-12-15) Huawei Proprietary and Confidential Copyright © Huawei Technologies Co., Ltd. - Page 118 One user can view the operations performed by the other user. l Remote Virtual Console (Private Mode): allows only one user to access and operate the server. Issue 02 (2017-12-15) Huawei Proprietary and Confidential Copyright © Huawei Technologies Co., Ltd.
-
Page 119: Logging In To The Ibmc Cli
The default iBMC user name is Administrator, and the default password is Admin@9000. Procedure Logging In over SSH The SSH protocol is used to provide secure remote login and other network services on an insecure network. Issue 02 (2017-12-15) Huawei Proprietary and Confidential Copyright © Huawei Technologies Co., Ltd. -
Page 120: Configuring Raid
The G530 V2 supports LSI SAS3108 and LSI SAS3008 RAID controller cards. The LSI SAS3008 supports RAID 0 and 1. For details, see the HUAWEI V5 Server RAID Controller Card User Guide. 5.5.6 Configuring the BIOS This topic describes how to configure the basic input/output system (BIOS) for the G530 V2. - Page 121 Server boot priority NIC Preboot Execution Environment (PXE) priority BIOS password For other settings, see the HUAWEI Server Purely Platform BIOS Parameter Reference. NOTE l The password complexity check function is enabled by default. l A simple password is easy to crack, which makes the system vulnerable. You are advised to use a password that meets complexity requirements or to enable the password complexity check function.
- Page 122 During the startup, press Delete, F11 (go to a boot manager), or F12 (boot the server over a network). No matter which method you choose, you need to enter the password in the dialog box, as shown in Figure 5-37. Issue 02 (2017-12-15) Huawei Proprietary and Confidential Copyright © Huawei Technologies Co., Ltd.
- Page 123 For details, see 5.5.1 Logging In to the iBMC WebUI. Choose Configuration from the main menu, and select Boot Device from the navigation tree, as shown in Figure 5-38. Issue 02 (2017-12-15) Huawei Proprietary and Confidential Copyright © Huawei Technologies Co., Ltd.
- Page 124 12 Access the BIOS. For details, see to #g5500_user_000017/step_007. 13 Choose Boot > Boot Type, and press Enter. The Boot screen is displayed, as shown in Figure 5-39 Figure 5-40. Issue 02 (2017-12-15) Huawei Proprietary and Confidential Copyright © Huawei Technologies Co., Ltd.
- Page 125 Figure 5-40 Boot screen (Legacy mode) 14 In the displayed dialog box, select Legacy Boot Type or UEFI Boot Type, and press Enter. 15 Select Boot Type Order and press Enter. Issue 02 (2017-12-15) Huawei Proprietary and Confidential Copyright © Huawei Technologies Co., Ltd.
- Page 126 The PXE Configuration screen provides PXE settings for two network ports and displays their MAC addresses. Figure 5-41 PXE Configuration 20 Select the network port to be configured and press Enter. Issue 02 (2017-12-15) Huawei Proprietary and Confidential Copyright © Huawei Technologies Co., Ltd.
- Page 127 Power on Password: sets the power-on password. Set All Hdd Password: sets all the hard disk passwords. Set All Master Hdd Password: sets all the master hard disk passwords. Issue 02 (2017-12-15) Huawei Proprietary and Confidential Copyright © Huawei Technologies Co., Ltd.
-
Page 128: Installing An Os
5.3.1 Logging In to the Management Module CLI. Step 2 Configure PCIe topologies on the management module CLI. For details, see the FusionServer G5500 Server 1.0.0 HMM Command Reference. ----End Issue 02 (2017-12-15) Huawei Proprietary and Confidential Copyright © Huawei Technologies Co., Ltd. -
Page 129: Optional Part Installation
6.3 GP608 Optional Part Installation 6.4 G530 V2 Optional Part Installation 6.5 GP316 Optional Part Installation 6.6 PSU 6.7 I/O Module 6.8 Management Module 6.9 Fan Module Issue 02 (2017-12-15) Huawei Proprietary and Confidential Copyright © Huawei Technologies Co., Ltd. -
Page 130: Precautions
You do not need to power off the G560 before installing a hard disk. Step 1 Determine the location for installing the hard disk. Figure 6-1 shows the locations of SAS/ SATA hard disks and NVMe SSDs. Issue 02 (2017-12-15) Huawei Proprietary and Confidential Copyright © Huawei Technologies Co., Ltd. - Page 131 The procedure ends. If the original RAID array (for example, RAID 0) does not support redundancy, reconfigure RAID. The procedure ends. Issue 02 (2017-12-15) Huawei Proprietary and Confidential Copyright © Huawei Technologies Co., Ltd.
-
Page 132: Cpu
If the original RAID array is redundant but does not have a hot spare disk, data is automatically rebuilt to the new hard disk. The procedure ends. For details, see the HUAWEI V2&V3 Server RAID Controller Card User Guide. ----End 6.2.2 CPU... -
Page 133: Memory Subsystem Architecture
The maximum number of DIMMs in this table is based on two-processor configuration. Note: This table is for reference only. For details about the components that can be purchased, consult your local Huawei sales representatives. 6.2.3.2 Memory Subsystem Architecture The G560 provides 24 DDR4 DIMM slots. -
Page 134: Dimm Ranks
A quad-rank DIMM is, effectively, two dual-rank DIMMs on the same module, with only one rank accessible at a time. Issue 02 (2017-12-15) Huawei Proprietary and Confidential Copyright © Huawei Technologies Co., Ltd. -
Page 135: Dimm Identification
1R: single-rank l 2R: dual-rank l 4R: quad-rank Data width on DRAM l X4: 4-bit l X8: 8-bit Memory generation l PC3: DDR3 l PC4: DDR4 Issue 02 (2017-12-15) Huawei Proprietary and Confidential Copyright © Huawei Technologies Co., Ltd. -
Page 136: Memory Configuration
To configure memory protection modes, access the BIOS and choose Advanced > Memory Configuration. For details, see the HUAWEI Server Grantley Platform BIOS Parameter Reference. Online Spare Memory Configuration Online spare memory provides protection against degraded DIMMs by reducing the likelihood of uncorrected memory errors. -
Page 137: Dimm Installation Rules
Step 5 Take a spare DIMM out of its ESD bag. Step 6 Open the two fixing clips of the DIMM slot. See (1) in Figure 6-4. Issue 02 (2017-12-15) Huawei Proprietary and Confidential Copyright © Huawei Technologies Co., Ltd. -
Page 138: Air Duct
Step 4 Remove the cover. For details, see Cover. Step 5 Installing a DIMM. For details, see Installing a DIMM. Step 6 Vertically place the air duct downwards. See Figure 6-6. Issue 02 (2017-12-15) Huawei Proprietary and Confidential Copyright © Huawei Technologies Co., Ltd. -
Page 139: Raid Controller Card
Step 3 Place the G560 on the ESD floor. Step 4 Remove the cover. For details, see Cover. Step 5 Determine the location for installing the RAID controller card. See Figure 6-7. Issue 02 (2017-12-15) Huawei Proprietary and Confidential Copyright © Huawei Technologies Co., Ltd. - Page 140 Figure 6-8 Installing the RAID controller card Step 8 Tighten the two screws using a Phillips screwdriver to secure the RAID controller card. See (2) in Figure 6-8. ----End Issue 02 (2017-12-15) Huawei Proprietary and Confidential Copyright © Huawei Technologies Co., Ltd.
-
Page 141: Supercapacitor
Phillips screwdriver. See (1) and (2) in Figure 6-10. Figure 6-10 Installing the supercapacitor tray Issue 02 (2017-12-15) Huawei Proprietary and Confidential Copyright © Huawei Technologies Co., Ltd. -
Page 142: Bios Battery
Step 3 Place the G560 on the ESD floor. Step 4 Remove the cover. For details, see Cover. Step 5 Determine the location for installing the G560 BIOS battery. See Figure 6-12. Issue 02 (2017-12-15) Huawei Proprietary and Confidential Copyright © Huawei Technologies Co., Ltd. -
Page 143: Tpm
3.1 Powering Off the Compute Node. Step 2 Remove the G560. For details, see 3.3 Removing the G560. Step 3 Place the G560 on the ESD floor. Issue 02 (2017-12-15) Huawei Proprietary and Confidential Copyright © Huawei Technologies Co., Ltd. - Page 144 Step 7 Insert the TPM vertically downwards into the connector on the mainboard. See (1) in Figure 6-15. Figure 6-15 Installing the TPM Step 8 Tighten the screw of the TPM using a Phillips screwdriver. See (2) in Figure 6-15. ----End Issue 02 (2017-12-15) Huawei Proprietary and Confidential Copyright © Huawei Technologies Co., Ltd.
-
Page 145: Enabling The Tpm
Step 4 Remove the cover. For details, see Removing the Cover of a G560. Step 5 Determine the location for installing the USB flash drive. See Figure 6-16. Figure 6-16 USB port Issue 02 (2017-12-15) Huawei Proprietary and Confidential Copyright © Huawei Technologies Co., Ltd. -
Page 146: Gp608 Optional Part Installation
6.3.1 3.5-inch Hard Disk Installing a 3.5-inch Hard Disk Step 1 Determine the location for installing the hard disk. Figure 6-18 shows the locations of hard disks. Issue 02 (2017-12-15) Huawei Proprietary and Confidential Copyright © Huawei Technologies Co., Ltd. - Page 147 Step 3 Raise the ejector lever completely and insert the hard disk into the slot. See (1) in Figure 6-19. Figure 6-19 Installing a 3.5-inch hard disk Step 4 Lower the ejector lever until it is latched. See (2) in Figure 6-19. ----End Issue 02 (2017-12-15) Huawei Proprietary and Confidential Copyright © Huawei Technologies Co., Ltd.
-
Page 148: Gpu Card And Gpu Filler Module
Figure 6-20 Locations of GPU cards Step 7 Align the GPU card with the slot, and insert the GPU card into the slot. See (1) in Figure 6-21. Issue 02 (2017-12-15) Huawei Proprietary and Confidential Copyright © Huawei Technologies Co., Ltd. - Page 149 Step 9 Connect the GPU card to the PCIe board using a power cable. If multiple GPU cards have been replaced, connect the power cables according to Figure 6-22. Issue 02 (2017-12-15) Huawei Proprietary and Confidential Copyright © Huawei Technologies Co., Ltd.
- Page 150 Step 4 Take a spare GPU filler module out of its ESD bag. Step 5 Determine the location for installing the GPU filler module. Figure 6-23 shows the locations of GPU filler modules. Issue 02 (2017-12-15) Huawei Proprietary and Confidential Copyright © Huawei Technologies Co., Ltd.
- Page 151 Figure 6-24 Installing a GPU filler module Step 7 Tighten the screw using a Phillips screwdriver to secure the GPU filler module. See (2) in Figure 6-24. Issue 02 (2017-12-15) Huawei Proprietary and Confidential Copyright © Huawei Technologies Co., Ltd.
-
Page 152: G530 V2 Optional Part Installation
Step 2 Take a spare hard disk out of its ESD bag. Step 3 Raise the ejector lever completely and insert the hard disk into the slot. See (1) in Figure 6-26. Figure 6-26 Installing a hard disk Issue 02 (2017-12-15) Huawei Proprietary and Confidential Copyright © Huawei Technologies Co., Ltd. -
Page 153: Cpu
CPUs on the same server must have the same BOM number. Step 7 Install a CPU carrier. Take the new CPU carrier out of its ESD bag. Issue 02 (2017-12-15) Huawei Proprietary and Confidential Copyright © Huawei Technologies Co., Ltd. - Page 154 NOTE The thermal compound injector has volume marks. Figure 6-29 shows the methods for pasting thermal compound. Figure 6-29 Pasting methods 中间一点法 一字法 二字法 S形法 十字法 五点法 Issue 02 (2017-12-15) Huawei Proprietary and Confidential Copyright © Huawei Technologies Co., Ltd.
- Page 155 Keep the protective cap horizontal to prevent damaging the socket pins. Shine a light at various angles onto the CPU bonding pad and the CPU socket and check for bent pins, foreign matter, and bonding pad damage. Issue 02 (2017-12-15) Huawei Proprietary and Confidential Copyright © Huawei Technologies Co., Ltd.
-
Page 156: Dimm
If a CPU socket has bent pins or contains foreign matter, or the bonding pad is damaged, stop the installation and contact Huawei technical support. Horizontally hold the CPU and heat sink to align pin 1 of the CPU and heat sink with Pin 1 of the notched corner on the bracket, and gradually place the CPU and heat sink on the bracket along the guide sleeves. -
Page 157: Memory Subsystem Architecture
CPU is 768 GB. Note: This table is for reference only. For details about the components that can be purchased, consult your local Huawei sales representatives. 6.4.3.2 Memory Subsystem Architecture G530 V2 provides 24 slots for installing DDR3 DIMMs. Each CPU integrates 16 memory channels: 1A, 1B, 1C, 1D, 1E, and 1F for CPU1, and 2A, 2B, 2C, 2D, 2E, and 2F for CPU 2. - Page 158 DIMM031(1D2) DIMM040(1E1) DIMM041(1E2) DIMM050(1F1) DIMM051(1F2) CPU 2 DIMM100(2A1) DIMM101(2A2) DIMM110(2B1) DIMM111(2B2) DIMM120(2C1) DIMM121(2C2) DIMM130(2D1) DIMM131(2D2) DIMM140(2E1) DIMM141(2E2) DIMM150(2F1) DIMM151(2F2) For DIMM slot locations, see 2.7.2 DIMM Slots. Issue 02 (2017-12-15) Huawei Proprietary and Confidential Copyright © Huawei Technologies Co., Ltd.
-
Page 159: Dimm Ranks
RDIMMs. 6.4.3.4 DIMM Identification To determine DIMM characteristics, see the label attached to the DIMM and refer to the following figure and table. Figure 6-31 DIMM identification Issue 02 (2017-12-15) Huawei Proprietary and Confidential Copyright © Huawei Technologies Co., Ltd. -
Page 160: Memory Configuration
To configure memory protection modes, access the BIOS and choose Advanced > Memory Configuration. For details, see the HUAWEI Server Grantley Platform BIOS Parameter Reference. Online Spare Memory Configuration Online spare memory provides protection against degraded DIMMs by reducing the likelihood of uncorrected memory errors. -
Page 161: Dimm Installation Rules
For a multi-CPU configuration, each CPU must have a valid memory mirroring configuration. – Installation Rules for the Memory Patrol Mode See the general DIMM installation rules. Issue 02 (2017-12-15) Huawei Proprietary and Confidential Copyright © Huawei Technologies Co., Ltd. -
Page 162: Dimm
See Figure 6-33. The two fixing clips pop up into place automatically. Figure 6-33 Installing a DIMM ----End 6.4.3.8 Air Duct Issue 02 (2017-12-15) Huawei Proprietary and Confidential Copyright © Huawei Technologies Co., Ltd. -
Page 163: Raid Controller Card
Step 4 Remove the cover. For details, see Removing the Cover of a G530 Step 5 Determine the location for installing the RAID controller card. See Figure 6-35. Issue 02 (2017-12-15) Huawei Proprietary and Confidential Copyright © Huawei Technologies Co., Ltd. - Page 164 Step 10 Install the G530 V2. For details, see 4.4.4 Installing a G530 Step 11 Power on the G530 V2. For details, see 3.2 Powering On the Compute Node. ----End Issue 02 (2017-12-15) Huawei Proprietary and Confidential Copyright © Huawei Technologies Co., Ltd.
-
Page 165: Bios Battery
BIOS battery until it is properly installed in the slot. See Figure 6-38. Figure 6-38 Installing the BIOS battery Issue 02 (2017-12-15) Huawei Proprietary and Confidential Copyright © Huawei Technologies Co., Ltd. -
Page 166: Tpm
Step 6 Take a spare TPM out of its ESD bag. Step 7 Insert the TPM vertically downwards into the connector on the mainboard. See (1) in Figure 6-40. Issue 02 (2017-12-15) Huawei Proprietary and Confidential Copyright © Huawei Technologies Co., Ltd. -
Page 167: Enabling The Tpm
Step 8 Restart the G530 V2 for the TPM settings to take effect. ----End 6.4.7 USB Installing the USB Flash Drive Step 1 Power off the G530 V2. For details, see 3.1 Powering Off the Compute Node. Issue 02 (2017-12-15) Huawei Proprietary and Confidential Copyright © Huawei Technologies Co., Ltd. - Page 168 Step 6 Take a spare USB flash drive out of its ESD bag. Step 7 Insert the USB flash drive into the connector on the G530 V2. See Figure 6-42. Figure 6-42 Installing the USB flash drive Issue 02 (2017-12-15) Huawei Proprietary and Confidential Copyright © Huawei Technologies Co., Ltd.
-
Page 169: Gp316 Optional Part Installation
Step 6 Take a spare riser card tray out of its ESD bag. Step 7 Vertically insert the riser card tray downwards into the slot. See (1) in Figure 6-44. Issue 02 (2017-12-15) Huawei Proprietary and Confidential Copyright © Huawei Technologies Co., Ltd. -
Page 170: Pcie Card
Figure 6-45 Locations PCIe cards Step 2 Take a spare PCIe card out of its ESD bag. Step 3 Open the PCIe ejector lever. See (1) in Figure 6-46. Issue 02 (2017-12-15) Huawei Proprietary and Confidential Copyright © Huawei Technologies Co., Ltd. -
Page 171: Psu
Step 2 Push the PSU along the guide rails into a slot until the PSU clicks into place. See Figure 6-47. NOTE PSUs on the same server must have the same BOM number. Issue 02 (2017-12-15) Huawei Proprietary and Confidential Copyright © Huawei Technologies Co., Ltd. - Page 172 FusionServer G5500 Server User Guide 6 Optional Part Installation Figure 6-47 Installing a PSU Step 3 Connect the power cable to the PSU. See (1) in Figure 6-48. Issue 02 (2017-12-15) Huawei Proprietary and Confidential Copyright © Huawei Technologies Co., Ltd.
- Page 173 Release the latch of the power cable. See (2) in Figure 6-49. Close the latch at the connection position of the power cable and socket. See (3) in Figure 6-49. Issue 02 (2017-12-15) Huawei Proprietary and Confidential Copyright © Huawei Technologies Co., Ltd.
-
Page 174: I/O Module
Before closing the latch, adjust its position properly so that it can securely fasten the power cable. Step 6 Log in to the iBMC WebUI, and check whether the new PSU is normal. For details, see FusionServer G5500 Server 1.0.0 iBMC User Guide. -
Page 175: Installing An I/O Module
Step 1 Power off the server as instructed in Powering Off the Server. Step 2 Take a spare I/O module out of its ESD bag. Step 3 Insert the I/O module into the slot. See (1) in Figure 6-52. Issue 02 (2017-12-15) Huawei Proprietary and Confidential Copyright © Huawei Technologies Co., Ltd. -
Page 176: Management Module
Step 2 Place the management module on the ESD floor. Step 3 Take a spare RTC battery out of its ESD bag. Step 4 Figure 6-53 shows the location of the RTC battery. Issue 02 (2017-12-15) Huawei Proprietary and Confidential Copyright © Huawei Technologies Co., Ltd. -
Page 177: Installing A Management Module
6-55. NOTE If only one management module is configured for a full-length compute node, install the management module in the slot MM1, as shown in Figure 6-55. Issue 02 (2017-12-15) Huawei Proprietary and Confidential Copyright © Huawei Technologies Co., Ltd. -
Page 178: Fan Module
Step 2 Hold the handle of the fan module with the TOP mark facing upwards, and insert the fan module into the slot until you hear a click. See Figure 6-56. Issue 02 (2017-12-15) Huawei Proprietary and Confidential Copyright © Huawei Technologies Co., Ltd. - Page 179 FusionServer G5500 Server User Guide 6 Optional Part Installation Figure 6-56 Installing a fan module ----End Issue 02 (2017-12-15) Huawei Proprietary and Confidential Copyright © Huawei Technologies Co., Ltd.
-
Page 180: Troubleshooting
If a fault occurs on a server, collect logs for fault diagnosis. Fault diagnosis Fault diagnosis rules and tools help Huawei technical support engineers and maintenance engineers to analyze and rectify faults according to alarms and hardware fault symptoms. Software and firmware upgrade Software and firmware upgrade packages can be downloaded by server model and installed as needed. -
Page 181: Software And Configuration Utilities
FusionServer G5500 Server User Guide 8 Software and Configuration Utilities Software and Configuration Utilities About This Chapter 8.1 iBMC 8.2 BIOS 8.3 Management Module Issue 02 (2017-12-15) Huawei Proprietary and Confidential Copyright © Huawei Technologies Co., Ltd. -
Page 182: Ibmc
(ACPI) for advanced power management, and hot swap. The Huawei Grantley-based server is developed based on the Insyde code base and uses a proprietary BIOS. It supports customization and provides a variety of in-band and out-of-band configuration functions as well as high scalability. -
Page 183: Management Module
The management module supports RMCP, RMCP+, SSL, SSH, FTP, SFTP, and DHCP. NOTE For security purposes, FTP, RMCP, and RMCP+ are disabled by default. For details, see the FusionServer G5500 Server 1.0.0 HMM Command Reference. Issue 02 (2017-12-15) Huawei Proprietary and Confidential... -
Page 184: Regulatory Information
FusionServer G5500 Server User Guide 9 Regulatory Information Regulatory Information About This Chapter 9.1 Safety Instructions 9.2 Warranty Issue 02 (2017-12-15) Huawei Proprietary and Confidential Copyright © Huawei Technologies Co., Ltd. -
Page 185: Safety Instructions
Personal Safety To ensure personal safety, note the following points: Only personnel certified or authorized by Huawei are allowed to install the hardware. Stop any operation that may cause personal injury or equipment damage, report the problem to a project supervisor immediately, and take protective measures. - Page 186 Before powering on a device, ensure that it has been properly grounded. Properly grounded devices prevent personal injury. Do not use a ladder alone. Have someone else hold the ladder steady to prevent accidents. Issue 02 (2017-12-15) Huawei Proprietary and Confidential Copyright © Huawei Technologies Co., Ltd.
- Page 187 Package heavy, bulky parts (such as chassis and blades) and fragile parts (such as PCIe GPUs and SSDs) separately. NOTE Use the Huawei Server Compatibility Checker for details about parts supported by a server. Ensure that all devices are powered off before transportation. Do not transport hazardous materials.
-
Page 188: Warranty
9.2 Warranty According to the Huawei Warranty Policy for Servers & Storage Products (Warranty Policy for short), Huawei provides a three-year warranty for servers, a one-year warranty for DVD- ROM drives and iBBUs, and a three-month warranty for software media. -
Page 189: Electrostatic Discharge
FusionServer G5500 Server User Guide 10 Electrostatic Discharge Electrostatic Discharge About This Chapter 10.1 Preventing Electrostatic Discharge 10.2 Grounding Methods to Prevent Electrostatic Discharge Issue 02 (2017-12-15) Huawei Proprietary and Confidential Copyright © Huawei Technologies Co., Ltd. -
Page 190: Preventing Electrostatic Discharge
Use conductive field service tools. Use a portable field service kit with a folding static-dissipating work mat. Issue 02 (2017-12-15) Huawei Proprietary and Confidential Copyright © Huawei Technologies Co., Ltd. -
Page 191: Specifications
This section describes the specifications of G560, GP608, G530 V2, and GP316. 11.2 PSU Specifications 11.3 Environmental Specifications 11.4 G560 Specifications 11.5 GP608 Specifications 11.6 G530 V2 Specifications 11.7 GP316 Specifications Issue 02 (2017-12-15) Huawei Proprietary and Confidential Copyright © Huawei Technologies Co., Ltd. -
Page 192: Product Specifications
50, and 60 through a maximum of eight 3.5-inch SAS or SATA hard disks in the GP608. A supercapacitor can be configured to provide power-off protection for the LSI SAS3108 RAID controller card. Issue 02 (2017-12-15) Huawei Proprietary and Confidential Copyright © Huawei Technologies Co., Ltd. - Page 193 PCIe 3.0 x16 channels and is connected to the mainboard through four connectors and to the GP608 through the chassis backplane. For details, see B.2 Logical Structure. Issue 02 (2017-12-15) Huawei Proprietary and Confidential Copyright © Huawei Technologies Co., Ltd.
- Page 194 CPUs of up to 165 W thermal design power (TDP). The heat sink with low fin density corresponds to CPU 1 and the heat sink with high fin density corresponds to CPU 2. Issue 02 (2017-12-15) Huawei Proprietary and Confidential Copyright © Huawei Technologies Co., Ltd.
- Page 195 The G530 V2 supports only one mezzanine card. The mezzanine card provides two PCIe 3.0 x16 channels and is connected to the mainboard through four connectors and to the GP316 through the chassis backplane. Issue 02 (2017-12-15) Huawei Proprietary and Confidential Copyright © Huawei Technologies Co., Ltd.
-
Page 196: Psu Specifications
PCIe cards by providing four PCIe x16 connectors. Each connector provides x8 bandwidth. 11.2 PSU Specifications The G5500 provides four slots for installing PSUs. Table 11-5 describes the PSUs and power. Issue 02 (2017-12-15) Huawei Proprietary and Confidential Copyright © Huawei Technologies Co., Ltd. -
Page 197: Environmental Specifications
1°C (1.8°F) as the altitude increases by 300 m (984.24 ft). HDDs are not supported at an altitude of over 3000 m (9842.5 ft). Issue 02 (2017-12-15) Huawei Proprietary and Confidential Copyright © Huawei Technologies Co., Ltd. -
Page 198: G560 Specifications
G560: 660 W power l GP608: 2400 W l G530 V2: 600 W l GP316: 1400 W 11.4 G560 Specifications Table 11-7 lists the G560 specifications. Issue 02 (2017-12-15) Huawei Proprietary and Confidential Copyright © Huawei Technologies Co., Ltd. -
Page 199: Gp608 Specifications
Front panel: black l Casing: silver Weight l Net weight (with two HDD hard disks): 6 kg (13.23 lb) l Packing materials: 1.7 kg (3.75 lb) Issue 02 (2017-12-15) Huawei Proprietary and Confidential Copyright © Huawei Technologies Co., Ltd. -
Page 200: Gp316 Specifications
Front panel: black l Casing: silver Weight l Net weight (with sixteen NVIDIA P4 cards): 12 kg (24.46 lb) l Packing materials: 2.7 kg (5.95 lb) Issue 02 (2017-12-15) Huawei Proprietary and Confidential Copyright © Huawei Technologies Co., Ltd. -
Page 201: Other Resources
FusionServer G5500 Server User Guide 12 Other Resources Other Resources About This Chapter 12.1 Product Information Resources 12.2 Product Configuration Resources Issue 02 (2017-12-15) Huawei Proprietary and Confidential Copyright © Huawei Technologies Co., Ltd. -
Page 202: Product Information Resources
Assistant is an online Memory Configuration Assistant application that shows the Assistant DIMM installation sequence in a graphical manner after the product name, CPU quantity, and DIMM quantity are specified. Issue 02 (2017-12-15) Huawei Proprietary and Confidential Copyright © Huawei Technologies Co., Ltd. - Page 203 How to Obtain ServiceCD This is used for installing Visit Support > Downloads OSs. > IT > Server, select a product model and version, and download the ServiceCD file. Issue 02 (2017-12-15) Huawei Proprietary and Confidential Copyright © Huawei Technologies Co., Ltd.
-
Page 204: A How To Obtain Help
A.2 Contacting Huawei Technical Support A.3 Making Debugging Preparations A.4 How to Use the Document A.5 How to Obtain Help from Website A.6 Ways to Contact Huawei Issue 02 (2017-12-15) Huawei Proprietary and Confidential Copyright © Huawei Technologies Co., Ltd. -
Page 205: Preparations For Contacting Huawei
Customer Service Center of Huawei for technical support as soon as possible. A.3 Making Debugging Preparations When you contact Huawei for help, the technical support engineer of Huawei might assist you to do certain operations to collect information about the fault or rectify the fault directly. -
Page 206: Ways To Contact Huawei
A How to Obtain Help Huawei enterprise business website: http://e.huawei.com/en/ Huawei carrier business website: http://carrier.huawei.com/en/ Huawei Technical Support If the fault persists after taking the above measures, contact Huawei technical support as follows: Enterprise customers: Global Service Hotline Carriers: Global TAC Information Contact the technical support personnel of your local Huawei office. - Page 207 FusionServer G5500 Server User Guide B Appendix Appendix B.1 Acronyms and Abbreviations B.2 Logical Structure Issue 02 (2017-12-15) Huawei Proprietary and Confidential Copyright © Huawei Technologies Co., Ltd.
-
Page 208: B Appendix
Direct Current DDR4 Double Data Rate 4 DEMT Dynamic Energy Management Technology DHCP Dynamic host Configuration Protocol DIMM Dual Inline Memory Module Data Module Domain Name System Issue 02 (2017-12-15) Huawei Proprietary and Confidential Copyright © Huawei Technologies Co., Ltd. - Page 209 Hyper Management Module High-performance Computing HTTP Hypertext Transfer Protocol HTTPS Hypertext Transfer Protocol Secure HVDC High Voltage Direct Current iBMC Integrated Baseboard Management Controller ICMP Internet Control Message Protocol-Internet Issue 02 (2017-12-15) Huawei Proprietary and Confidential Copyright © Huawei Technologies Co., Ltd.
- Page 210 Metropolis Area Network Management Information Base Management Module Module Management Controller MTBF Mean Time Between Failures Maximum Transfer Unit Next Business Day NC-SI Network Controller Sideband Interface Issue 02 (2017-12-15) Huawei Proprietary and Confidential Copyright © Huawei Technologies Co., Ltd.
- Page 211 Serial Advanced Technology Attachment SGMII Serial Gigabit Media Independent Interface SMTP Simple Mail Transfer Protocol SM_CLP Server Management Command Line Protocol SNMP Simple Network Management Protocol Solid State Disk Issue 02 (2017-12-15) Huawei Proprietary and Confidential Copyright © Huawei Technologies Co., Ltd.
-
Page 212: Logical Structure
The RAID controller card determines RAID properties of the hard disks. The hard disk backplane only provides physical channels and does not process hard disk data. Issue 02 (2017-12-15) Huawei Proprietary and Confidential Copyright © Huawei Technologies Co., Ltd. - Page 213 FusionServer G5500 Server User Guide B Appendix Figure B-1 Logical topology 1 Issue 02 (2017-12-15) Huawei Proprietary and Confidential Copyright © Huawei Technologies Co., Ltd.
- Page 214 Two SFP+ Ethernet ports are provided by the 10GE NIC that is integrated into the PCH and connected to the management module through the chassis backplane. Issue 02 (2017-12-15) Huawei Proprietary and Confidential Copyright © Huawei Technologies Co., Ltd.
- Page 215 One of the two slots can be enabled by software programming. By default, the expansion slot is disabled. Figure B-3 Logical structure of the G530 V2 and GP316 Issue 02 (2017-12-15) Huawei Proprietary and Confidential Copyright © Huawei Technologies Co., Ltd.