Table of Contents
Advertisement
Advertisement
Table of Contents

Related Manuals for Baumatic BT85.1GL


Summary of Contents for Baumatic BT85.1GL
- Page 1 BT85.1GL Cooker Hood...
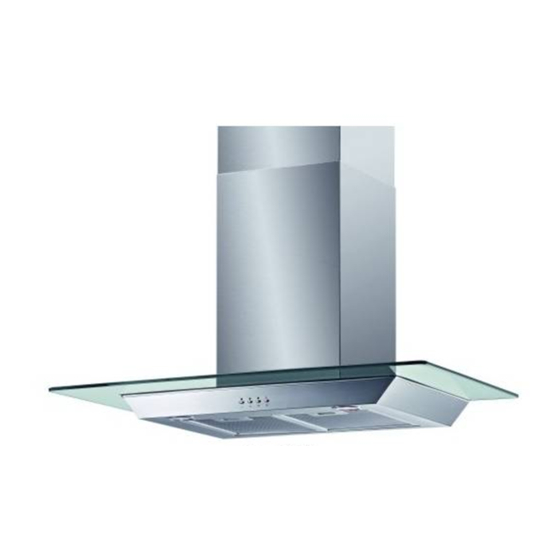
- Page 2 User Manual for your Baumatic BT85.1GL Cooker 90 cm Chimney Hood in Stainless Steel NOTE : This User Instruction Manual contains important information, including safety & installation points, which will enable you to get the most out of your appliance. Please keep it in a safe place so that it is easily available for future reference.
-
Page 3: Table Of Contents
YOUR COOKER HOOD’S SPECIFICATIONS ….……………..………….3 IMPORTANT SAFETY INFORMATION……………………………….…4-5 CARING FOR THE ENVIRONMENT…………………………………………6 USING YOUR COOKER HOOD………………………………..……………..7 MAINTAINING AND CLEANING YOUR COOKER HOOD ……….8-10 INSTALLATION INSTRUCTIONS ……………………….……...….12-19 INSTALLATION NOTES – EXTRACTION / PURIFYING VERSION .….19 NOTE ON INSTALLING THE VERSION WITH LOWER BRACKET..……20 TROUBLESHOOTING ……………………………………………21 CONDITIONS OF GUARANTEE……………………………………………22 CONTACT DETAILS…………………………………………………………..23... -
Page 4: Your Cooker Hood's Specifications
Specifications of your BT85.1GL Cooker Hood Congratulations on purchasing a Baumatic Cooker Hood! To fully enjoy using your appliance long into the future, please firstly familiarise yourself with its specifications, safety advice and operational instructions included in this manual. You will also need this manual to ensure that your Cooker Hood has been installed properly. -
Page 5: Important Safety Information
Important Safety Information: Any installation work must be carried out by a qualified electrician or competent person. The hood must be installed in accordance with the installation instructions and all measurements followed. If the cooker hood is installed for use above a gas appliance then the provision for ventilation must be in accordance with the Gas Safety Codes of Practice BS.6172,... - Page 6 Important Safety Information: o Ensure the ducting for the extractor function has the same diameter as the outlet hole all the way through. Keep young children from using, playing with or tampering with the cooker hood. Older children and infirm persons should be supervised if they are using the cooker hood.
-
Page 7: Environmental Note
Environmental Note Note : Before discarding an old appliance, switch off and disconnect it from the power supply. Cut off and render any plug useless. Cut the cable off directly behind the appliance to prevent misuse. This should be undertaken by a competent person. CONFORMITY TO W.E.E.E. -
Page 8: Using Your Baumatic Cooker Hood
Motor operation: = low speed, ‘U’ – Light ‘on/off’ button-This button controls the light PLEASE NOTE THAT YOUR BAUMATIC COOKER HOOD CAN BE USED EITHER IN RECIRCULATION MODE OR IN EXTRACTION MODE. TO USE THE HOOD IN RECIRCULATION MODE, YOU WILL NEED TO FIT THE CARBON FILTERS. -
Page 9: Maintaining And Cleaning Your Cooker Hood
Cleaning your Baumatic Cooker Hood: Before cleaning, always ensure that you have IMPORTANT: switched your cooker hood OFF at the omni-polar switch, set at the wall from the cable: Clean the external parts with mild liquid detergents on a damp cloth. - Page 10 Maintenance - Cleaning the Anti-grease Filters First remove the grille by pulling down on it. Undo the side catches. You can now clean the anti-grease filter grilles. Soak them for about one hour in hot water with a grease-loosening detergent then rinse off thoroughly with hot water.
-
Page 11: Maintenance – Changing The Light Bulb And Carbon Filter
Maintenance – Changing the Light Bulb and Carbon Filter Changing the light bulb Before changing the light bulb, ensure that the appliance is not live (i.e., ensure that you have switched it off at the wall switch). Remove the metal anti-grease filters (see Figure 2 below) and find the old bulb located in the light fixture up inside the exposed canopy. -
Page 12: Installing / Changing The Carbon Filter
Installing / Changing the Carbon Filter Installing / Changing the Carbon Filter. Your Baumatic Cooker Hood uses a pair of CARBON FILTERS to purify the air for the air recirculation function. You will find that the filters will attach to both sides of the fan motor (please see figures at bottom of page). -
Page 13: Electrical Connection
INSTALLATION INSTRUCTIONS – Electrical Connection. Before installation and usage, read all the instructions and make sure that the voltage (V) and the frequency (Hz) indicated on the identification plate (found inside your Cooker Hood) and on the data inside the appliance are exactly the same as the voltage and frequency in your home. -
Page 14: Installation Instructions
SEE PAGE 18 NOW TO UNDERSTAND CRUCIAL DIFFERENCES IN THESE. NOTE: Your Baumatic Cooker Hood should only be fitted on a wall. Do NOT position it any less than 700 mm (70 cm) above the hob. 1) Remove the metal anti-grease filters (See figure at right). -
Page 15: Attaching The Hood
INSTALLATION INSTRUCTIONS -------------------------------------------------------------------------- 3) Using a drill bit with a 6 mm diameter, make holes in the wall where you have marked these positions (see below). -------------------------------------------------------------------------------------------------------------------------------------------------------------------------------------------------------------------------------------------------- 4) Insert the expansion fixings (rawlplugs) in the holes and then screw the support screws halfway in (see below figure, at right). -
Page 16: Installation Instructions – Attaching The Hood
INSTALLATION INSTRUCTIONS – Attaching the Hood ------------------------------------------------------------------------------------------- ------------------------------------------------------------------------------------------- 6) (EXTRACTION FUNCTION ONLY) Connect the coupling to the top of the cooker hood (see below). Then connect the discharge pipe to the coupling as shown below. Remember that your ducting will have to match the specifications shown in the notes on Extraction / Air Purifier (Recirculation) Modes on p.18. -
Page 17: Installation Instructions - Fitting The Chimney
INSTALLATION INSTRUCTIONS FITTING THE PIPE – been installed, you can now fit the pipe. 1) Take the two casings ‘A’ and ‘B’: 2) Rest the bottom of the casing ‘A’ on the top of the hood, taking care to position the tabs of the casing correctly on the back of the hood as shown as part ‘X’... -
Page 18: Fitting The Chimney
INSTALLATION INSTRUCTIONS 6) Take the fixing bracket ‘G’ (Fig. 4 – previous page), centre it with respect to the mark you previously made, keeping it in contact with the ceiling, and then mark the anchoring holes (‘H’). 7) Using a drill bit with a 6mm diameter, make two holes on the fixing marks you previously made (see below). -
Page 19: Attaching The Glass
ATTACHING THE GLASS Remove the metal grease filters from the hood Slacken both anchoring screws “F” Place the glass ‘Q’ on the upper shelf of the hood, pushing it in towards the wall. Tightening the screws ‘F’ again in the hole and connecting them to the unit. -
Page 20: Installation Notes - Extraction / Purifying Version
Extraction / Air Purifier Modes of Operation EXTRACTION OPERATION – Installation Instructions Ensure that you have fitted the union (‘N’) to the upper part of the hood using the packaged two screws supplied inside the packing (Fig. 1 – on right). Using a 125 mm diameter pipe, connect the union (N) on the upper part of the hood (see Fig. -
Page 21: If Your Cooker Hood Comes With A Lower Bracket
(inset), the bracketed connecting area of the hood (‘N’). Hook or attach the hood to the bracket using the screws supplied and carefully check that it has been done properly. A few hoods may be supplied with specific screws for vertical or horizontal adjustment. -
Page 22: Troubleshooting
If something has gone wrong with your Cooker Hood, checking against this chart might keep you from having to call for service. Symptom The cooker hood will not start! The cooker hood is not working effectively! The cooker hood has switched off during operation! Troubleshooting •... -
Page 23: Conditions Of Guarantee
Baumatic appliance. * In addition, your appliance is covered by a 5 year parts warranty. Baumatic Ltd will provide free of charge the parts required to repair the appliance, only if they are fitted by a Baumatic engineer, for any defect that arises due to faulty materials or workmanship within a period of 5 years from the original purchase date. -
Page 24: Contact Details
Headquarters Baumatic Ltd. Baumatic Buildings, 6 Bennet Road, Reading, Berkshire RG2 0QX, United Kingdom Sales Telephone +44 118 933 6900 Sales Fax +44 118 931 0035 Service Telephone +44 118 933 6911 Service Fax +44 118 986 9124 Spares Telephone...
Need help?
Do you have a question about the BT85.1GL and is the answer not in the manual?
Questions and answers