Table of Contents
Advertisement
Advertisement
Table of Contents

Related Manuals for Woodpecker PT-A


Summary of Contents for Woodpecker PT-A
-
Page 2: Table Of Contents
Contents Forward ..........................1 1 Introduction ........................1 2 Installation ........................4 3 Function and operation ....................7 4 Troubleshooting ......................1 2 5 Cleaning, disinfection, and sterilization ..............1 5 6 Maintenance, storage, and transport ................2 0 7 Environmental protection ....................2 1 8 After service ........................2 1 9 Manufacturer’s right ....................2 1 10 Symbol instruction ....................2 2 11 European authorized representative ................2 3... -
Page 3: Forward
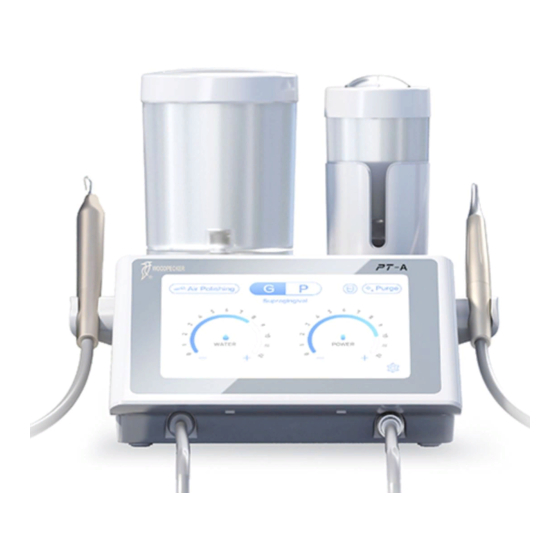
1 Introduction 1.1 Brief introduction PT-A Dental Scaler and Air Polisher has both ultrasound system and air polishing system. It is suitable for periodontal treatment and root canal irrigation in dental clini- cal treatment. It can remove subgingival and supragingival calculus and plaque, so as to achieve the therapeutic effect of consolidating periodontal tissue. - Page 4 bicarbonate, hydrophobic silica, edible essence), air polishing handpiece, ultrasonic handpiece, working tips, sand blasting nozzle, power adapter and foot petal, etc. Appled part:working tips, sand blasting nozzle. 1.5 Scope of application 1.5.1 Ultrasound system ① Scaling · Removal of supragingival calculus ·...
- Page 5 1.7 Device safety classification 1.7.1 Classified by operation mode: Continuous operating device 1.7.2 Type of protection against electric shock: Class Ⅰ 1.7.3 Degree of protection against electric shock: B type applied part 1.7.4 Degree of protection against harmful ingress of water: Ordinary equipment (IPX0).
-
Page 6: Installation
2 Installation 2.1 Front view of the main unit Figure 1 Front view of main unit 2.2 Rear view of the main unit Figure 2 Rear view of the main unit... - Page 7 2.3 Touch panel Ultrasonic scaling Air polishing scaling Cleaning mode Scaling/supragingival air polishing Perio/subgingival air polishing Endodontic treatment Turn down water volume/power/air pressure Turn up water volume/power/air pressure...
- Page 8 Setting Figure 3 Schematic diagram of touch panel 2.3 Schematic diagram of handpiece Figure 4 Ultrasonic handpiece Figure 5 Air polishing handpiece 2.4 Schematic diagram of tip installations Figure 6 Schematic diagram of tip installation...
-
Page 9: Function And Operation
2.5 Installation procedures ① Open the package, check whether the equipment is complete as per the packing list, and place the main unit on a solid plane, holding it directly facing the operator. ② Connect the power adapter with main unit. ③... - Page 10 Irrigation Only water spray Air+Water 【 Note 】 In the Enhance mode, the power/air pressure is increased by three levels based on the original level, and the maximum is level 12. When the pedal button C is re- leased, the gear position is automatically restored to the previously set gear position. Figure 8 Schematic diagram of multi-function foot pedal 3.2 Ultrasound system 3.2.1 Scaling...
- Page 11 rexertion or overstay in scaling. 9. Vibrating intensity: Adjust the vibrating intensity according to your need. Generally start with level 1 power, and adjust the vibrating intensity according to the teeth sensitivi- ty and hardness of calculus during clinical application. 10.
- Page 12 5. Generally, hold the handpiece with the gesture of holding a pen. 6. Adjust the water volume and air pressure to appropriate level. Normally the water volume starts with level 5, and air pressure starts with level 1. During clinical applica- tion, adjust the water volume and air pressure according to the teeth sensitivity and den- tal plaque condition.
- Page 13 2. Allow the machine to work with water for 10 seconds before each clinical opera- tion to remove any water remaining in the pipe. 3. Operators should be equipped with adequate protection (e.g., goggles, masks, etc.) to prevent cross-contamination. 4. Product use must comply with the relevant operation specifications and relevant regulations of the medical department.
-
Page 14: Troubleshooting
Please use corresponding tips of the Woodpecker brand. 25. If you find that the sealing ring is damaged when using PT-A, please refer to the annex Sealing Ring Specifications in the Manual and get it replaced with suitable sealing ring. - Page 15 Water volume adjustment knob Open the water volume is not open. adjustment knob. 【 Note1 】 Keep the water supply mode The tip vibrates but Wrong selection of water displayed on screen consistent there is no water supply mode with the actual water supply. spray after power on and stepping on the Filter clogging...
- Page 16 Water volume adjustment knob Open the water volume is not open. adjustment knob. 【 Note1 】 Keep the water supply mode Wrong selection of water There is air flow displayed on screen consistent supply mode but no water spray with the actual water supply. after power on and Filter clogging Clean the filter...
-
Page 17: Cleaning, Disinfection, And Sterilization
4.2 Notice 【 Note1 】 As shown in the picture, the water volume can be increased or decrease through adjusting the water volume adjustment knob. 【 Note2 】 If the tip is surely tightened and there is water mist spray, the tip is consi- dered to be damaged with the following phenomena: 1) The vibration intensity of the tip and the degree of water atomization are signifi- cantly weakened. - Page 18 There should be a flushing connector connected to the inner cavity of the product. The cleaning procedure is suitable for the handle, and the flushing period is suffi- cient. But ultrasonic cleaning is not allowed for Ultrasonic handpiece. It is recommended to use a washer-disinfector in accordance with EN ISO 15883. For the specific procedure, please refer to the automated disinfection section in the sec- tion “Disinfection”.
- Page 19 • The cleaning procedure is suitable for the handle and the flushing cycle is sufficient (5-10 minutes). • Only distilled or deionized water with a small amount of microorganisms (<10 cfu/ml) can be used for all rinsing steps. (For example, pure water that is in accordance with the European Pharmacopoeia or the United States Pharmacopoeia).
- Page 20 seconds of each time. Dry the handpieces and its accessories with filtered compressed air (maximum pres- sure: 3 bar). After the program is finished, remove the handpieces and its accessories from the washer-disinfector, inspect (refer to section “Inspection and Maintenance”) and packa- ging (refer to chapter “Packaging”).
- Page 21 4) If the service time (number of times) of the Ultrasonic handpiece reaches the spe- cified service life (number of times), please replace it in time. 5) Do not use the machine when the machine is being cleaned/disinfected/sterilized. 5.6 Packaging The disinfected and dried handpieces and their accessories are assembled and qui- ckly packaged in a medical sterilization bag (or special holder, sterile box).
-
Page 22: Maintenance, Storage, And Transport
6 Maintenance, storage, and transport 6.1 Maintenance 6.1.1 Air filter 1) When water accumulates in the filter, turn the knob at the bottom of the filter cou- nterclockwise to drain the water, and tighten the knob clockwise. 2) Replacement of the filter element: Use a filter wrench to unscrew the transparent cover of the air filter, then use the wrench to unscrew the black nut at the lower end of the filter element, remove the white filter element and discard it into the trash can, re- place it with a new filter element, and reinstall the black nut and transparent shell. -
Page 23: Environmental Protection
This product is a precision equipment. If there is problem that needs to be repaired, returned to Woodpecker or handled by professionals is recommended. 9 Manufacturer’s right We reserve the rights to change the design of the equipment, the technique, fittings,... -
Page 24: Symbol Instruction
notice. If there are some differences between blueprint and real equipment, take the real equipment as the norm. 10 Symbol instruction Trademark Manufacturer Consult the accompanying Date of manufacture documents Ordinary equipment B type applied part Recovery Anti-drip equipment Handle with care Keep dry Alternating current Used indoors only... -
Page 25: European Authorized Representative
Guidance and manufacturer's declaration of electromagnetic emissions The model PT-A is intended for use in the electromagnetic environment specified below. The customer or the user of the model PT-A should assure that it is used in such an environment. Emissions test... - Page 26 Guidance & Declaration - Electromagnetic immunity The model PT-A is intended for use in the electromagnetic environment specified below. The customer or the user of the model PT-A should assure that it is used in such an environment. IEC 60601...
- Page 27 If the measured field strength in the location in which the model PT-A is used exceeds the applicable RF compliance level above, the model PT-A should be observed to verify normal operation. If abnormal performance is observed,...
- Page 28 The model PT-A is intended for use in electromagnetic environment in which radiated RF disturbances is controlled. The customer or the user of the model PT-A can help prevent electromagnetic interference by maintaining a minimum distance between portable and mobile RF communications equipment (transmitters) and the model PT-A is recommended below, according to the maximum output power of the communications equipment.
-
Page 29: Statement
13 Statement Woodpecker reserves the right to change the design of the equipment, the technique, fittings, instruction manual and the content of the original packing list at any time wi- thout further notice. The pictures are only for reference. The final interpretation rights belong to Guilin Woodpecker Medical Instrument Co., Ltd. - Page 31 ZMN-SM-026 V1.5-20201112...
Need help?
Do you have a question about the PT-A and is the answer not in the manual?
Questions and answers
Do We require the air Handpiece to blow constant air, even with footswitch not activated? If not please advice
handpiece dont switch to airpolishing after lift it up
The Woodpecker PT-A handpiece may not switch to air polishing after being lifted up due to several possible issues:
1. Clogging of the handpiece tail cord – The tail cord may need to be cleaned or replaced.
2. Solenoid valve failure – This requires contacting the local distributor or manufacturer for assistance.
3. Water volume adjustment knob not open – Ensure the knob is open.
4. Incorrect water supply mode selection – The mode displayed on the screen should match the actual water supply.
5. Filter clogging – The filter should be cleaned.
6. Impurity in the solenoid valve – Contact the local distributor or manufacturer.
7. Water line clogging – This requires professional service.
8. Damaged O-ring or rubber ring on the powder tank – The broken part should be replaced.
9. Powder residue at the thread – Remove any residual powder to ensure proper sealing.
10. Loose or damaged upper cover of the powder tank – The cover should be replaced if necessary.
This answer is automatically generated