Table of Contents
Advertisement
Quick Links
Advertisement
Table of Contents

Related Manuals for Stanley Healthcare Bed-Check Classic-Check Sensormat 72020


Summary of Contents for Stanley Healthcare Bed-Check Classic-Check Sensormat 72020
- Page 1 Classic-Check ® Bed-Check ® Sensormat ® User Manual CAUTION Before installing this system, please read and follow these instructions carefully. Failure to do so could result in injury or death. No device is a substitute for proper nursing care. 0163-436-C...
-
Page 3: Table Of Contents
Table of Contents Quick Start Procedures ..................2 (For the experienced Bed-Check ® caregiver, no setting changes) Quick Set Procedures .................... 3 (For the experienced Bed-Check ® caregiver making setting changes) How To Use the System ..................4 (Complete detailed instructions) Sensormat ®... - Page 4 Make sure you have thoroughly read and understand the Classic-Check ® system instructions before using the Sensormat ® Stanley Healthcare makes no claims whatsoever as to the viability of using non- Bed-Check ® brand pressure sensitive pads with the Classic-Check ®...
-
Page 5: Quick Start Procedures
Quick Start Procedures How to get started with no setting changes - for the experienced Bed-Check ® Caregiver. Do use this section if you already understand the basic operational procedures, and the present settings do not need to be changed. Do not use this section if you are unfamiliar with this equipment or wish to change settings. -
Page 6: Quick Set Procedures
Quick Set Procedures How to change settings - for the experienced Bed-Check ® Caregiver. Best done holding the unit with both hands and using both thumbs to press buttons. We recommend setting volumes after setting the tone. Classic-Check ® remembers its current setting after power interruptions. -
Page 7: How To Use The System
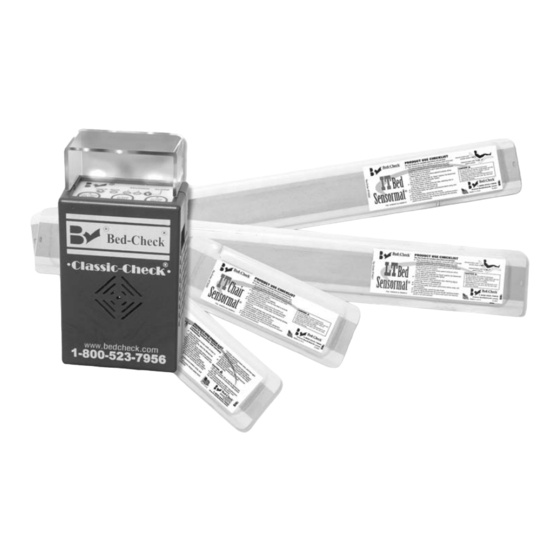
How To Use The System (Complete detailed instructions) The Classic-Check ® System consists of a control unit and a disposable pressure sensitive Sensormat ® , available in several sizes either for use on a standard hospital bed or a bed- side chair. - Page 8 WARNING To ensure compatibility, the Classic-Check control unit should be used only ® with Bed-Check ® Sensormat ® pressure sensitive mats. An alarm may sound when a damaged or incompatible mat is plugged into the control unit. The power supply must be unplugged from the wall to cancel the alarm. Always physically inspect the status of the control unit by viewing the illumi- nated indicators on the face of the control unit before leaving the patient’s room.
-
Page 9: Interfacing With The Nurse Call System
Interfacing with the Nurse Call System The Classic-Check ® can be set for a normally open or normally closed nurse call system. The unit is factory preset to function with a normally open system. The Control Unit uses a standard, two conductor, 1/4 inch diameter phone plug, the most common type of nurse call connection. - Page 10 Possible Internal Set-up Instructions (only if connecting to a nurse call system) 1. Determine if your nurse call system is a normally closed or normally open system (consult your BioMed). The Classic-Check ® Unit is factory set for a normally open system unless otherwise specified. 2.
-
Page 11: System Operation
System Operation The Classic-Check ® Unit is factory set for a 3 second delay, day mode, “Low pitch warble” alarm tone, maximum day volume and minimum night volume. 1. Power up the Classic-Check ® Unit by plugging the power cord into a standard (120 VAC) outlet. - Page 12 8. When pressure (weight) is removed from the Sensormat ® (patient begins to exit the bed or chair), the Classic-Check ® Unit begins the delay countdown. Once the countdown starts, weight back on the Sensormat ® will stop the countdown and MONitoring will resume. This reduces false alarms.
-
Page 13: Changing Operational Parameters (Setting)
Changing Operational Parameters Front Panel of Classic-Check ® Day/Night Mode Setting The Classic-Check ® Unit has a blue light in the clear splash shield that illumi- nates in the NITE mode. In addition, you may pre-set the alarm volumes sepa- rately for DAY and NITE modes. - Page 14 1. To hear the current alarm tone setting, a. Press and hold RESET. b. Press and release ALARM DELAY. c. Release RESET. You will hear the current tone setting. Silence by pressing RESET. Note that the volume may be wrong at this point, but it is best to set volume after the tone has been selected.
- Page 15 Volume Settings Since each alarm tone is different, you may wish to change the volume setting whenever the alarm tone selection is changed. You may also choose to set dif- ferent volumes for DAY and NITE modes. For any selected alarm tone, there are 7 selectable volumes each for DAY and NITE modes.
-
Page 16: Troubleshooting
Troubleshooting WARNING Test the system’s operations daily. Failure to do so could result in injury or death. Problem: No alarm - Patient out of bed Check: 1. Are you using the Bed-Check ® Sensormat ® or another manufacturer’s mat? A defective mat or a mat provided by a different manufacturer will generally cause the Control Unit to alarm when it is plugged into the unit and power is on. -
Page 17: Care And Maintenance
Problem: Room alarm triggered - No call at nursing station -or- Nurse call will not turn off after an alarm Check: 1. Is the nurse call plug firmly connected to the patient station or adapter? 2. Is the call cord or pillow speaker firmly connected to the patient station or adapter? 3. -
Page 18: Warranty Information
LIMITED WARRANTY: BED-CHECK ® CONTROL UNITS 1. WARRANTOR: This Limited Warranty is given by Stanley Security Solutions, Inc., doing business at Lincoln, NE 68503. 2. DURATION: This Limited Warranty begins on the date the product is delivered to the purchaser and continues for a period of two years (new units) or one year (refurbished units). - Page 19 LIMITED WARRANTY BED-CHECK ® SENSORMATS ® 1. WARRANTOR: This Limited Warranty is given by Stanley Security Solutions, Inc., Lincoln, NE 68503. 2. DURATION: This Limited Warranty begins on the date the product is delivered to the purchaser and continues for a period of one year or for the duration of the warranty stated on the Sensormat®...
- Page 20 © 2008-2013 Stanley Healthcare. All Rights Reserved. Bed-Check, Classic-Check, and Sensormat are registered trademarks of Stanley Black & Decker or its affiliates.
Need help?
Do you have a question about the Bed-Check Classic-Check Sensormat 72020 and is the answer not in the manual?
Questions and answers