National Instruments PXIe-4310 User Manual
8-channel, 16-bit, 400 ks/s/ch, ch-ch isolated analog input module
Hide thumbs
Also See for PXIe-4310:
- Getting started manual (24 pages) ,
- Calibration procedure (10 pages)

Related Manuals for National Instruments PXIe-4310


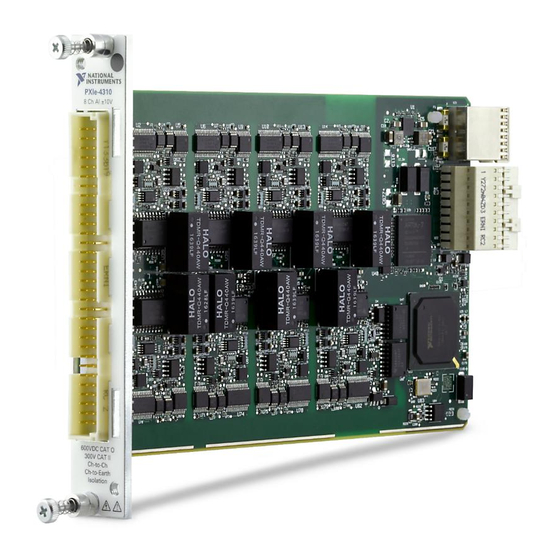
Summary of Contents for National Instruments PXIe-4310
- Page 1 SC Express PXIe-4310 User Manual 8-channel, 16-bit, 400 kS/s/ch, Ch-Ch Isolated Analog Input Module PXIe-4310 User Manual May 2017 377025A-01...
- Page 2 11500 North Mopac Expressway Austin, Texas 78759-3504 USA Tel: 512 683 0100 NI Services For further support information, refer to the appendix. To comment on National Instruments documentation, refer to the National Instruments website at ni.com/info enter the Info Code feedback...
- Page 3 National Instruments Corporation. National Instruments respects the intellectual property of others, and we ask our users to do the same. NI software is protected by copyright and other intellectual property laws. Where NI software may be used to reproduce software or other materials belonging to others, you may use NI software only to reproduce materials that you may reproduce in accordance with the terms of any applicable license or other legal restriction.
- Page 4 ™ The ExpressCard word mark and logos are owned by PCMCIA and any use of such marks by National Instruments is under license. The mark LabWindows is used under a license from Microsoft Corporation. Windows is a registered trademark of Microsoft Corporation in the United States and other countries.
-
Page 5: Table Of Contents
Input Ranges ........................2-5 Analog Input Filter ......................2-6 Self Calibration......................... 2-7 Device Pinout ........................2-7 I/O Connector Signal Description ................2-9 PXIe-4310 Block Diagram ....................2-10 Chapter 3 Acquiring Analog Input Analog Input Data Acquisition Methods................3-1 Software-Timed Acquisitions................... 3-1 Hardware-Timed Acquisitions ................. - Page 6 Contents Clock Generation and Routing ..................3-10 Reference Clock......................3-11 10 MHz RefClk......................3-11 PXI Express Clock and Trigger Signals ..............3-11 PXIe_CLK100 ....................3-11 PXIe_SYNC100....................3-12 PXI_CLK10 ...................... 3-12 PXI Triggers ..................... 3-12 PXI_STAR Trigger...................3-12 PXIe_DSTAR<A..C> ..................3-13 Synchronizing Multiple Devices ................3-13 Triggering .........................
-
Page 7: Getting Started
TB-4310 (10V) that can be expanded to 600 V when using a TB-4310 (600V). Each channel of the PXIe-4310 has a 16-bit ADC with three programmable filter settings and four gain settings. Two input PFI lines are available on the module for triggering/clocking. -
Page 8: Using The Pxie-4310
Using the PXIe-4310 This chapter describes how to connect AI input signals to the PXIe-4310. It also provides the I/O connector signal pin assignments of the module. Driver support for the PXIe-4310 was first available in NI-DAQmx 17.1. For the list of devices supported by a specific release, refer to the NI-DAQmx Readme, available on the version-specific download page or installation media. -
Page 9: Signal Connections
Figure 2-2 or to an isolated ground of the source as long as the working voltage specification of the PXIe-4310 is not violated. To ensure the specified EMC performance, wire the AI+ and AI- signals as twisted pairs and use the COM as a shield. - Page 10 PGIA to reject V . A mismatch in the source impedance can cause a portion of V to appear as a differential voltage between AI+ and AI-. © National Instruments | 2-3...
-
Page 11: Working Voltage Range
), or subtracting COM <0..7> from AI <0..7>+, must be less than the maximum working voltage specification. Refer to the PXIe-4310 Specifications working voltage limits. When using the TB-4310 (600V), divide the input signal voltage (V ) by 60 when calculating the working voltage, as shown in Figure 2-5. -
Page 12: Input Ranges
AI channel on your PXIe-4310 module. The input range affects the resolution of the PXIe-4310 module for an AI channel. Resolution refers to the voltage of one ADC code. For example, a 16-bit ADC converts analog inputs into one of 65,536 (= 2 ) codes—that is, one of 65,536 possible digital values. -
Page 13: Analog Input Filter
-1 V to 1 V Analog Input Filter The PXIe-4310 has selectable filter settings per channel. Each channel can independently be set to one of the three available lowpass filter settings: 10 kHz, 100 kHz, and Disable. The 10 kHz and 100 kHz filters are 2-pole Butterworth filters, and their designation refers to the -3 dB cut-off frequency. -
Page 14: Self Calibration
Device Calibration in the NI-DAQmx Help or the LabVIEW Help. Device Pinout I/O Connector Table 2-2 shows the pinout of the front connector of the PXIe-4310. Refer to the Signal Description section for definitions of each signal. Refer to the PXIe-4310 and TB-4310 (10V)/TB-4310 (600V) Getting Started Guide and Terminal Block Specifications for signal locations on the terminal block. - Page 15 Chapter 2 Using the PXIe-4310 Table 2-2. Front Signal Pin Assignments Front Connector Diagram Pin Number Column A Column B Column C Channel AI0- AI0+ — Column COM0 — — — — — — — COM1 — AI1- AI1+ —...
-
Page 16: I/O Connector Signal Description
AI. Note: These channels may only be referenced to channel 7 in order to maintain safety isolation. RSVD COM 7 Bi-Directional These pins are reserved for communication with the accessory. © National Instruments | 2-9... -
Page 17: Pxie-4310 Block Diagram
Chapter 2 Using the PXIe-4310 PXIe-4310 Block Diagram Figure 2-6 shows the block diagram of the PXIe-4310 module. Figure 2-6. PXIe-4310 Block Diagram 600 V CAT O / 300 V CAT II Isolation AI CH 0 M-CAL Gain & Filter Selection... -
Page 18: Acquiring Analog Input
If you use a reference trigger, you must use finite sample mode. – Continuous acquisition refers to the acquisition of an unspecified number of samples. Instead of acquiring a set number of data samples and stopping, a continuous © National Instruments | 3-1... -
Page 19: Aggregate Versus Single Channel Sampling Rates
Aggregate versus Single Channel Sampling Rates The PXIe-4310 module has one ADC per channel, so the single channel maximum sample rate can be achieved on all channels simultaneously. The total aggregate sample rate determines the maximum bus bandwidth used by the device. The aggregate sample rate is the product of the maximum sample rate for a single channel multiplied by the number of AI channels that the device supports. -
Page 20: Analog Input Timing Signals
AI Pause Trigger Signal AI Sample Clock Signal The PXIe-4310 module uses the AI Sample Clock (ai/SampleClock) signal to initiate an acquisition on each active analog input channel. Since there is one ADC per channel, the AI Sample Clock signal controls the sample period for all of the channels in a task. Since there is one timing engine per module, all analog channels on a module must use the same sample clock. -
Page 21: Using An External Source
Chapter 3 Acquiring Analog Input A programmable internal counter divides down the AI Sample Clock Timebase to generate the AI Sample Clock. The output of the counter is called the Onboard Clock signal. Onboard Clock is the default sample clock source for hardware-timed acquisitions unless you specify an external source. -
Page 22: Ai Start Trigger Signal
Figure 3-2. Typical Posttriggered DAQ Sequence AI Start Trigger AI Sample Clock Sample Counter Your DAQ device only acquires data after a start trigger pulse. The device ignores AI Sample Clock if a start trigger pulse has not occurred. © National Instruments | 3-5... -
Page 23: Routing Ai Start Trigger To An Output Terminal
Chapter 3 Acquiring Analog Input In place of a software generated pulse, you can use any of the following digital signals as the AI Start Trigger Source: • PFI <0,1> • PXI_Trig <0..7> • PXI_STAR • PXIe_STAR <A,B> The source can also be one of several other internal signals on your device. Refer to Device Routing in MAX in the NI-DAQmx Help or the LabVIEW Help for more information. -
Page 24: Ai Reference Trigger Signal
The sample counter for posttrigger samples does not start decrementing until the AI Reference Trigger pulse has occurred. Figure 3-5. Typical Pretriggered DAQ Sequence AI Start Trigger Don't Care AI Reference Trigger AI Sample Clock Sample Counter © National Instruments | 3-7... -
Page 25: Using A Digital Source
Chapter 3 Acquiring Analog Input To take a pretriggered acquisition, specify a buffer of finite size and a number of pretrigger samples (samples that occur before the reference trigger). The number of posttrigger samples (samples that occur after the reference trigger) desired is the buffer size minus the number of pretrigger samples. -
Page 26: Using An Analog Source
Figure 3-7. Halt (Internal Clock) and Free Running (External Clock) T – A AI Sample Clock AI Pause Trigger Halt. Used on Internal Clock AI External Sample Clock AI Sample Clock AI Pause Trigger Free Running. Used on External Clock © National Instruments | 3-9... -
Page 27: Using A Digital Source
Note Clock Generation and Routing The clock generation and routing circuity creates the main timing signals for your PXIe-4310 module. All internally generated analog input timing signals are derived from these main timing signals. The clock generation and routing subsystem also allows you to synchronize the clocking of multiple measurement devices in a PXI Express chassis. -
Page 28: Reference Clock
The 10 MHz reference clock is generated by dividing down the onboard 100 MHz oscillator. The 10 MHz RefClk can be used to synchronize other devices to the PXIe-4310 module. The 10 MHz RefClk can be routed to the PXI_Trig <0..7> terminals. Other devices connected to the PXI_Trig bus can use this signal as a clock input. -
Page 29: Pxie_Sync100
Chapter 3 Acquiring Analog Input PXIe_SYNC100 PXIe_SYNC100 is a common, low-skew 10 MHz reference clock with a 10% duty cycle for synchronization of multiple modules in a PXI Express measurement or control system. The PXI Express backplane is responsible for generating PXIe_SYNC100 independently to each peripheral slot in a PXI Express chassis. -
Page 30: Pxie_Dstar
The master module routes its 10 MHz RefClk to one of the PXI_Trig <0..7> signals. All modules (including the master module) then use the 10 MHz RefClk as an external reference clock source. © National Instruments | 3-13... - Page 31 Sharing a trigger between multiple devices using PXI trigger lines introduces skew in the trigger signal, due to the propagation delay of the signal. The PXIe-4310 can compensate for that skew by locking the trigger to a clock (PXIe_SYNC100) that is derived from the reference clock (PXIe_CLK100).
-
Page 32: Triggering
PXIe-4310 User Manual Triggering The following sections provide details about analog and digital triggering of the PXIe-4310 module. Analog Edge Triggering For analog edge triggering, configure the device to detect a certain signal level and slope, either rising or falling. Figure 3-10 shows an example of rising edge analog triggering. The trigger asserts when the signal starts below level and then crosses above level. -
Page 33: Window Triggering
Chapter 3 Acquiring Analog Input When using hysteresis with a falling slope, the trigger is armed when the signal starts above Level, plus the hysteresis value, and asserts when the signal crosses below Level. For example, if you add a hysteresis of 1 V to a level of 3.2 V, the signal must start at or rise above 4.2 V to arm the trigger. -
Page 34: Digital Input Triggering
PXIe-4310 User Manual Digital Input Triggering You can configure the PXIe-4310 device to start or pause an acquisition in response to a digital trigger signal from either PFI <0, 1>, PXIe_DSTAR <A, B>, PXI_Trig <0..7>, or PXI_STAR. The trigger circuit can respond to a rising, falling, or level sensitive signal, in one of the following three modes: •... -
Page 35: Accessories
This section describes the accessories available for the PXIe-4310 module. TB-4310 (10V)/TB-4310 (600V) Accessory The TB-4310 (10V)/TB-4300 (600V) terminal blocks provide screw terminal connectivity for the PXIe-4310. The TB-4310 (600V) provides 60x attenuation to the input signal voltage to expand the input range of the PXIe-4310 to 600V. •... -
Page 36: Accessory Power
Accessories Accessory Power The PXIe-4310 provides auxiliary power for accessories connected to the module and has protection in the event of a fault condition. If a fault occurs in the form of an over-power condition, the power supply latches off until it is reset. To reset after a fault condition perform a Device Reset in MAX or programmatically in your Application Development Environment (ADE). -
Page 37: Ni Services
System Integration—If you have time constraints, limited in-house technical resources, or • other project challenges, National Instruments Alliance Partner members can help. To learn more, call your local NI office or visit ni.com/alliance © National Instruments | A-1... - Page 38 Appendix A NI Services Training and Certification—The NI training and certification program is the most • effective way to increase application development proficiency and productivity. Visit for more information. ni.com/training – The Skills Guide assists you in identifying the proficiency requirements of your current application and gives you options for obtaining those skills consistent with your time and budget constraints and personal learning preferences.
Need help?
Do you have a question about the PXIe-4310 and is the answer not in the manual?
Questions and answers