Avaya B199 Installing And Administering
Hide thumbs
Also See for B199:
- Manual (64 pages) ,
- Quick manual (11 pages) ,
- Quick reference manual (5 pages)

Related Manuals for Avaya B199


Summary of Contents for Avaya B199
- Page 1 Installing and Administering Avaya Conference Phone B199 Release 1.0.4 Issue 2 February 2021...
- Page 2 APPLICABLE AVAYA AFFILIATE (“AVAYA”). such modifications, additions, or deletions were performed by or on the express behalf of Avaya. End User agrees to indemnify and hold Avaya grants You a license within the scope of the license types harmless Avaya, Avaya's agents, servants and employees against all...
- Page 3 INFORMATION FOR H.264 (AVC) AND H.265 (HEVC) CODECS written consent of Avaya can be a criminal, as well as a civil offense MAY BE OBTAINED FROM MPEG LA, L.L.C. SEE HTTP:// under the applicable law.
- Page 4 • Please only use the connecting cables, power cord, and U.S. Federal Communications Commission (FCC) Statements AC adapters shipped with the equipment or specified by Avaya to be used with the equipment. If you use any Compliance Statement other equipment, it may cause failures, malfunctioning, The changes or modifications not expressly approved by the party or fire.
- Page 5 By using the Avaya device you agree that Avaya, from time to time, harmful interference to radio communications. However, there is no may collect network and device data from your device and may use guarantee that interference will not occur in a particular installation.
-
Page 6: Table Of Contents
Viewing the IP address .................... 25 Setting a static IP address ........ 26 Logging in to the web interface of Avaya Conference Phone B199 .............. 27 Logging out from Avaya Conference Phone B199 ................ 27 Registering an account on the phone .............. - Page 7 Converting the certificates to .PEM format .................... 74 Standard encryption algorithms .................. 75 Standard encryption for 802.1x .............. 76 Enabling EAP MD5 for 802.1x on the phone February 2021 Installing and Administering Avaya Conference Phone B199 Comments on this document? infodev@avaya.com...
- Page 8 .................. 107 Importing the configuration file ................. 107 Validation and migration of configuration ...................... 108 Device Management .................... 109 Device Enrollment Services .............. 110 Device Enrollment Services enrollment code February 2021 Installing and Administering Avaya Conference Phone B199 Comments on this document? infodev@avaya.com...
- Page 9 Contents .... 110 Provisioning Avaya Conference Phone B199 using Device Enrollment Services .................. 111 Starting automatic provisioning ................. 111 Device Enrollment Services error prompt ................ 112 Disabling Device Enrollment Services .............. 112 Firmware downgrade with DES provisioning ............ 113 Configuring Device Management settings on the phone ........ 113...
-
Page 10: Chapter 1: Introduction
Chapter 1: Introduction Purpose This document provides checklists and procedures for installing, configuring, and administering Avaya Conference Phone B199. It is intended primarily for implementation engineers and administrators. Change history Issue Date Summary of changes Release 1.0.4 February 2021 • Updated... - Page 11 123 to the Device Management section. • Added a note in Factory reset on page 125 on Device Enrollment Services feature behavior after factory reset. February 2021 Installing and Administering Avaya Conference Phone B199 Comments on this document? infodev@avaya.com...
-
Page 12: Chapter 2: Overview
Chapter 2: Overview Phone overview Avaya Conference Phone B199 is a SIP conference phone that you can use to make calls and hold conferences with a great audio quality. It provides an improved user experience and ensures an easier connection to audio conference bridges. The phone is based on a multi-connectivity platform to leverage the “Bring your own device”... - Page 13 Important: In case B199 Conference Phone and the corresponding accessories are damaged, the device does not operate normally or exhibits a distinct change in performance, refer for servicing to the qualified service personnel.
-
Page 14: Physical Layout
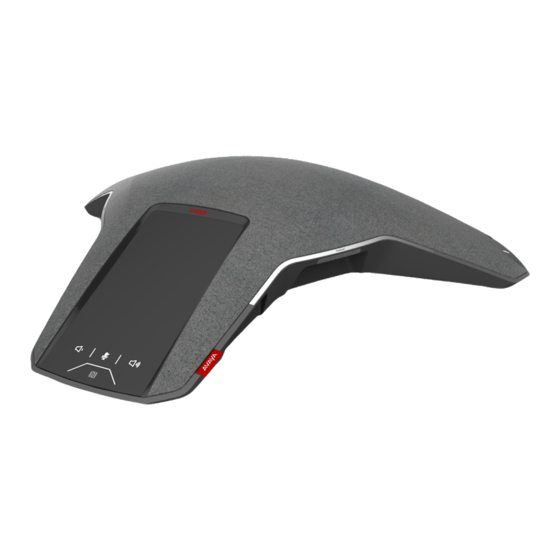
Overview Physical layout Figure 1: Front view of Avaya Conference Phone B199 The following table lists the buttons and the other elements of Avaya Conference Phone B199. Callout number Description Mute buttons Volume down button Volume up button NFC tag... -
Page 15: Connection Layout
Connection layout Connection layout Figure 2: Connection layout of Avaya Conference Phone B199 The following table lists the sockets and ports available on Avaya Conference Phone B199 for connection. Callout number Description PoE/Ethernet connection socket USB Type A Micro-USB Type B Audio expansion ports ®... -
Page 16: Icons
Width 326.41 mm Length 369.87 mm Height 74.7 mm Icons Icons on the home screen of Avaya Conference Phone B199 Icon Name Description Recent To check the call list. The phone provides the following information about the calls: • Number. View the phone number of the contact. - Page 17 Logged In To indicate that the user logged in as the administrator. Microphone Muted To indicate that the phone is in muted state. Table continues… February 2021 Installing and Administering Avaya Conference Phone B199 Comments on this document? infodev@avaya.com...
- Page 18 USB Connected To indicate an active USB connection. ® ® Avaya Conference To show the connection of the phone to Avaya Conference Assistant. Assistant connected Daisy Chain Mode To indicate that the phone is in a daisy chain mode. Loading To show that the phone is loading the new version of the firmware or new setting from DES server.
-
Page 19: Prerequisites
Prerequisites Avaya Conference Phone B199 is based on a multi-connectivity platform to support the “Bring your own device” use case. Connect your B199 Conference Phone to a SIP server using the Ethernet. The following table describes the tasks you must perform before setting up your B199:... -
Page 20: Power Supply Connectivity
Power supply connectivity Avaya Conference Phone B199 uses 10/100/1000 Mbit Ethernet and supports PoE Type 1 and Type 2 power supply, which means either 15W or 30W at the power distribution unit. Operation modes: • PoE 802.3af 15W •... - Page 21 The app is available for free at AppStore and Google Play ® Operation environment • Avaya Aura • IP Office Table continues… February 2021 Installing and Administering Avaya Conference Phone B199 Comments on this document? infodev@avaya.com...
- Page 22 Overview Name Description Interoperability with PBX and • Broadsoft platforms • Zang Office • Ring Central February 2021 Installing and Administering Avaya Conference Phone B199 Comments on this document? infodev@avaya.com...
-
Page 23: Chapter 3: Initial Setup And Configuration
Avaya Conference Phone B199 officially supports only the Google Chrome browser. The administrator can always change the administrator password. By default, the administrator password is not set. You must set it when you first activate B199 Conference Phone or after you reset the phone to the factory settings. -
Page 24: Setting Up A Dhcp Server
The phone reboots. Setting up a DHCP server About this task Avaya Conference Phone B199 supports any DHCP server software as long as the software is correctly configured. Before you begin Contact your server software vendor to obtain server software installation and configuration instructions. -
Page 25: Viewing The Ip Address
Viewing the IP address About this task View the IP address of your Avaya Conference Phone B199. Use this address to log into the web interface of the conference phone and manage the settings in the device through the web browser. -
Page 26: Logging In To The Web Interface Of Avaya Conference Phone B199
Logging in to the web interface of Avaya Conference Phone B199 About this task Use this procedure to log in to the web interface of your B199 Conference Phone. You can access the web interface only if you set the administrator password for your phone. -
Page 27: Logging Out From Avaya Conference Phone B199
3. Click Login to log in to the web server of your B199 Conference Phone. Logging out from Avaya Conference Phone B199 About this task Use this procedure to log out from the web server of your B199 Conference Phone from your web browser. Before you begin You must be logged in to the web interface of your conference phone. -
Page 28: Registering An Account Through The Web Interface
6. (Optional) Enter Registration Timeout value in seconds. This is a request to the SIP server that specifies when the registration must expire. B199 Conference Phone automatically renews the registration within the set period if the phone is still on and connected to the server. - Page 29 3. Enable Keep Alive. 4. (Optional) Repeat Steps above for the secondary and fallback accounts. 5. Click Save. The phone restarts the application to apply the changes. February 2021 Installing and Administering Avaya Conference Phone B199 Comments on this document? infodev@avaya.com...
-
Page 30: Chapter 4: Registration In The Network
Chapter 4: Registration in the network Registration in the Avaya network You must register Avaya Conference Phone B199 in the Avaya network to use all communication solutions available. Registration starts with creating a communication profile for the phone with an ®... - Page 31 The screen displays a new user profile. 3. Configure the settings in the Identity tab. a. In the Last name field, type your last name or Avaya as the brand name for the phone. b. In the First name field, type your first name or the phone model.
-
Page 32: Configuring The Avaya Aura Communication Manager Profile
About this task ® Use this procedure to configure the station associated with the Avaya Aura Communication Manager endpoint profile of the phone. You must do it to use the conference features of Avaya Conference Phone B199. Before you begin ®... -
Page 33: Ip Office Call Limitation For Avaya Conference Phone B199
To install the phone on an IP Office system, follow the ‘Generic Installation Process’ outlined in the IP Office SIP Telephone Installation Notes manual. IP Office call limitation for Avaya Conference Phone B199 With R.1.0.2 and earlier, an attempt to make a call over any trunk fails if an account code is configured in IP Office for such a call. -
Page 34: Chapter 5: Settings Configuration And Management
Configuration of settings on Avaya Conference Phone B199 You can configure almost all settings directly on your B199 Conference Phone. For that you need to navigate through the menu and select the options you need. Using the web interface makes the settings configuration easier. -
Page 35: Configuring The Phone Settings On The Phone
4. Click Save. Phone settings description The following table lists the basic settings of Avaya Conference Phone B199 available through the web interface in the Phone tab or on the phone in Settings > Phone and Settings > Admin Login > Phone. - Page 36 • French • Spanish • Portuguese • Dutch • Simplified Chinese The characters on the B199 keyboard match the selected language for all languages except Simplified Chinese. For Simplified Chinese, B199 uses English keyboard layout. Security Allow Legacy To enable or disable legacy encryption for backward compatibility. By default, Encryption the legacy encryption mode is disabled.
- Page 37 You can use this function only through the web interface. Daisy Chain To choose a mode, in which your B199 Conference Phone operates in case of a daisy chain arrangement. The options are: • Master. This is the default setting.
- Page 38 • Manually enter the date in the field by clicking the day, month, and year to change the value. • Select a date from the date picker. Note: You can use this function only through the web interface. Table continues… February 2021 Installing and Administering Avaya Conference Phone B199 Comments on this document? infodev@avaya.com...
- Page 39 • yyyy/mm/dd - Full numerical designation of the year/month/date. For example, 2020/01/10. You can also leave the Default format of the date. In this case your B199 Conference Phone applies the date format that is standard for the selected language. For example, if your selected language is Finnish, the date format is dd.mm.yyyy.
- Page 40 To enable or disable the Daylight Saving Time (DST) mode based on the DST) selected geographical timezone. By default, DST is disabled. Note: You can use this function only through the web interface. Table continues… February 2021 Installing and Administering Avaya Conference Phone B199 Comments on this document? infodev@avaya.com...
- Page 41 To save changes on the phone, you must return to the home screen, and the phone restarts the application or reboots to apply them. February 2021 Installing and Administering Avaya Conference Phone B199 Comments on this document? infodev@avaya.com...
-
Page 42: Daylight Saving Time
Settings configuration and management Daylight Saving Time Together with the UTC timezones, B199 Conference Phone supports the Daylight Saving Time (DST) feature, which advances the clock during the specified period of time. Activate this feature manually through the web interface by enabling Custom DST. The Custom DST settings card provides for defining a required transition date. -
Page 43: Daylight Saving Time State
Minute offset B199 Conference Phone supports the minute offset of the specified UTC time zone. You can set the UTC time zone offset to 0, 15, 30, or 45 minutes. Configuring the minute offset through the web interface About this task Use this procedure to configure the minute offset through the web interface. -
Page 44: Configuring The Minute Offset Using The Configuration File
Configuration file on page 98 Time format B199 Conference Phone supports various time formats so that the user get the convenient time presentation. The following values are available for the time format parameter: • hh:mm - B199 Conference Phone shows time using the 24-hour clock approach. -
Page 45: Configuring The Time Format Using The Configuration File
98 Provision of the NTP server address Use DHCP option 42 to provide NTP server address to Avaya Conference Phone B199 when using 802.1x certificates. In this case, you must have DHCP enabled on the phone to display the accurate time received from this NTP server address. -
Page 46: Sleep Mode
Settings configuration and management Sleep mode B199 Conference Phone supports the sleep mode feature, which saves power by turning the screen off after a specified period of inactivity. By default, the sleep mode is in disabled state. The phone administrator can enable the sleep mode and configure the time-out value. -
Page 47: Network Settings
• VLAN ID • LLDP • 802.1x • SIP DiffServ • Media DiffServ You can configure the network settings on the phone or through the web interface of B199 Conference Phone. Related links Network settings description on page 48 Configuring the network settings on the phone... -
Page 48: Configuring The Network Settings Through The Web Interface
Settings configuration and management Configuring the Network settings through the web interface About this task Use this procedure to configure the Network settings of your Avaya Conference Phone B199 through the web interface. Procedure 1. Log in to the web interface. - Page 49 Leave the field blank for DHCP default settings. VLAN To enable or disable the Virtual Local Area Network (VLAN). By enabling this option, all communication to and from B199 Conference Phone goes through the specified VLAN. Note: The phone also uses this VLAN to communicate through the web interface.
- Page 50 To specify Emergency Location Identification Number (ELIN). 802.1.x 802.1x slider To enable or disable 802.1x. When enabled, B199 Conference Phone asks an authentication server for permission when connected to the LAN. Authentication Name To specify your name in the network.
-
Page 51: Lldp Data Units
To specify the password for encryption of the private key when using TLS. LLDP Data Units When Avaya Conference Phone B199 uses LLDP, it sends the information as LLDP Data Units. Each LLDP Data Unit is a sequence of Time-Length-Value (TLV) strings. - Page 52 REVISION SOFTWARE REVISION = VALUE ORGANIZATION EXTENDED OUC = 00-12-BB; AVAILABLE SPECIFIC POWER-VIA-MDI PARAMETERS = POWER TYPE, POWER SOURCE, POWER PRIORITY, POWER VALUE BASIC MANDATORY END-OF-LLDPU February 2021 Installing and Administering Avaya Conference Phone B199 Comments on this document? infodev@avaya.com...
-
Page 53: Media Settings
Media settings description on page 54 Configuring the media settings on the phone About this task Use this procedure to configure the media settings of your Avaya Conference Phone B199 on the phone. Before you begin Log in as the administrator. -
Page 54: Media Settings Description
Settings configuration and management Media settings description The following table lists the media settings of Avaya Conference Phone B199 available through the web interface in the Media tab or on the phone in Settings > Media. Note: Starting from Release 1.0.1, the SRTP, SRTCP, and Capability Negotiation settings are not supported on B199 phones sold in Russia, Belarus, Kazakhstan, Kyrgyzstan, and Armenia to meet local restrictions on the use of encryption. -
Page 55: Voice Quality Monitoring
After you click Save, the phone saves the changes and restarts application. Voice quality monitoring Configure Avaya Conference Phone B199 to generate quality metrics and evaluate the overall quality of the calls. You can use this information to troubleshoot various quality aspects of the phone calls. -
Page 56: Quality Estimate Metrics
The following table shows the direct measures of the quality of the established call or transmission. These metrics incorporate the effects of codec type, packet loss, discard, burstiness, and delay. February 2021 Installing and Administering Avaya Conference Phone B199 Comments on this document? infodev@avaya.com... -
Page 57: Analog Parameters
Configuring RTCP XR About this task By default, the voice quality monitoring feature on Avaya Conference Phone B199 is disabled. To use this feature, enable it and specify the Uniform Resource Identifier (URI) of the RTCP XR collector. You can do this on the phone, through the phone web interface, or using the configuration .xml file. - Page 58 5. Import the configuration file to the phone through the web interface or to the provisioning server to configure several phones simultaneously. Related links Exporting the configuration file on page 107 Device Management on page 108 February 2021 Installing and Administering Avaya Conference Phone B199 Comments on this document? infodev@avaya.com...
-
Page 59: Ldap Settings
An LDAP database can contain thousands of contacts. To facilitate the search through the directory server, Avaya Conference Phone B199 has a built-in search function, which filters the content from the LDAP database, based on the search parameters that you enter. - Page 60 By default, this setting is enabled. Max hits To specify the maximum number of hits to return for each LDAP search. The default value is 20. Table continues… February 2021 Installing and Administering Avaya Conference Phone B199 Comments on this document? infodev@avaya.com...
- Page 61 To restrict the external prefix that the phone adds only if the phone number is prefix longer than the minimum length. This allows to use short internal numbers. The default setting is 0. Table continues… February 2021 Installing and Administering Avaya Conference Phone B199 Comments on this document? infodev@avaya.com...
-
Page 62: Configuring The Ldap Number Attributes Through The Web Interface
If complete information is unavailable, you can configure only the known parameters. Configuring the LDAP number attributes through the web interface About this task Configure the LDAP number attributes through the web interface of your Avaya Conference Phone B199. Procedure 1. Log in to the web interface. -
Page 63: Configuring The Ldap Number Attributes Using A Configuration File
LDAP server. Configuring the LDAP number attributes using a configuration file About this task Configure the LDAP number attributes by using a configuration file for your Avaya Conference Phone B199. Before you begin To configure the LDAP number attributes you need to do the following: •... -
Page 64: Sip Settings
• Transport Layer Security (TLS) • Advanced SIP settings • DTMF • NAT Traversal The SIP settings can be configured on the phone or through the web interface of B199 Conference Phone. Configuring the SIP settings on the phone About this task Use this procedure to configure the SIP settings of your Avaya Conference Phone B199 on the phone. -
Page 65: Sip Settings Description
The phone restarts the application to apply the changes. SIP settings description The following table lists the SIP setting of Avaya Conference Phone B199 available through the web interface in the SIP tab or on the phone in Settings > SIP. - Page 66 Verify Server To enable or disable Verify Server. The options are: • Yes: When B199 Conference Phone is acting as a client for outgoing connections with secure SIP, it always receives a certificate from the peer. If you select this, the phone ends the connection in case of a non-valid server certificate.
- Page 67 Registration Timeout To specify the time when the registration of the primary account expires and the SIP server is sent a corresponding request. B199 Conference Phone automatically renews the registration within the time interval if the phone is still on and connected to the server. The default value is 300 seconds.
- Page 68 To specify the time when the registration of the fallback account expires and the SIP server is sent a corresponding request. The default value is 300 seconds. DTMF Table continues… February 2021 Installing and Administering Avaya Conference Phone B199 Comments on this document? infodev@avaya.com...
- Page 69 SIP server does not support other DTMF signalling methods. Note: When RFC 4733 is configured as the DTMF method on B199 Conference Phone, but other party does not accept such method, the phone falls back into using the In-band method.
-
Page 70: Caller Information Presentation
After you click Save, the phone saves the changes and restarts application. Caller information presentation B199 Conference Phone displays the information about the calling person to show who is calling or demonstrate that the caller ID is unknown. This data is available on the Incoming Call, Active Call and Recent Call List screens. -
Page 71: Certificates Application
For example, when B199 Conference Phone receives the SIP invite message From: "John Doe" <sip:1234@192.168.1.4> , John Doe is the CNAM and 1234 is the CID. The following table lists the information on the screen, which B199 Conference Phone displays, depending on the parameters the server provides:... -
Page 72: Downloading The Root Certificate
In Key Size, specify 1024. g. Select Automatic key container name. h. Select Mark keys as exportable. i. Select Enable strong private key protection. j. In Request Format, select PKCS10. February 2021 Installing and Administering Avaya Conference Phone B199 Comments on this document? infodev@avaya.com... -
Page 73: Installing The Certificate
Procedure 1. Click Settings > Advanced > Privacy and security > Manage certificates. 2. In the Certificates window, select the certificate to export and click Export. February 2021 Installing and Administering Avaya Conference Phone B199 Comments on this document? infodev@avaya.com... -
Page 74: Converting The Certificates To .Pem Format
7. Click Finish. Converting the certificates to .PEM format About this task Use this procedure to convert the certificates for the phone to .PEM format. Avaya Conference Phone B199 supports certificates in the .PEM format only. Procedure 1. Use the following Openssl commands to convert the files: a. -
Page 75: Standard Encryption For 802.1X
• Media encryption with SRTP • 802.1x Standard encryption for 802.1x You can configure Avaya Conference Phone B199 to allow 802.1x authentication to use EAP MD5 method. If you need to use EAP MD5 method for 802.1x, ensure that you set the Allow Legacy Encryption option to true. -
Page 76: Enabling Eap Md5 For 802.1X On The Phone
EAP MD5 requires Allow Legacy Encryption to be enabled. Procedure 1. Log in as the administrator. 2. Choose the Network tab. February 2021 Installing and Administering Avaya Conference Phone B199 Comments on this document? infodev@avaya.com... -
Page 77: Standard Encryption For Media Encryption With Srtp
78 Standard encryption for media encryption with SRTP When the key exchange for media encryption with SRTP occurs, Avaya Conference Phone B199 supports the AES_256_CM_HMAC_SHA1_80 mandatory crypto. Some servers do not support this mandatory crypto. In this case you must enable the Allow Legacy Encryption option to make an SRTP call. -
Page 78: Configuring The Legacy Encryption Mode Through The Web Interface
Use this procedure to configure the legacy encryption mode of your Avaya Conference Phone B199 using the .xml configuration file. When you boot the phone after successful provisioning, the setting file changes, depending on the configuration of the standard encryption use. - Page 79 Standard encryption algorithms Before you begin Get the configuration .xml file for Avaya Conference Phone B199. Procedure 1. Open the configuration file. 2. In the <phone> section, locate <allow_legacy_encryption> tag and set the value to true. By default, the value is false.
-
Page 80: Chapter 6: Features And Accessories
Chapter 6: Features and accessories ® Avaya Conference Assistant You can manage your Avaya Conference Phone B199 from a mobile phone or a tablet if you have ® ® Avaya Conference Assistant installed on the device. Download and install Avaya Conference Assistant free from App Store and Google Play like any other application. -
Page 81: Disconnecting Devices
® Avaya Conference Assistant Important: You can pair up to 100 mobile phones or tablets with your B199 Conference Phone. But only one user connection is active at a time. Before you begin ® Install Avaya Conference Assistant on your mobile device. -
Page 82: Deleting Pairing
Features and accessories Before you begin ® Ensure that B199 Conference Phone is connected to a mobile device with Avaya Conference Assistant installed. • To disconnect from the mobile device, do the following: ® 1. In Avaya Conference Assistant, tap the connection symbol in the upper left corner of the screen. -
Page 83: Configuring The Avaya ® Conference Assistant Settings
The phone displays a connection symbol on the screen. 3. Tap Settings and proceed with configuration. ® Avaya Conference Assistant settings The following table lists the parameters for Avaya Conference Phone B199, which you can set ® from the Avaya Conference Assistant interface: Name... -
Page 84: Expansion Of The Phone Coverage
Assistant Expansion of the phone coverage Use your Avaya Conference Phone B199 on larger conference tables or when the number of a meeting participants is greater than 10. In this case you can ensure high-level quality of audio signal by expanding the phone coverage in the room without a PA system. Do it by connecting Smart Mic expansion microphones to the phone or by cascading several B199 devices in a daisy chain. -
Page 85: Arranging A Daisy Chain
Expansion of the phone coverage daisy chain is 3. One B199 phone acts as a central device (a “master”) and one or two other units act as expansion devices (“slaves”). The typical arrangements when the phone’s coverage is expanded are the following: •... -
Page 86: Defining The Mode Of The Phone
Defining the mode of the phone About this task Use this procedure to define the mode of your Avaya Conference Phone B199 in a daisy chain. • To define the mode of your B199 on the phone, do the following: 1. -
Page 87: Disabling The Daisy Chain Mode
The phone suggests an automatic upgrade of the expansion microphone firmware when you connect your Smart Mic to B199. You can connect one or two Smart Mics simultaneously. You can also initiate the expansion microphone firmware upgrade manually. If you connect the expansion microphone to Avaya Conference Phone B199 during an active call, the upgrade does not start until the call ends. -
Page 88: Expansion Microphone And Conference Phone Firmware Upgrade
The phone displays the Upgrade in progress message and shows the upgrade progress in percentage (0%-100%). When you connect one Smart Mic to B199, the phone shows the upgrade status for Smart Mic 2 as N/A. Smart Mic 1: 10% Smart Mic 2: N/A 3. -
Page 89: Upgrading Two Expansion Microphones
Result When the upgrade is complete for Smart Mic 1 and Smart Mic 2 is still upgrading, the LED turns off on Smart Mic 1, and Avaya Conference Phone B199 displays the following message: Upgrade in progress Smart Mic 1: Done... -
Page 90: Terminating Expansion Microphone Upgrade
Conference Phone B199 displays the following message: Upgrade in progress Smart Mic 1: 50% Smart Mic 2: Failed When Smart Mic 1 upgrade is complete, its LED turns off, and Avaya Conference Phone B199 displays the following message: Upgrade in progress Smart Mic 1: Done Smart Mic 2: Failed This message disappears in 10 seconds. -
Page 91: Bluetooth Connection
Conference Assistant. Switching between the Bluetooth modes The default mode is Bluetooth LE. To switch to Bluetooth Classic, you must pair and connect B199 Conference Phone to a Bluetooth device. When you select the Bluetooth Classic mode, the phone turns off Bluetooth LE. If there is no Bluetooth Classic connection, the phone switches back to Bluetooth LE after a timeout. -
Page 92: Bluetooth Classic Profiles
You can connect only one device supporting Bluetooth at a time. Procedure 1. On the B199 Conference Phone screen, tap Settings > Bluetooth > Pair with device. The LEDs start flashing blue, and the phone displays the following message: This phone is now discoverable as “<Phone Name>”. -
Page 93: Removing Bluetooth Pairing
Tap Cancel to cancel pairing, for example, if you do not want to make the phone discoverable. In this case, you return to the Bluetooth menu. 2. On your Bluetooth device, find B199 Conference Phone in the list of devices available for Bluetooth connection and tap the phone name. -
Page 94: Connection Between Paired Bluetooth Devices
Disconnected and then stops displaying the Bluetooth icon. Reconnection You can reconnect your Bluetooth device to B199 Conference Phone if the two devices are in a paired state. You can reconnect B199 Conference Phone to the paired Bluetooth device only from the paired Bluetooth device. - Page 95 3. Save and import the configuration file. The phone restarts the application. Related links Importing the configuration file on page 107 Configuration file on page 98 February 2021 Installing and Administering Avaya Conference Phone B199 Comments on this document? infodev@avaya.com...
-
Page 96: Chapter 7: Maintenance
Chapter 7: Maintenance Provisioning on Avaya Conference Phone B199 To ensure effective operation of your Avaya Conference Phone B199, you can upload to the phone the latest firmware version with the software update packages and configuration file with the necessary settings. You can upgrade and configure a single phone or multiple phones simultaneously. -
Page 97: Firmware Upgrade Using Check-Sync
The name of the chosen file is near the Choose file button. 4. Click Save. The system displays the upgrade in the browser window and on the screen of B199 Conference Phone. Note that the phone must be in the idle state. If the phone is not in the idle state, you see the following message on the web interface: Phone is currently in “Busy”... -
Page 98: Configuration File
Event: check-sync;reboot=true Event: check-sync;reboot=false If the reboot value is true, Avaya Conference Phone B199 will reboot regardless of any firmware upgrades or new configuration files available. The phone applies the new configuration of firmware before the forced reboot. If the reboot value is false or not defined, the phone restarts the application, reboots, or does nothing depending on the requirements of the firmware upgrade or new configuration parameters in the configuration file. - Page 99 To specify the internet Low Bitrate Codec (iLBC) codec settings. <prio> To specify the codec priority (0–6). <mode> To specify the frame length in ms. Table continues… February 2021 Installing and Administering Avaya Conference Phone B199 Comments on this document? infodev@avaya.com...
- Page 100 To specify the optional interval for registration in seconds. If zero, the phone uses the default interval. The default setting is 300. <secondary_account> To specify the secondary account settings. Table continues… February 2021 Installing and Administering Avaya Conference Phone B199 Comments on this document? infodev@avaya.com...
- Page 101 The default setting is 300. <source_port> To specify the source port to listen to. <transport_protocol> To specify the transport protocol which the phone must use. Table continues… February 2021 Installing and Administering Avaya Conference Phone B199 Comments on this document? infodev@avaya.com...
- Page 102 To specify whether ICE is configured for the phone. <enable> To specify whether ICE is enabled. <stun> To specify whether STUN is configured for the phone. Table continues… February 2021 Installing and Administering Avaya Conference Phone B199 Comments on this document? infodev@avaya.com...
- Page 103 To specify Domain Name Server (DNS) 1 of the phone. <dns2> To specify DNS 2 of the phone. You can use maximum two DNS. <static_ip> To specify the static IP settings. Table continues… February 2021 Installing and Administering Avaya Conference Phone B199 Comments on this document? infodev@avaya.com...
- Page 104 To specify the trailing street suffix. <street_suffix> To specify the street suffix. <number> To specify the number of the building where the phone is located. Table continues… February 2021 Installing and Administering Avaya Conference Phone B199 Comments on this document? infodev@avaya.com...
- Page 105 To select the DHCP option used for the Device Management server address. <des> To specify the Device Enrollment Services settings. <des_stat> To specify user setting of DES enablement. Table continues… February 2021 Installing and Administering Avaya Conference Phone B199 Comments on this document? infodev@avaya.com...
- Page 106 To specify the minimum allowed TLS version. The default setting is 1.2. To enable support of TLS v.1.0 and TLS v.1.1, set the value to all. February 2021 Installing and Administering Avaya Conference Phone B199 Comments on this document? infodev@avaya.com...
-
Page 107: Exporting The Configuration File
Exporting the configuration file About this task Use this procedure to export the configuration file from your Avaya Conference Phone B199. Before you begin Decide where the exported configuration file will be saved. By default, it is saved in the folder for downloaded files on your PC. -
Page 108: Device Management
Configuration validation B199 Conference Phone validates compatibility of the configuration with the firmware against an xml schema file based on the configuration file version. Starting from Release 1.0.1, a configuration file has a version number attribute. The phone application compares the configuration file version to the firmware version running on the phone to determine the migration steps required to make the configuration file consistent with the firmware. -
Page 109: Device Enrollment Services
The Device Enrollment Services feature works only if a provisioning server is configured in the Avaya DES for the MAC address of your B199 Conference Phone. The manufacturer starts the device setup by entering the device details, such as certificate information, MAC address, and... -
Page 110: Device Enrollment Services Enrollment Code
• Tap Yes to start automatic provisioning with DES. B199 Conference Phone contacts the DES server. The DES server redirects the phone to the configured file server from which the phone receives all the configuration parameters and the upgrade file for installation. -
Page 111: Starting Automatic Provisioning
Starting automatic provisioning About this task You can start automatic provisioning with the Device Enrollment Services (DES) server manually from either the DES menu on Avaya Conference Phone B199 or the phone web interface. Procedure 1. Log in as the administrator. -
Page 112: Disabling Device Enrollment Services
• Never: To not send the report and to remove the DES warning icon. Note: With R.1.0.2 and earlier, B199 Conference Phone does not have the reporting feature. Therefore, the phone does not send the report when you choose Yes. -
Page 113: Configuring Device Management Settings On The Phone
The phone reboots to apply the changes. Device Management settings The following table lists the Device Management settings of Avaya Conference Phone B199 available through the web interface in the Provisioning tab in the Device Management section or on the phone in Settings > Device Management. - Page 114 • Off: Server certificates are not checked. This is the default setting. Lowest TLS Version To specify the lowest TLS version for the phone. The options are: • 1 • 1.1 • 1.2 Table continues… February 2021 Installing and Administering Avaya Conference Phone B199 Comments on this document? infodev@avaya.com...
-
Page 115: Files On The Provisioning Server
• Firmware file • Firmware metadata file • Global configuration file • Device-specific configuration file (optional) • Global certificate configuration file • Device-specific certificate configuration file (optional) February 2021 Installing and Administering Avaya Conference Phone B199 Comments on this document? infodev@avaya.com... -
Page 116: Global Configuration File
The default name for this file is avayab199.xml. Instead of the .xml file format, you can also use cgi, php, asp, js, or jsp file formats. B199 Conference Phone first searches for the configuration file in .xml format. If the phone fails to find the .xml file on the provisioning server, it searches for the configuration file in other formats... -
Page 117: Device-Specific Configuration File
The default name for this file is avayab199-<MAC>.xml, where <MAC> is the MAC address of the specific phone. Instead of the .xml file format, you can also use cgi, php, asp, js, or jsp file formats. B199 Conference Phone first searches for the configuration file in .xml format. If the phone cannot find the .xml file on the provisioning server, it searches for the configuration file in the other formats. - Page 118 Note: The phone starts downloading the certificate if the MD5 hash value is different from the MD5 hash of the certificate file that Avaya Conference Phone B199 stores or if no certificate has February 2021 Installing and Administering Avaya Conference Phone B199...
-
Page 119: Certificate Configuration File Structure
SIP connection. <privkey_uri> To specify the path to get the private key for the SIP connection. Table continues… February 2021 Installing and Administering Avaya Conference Phone B199 Comments on this document? infodev@avaya.com... - Page 120 <privkey_hash algo="md5"> connection to the LDAP server. The following is the example of the certificate configuration file for Avaya Conference Phone B199. Note that it contains only 2 out of 4 sections. <certificates>...
-
Page 121: Firmware Binary
Firmware binary This file contains the firmware binary that is downloaded and installed by Avaya Conference Phone B199 if the metadata file shows that it is newer than the currently installed version. The binary file can be downloaded from http://support.avaya.com/. -
Page 122: Upgrading Multiple Devices
Upgrading multiple devices About this task You can upgrade firmware on multiple Avaya Conference Phone B199 devices using Device Management instead of upgrading each phone individually. For this purpose, Device Management must be enabled for the devices, the provisioning server must be specified for the devices, and the firmware binary file and the firmware metadata file must be available on the provisioning server. -
Page 123: Configuring Multiple Devices
Configuring multiple devices About this task You can configure multiple Avaya Conference Phone B199 devices using the configuration file as a management tool instead of configuring the settings on each phone individually. For this purpose, you need to export the configuration file, edit the settings as necessary, and then place the configuration file to the provisioning server. -
Page 124: Configuring Remote Syslog Settings
With the remote syslog feature enabled, the phone sends the syslog messages to the syslog server and also logs them in the local log. By default, the remote logging feature on B199 Conference Phone is in the disabled state. Configuring remote syslog settings... -
Page 125: Fall Back Server Support
Performing factory reset About this task You can reset your Avaya Conference Phone B199 to factory default. You can do the factory reset only on the phone after you log in as the administrator. If you need to perform the factory reset without logging in as the administrator, follow the... -
Page 126: System Recovery
5. (Optional) Tap Cancel to return to the Phone settings. System recovery As an administrator, you can perform system recovery on Avaya Conference Phone B199 to return the phone to operable state, for example, after a faulty upgrade or when the phone application fails. -
Page 127: Web Interface Settings
You can configure this parameter only through the web interface. Important: The phone supports connection to the web interface only through https. The following table shows the web interface settings that you can configure for B199 Conference Phone in the Provisioning tab: Name... - Page 128 Maintenance Section name Description General To show the status information of B199 Conference Phone, including the following: • Phone Name • Product Name • Build Version • HW Revision • Serial Number • Smart Microphone 1 Version • Smart Microphone 2 Version Network To show the information about the network settings of the phone.
-
Page 129: Viewing The Phone Status
You can not change settings in the Status tab. Viewing the phone status About this task Use this procedure to view the status and settings of Avaya Conference Phone B199 through the web interface. Procedure 1. Log in to the web interface. -
Page 130: Viewing System Logs
1. On the web interface, click Network logs. 2. You can do the following: • Click the Reboot Into Network Log Mode button to reboot the phone into the network log mode. February 2021 Installing and Administering Avaya Conference Phone B199 Comments on this document? infodev@avaya.com... -
Page 131: Licenses
• MPL v2.0. This is the simple copyleft Mozilla Public License (MPL) version 2.0. Note: You can get the license information only through the web interface. February 2021 Installing and Administering Avaya Conference Phone B199 Comments on this document? infodev@avaya.com... -
Page 132: Viewing Licenses
Maintenance Viewing licenses About this task Use this procedure to view the status and settings of Avaya Conference Phone B199 through the web interface. Procedure 1. Log in to the web interface. 2. Select the Licenses tab. 3. Select the license that you want to view from the list of licenses available. -
Page 133: Chapter 8: Related Resources
Chapter 8: Related resources Documentation The following table lists related documents, which you can see at http://support.avaya.com: Title Use this document to: Audience Deploying ® ® Administering Avaya Aura System Get an understanding of Avaya Aura Implementation Manager System Manager. -
Page 134: Finding Documents On The Avaya Support Website
• Links to other pertinent information If you are an authorized Avaya Partner or a current Avaya customer with a support contract, you can access the Knowledge Base without extra cost. You must have a login account and a valid Sold-To number. -
Page 135: Viewing Avaya Mentor Videos
Avaya Mentor videos provide technical content on how to install, configure, and troubleshoot Avaya products. About this task Videos are available on the Avaya Support website, listed under the video document type, and on the Avaya-run channel on YouTube. • To find videos on the Avaya Support website, go to https://support.avaya.com/... - Page 136 Avaya support website ............134 structure ................98 configuring the Avaya Aura Communication Manager profile ....................32 configuring the Avaya Aura Session Manager profile ..basic settings ............... configuring the phone ............Bluetooth connecting to a network with DHCP ........audio streaming ............
- Page 137 .................35 phone settings configuration language ................on the phone ..............35 LDAP ................... physical layout ..............configuring number attributes ......... 62, power-saving mode ............. settings ................. February 2021 Installing and Administering Avaya Conference Phone B199 Comments on this document? infodev@avaya.com...
- Page 138 ..............26, SIP invite ................70 logging out ..............SIP NOTIFY .................97 ................23 SIP settings ..............64, configuring settings on the phone .........64 sleep mode ................enabling ................ February 2021 Installing and Administering Avaya Conference Phone B199 Comments on this document? infodev@avaya.com...
Need help?
Do you have a question about the B199 and is the answer not in the manual?
Questions and answers