Table of Contents
Advertisement
Advertisement
Table of Contents

Related Manuals for NZXT KRAKEN X RGB Series


Summary of Contents for NZXT KRAKEN X RGB Series
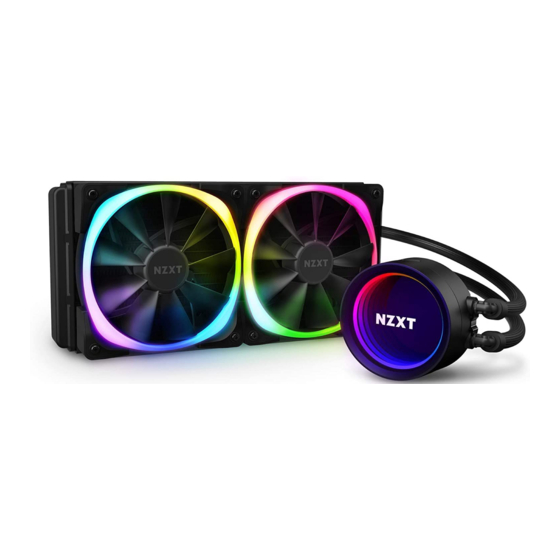
- Page 1 KRAKEN X RGB SERIES LIQ UID C OOLER W ITH RGB FANS...
- Page 2 1. COMPONENTS 4. DOWNLOADING NZXT CAM ........
- Page 3 1. COMPONENTS K R A K E N X R G B S E R I E S A. Kraken X53 / X63 / X73 C. AMD Retention Bracket B. Intel Retention Bracket (Pre-Installed ) D. Intel Backplate...
- Page 4 COMPONENTS K R A K E N X R G B S E R I E S E. Intel Socket 1200/115X/1366 Standoff I. 30MM UNC 6-32 Fan Screw X53 - x16, X63 - x16, X73 - x12 F. Intel Socket 2011/2066 Standoff J.
- Page 5 COMPONENTS K R A K E N X R G B S E R I E S L. Aer RGB Fan O. Fan Splitter Cable X53 - x2 120MM, X63 - x2 140MM, X73 - x3 120MM M. Breakout Cable Set P.
- Page 6 2. PREPARATION K R A K E N X R G B S E R I E S 2.1 Preparation - Intel LGA 1200/115X/1366 2.3 Preparation - AMD ................. 2.2 Preparation - Intel LGA 2011/2066 ......
- Page 7 2.1 PREPARATION - INTEL LGA 1200 /115X/1366 K R A K E N X R G B S E R I E S STEP 1 - PREPARING THE BACKPLATE Move all four sliders on the Intel backplate to the innermost positions for Socket 1200/115X or the outermost positions for Socket 1366.
- Page 8 2.1 PREPARATION - INTEL LGA 1200 /115X/1366 K R A K E N X R G B S E R I E S CORRECT STEP 2 - INSTALLING THE BACKPLATE Install the Intel backplate on the rear of the motherboard as oriented in the picture.
- Page 9 2.1 PREPARATION - INTEL LGA 1200 /115X/1366 K R A K E N X R G B S E R I E S STEP 3 - INSTALLING THE STANDOFFS From the front of the motherboard, install the four Socket 1200/115X/1366 standoffs.
- Page 10 2.2 PREPARATION - INTEL LGA 2011/2066 K R A K E N X R G B S E R I E S STEP 1 - PREPARING THE BACKPLATE From the front of the motherboard, install the four Socket 2011/2066 standoffs.
- Page 11 2.3 PREPARATION - AMD K R A K E N X R G B S E R I E S STEP 1 - PREPARING THE RETENTION BRACKET Remove the stock AMD mounting bracket and keep the original backplate on the rear of the motherboard. FOR SOCKET TR4, PLEASE SKIP TO AMD - STEP 3...
- Page 12 2.3 PREPARATION - AMD K R A K E N X R G B S E R I E S STEP 2 - INSTALLING THE STANDOFFS From the front of the motherboard, install the four AMD standoffs (AM4).
- Page 13 2.3 PREPARATION - AMD K R A K E N X R G B S E R I E S STEP 3 - CHANGING THE RETENTION BRACKET 1. Press and hold the Intel retention bracket firmly towards the pump. 2. Rotate the Intel retention bracket counterclockwise to release. 3.
- Page 14 3. INSTALLATION K R A K E N X R G B S E R I E S 3.1 Installing the Pump - Pump Orientation 3.6 Connecting the Pump Tach ............3.2 Installing the Pump - Intel/AMD AM4 3.7 Connecting the SATA Power Cable ....
- Page 15 K R A K E N X R G B S E R I E S The pump cap has a rotatable upper cap with 12 locking points for NZXT logo orientation. Depending on your motherboard, you can orient the pump’s tube orientation to fit your needs.
- Page 16 3.2 INSTALLING THE PUMP - INTEL/AMD AM4 K R A K E N X R G B S E R I E S SOCKET 1366 / 2011 / 2066 Place the pump with the retention bracket onto the CPU. Ensuring the standoffs go through the holes on the bracket SOCKET 1200/ 115X and securely apply the thumb nuts.
- Page 17 3.3 INSTALLING THE PUMP - AMD TR4 K R A K E N X R G B S E R I E S 46MM Place the pump with the retention bracket onto the CPU. The SocketTR4 screw holes has a short and long side. Ensure the four screws are aligned and tighten the screws in sequence from 1 through 4.
- Page 18 3.4 MOUNTING THE RADIATOR AND FANS K R A K E N X R G B S E R I E S Depending on your radiator mounting setup, please use the appropriate screws to mount the radiators: • DIRECT MOUNTING •...
- Page 19 3.4 MOUNTING THE RADIATOR AND FANS K R A K E N X R G B S E R I E S DIRECT MOUNTING For mounting in which the radiator fits directly onto the case, please install the fan(s) first using the 30mm fan screws and washers.
- Page 20 3.4 MOUNTING THE RADIATOR AND FANS K R A K E N X R G B S E R I E S INDIRECT MOUNTING For mounting in which the fan(s) fit between the radiator and chassis, please use the 30mm fan screws and washers for mounting.
- Page 21 3.5 POWERING THE FANS K R A K E N X R G B S E R I E S You may use the included fan splitter to connect the fans to your motherboard or a fan controller (not included). Please refer to the documentation from the manufacturer on powering the fans.
- Page 22 3.6 CONNECTING THE PUMP TACH K R A K E N X R G B S E R I E S Connect the 3-pin connector on the breakout cable set to the 4-pin CPU_FAN or AIO_PUMP connector on the motherboard. NOTE •...
- Page 23 3.7 CONNECTING THE SATA POWER CABLE K R A K E N X R G B S E R I E S Connect the SATA power cable on the power cable set to the SATA power cable from the power supply.
- Page 24 3.8 CONNECTING THE USB CABLE K R A K E N X R G B S E R I E S Connect the Micro-USB cable from the pump to an available USB 2.0 internal connector on the motherboard.
- Page 25 3.9 CONNECTING RGB LED FOR LIGHTING CONTROL K R A K E N X R G B S E R I E S Check the orientation and connect compatible NZXT RGB devices to the RGB LED connector on the breakout cable.
- Page 26 3.10 CONNECTING THE AER RGB FANS K R A K E N X R G B S E R I E S Connect the fan connection cable to the Aer RGB 2.
- Page 27 3.10 CONNECTING THE AER RGB FANS K R A K E N X R G B S E R I E S To add another fan, connect the 100mm Fan-to-fan cable between the Out port on the first fan and the In port on the next.
- Page 28 Descargue e instale NZXT CAM en nzxt.com/camapp. Téléchargez et installez NZXT CAM depuis nzxt.com/camapp. laden Sie NZXT CAM von nzxt.com/camapp herunter und installieren Sie die Software. Scaricare e installare NZXT CAM da nzxt.com/camapp. Baixe e instale o NZXT CAM de nzxt.com/camapp.
- Page 29 5. APPENDIX K R A K E N X R G B S E R I E S 5.1 NZXT Global Warranty Policy 5.3 Regulatory Notices A-11 ..................5.2 Support and Service 限用物质及元素列表/限用物質及元素清單 A-12 ............... A -1...
- Page 30 5.1 NZXT GLOBAL WARRANTY POLICY K R A K E N X R G B S E R I E S This NZXT Global Warranty Policy governs the sale of products by NZXT to you. I. WARRANTY LENGTH II. WHO IS PROTECTED...
- Page 31 NZXT shall not, in any event, be liable for any incidental or unauthorized product modification or failure to follow instructions included with the product;...
- Page 32 To receive a warranty service for your product when purchased directly limited to those of merchantability or fitness for a particular purpose. The from NZXT, you must submit a request via the NZXT Support site outlining duration of implied warranties is limited to the warranty length specified the problem.
- Page 33 VIII. APPLICABLE LAW AND ADDITIONAL LEGAL RIGHTS FOR CONSUMERS In the United Kingdom: • For NZXT products sold to customers in the UK, during the expected This warranty gives you specific legal rights. These conditions are lifespan of your product your legal rights entitle you to the following:...
- Page 34 NZXT Customer Support (see above) for assistance and instructions. NZXT will not accept returns without prior approval and an Outside North America, Europe, and Australasia: RMA number.
- Page 35 > Visit nzxt.com/warranty and support.nzxt.com for information on warranty coverage and service. Eligible products under this NZXT Warranty qualify for a full refund or > Visite el sitio Web nzxt.com/warranty y support.nzxt.com para obtener exchange only with an authorized RMA number and if the item is returned información sobre la cobertura y el servicio de la garantía.
- Page 36 SUPPORT AND SERVICE SUPPORT ET SERVICE If you have any questions or problems with the NZXT product you Si vous avez des questions ou des problèmes avec le produit NZXT purchased, please don’t hesitate to contact us using our support system.
- Page 37 K R A K E N X R G B S E R I E S ASSISTENZA E SERVIZIO In caso di dubbi o problemi con il prodotto NZXT acquistato, non esitate a contattarci utilizzando il nostro sistema di assistenza. support.nzxt.com NZXT : service@nzxt.com...
- Page 38 K R A K E N X R G B S E R I E S 지원 및 서비스 支持和服务 구입한 NZXT 제품과 관련하여 질문 또는 문제가 있을 경우 , 당사의 지원 시스템 如果有任何疑问或者在使用 NZXT 产品的过程中遇到任何问题,欢迎联络 ( support.nzxt.com ) 을 사용하여 문의하십시오 . service@nzxt.com,联络时请提供关于问题的详细说明及购买凭证。您可以向...
- Page 39 5.3 REGULATORY NOTICES K R A K E N X R G B S E R I E S Designed in Los Angeles, California. Made in China 中國製造 中国制造 This device complies with Part 15 of the FCC Rules. Operation is subject to the following two conditions: (1) This device may not cause harmful interference, and (2) this device must accept any interference received, including interference that may cause undesired operation.
- Page 40 5.4 限用物质及元素列表/限用物質及元素清單 K R A K E N X R G B S E R I E S ROHS COMPLIANCE 产品名称:KRAKEN X-3 RGB SERIES 產品名稱:KRAKEN X-3 RGB SERIES ( 型号 : RL-KRX53-R1 / RL-KRX63-R1 / RL-KRX73-R1) ( 型號 : RL-KRX53-R1 / RL-KRX63-R1 / RL-KRX73-R1) 有害物质...
Need help?
Do you have a question about the KRAKEN X RGB Series and is the answer not in the manual?
Questions and answers