Table of Contents
Advertisement
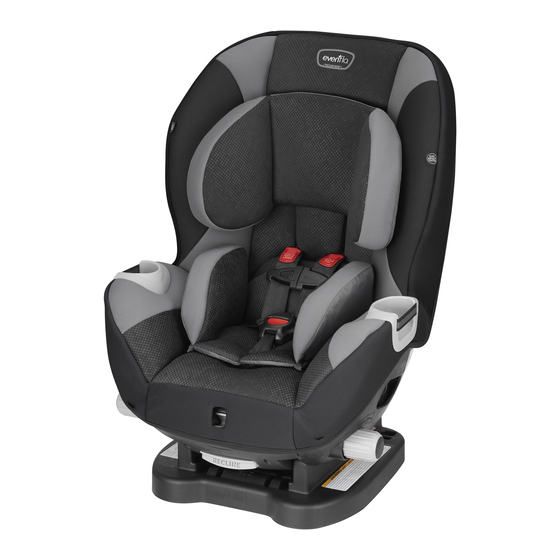
Triumph™
Child Restraint System
Owner's Manual
Keep for future use
Rear-facing*
2.3 to 18 kg
(5 to 40 lbs)
48 to 94 cm
(19 to 37 in.)
Forward-facing*
10 to 29.4 kg
(22 to 65 lbs)
71 to 127 cm
(28 to 50 in.)
At least 2 years old
* See page 4 for complete requirements.
Para instrucciones en Español,
llamar al: 1-800-233-5921
WARNING:
To reduce the risk of serious injury
or death, read this owner's manual prior
to installing and using this child restraint.
© 2018 Evenflo Company, Inc.
25701443
7/18
Advertisement
Table of Contents

Related Manuals for Evenflo Triumph


Summary of Contents for Evenflo Triumph
- Page 1 * See page 4 for complete requirements. Para instrucciones en Español, llamar al: 1-800-233-5921 WARNING: To reduce the risk of serious injury or death, read this owner’s manual prior to installing and using this child restraint. © 2018 Evenflo Company, Inc. 25701443 7/18...
-
Page 2: Table Of Contents
More children are killed every year as passengers in car crashes than by any other type of injury. INTERACTIVE PDF To reduce the risk of SERIOUS INJURY or DEATH, read Table of Contents(TOC) this owner’s manual and your vehicle owner’s manual Important Information before installing and using this child restraint. -
Page 3: Child Requirements
Preterm and low-birth weight infants are at additional risk of breathing difficulties and heart problems Rear-facing when placed in a child restraint. Evenflo requires that the • 2.3 to 18 kg (5 to 40 lbs) evaluation recommended by the AAP be conducted for all •... -
Page 4: Warnings
WARNING WARNING Air Bag Warning General Warnings • DO NOT use this child restraint in the front seat of a Rear-facing and Forward-facing Use vehicle equipped with an air bag, unless the air bag • Failure to follow the Child Requirements for has been deactivated. - Page 5 Consult vehicle owner’s manual, try a different seating • MUST be at least 2 years old. location, or call Evenflo for further assistance. • Adjust, or remove, the vehicle headrest in the • ONLY use this child restraint on forward-facing seat where the child restraint is to be installed, vehicle seats.
-
Page 6: Latch Warnings
• DO NOT attach additional padding, toys, or other vehicle lower anchor bar. devices not made by Evenflo or described in these • NEVER use the vehicle seat belts when using the instructions for the child restraint. Items not tested with Lower anchor connector assembly. -
Page 7: Safe Practices
Everyone rides buckled up or the vehicle does model number and manufacturing date to: not go. Make no exceptions for adults or children. If Evenflo Company, Inc., someone unbuckles, stop the vehicle. Being firm and 1801 Commerce Dr., consistent from the start will mean fewer discipline Piqua, OH 45356 problems as children get older. -
Page 8: Visual Glossary
Visual Glossary Visual Glossary Your vehicle components may be significantly different than pictured. Consult your owner’s manual to help you identify your vehicle components. Front Seat Lap Fold-down Armrest and Shoulder Belts Consult your vehicle’s owners manual. Rear Front Headrests Back Seat Tether Anchors Headrests... -
Page 9: Child Restraint Features
Child Restraint Features Child Restraint Features Front Description Adjustable Headrest* Harness Tabs Harness Straps Buckle Tongue Holders* Cup Holder* TensionRight™ Tightening Knob Tension Release Button Seat Pad Chest Clip BeltTrac™ Access Flap Buckle Crotch Strap ReclineRight™ Lever Tether Strap and Hook Lower Anchor Connector Assembly Base Instructions... -
Page 10: Using The Child Restraint
Using the Child Restraint Rear-facing Installation Checklist Rear-facing 1. Secure child restraint to the vehicle seat. Child restraint is in Position #1 (page 20). Child Requirements: Install with vehicle seat belt (page 20) or lower • Weight: 2.3 to 18 kg (5 to 40 lbs) anchor connector assembly (page 24). -
Page 11: Rear-Facing Installation With Seat Belt
Rear-facing Installation with Seat Belt Adjust the recline to Position #1 by lifting WARNING the back of the seat slightly while pulling NEVER turn a child restraint the Recline Right forward-facing with an infant lever weighing less than 10 kg (22 lb.). Crash forces may cause serious injury or death. - Page 12 The seat belt must be as tight as possible. Put your full weight into the child restraint as you tighten the seat belt If you can move the child restraint more than 25 mm (1 in.) side to side or front to back at the rear-facing WARNING belt path...
-
Page 13: Rear-Facing Installation With Lower Anchor Connectors
Rear-facing Installation with Lower Know Your Lower Anchor Connector Assembly Anchor Connectors The lower anchor connector assembly that comes with your LATCH is a system for attaching the child restraint to your child restraint will be one of the two types below. vehicle seat. - Page 14 Correct Incorrect IMPORTANT: Make sure both lower anchor Quick Connectors Insert the ends of the lower anchor connector assembly are facing upward and the straps are not twisted. strap in the rear-facing belt path openings, as shown (front openings). Note: Make sure the Using your full weight, adjustment buckle enters the opening on the correct...
-
Page 15: Using The Child Restraint Forward-Facing
Using the Child Restraint Forward-facing Installation Checklist Forward-facing 1. Secure child restraint to the vehicle seat. Child restraint is in Position #2 or #3 (page 30). Child Requirements: Child restraint base sits flat on vehicle seat. • Weight: 10 to 29.4 kg (22 to 65 lbs) Install with vehicle seat belt (page 30) or lower •... -
Page 16: Forward-Facing Installation With Seat Belt
WARNING Forward-facing Installation with Seat Belt The Intermediate Recline Position (Position #2) If the vehicle seat belts are not routed correctly, and Full Upright Position (Position #3) are ONLY the child restraint may not protect your child in a crash. for forward-facing use. - Page 17 Install Locking Clip (not The vehicle seat belt included), if necessary. must be as tight as If your vehicle was built prior possible. Locking Clip to model year 1996, and Using your full weight, installed properly has a lap/shoulder belt that is push the child restraint equipped with an emergency firmly into the vehicle...
- Page 18 Pull the strap and tighten the tether securely. Note: If your tether strap does not reach the vehicle tether anchor bracket, call Evenflo’s ParentLink for a tether extender, at 1-800-233-5921 (U.S.) or 1-937-773-3971 (Canada), or 01-800-706-12-00 (Mexico). WARNING •...
-
Page 19: Forward-Facing Installation With Lower Anchor Connectors
WARNING Forward-facing Installation with Lower Anchor Connectors • In addition to these instructions, read and follow your vehicle owner’s manual regarding installation of child LATCH is a system for attaching the child restraint to your restraints and LATCH. If there is a discrepancy, follow vehicle seat. - Page 20 Remove the lower anchor connector strap from the rear-facing position (front openings). Refer to your vehicle owner’s manual to locate the lower anchor bars on your vehicle seat. Attach the left hook , or clip , to the left anchor , and the right hook to the right anchor bar.
-
Page 21: Securing Your Child In The Child Restraint
Pull the strap tighten the tether securely. Note: If your tether strap does not reach the vehicle tether anchor bracket, call Evenflo’s ParentLink for a tether extender, at 1-800-233-5921 (U.S.) or 1-937-773-3971 (Canada), or 01-800-706-12-00 (Mexico). -
Page 22: Adjusting The Crotch Strap
The harness straps must be snug against the child. A snug strap should not allow any slack. It lies in a relatively straight line without sagging. It does not press on the child’s flesh or push the child’s body into an unnatural position. Check the harness straps near the shoulders for slack. -
Page 23: Removing Child From The Restraint
Removing Child from the Restraint Removing the Lower Anchor Connectors To unfasten the chest clip, push the release button and pull apart. Press the adjuster release button to loosen harness strap. Press the red buckle release , and remove the buckle tongues. -
Page 24: Removing The Tether Strap
Removing the Tether Strap Removing the Seat Pad You will need to remove your seat pad for cleaning. The tether strap that comes with your child restraint will be one of the two types below. Unbuckle harness straps and disconnect chest clip. -
Page 25: Installing The Seat Pad
Stretch seat pad over cup holders* . Make sure the edges of the seat pad are tucked beneath the edge of each cup holder to enclose the foam underneath. Open the BeltTrac access flap and remove the seat pad from the seat shell. -
Page 26: Installing The Accessories
Installing the Accessories The Body Pillow and Infant Head Support WARNING Fold in both sides of the BeltTrac access flap Use the Body Pillow and Infant Head Support with the child restraint in the rear-facing position ONLY. The optional Body Pillow is used to help support your child by placing it in the restraint, as shown. -
Page 27: Securing Your Child Restraint In Aircraft
Securing Your Child Restraint in Aircraft The Federal Aviation Administration (FAA) recommends that you secure your child for air travel in an appropriate child restraint based on your child’s weight and size. Turbulence can happen with little or no warning. When turbulence occurs, the safest place for your child is in a properly installed child restraint, not in an adult’s lap or on the aircraft seat with its seat belt. -
Page 28: Installing Child Restraint Forward-Facing In Aircraft
Installing Child Restraint Forward-facing in Aircraft IMPORTANT: Before installing the child restraint, make sure the aircraft seat is in a fully upright position. Unbuckle the aircraft seat belts and lay over the armrests, as shown. Adjust the child restraint to its upright position (page 30), then place it on the aircraft seat forward-facing. -
Page 29: Care And Cleaning
Take care to clean the belt. For your child’s comfort, Evenflo recommends in the areas where crumbs and other debris tend to cushioning the child’s back by placing a small pillow or accumulate. -
Page 30: Replacement Parts
(found on the back of the child restraint). sole obligation under this express limited warranty shall be, at Evenflo’s option, to repair or replace any Product that is determined to be defective by Evenflo and determined to be covered by this warranty. - Page 31 USA: 1-800-233-5921, 8 AM to 5 PM E.T. Canada: 1-937-773-3971 México: 01-800-706-12-00...
Need help?
Do you have a question about the Triumph and is the answer not in the manual?
Questions and answers