Table of Contents
Advertisement
Quick Links
Advertisement
Table of Contents

Subscribe to Our Youtube Channel
Related Manuals for ATP Electronics Piper Archer

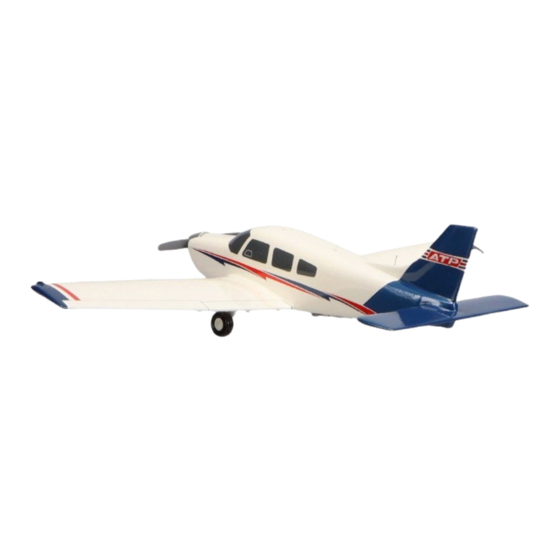
Summary of Contents for ATP Electronics Piper Archer
- Page 1 Piper Archer Training Supplement ATPFlightSchool.com Revised 2019-08-08...
- Page 2 Transport Professionals assumes no responsibility or liability for any errors or inaccuracies that may appear in this manual. This manual does not replace the Piper Archer Pilot Operating Handbook, FAA Airplane Flying Handbook, or Practical Test Standards / Airman Certification Standards. Nothing in this manual shall be interpreted as a substitute for the exercise of sound judgement.
-
Page 3: Table Of Contents
Accelerated Stall........44 Soft-Field Takeoff & Climb (Flaps 25°) ..19 Arrival Procedures ......20 Secondary Stall (Power-On) .......45 Piper Archer Landing Criteria ....20 Secondary Stall (Power-Off) ......45 Good Planning = Good Landing ....20 Elevator Trim Stall ........46 Cross-Control Stall........47... -
Page 5: Aircraft Systems
SECTION 1 Aircraft Systems Engine The Archer is equipped with a Lycoming, 4-cylinder, O-360 (opposed, 360 cubic inch) engine rated at 180 horsepower at 2700 RPM. The engine is direct drive (crankshaft connected directly to the propeller), horizontally opposed (pistons oppose each other), piston driven, carbureted and normally aspirated (no turbo or supercharging). -
Page 6: Oil
From the Archer POH, in regards to carburetor heat usage during approach: "Carburetor heat should not be applied unless there is an indication of carburetor icing, since the use of carburetor heat causes a reduction in power which may be critical in case of a go-around. -
Page 7: Flaps
Flaps The Archer is equipped with a manual flap system. The flaps are extended with a lever located between the two pilot seats. Flap settings are 0°, 10°, 25°, and 40°, and are spring-loaded to return to the 0 ° position. ATP operations require flaps 25°... -
Page 8: Electrical System
An electric engine priming system is provided to facilitate starting. The primer switch is located on the far left side of the overhead switch panel. CAUTION: DO NOT OVER-PRIME. Over-priming washes lubrication from cylinder walls and increases fire risk. Always follow the checklist for primer usage. -
Page 9: Garmin G500
electrical load should be reduced as much as possible. Check the alternator circuit breakers for a popped circuit. The next step is to attempt to reset the overvoltage relay. This is accomplished by moving the ALT switch to OFF for one second and then to ON. If the trouble was caused by a momentary overvoltage condition (30.5 volts and up) this procedure should return the ammeter to a normal reading. - Page 10 G500 Components The G500 is comprised of six main components: • Primary Flight Display (PFD, left) and Multi-Function Display (MFD, right) • Attitude Heading Reference System (AHRS) • Air Data Computer (ADC) • Magnetometer • Temperature Probe • Dual Garmin GNS 430 GPS The PFD (left) shows primary flight information in place of traditional pitot- static and gyroscopic instruments, and also provides an HSI for navigation.
- Page 11 G500 PFD Functions These buttons toggle the function of the PFD knob. Set heading bug - (push PFD knob to set heading bug to current heading) Set course - (when in VLOC mode) Set altitude bug and alerter - Set V/S Bug - (do not use) Altimeter setting - BARO...
-
Page 12: Standby Instruments
Standby Instruments Standby Attitude Indicator An electrical standby attitude indicator is powered and charged by the electrical system during normal operations. During an electrical failure, the standby attitude indicator will continue operating from its internal dedicated battery for approximately 60 seconds while an amber blinking LED prompts you to press the “STBY PWR”... -
Page 13: G500 Failures & Partial-Panel
Standby Altimeter & Airspeed Indicator The pitot-static system provides information to the standby altimeter and airspeed indicator. G500 Failures & Partial-Panel Approaches For partial-panel training and checkrides, the two most common training scenarios are simulated AHRS failure and PFD failures. Instrument Failure Condition Simulated By... - Page 14 AHRS Failure The PFD continues displaying airspeed, altitude, vertical speed, compass rose and ground track. Ground track and compass rose indications are supplied by GPS, indicated by a “TRK” message. Any precision or non-precision approach is available using the HSI on the PFD. Pilot Action 1.
- Page 15 Pilot Action 1. Use standby attitude indicator. Press the "STBY PWR" button right of the blinking LED to continue operating using its internal battery. 2. Use standby airspeed, altimeter, and compass. 3. Declare an emergency and exit IMC as soon as practicable. The manufacturer does not specify the endurance time of the integral emergency battery.
-
Page 16: Garmin G1000
Garmin G1000 Enroute PFD: Active with appropriate nav source (needles) active. MFD: Map page with Traffic Information active. Range selected to view two future fixes. G1000 Standard Configuration Full Panel Approaches PFD: Active with appropriate nav source (needles) active. MFD: Map page with Traffic Information active. Range selected to view one or two future fixes. -
Page 17: Heater
Heater Heat for the cabin interior and the defroster system is provided by a heater shroud that routes fresh air past the exhaust manifold and directs it into the cabin. The amount of heat desired can be regulated with the controls located on the far right side of the instrument panel. -
Page 18: Performance / Weight & Balance
SECTION 2 Performance / Weight & Balance Piper Archer V-Speeds Speeds listed below are in Knots Indicated Airspeed (KIAS). Airspeed V-Speed KIAS Description Indicator Marking Stall speed in landing configuration Bottom of White Line Stall speed with zero flaps Bottom of Green Line... -
Page 19: Sample Weight & Balance Problem
Sample Weight & Balance Problem Complete the following sample weight and balance problem. Conditions Basic Empty Weight ................1590.0 lbs. (Remember to use actual aircraft BEW for flight check.) Front Pilots ......................350 lbs. Rear Passengers ....................50 lbs. Baggage .................... 2 Bags @ 75 lbs. (May need to relocate some baggage to rear passenger seats.) Max Ramp Weight .................. -
Page 20: Formulas
Plot Zero Fuel CG and Takeoff CG on the CG Envelope Graph below. Answers: (1) 2,140 lbs. (2) 90.95 (3) 2,420 lbs. (4) 91.45 (5) Forward Formulas • Weight × Arm = Moment • Total Moment ÷ Total Weight = CG •... -
Page 21: Departure Procedures
SECTION 3 Departure Procedures Passenger Briefing Safety Belt/Harness Usage Fire Extinguisher Location/Usage Cockpit Door Operation No Smoking Emergency Exit Operation PIC Authority/Training/Checkride Pre-Takeoff Briefing (Standard Procedures) Engine failure or abnormality prior to rotation: • Abort takeoff – throttle immediately closed •... -
Page 22: Normal Takeoff (Flaps 0°)
Normal Takeoff (Flaps 0°) Do not delay on runway. 1. Line up on centerline positioning controls for wind 2. Hold brakes 3. Increase throttle to 2000 RPM 4. Check engine gauges 5. Release brakes 6. Increase throttle to full power 7. -
Page 23: Soft-Field Takeoff & Climb (Flaps 25°)
Short-Field Takeoff & Climb Profile “After Takeo Checklist” Lined Up on Runway Centerline Retract Flaps 1,000’ AGL Approx. “Airspeed Alive” Past Obstacle 60 KIAS 55 KIAS Lift-O Soft-Field Takeoff & Climb (Flaps 25°) 1. Flaps 25° 2. Roll onto runway with full aft yoke – minimum braking – do not stop 3. -
Page 24: Arrival Procedures
SECTION 4 Arrival Procedures Piper Archer Landing Criteria • Plan and brief each landing carefully. • Enter the traffic pattern at TPA trimmed for 90 KIAS in level flight. (landing profiles depend on this) • Maintain a constant angle glidepath. -
Page 25: Approach Briefing
should be specific to each approach and landing, but presented in a standard format that makes sense to other pilots and instructors. Approach Briefing Field Elevation Type of Approach & Landing Type of Approach Landing Runway NAV Frequency Field Elevation Course Pattern Altitude Glideslope Intercept or FAF Altitude... -
Page 26: Stabilized Approach
Stabilized Approach Definition: A stabilized approach is one in which the pilot establishes and maintains a constant angle glidepath towards a predetermined point on the landing runway. It is based on the pilot’s judgment of certain visual cues, and depends on a constant final descent airspeed and configuration (FAA-H-8083- 3B, p. -
Page 27: Pitch & Power
AIM 2-3-3 – The "Runway Aiming Point Markings" consist of a broad white stripe located on each side of the runway centerline, approximately 1,000' from the landing threshold. ATP requires all landings to occur within the first 1,000' of the landing runway. When flying a visual approach and landing in an Archer, the (visual) aiming point chosen by the pilot is often an earlier point on the runway than the AIM defined "aiming point markings"... -
Page 28: Go Around Philosophy
Go Around Philosophy The decision to execute a go-around is both prudent and encouraged anytime the outcome of an approach or landing becomes uncertain. ATP considers the use of a go-around under such conditions as an indication of good judgement and cockpit discipline on the part of the pilot. -
Page 29: Flap Setting
Flap Setting ATP students are trained to land using the Standardized Flaps 25° Landing profile. When conditions are necessary for a Soft-Field or Short-Field landing, those profiles should be used. Traffic Pattern Operations Pattern Briefings should include: • Flap Setting •... - Page 30 Normal Visual Approach & Landing 1. Complete the “Approach Checklist” before entering the airport traffic pattern; devote full attention to aircraft control and traffic avoidance. 2. Slow to 90 KIAS prior to entering downwind or traffic pattern. 3. Enter traffic pattern at published TPA (typically 1,000' AGL). 4.
- Page 31 Normal Visual Approach & Landing Profile Rollout • Maintain Centerline Until Taxi Speed Short Final • Increase Crosswind Control Inputs On Final • When Landing is Assured as Airplane Slows • Maintain 70 KIAS Slow to 66 KIAS 45˚ Touchdown 90˚...
-
Page 32: Short-Field Approach & Landing
Short-Field Approach & Landing Steps 1-7 are identical to a normal approach and landing procedure. 8. Select flaps 40° and slow to 66 KIAS on final when landing is assured. 9. Close throttle slowly during flare – touch down on intended touchdown point with little or no floating. -
Page 33: Soft-Field Approach & Landing
Soft-Field Approach & Landing Steps 1-7 are identical to a normal approach and landing procedure. 8. On short final when landing is assured, select flaps 40° and slow to 66 KIAS. 9. Fly the airplane onto the ground, slowly transferring the weight from the wings to the main landing gear. -
Page 34: Power-Off 180° Approach And Landing
Power-Off 180° Accuracy Approach and Landing Steps 1-4 are identical to a normal approach and landing procedure. 5. Fly parallel to the runway, correcting for crosswind, at a distance that aligns the runway with the wingtip. 6. When abeam runway end, smoothly reduce power to idle. 7. - Page 35 Power-Off 180° Accuracy Approach and Landing Profile Arrival Procedures • 31...
-
Page 36: Crosswind Approach & Landing
Crosswind Approach & Landing Carefully planned adjustments must be made to the normal approach and landing procedure to safely complete a crosswind approach and landing. Planning Before entering the traffic pattern, brief how your approach and landing will be different by acknowledging the wind direction, crosswind component, planned flap setting, and how your traffic pattern ground track will differ as a result of the winds. - Page 37 TIP: During windy conditions, adjust turns in the traffic pattern as necessary to maintain the correct ground track and distance from the runway. For example, a strong tailwind during the downwind leg will blow the airplane too far from the runway if the pilot waits until the 45˚...
-
Page 38: Go-Around Procedure
Go-Around Procedure A go-around procedure must be initiated any time the conditions for a safe approach and landing are not met. Some examples of unsatisfactory approach and landing conditions are: • Unstable approach path or airspeed. • Improper runway alignment. •... -
Page 39: Precision Approach & Landing
If the rejected landing is due to conflicting traffic, maneuver as necessary during the climb to clear and avoid conflicting traffic. Precision Approach & Landing ATP recommends setting flaps 10° at glideslope intercept for ILS precision approaches. Flaps 10° allows for a stabilized approach to touchdown. 1. - Page 40 Within 30 NM of the airport, if flying a GPS approach, the GPS will display “TERM.” 2. When Direct To IAF or on vectors, set the desired course on the CDI. 3. Complete the “Approach Checklist.” 4. Slow to 90 KIAS when on a published segment of the approach or if on vectors.
-
Page 41: Circling Approach
Circling Approach When conducting a circling approach (precision or non-precision), execute the approach with the same speeds at flaps 10° to the published circling minimums. Maintain circling minimums at 80 KIAS, until in a position from which a normal landing may be made. When descending from MDA (circling minimums), select flaps 25°... -
Page 42: In-Flight Maneuvers
SECTION 5 In-Flight Maneuvers Required maneuvers for the Commercial Pilot Single-Engine Add-On are performed the same as those for Private Pilot, with two exceptions: • Commercial steep turns are accomplished with at least 50° of bank. • Stall recovery at the commercial level is performed at the first indication of an impending stall (e.g., aircraft buffet, stall horn, etc.). -
Page 43: Steep Turns
GROUND USE ONLY Steep Turns Steep turns are to be accomplished above 3,000' AGL. Roll into one coordinated 360˚ turn, then follow with another coordinated 360˚ turn in the opposite direction. Roll into and out of turns at approximately the same rate. 1. -
Page 44: Power-Off Stall
GROUND USE ONLY Power-Off Stall Stalls are to be accomplished at an entry altitude that will allow completion no lower than 1,500' AGL. This maneuver is begun by first establishing a stabilized descent in the landing configuration. Perform two 90° clearing turns Approx. -
Page 45: Emergency Descent
GROUND USE ONLY Emergency Descent During a simulated emergency descent, the applicant must be able to recognize situations requiring an emergency descent, such as cockpit smoke and/or fire. Situational awareness, appropriate division of attention, and positive load factors should be maintained during the maneuver and descent. 1. -
Page 46: Lazy Eights
GROUND USE ONLY Lazy Eights Lazy Eights are to be accomplished at an entry altitude that will allow the task to be completed no lower than 1,500' AGL. The applicant is required to maintain coordinated flight throughout the maneuver, with a constant change of pitch and roll rate. 1. -
Page 47: Eights On Pylons
GROUND USE ONLY Eights On Pylons Eights on Pylons are to be accomplished at the appropriate pivotal altitude (groundspeed /11.3), governed by the aircraft's groundspeed. The applicant is required to maintain coordinated flight while flying a figure eight pattern which holds the selected pylons using the appropriate pivotal altitude. -
Page 48: Steep Spirals
GROUND USE ONLY Steep Spirals 1. Altitude – at least 3,000’ AGL 2. Perform two 90° clearing turns 3. 90 KIAS (approx. 1800 RPM), maintain altitude 4. Clean configuration flow 5. Choose visual reference point 6. Reduce throttle to idle 7. -
Page 49: Secondary Stall (Power-On)
GROUND USE ONLY Secondary Stall (Power-On) Secondary Stalls are to be accomplished above 3,000' AGL. The purpose is to demonstrate the effect of attempting to hasten the completion of a stall recovery before the airplane has regained sufficient flying speed. Demonstrate and simultaneously explain secondary stalls from an instructional standpoint. -
Page 50: Elevator Trim Stall
GROUND USE ONLY Elevator Trim Stall Elevator Trim Stalls are to be accomplished above 3,000' AGL. The purpose is to demonstrate what can happen when full power is applied for a go-around and positive control of the airplane is not maintained. Demonstrate and simultaneously explain elevator trim stalls from an instructional standpoint. -
Page 51: Cross-Control Stall
GROUND USE ONLY Cross-Control Stall Cross-Control Stalls are to be accomplished above 3,000' AGL. The purpose is to demonstrate the effect of improper control technique and to emphasize the importance of using coordinated control pressures whenever making turns. This demonstration shows what can happen during a poorly executed base-to-final turn where too much rudder is applied in the direction of the turn. -
Page 52: Oral Review
SECTION 6 Oral Review Lost Comm Procedure (FAR 91.185) If in VFR conditions, or if VFR conditions are encountered, squawk 7600, remain VFR and land as soon as practicable. If in IFR conditions, squawk 7600 and fly: Route Altitude (First that applies) (Whichever is highest until descent is required for landing) Assigned Minimum IFR Altitude... -
Page 53: Sample Oral Questions
5. VOR limits: 4 degrees for VOT, ground checkpoint and dual check. 6 degrees for an airborne check. 6. VOR equipment must be checked every 30 days. 7. Transponders must be checked every 24 calendar months. 8. Pitot static systems must be checked every 24 calendar months. 9. - Page 54 4. Describe the propeller system. A. Who makes the propellers? B. How is propeller RPM adjusted? C. Define fixed pitch. 5. Describe the electrical system. 6. What are the indications of a failed alternator? 7. Will the engine continue to run with the alternator and battery master switches turned off? 8.
- Page 55 21. What is the fuel capacity? How many gallons are unusable? 22. What grade fuel is to be used in the PA-28? 23. How many fuel pumps are on the aircraft? 24. When is the electric fuel pump to be used? 25.
-
Page 56: Archer Differences
Flaps 10 on downwind, 20 on base checklist Landing Profile Cessna 172 Training Supplement pages Piper Archer Training Supplement page 23 & 24 GNS 430 have removable NavData cards. GNS 430 have removable NavData cards. G1000 have Internal memory and must be Do not remove the SD card from G500. - Page 57 Standby Power failure. the essential bus for at least 30 minutes. (Piper Archer III Manual, pg 9-141) (172S NAV III Manual, pg 3-17) Piper Archer Training Supplement page 8 Altimeter & Airspeed Indicator - Pitot Static Altimeter &...
- Page 60 ATPFlightSchool.com P.O. BOX 1784 • Ponte Vedra Beach, FL 32004-1784 (904) 595-7950 • Fax: (904) 273-2164 Atlanta (FFC, LZU, PDK) • Austin • Camarillo • Charlotte • Chicago Dallas (ADS, DFW, GKY, TKI) • Daytona Beach • Denver (APA, BJC) • Fort Lauderdale Fort Myers •...
Need help?
Do you have a question about the Piper Archer and is the answer not in the manual?
Questions and answers