Table of Contents
Advertisement
Advertisement
Table of Contents
Troubleshooting

Related Manuals for PHILIPS Respironics DreamStation 2 Advanced CPAP


Summary of Contents for PHILIPS Respironics DreamStation 2 Advanced CPAP
- Page 1 DreamStation 2 Advanced CPAP DreamStation 2 Advanced Auto CPAP User manual...
- Page 2 © Koninklijke Philips N.V., 2020. All rights reserved.
-
Page 3: Table Of Contents
Contraindications ................................. 1 Warnings ....................................2 Cautions ....................................5 Symbols glossary .................................8 System contents .................................. 9 How to contact Philips Respironics ..........................9 2. System overview ..................................10 Device with integrated humidifier ..........................10 Humidifier water tank ................................12 3. Device setup .................................... 14 Installing/replacing the air filters........................... - Page 4 7. Cleaning and care ................................... 41 Home cleaning: device exterior, heater plate, and humidifier air inlet seal ............. 41 Home cleaning: humidifier water tank (lid, water tank base, and water tank seal) ........41 Home cleaning: tubing ..............................42 Caring for the filters ................................43 Service ....................................43 8.
-
Page 5: Safety Information
Safety information Intended use The DreamStation 2 Advanced CPAP/DreamStation 2 Advanced Auto CPAP system delivers positive airway pressure therapy for the treatment of Obstructive Sleep Apnea in spontaneously breathing patients weighing over 30 kg (66 lbs). It is for use in the home or hospital/institutional environment. -
Page 6: Warnings
This device is activated when the power cord is connected. Use only power cords supplied by Philips Respironics for this device. Use of power cords not supplied by Philips Respironics may cause overheating or damage to the device. - Page 7 Proper operation of the device with other circuits has not been tubing verified by Philips Respironics and is the responsibility of the health care professional. A mask should not be used unless the device is turned on and operating properly. The exhalation port(s) associated with the mask should never be blocked.
- Page 8 Do not connect the device to an unregulated or high pressure oxygen source. When using oxygen with this system, a Philips Respironics pressure valve must be placed in-line with the patient circuit between the device and the oxygen source. The pressure valve helps to prevent the back flow of oxygen from the patient circuit into the device when the unit is off.
-
Page 9: Cautions
Periodically inspect electrical cords, cables, tubing, and accessories for damage or signs of wear. Discontinue use and replace if damaged. Repairs and adjustments must be performed by Philips Respironics-authorized service personnel only. Unauthorized service could cause injury, invalidate the warranty, or result in costly device damage. - Page 10 When DC power is obtained from a vehicle battery, the device should not be used while the vehicle’s engine is running. Damage to the device may occur. Only use a Philips Respironics DC power cord and battery adapter cable. Use of any other system may cause damage to the device.
- Page 11 Do not use harsh detergents, abrasive cleaners, or brushes to clean the system. Only the cleaning procedures listed in this manual are recommended by Philips Respironics. Use of other cleaning processes, not specified by Philips Respironics, may affect the performance of the product.
-
Page 12: Symbols Glossary
Symbols glossary The following symbols may appear on the device, power supply, and accessories. For a full list and description of the symbols used on the device and its packaging, see www.symbols. philips.com. Symbol Title and Meaning Symbol Title and Meaning Consult instructions for use. -
Page 13: System Contents
Should you experience trouble with this equipment or require assistance setting up, using, or maintaining the device or accessories, please contact your home care provider. If you need to contact Philips Respironics directly, call the Philips Respironics Customer Service department at 1-800-345-6443 or 1-724-387-4000. You can also use the following address: Respironics, Inc. -
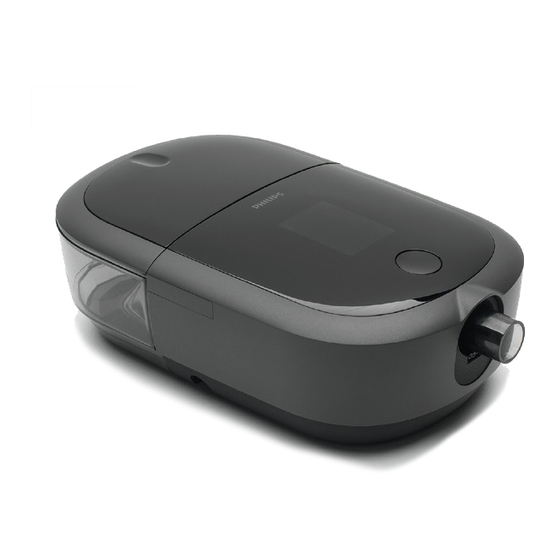
Page 14: System Overview
2. System overview The DreamStation 2 Advanced CPAP/DreamStation 2 Advanced Auto CPAP is a Continuous Positive Airway Pressure therapy device designed for the treatment of Obstructive Sleep Apnea (OSA). The integrated humidifier and optional heated tubing is designed to deliver humidification to provide added comfort during therapy. - Page 15 Feature Description Feature Description Air outlet port Connect the flexible Filter access Access the filter here. tubing here Heated tubing Line up and connect the SD card Access the SD card here. pin connector heated tubing connector access here Therapy on/off Starts and stops the Air inlet for Connects to the...
-
Page 16: Humidifier Water Tank
Humidifier water tank - 12 -... - Page 17 Feature Description Removable to fill the water tank. Lid front tab Remove lid from here Water tank release Unlatches water tank from the device when pressed indent Lid hooks Connect over water tank base tabs Water tank latch Latches the water tank to the device Water tank base tabs Connect water tank lid hooks here to attach the water tank lid Maximum fill lines...
-
Page 18: Device Setup
3. Device setup Installing/replacing the air filters Caution: A properly installed, undamaged Philips Respironics reusable pollen filter is required for proper operation. The device uses a reusable pollen filter that can be rinsed and a disposable ultra-fine filter. The reusable filter screens out normal household dust and pollens, while the ultra-fine filter provides more complete filtration of very fine particles. -
Page 19: Where To Place The Device
4. Place the filter into the therapy device. 5. Reinstall the humidifier water tank. Where to place the device Place the device on a firm, flat surface somewhere within easy reach of where you will use it at a level lower than your sleeping position. Make sure the device is away from any heating or cooling equipment (e.g., forced air vents, radiators, air conditioners). - Page 20 Complete the following steps to operate the device using AC power: 1. Plug the power supply cord’s connector into the power inlet on the bottom of the device For convenience, the power connection allows for the cord to connect and route in the direction that works best for your setup.
-
Page 21: Setting Up The Integrated Humidifier
2. Plug the socket end of the AC power cord into the power supply 3. Plug the pronged end of the AC power cord into an electrical outlet that is not controlled by a wall switch 4. Verify that the plug on the bottom of the device, at the power supply, and at the electrical outlet are fully inserted. - Page 22 Removing the humidifier water tank 1. Gently press down on the indented area on the top of the humidifier water tank to unlatch the tank from the device. 2. Grip the top and bottom of the humidifier water tank and slide it out away from the device.
- Page 23 3. Remove the lid by pulling up on the lid tab while holding the water tank base. 4. Pour out any remaining water and rinse the water tank base. Filling and connecting the water tank 1. Place the water tank base on a firm, flat surface.
- Page 24 2. Reattach the lid. Place the hooks on the lid over the tabs on the water tank base 3. Press down until the lid snaps securely over the tab on the front of the water tank base. - 20 -...
-
Page 25: Connecting The Breathing Circuit
Philips Respironics interface with a separate exhalation device (such as the Whisper Swivel II) • Philips Respironics flexible tubing (12, 15, or 22 mm standard tubing or 12 or 15 mm heated tubing), 1.83 m (6 ft.) •... - Page 26 To connect your breathing circuit to the device, complete the following steps. Note: If you are using the optional 12 mm (non-heated) performance tubing, an adapter is required to connect to the therapy device. Note: Tubing is identified on the cuff with the tubing identifier symbol: “12”, “15”, “HT12”, or “HT15”.
-
Page 27: Starting The Device
Starting the device 1. Ensure power is supplied to the device. The first screen to display will be the Philips logo, Respironics logo, followed by the device model screen, and then a screen that contains a summary of your therapy. See the “Therapy off display” section later in this manual for a description of the User Interface (UI) screens. -
Page 28: Therapy Off Display
Therapy Off display A summary of your therapy displays on the UI when therapy is turned off. From here you can tap “Settings” to view additional details about your therapy, perform a mask check fit, and adjust Comfort and Device settings. The following therapy results may appear on the Last Session screen. -
Page 29: Navigating The Device Screens
Navigating the device screens The UI on this device allows you to adjust the device settings and view information about your therapy. The UI consists of the display screen and the touch panel. To adjust a setting: 1. Tap “Settings” from the Last Session screen. 2. - Page 30 Symbol Meaning Description Humidity You can change this setting from 0 to 5. Only displays when humidification is enabled. Heated tube You can change this setting from 0 to 5. Only displays when temperature optional heated tube is connected. FLEX This allows you to adjust the level of air pressure relief that you feel when you exhale during therapy.
-
Page 31: Therapy On Display
Therapy On display While the device is delivering therapy, the pressure setting is displayed. You can also view and adjust humidification, heated tube temperature, and RAMP PLUS settings. Note: The device goes into stand-by mode (display is black) after 60 seconds of inactivity. To wake up the device, tap anywhere on the display. - Page 32 Symbol Feature Description RAMP PLUS The device is equipped with a RAMP PLUS feature that allows (Ramp+) you to adjust your starting pressure for a set period of time (default of 30 minutes) for added comfort when you are trying to fall asleep.
- Page 33 Symbol Feature Description 5 and Ramp The therapy on display indicates when ramp is active. The indicator circle around the therapy display is dotted blue (5) when ramp is active and solid blue (6) when ramp is not active or therapy pressure is achieved.
-
Page 34: Pop-Up Messages And Troubleshooting
4. Pop-up messages and troubleshooting Pop-up messages Device pop-up messages may appear on your screen to alert you of a required action, device status update, or reminder. When the pop-up message appears, follow any required actions. See table below or the “Troubleshooting” section later in this manual for additional solutions to problems you may be experiencing. - Page 35 Check Power Incompatible power supply is attached. Alert Low Voltage. Please use a Confirm a compatible Philips Respironics power compatible power supply or supply is attached. Switch to compatible power fully charge the battery. supply if needed. If battery is being used, ensure battery is adequately charged.
-
Page 36: Status Pop-Up Messages
Message Message Possible cause/additional action type SD Card Indicates SD card has been removed from therapy Notification Your SD card has been device and not reinserted before the start of the removed. Please reinsert to current therapy session. record therapy data. Reinsert the SD card to record therapy data. -
Page 37: Reminder Pop-Up Messages
Screen Text Description A prescription or setting update was unsuccessful. Contact your Update home care provider. A prescription or setting update was unsuccessful. Indicates SD card has been removed from therapy device and not SD Removed reinserted before the start of the current therapy session. Reinsert Reinsert the SD card to record therapy data. -
Page 38: Troubleshooting
Troubleshooting Problem Why it happened What to do Nothing There’s no power If you are using AC power, check the outlet and verify that happens at the outlet or the device is properly plugged in. Make sure there is power when you the device is available at the outlet. - Page 39 Problem Why it happened What to do The airflow is The air filters may Rinse or replace the reusable air filter or replace the disposable much warmer be dirty. The ultra-fine filter. than usual. device may be The temperature of the air may vary somewhat based on your operating in direct room temperature.
-
Page 40: Connectivity
Cellular QoS The Cellular modem is designed for use with select Philips Respironics therapy devices. It automatically transfers data between the DreamStation 2 device and Philips Respironics proprietary compliance software. The DreamStation 2 modem incorporates various methods to minimize likelihood of QoS problems. -
Page 41: Bluetooth Wireless Technology
Bluetooth wireless technology Bluetooth wireless technology is one method by which you can transfer your therapy device’s data to DreamMapper. DreamMapper is a mobile and web-based system designed to help Obstructive Sleep Apnea (OSA) patients enhance their sleep therapy experience. Pairing your therapy device to your Bluetooth-enabled mobile device Note: You can only pair your therapy device to one mobile device at any given time. -
Page 42: Accessories
6. Accessories There are several optional accessories available for your DreamStation 2 Advanced device. Contact your home care service provider for additional information on the available accessories. When using optional accessories, always follow the instructions enclosed with the accessories. SD card The device may come with an SD card inserted in the SD card slot behind the water tank. -
Page 43: Oximeter
The screen will then appear black until the update is complete. 4. The device will restart when the upgrade is complete. Remove the SD card. 5. If an error occurs, contact Philips Respironics for a new SD card. Oximeter The DreamStation 2 Advanced device can pair to a pulse oximeter, using Bluetooth, for measuring %SpO2 and pulse rate. -
Page 44: Dc Power
Do not connect the device to an unregulated or high pressure oxygen source. DC power A Philips Respironics DC power cord can be used to operate this device in a stationary recreational vehicle, boat, or motor home. In addition, a Philips Respironics DC battery adapter cable, when used with a DC power cord, allows the device to be operated from a 12 VDC free-standing battery. -
Page 45: Cleaning And Care
7. Cleaning and care Warning: Allow the humidifier heater plate and water to cool down for approx- imately 15 minutes before removing the water tank. A burn may result from: touching the heater plate, coming in contact with the heated water, or touching the tank base. -
Page 46: Home Cleaning: Tubing
3. Wash the humidifier water tank (lid, water tank base, and water tank seal) in the dishwasher (top shelf only) or the in a solution warm water and a mild liquid dishwashing detergent (1 teaspoon of liquid dish soap per gallon of warm water). 4. -
Page 47: Caring For The Filters
4. Visually inspect the tubing for cleanliness. Repeat the cleaning if not visually clean. 5. Inspect the tubing for damage or wear (cracking, tears, punctures, etc.). Discard and replace if necessary. Caring for the filters Notes • Only Philips supplied filters should be used as replacement filters. •... -
Page 48: Technical Specifications
8. Technical specifications Environmental Operating Temperature Device: 5° to 35°C (41° to 95°F) Storage Temperature -20° to 60°C (-4° to 140°F) Relative Humidity (operating & storage) 15 to 95% (non-condensing) Atmospheric Pressure: Device: 101 to 77 kPa (0 - 2286 m / 0 - 7500 ft) Physical Dimensions 273.81 mm L x 158.5 mm W x 84.83 mm H... -
Page 49: Iec 60601-1 Classification
IEC 60601-1 classification Type of Protection Class II Equipment Against Electric Shock Degree of Protection Type BF Applied Part Against Electric Shock Degree of Protection Device: Drip Proof, IP22 Against Ingress of Water First characteristic numeral - 2 - Protection against ingress of solid foreign objects ≥... -
Page 50: Declared Dual-Number Noise Emissions Values (In Accordance With Iso 4871)
Declared dual-number noise emissions values (in accordance with ISO 4871) Tube Size Sound Pressure Uncertainty Sound Power Uncertainty Level (L) Level 15 and 22 (mm) tubing 30.5 dB(A) 2.0 db(A) 38.5 dB(A) 2.0 dB(A) type 12 (mm) tubing type 30.5 dB(A) 2.0 db(A) 38.5 dB(A) 2.0 dB(A) -
Page 51: Iso 80601-2-70 Pneumatic Diagram
Wireless notices • The Bluetooth® word mark and logos are registered trademarks owned by Bluetooth SIG, Inc. and any use of such marks by Philips Respironics is under license. Other trademarks and trade names are those of their respective owners. •... -
Page 52: Radio Specifications
• This device complies with part 15 of the FCC Rules. Operation is subject to the following two conditions: (1) This device may not cause harmful interference, and (2) this device must accept any interference received, including interference that may cause undesired operation. -
Page 53: Intake Port Filters
Maximum Output Power 25 dBm Modulation OFDM/SC-FDMA Bandwidth: 1.4 MHz Bluetooth Operating Frequency Range 2.4-2.4835 GHz Maximum Output Power 0 dBm Modulation GFSK, P/4 DQPSK, 8DQPSK Bandwidth: 1 MHz Intake Port Filters Pollen Filter 100% Polyester 88% Efficient @ 7-10 micron size Ultra-fine Filter Blended Synthetic Fiber 95% Efficient @ 0.5-0.7 micron size... -
Page 54: Disposal
Disposal Dispose of this device in accordance with local regulations. 9. EMC information Your unit has been designed to meet EMC standards throughout its Service Life without additional maintenance. There is always an opportunity to relocate your DreamStation 2 Advanced Therapy Device within an environment that contains other devices with their own unknown EMC behavior. - Page 55 missions omplianCE lECTromagnETiC nvironmEnT uidanCE RF emissions Class B CISPR 11 The device is suitable for use in all Harmonic emissions Class A establishments, including domestic IEC 61000-3-2 establishments and those directly connected to the public low-voltage power supply network. Voltage fluctuations/Flicker emissions Complies...
- Page 56 iEC 60601 T mmuniTy EvEl omplianCE EvEl lECTromagnETiC nvironmEnT uidanCE Surge ±1 kV differential mode ±1 kV differential mode Mains power quality IEC 61000-4-5 should be that of ±2 kV common mode N/A: Device is Class 2 a typical home or and does not have earth hospital environment.
- Page 57 Guidance and Manufacturer’s Declaration - Electromagnetic Immunity – This device is intended for use in the electromagnetic environment specified below. The user of this device should make sure it is used in such an environment. iEC 60601 T mmuniTy EvEl omplianCE EvEl lECTromagnETiC...
- Page 58 1143581 R00 HM 04/05/2020 EN-DOM - 54 -...
Need help?
Do you have a question about the DreamStation 2 Advanced CPAP and is the answer not in the manual?
Questions and answers