Advertisement
Quick Links
Before assembly
• We recommend that time is taken to read
the instructions before starting assembly,
then follow the easy step by step guide.
The instruction sheet is only a guide to the
assembly. Certain items may not be shown
to scale.
• Check all components prior to assembly
• This product should be assembled by no less
than two people
• Drill all components where indicated
x 2
Drill
Recommended tools for assembly
• Power Drill/Screwdriver
• Crosshead drill bit
• 3mm diameter drill bit
• Hammer
• Sharp knife
• Spirit level
• Step ladder
No.
Components
1
Floor
2
Door end floor block
3
Back wall panel
4
Plain wall panel
5
Hatch panel
6
Left-hand door end wall panel
7
Right-hand door end wall panel
8
Front/back top wall panel
9
Plain side top panel
10
Hatch side top panel
11
Apex panel
12
Door header rail
(28x28x646mm)
13
Door
14
Bar shelf
15
Shelf support rail
(28x28x546mm)
16
Bar shelf infill frame
(28x35x690mm)
17
Roof Purlin
(28x35x1770mm)
18
Large roof panel
19
Small roof panel
20
Felt batten
(28x35x1794mm)
21
Roof felt
(4m)
22
Roof ridge felt
23
Plain side coverstrip
(12x40x1940mm)
24
Hatch side lower c/strip
(12x40x1000mm)
25
Bar shelf end coverstrip
(12x48x200mm)
26
Bar front edge coverstrip
(12x48x1795mm)
27
Bar shelf centre coverstrip
(12x30x805mm)
28
Hatch side mid c/strip
(12x60x668mm)
29
Hatch side upper c/strip
(12x40x230mm)
30
Hatch centre coverstrip
(12x30x668mm)
31
Hatch cover
32
Bargeboard
33
Finial
No.
Fixing Kit
34
T-hinge
35
Hasp & staple
36
Turn button
37
60mm screws
38
50mm screws
39
32mm screws
40
25mm screws
41
19mm round head screws
42
30mm nails
43
10mm Felt nails
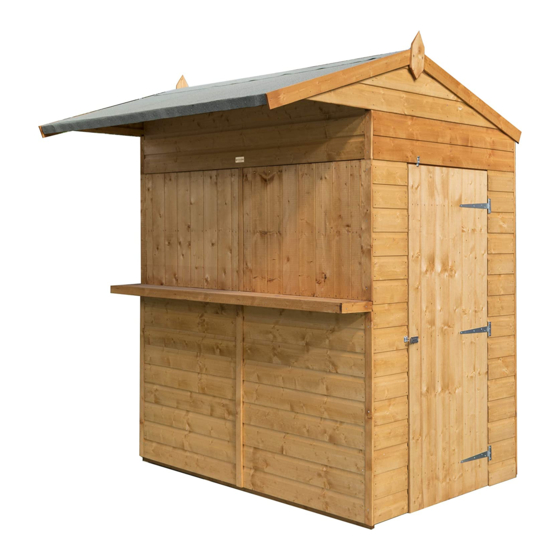
Garden Bar
Assembly Instructions
Qty.
1
2
1
2
2
1
1
2
1
1
2
1
1
2
1
2
4
2
22
2
2
1
23
1
3
3
2
12
1
2
2
2
1
2
4
2
Qty.
6
3
13
1
9
20
35
80
34
30
36
7
83
34
104
17
18
21
20
9
4
7
1
2
English SS458A
19
32
31
10
30
5
27
16
14
26
33
11
8
29
28
3
15
25
24
Advertisement

Related Manuals for Rowlinson Garden Products Garden Bar


Summary of Contents for Rowlinson Garden Products Garden Bar
- Page 1 Garden Bar English SS458A Assembly Instructions Before assembly • We recommend that time is taken to read the instructions before starting assembly, then follow the easy step by step guide. The instruction sheet is only a guide to the assembly. Certain items may not be shown to scale.
- Page 2 1. Floor Position the door end floor blocks flush to the edge of the floor between the floor frames. Secure each block in place using 2 x 32mm screws. Screwing through the floor board into the block. Prepare a level area for the building sit. Place the floor in position and ensure level. It is recommended to drill pilot holes for each screw before assembly.
- Page 3 4. Apex panels Place an apex panel on top of the back panel and secure using 3 x 50mm screws. Screw up through the top frame of the back panel into the bottom frame of the apex panel. Attached the front apex in the same way. Fix the door header rail flush to the bottom of the frame of the door end top panel using 2 x 50mm screws. Door header rail 50mm...
- Page 4 7. Bar shelves Fit the shelf support rail to the back wall, ensure it is level with the bottom frame of the hatch opening. Secure in place using 1 x 50mm screw at each end, screw through the fram of the back panel into the ends of the rail.With one bar shelf on the inside of the building and the other on the outside, interlock the two halves through the hatch panel openings.
- Page 5 8. Roof Felt Cut the 4m roofing felt roll into two equal lengths. Place one length over one roof section. At the front and along the lower edge of the roof leave an overhang of felt of at least 45mm. Fold down the felt along the lower edge and secure to the felt batten using 20 x10mm felt nails evenly spaced. Tension the felt over the roof and secure along the upper edge using 4 x 10mm felt nails.
- Page 6 During hot spells spray water directly onto the panels with the aid of a garden hose. If in doubt of any aspect regarding the assembly, use or safety of your Garden Bar please contact us: Help Line: (Normal Office Hours) 01829 261 121 Email: support@rowgar.co.uk...
Need help?
Do you have a question about the Garden Bar and is the answer not in the manual?
Questions and answers