Table of Contents
Advertisement
Quick Links
Advertisement
Table of Contents
Troubleshooting

Related Manuals for Canon varioPrint 115


Summary of Contents for Canon varioPrint 115
- Page 1 Operation guide varioPRINT DP line varioPRINT 115, 130, 140...
- Page 2 No part of this publication may be reproduced or transmitted in any form or by any means, electronic or mechanical, including photocopying and recording, or by any information storage or retrieval system without the prior written permission of Canon Inc. Copyright Copyright 2011-2017 Océ.
- Page 3 Note This Operation Guide is written for world-wide markets. As such it may contain information relating to accessories or licensed functionality not supported by Canon U.S.A., Inc. as of the date of the manual publication.
-
Page 4: Table Of Contents
Adjust the control panel..........................48 Work with the Workflow Profiles........................52 Automated Workflows........................... 58 Introduction to Automated Workflows....................58 Add an Automated Workflow......................... 62 Edit an Automated Workflow........................63 Delete an Automated Workflow......................64 Restore the Factory Default Workflow....................65 Canon varioPRINT DP line... - Page 5 Bundle Jobs in the List of [Waiting jobs]..................... 119 Add extra sheets to a job........................121 Use the DocBox (Option)..........................122 The DocBox Function..........................122 Introduction to the DocBox Function..................... 122 Create a New DocBox........................124 Handle the Jobs in a DocBox........................ 125 Canon varioPRINT DP line...
- Page 6 Create a New Transaction Setup....................202 Edit a Transaction Setup......................... 203 Activate a Transaction Setup......................204 Exchange All Setups Between Printers..................205 IPDS.................................206 Media information (IPDS)....................... 206 Output Recovery in Case of an Error (IPDS)..................207 PCL................................210 Media Messages (PCL)........................210 Canon varioPRINT DP line...
- Page 7 Introduction to the [Trays] View......................282 Introduction to the [Media] Section......................284 Media Related Actions..........................287 Open a Tray and Load Media Using the Paper Tray Button...............287 Load and Assign Media Using the [Trays] Softkey................288 Add media to the media catalog......................290 Canon varioPRINT DP line...
- Page 8 Clear a Paper Jam in the Registration Unit................... 415 Remote Service (ORS) (Option)........................420 Remote Service............................420 Add Toner and Staples..........................422 Check the Status of the Toner Reservoir....................422 Add Toner............................... 423 Check the Status of the Staple Cartridges................... 425 Canon varioPRINT DP line...
- Page 9 Store the logging in case of software errors....................446 Appendix A Specifications........................447 General................................448 Environmental.............................. 449 Printer Speed..............................450 Paper Modules..............................451 Finishing and delivery specifications ......................452 Media Specifications............................ 454 Printing, Copying and Scanning......................... 455 PRISMAsync Controller..........................457 Printer Driver Support..........................458 Index..........................459 Canon varioPRINT DP line...
-
Page 10: Chapter 1 Introduction
Chapter 1 Introduction... -
Page 11: Notes For The Reader
Reading these notes is highly recommended. Indicates an operation that must not be performed. Read these items carefully and make sure not to perform the described operations. Chapter 1 - Introduction Canon varioPRINT DP line... -
Page 12: Users Of The Print System
The table below shows the access rights of the user group members. Access to Operator Central Key opera‐ Mainte‐ System operator nance op‐ adminis‐ erator trator Only personal jobs All jobs Control panel Remote tools Maintenance tasks Configuration settings IT settings Chapter 1 - Introduction Canon varioPRINT DP line... -
Page 13: Information In This Operation Guide
• Technical reference manual • High Capacity Stacker operation guide • Decurler operation guide • PRISMAsync Remote Manager operation guide The other optionals have an operation guide that is delivered together with the product. Chapter 1 - Introduction Canon varioPRINT DP line... -
Page 14: Explore The Print System
Chapter 2 Explore the print system... -
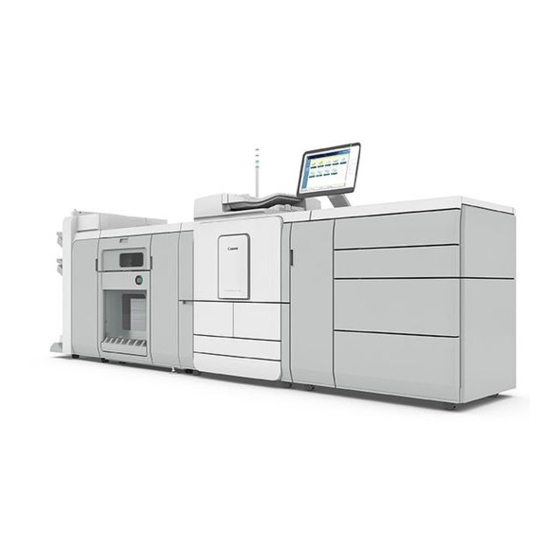
Page 15: Overview Of The Varioprint Dp Line Including Accessories
Total capacity: 4,000 sheets. Printer module Print the jobs. Access to the printer module is required: • To clear paper jams, and • To carry out Printer Operation Care (POC) actions. Chapter 2 - Explore the print system Canon varioPRINT DP line... - Page 16 Trim the top and bottom of each booklet. Puncher Punch the output. shown Booklet maker Make a booklet of the output. shown Copy tray Tray to receive the output. shown Chapter 2 - Explore the print system Canon varioPRINT DP line...
-
Page 17: Printer Only Configuration
ADF. The copy and scan mode are not available on the control panel, which disables the use of the scanner to carry out copy and scan jobs. Chapter 2 - Explore the print system Canon varioPRINT DP line... -
Page 18: Naming Conventions For Accessories (Generic Naming In User Interfaces)
High Capacity Stacker-G1 [Stacker] High Capacity Stacker-H1 [Stacker] Booklet Trimmer-F1 [Trimmer] Two-Knife Trimmer-A1 [Trimmer] Duplex Color Image Reader Unit-L1 [Scanner] Decurler Unit-C1 [Decurler] BLM600 [Booklet maker] Output tray [Copy tray] Chapter 2 - Explore the print system Canon varioPRINT DP line... -
Page 19: The Paper Modules
• Two standard trays with a capacity of 600 sheets each. Contact your local authorized dealer for more information about the dual paper trays. Chapter 2 - Explore the print system Canon varioPRINT DP line... -
Page 20: Professional Stacker / Stapler
Lower tray, to collect finished output. The guides enable correct placement of the printed output. Upper tray, to collect finished output. The guides enable correct placement of the printed output. Extension guides for long sheets are attached to this tray. Chapter 2 - Explore the print system Canon varioPRINT DP line... - Page 21 [3] Internal view of the stacker / stapler and saddle-stitch unit (Booklet Finisher-W1 ) Description internal parts of stacker/stapler Punch waste tray, to collect the punch waste. Staple waste tray, to collect the staple waste. Chapter 2 - Explore the print system Canon varioPRINT DP line...
-
Page 22: Copy Tray
[4] Copy tray Description Auxiliary tray, to collect large, printed output (A3 / 11" x 17" or A4R / LTRR). Copy tray, to collect printed output. Chapter 2 - Explore the print system Canon varioPRINT DP line... -
Page 23: Removable Hard Disk (Option)
Each removable hard disk is unique. Always use the same dedicated removable hard disk with a particular printer. Chapter 2 - Explore the print system Canon varioPRINT DP line... -
Page 24: Main Parts
Main Parts Main Parts Illustration [6] Main parts of the removable hard disk Part Description Hard disk Hard disk housing Right-hand handle Left-hand latch Chapter 2 - Explore the print system Canon varioPRINT DP line... -
Page 25: Remove The Removable Hard Disk
Press the left-hand latch (1) of the hard disk housing. The right-hand handle (2) is released. Pull the right-hand handle to slide out the removable hard disk. Place the staple box back. Close the cover. Chapter 2 - Explore the print system Canon varioPRINT DP line... - Page 26 Remove the Removable Hard Disk Step Action Illustration Store the hard disk in a secure place, for example a safe. Chapter 2 - Explore the print system Canon varioPRINT DP line...
-
Page 27: Insert The Removable Hard Disk
When the hard disk is completely inserted, close the right-hand handle (1). A click confirms that the right- hand handle is locked correctly behind the left-hand latch (2). Chapter 2 - Explore the print system Canon varioPRINT DP line... - Page 28 Insert the Removable Hard Disk Step Action Illustration Place the lock (1). Place the staple box (2) back. Close the cover (3). Press the On/Off button to turn the printer on. Chapter 2 - Explore the print system Canon varioPRINT DP line...
-
Page 29: Troubleshooting
• Press the On/Off button to turn on the print- NOTE Do not insert other hard disks or hard disks without the correct varioPRINT DP line software. The printer will not function correctly. Chapter 2 - Explore the print system Canon varioPRINT DP line... -
Page 30: Explore The Ease Of Operation
Chapter 3 Explore the ease of operation... -
Page 31: What The Print System Can Do For You
Remote Manager application offers remote workload and job planning across the printer fleet from one central overview. The Remote Control App ensures you stay informed about the print production on your printers. Chapter 3 - Explore the ease of operation Canon varioPRINT DP line... -
Page 32: Control Panel
• Check the content of all paper trays. • Load a new media type into a paper tray, or • Change the media type which is available in one of the paper trays. Chapter 3 - Explore the ease of operation Canon varioPRINT DP line... - Page 33 • LED off The machine is idle. There are no jobs scheduled for printing and no operator attention is required. Access to the control panel Chapter 3 - Explore the ease of operation Canon varioPRINT DP line...
- Page 34 The system administrator is responsible for user authorization and for providing your credentials. Users of the print system on page For more information, see [7] Login screen [8] Username is displayed at the bottom of the screen Chapter 3 - Explore the ease of operation Canon varioPRINT DP line...
-
Page 35: Settings Editor
In the address bar, enter the IP address or host name of the PRISMAsync controller. http://<printername or IP address> https://<printername or IP address> The Settings Editor application appears. Chapter 3 - Explore the ease of operation Canon varioPRINT DP line... - Page 36 Settings Editor You can now make the required changes. Chapter 3 - Explore the ease of operation Canon varioPRINT DP line...
-
Page 37: Remote Manager
• Monitor the status and current activities of each printer. • Distribute jobs across the available print systems. • Submit PDF jobs. • Export and import PDF jobs for preflight tooling. Chapter 3 - Explore the ease of operation Canon varioPRINT DP line... -
Page 38: Media-Based Workflow
Define the media attributes on the control panel or with the Settings Editor. The system administrator determines if operators are allowed to manage the media catalog from the control panel. Chapter 3 - Explore the ease of operation Canon varioPRINT DP line... -
Page 39: Document Printing Workflow
Job preparation PRISMAprepare PRISMAsync driver Remote Manager Workload planning Job planning Waiting Printed jobs DocBox jobs Print production Scheduled jobs [10] Job workflow for document printing mode Chapter 3 - Explore the ease of operation Canon varioPRINT DP line... -
Page 40: Transaction Printing Workflow
For color management, the output profile associated with the media family of the media is used. The control panel shows the media which the job uses. Chapter 3 - Explore the ease of operation Canon varioPRINT DP line... - Page 41 A stack eject follows when the printed output goes to the high capacity stacker. As a result, you must submit the job again. Chapter 3 - Explore the ease of operation Canon varioPRINT DP line...
-
Page 42: Start The Print System
Chapter 4 Start the print system... -
Page 43: Power Buttons And Power Modes
Factory default: 20 minutes. The printer wakes up when a job arrives in the list of [Scheduled jobs] or when you touch the control panel (either the screen or any button). Chapter 4 - Start the print system Canon varioPRINT DP line... - Page 44 In that case it is advised to disable the deep sleep mode. Then the printer will use the sleep mode instead. Chapter 4 - Start the print system Canon varioPRINT DP line...
-
Page 45: Turn On The System
Put the On/Off button of each connected finishing unit into the "I" position. Press the On/Off button on top of the printer, next to the base of the control panel. Chapter 4 - Start the print system Canon varioPRINT DP line... -
Page 46: Shut Down The System
When the shut down is complete, the control panel will be off. To shut down the system completely, switch the On/Off button of each connected finishing unit into the "O" position. Chapter 4 - Start the print system Canon varioPRINT DP line... -
Page 47: Restart The System
[14] Restart the system Procedure Touch [System] -> [Setup] -> [Shut down system]. The control panel displays the message [Are you sure you want to shut down?]. Press [Restart]. Chapter 4 - Start the print system Canon varioPRINT DP line... -
Page 48: Prepare The Print System
Chapter 5 Prepare the print system... -
Page 49: Adjust The Control Panel
Use of shorter job names When the job name is too long to display on the control panel, PRISMAsync truncates the job name. You can determine how PRISMAsync shortens the job names. Chapter 5 - Prepare the print system Canon varioPRINT DP line... - Page 50 The higher the value, the higher the brightness. [Contrast] You can increase or decrease the contrast from level 10 to 100 in steps of one. The higher the value, the higher the contrast. Chapter 5 - Prepare the print system Canon varioPRINT DP line...
- Page 51 2. Choose the automatic adjustment method or touch the + and - buttons to adjust the brightness and contrast manually. 3. Touch [OK]. Use pinch zoom gestures When you want to use pinch-in and pinch-out gestures you must first enable the multi-touch function. Chapter 5 - Prepare the print system Canon varioPRINT DP line...
- Page 52 Adjust the control panel [18] Multi-touch function 1. Touch [System] -> [Setup] -> [Control panel settings]. 2. Enable the multi-touch function. 3. Touch [OK]. 4. Restart the system. Chapter 5 - Prepare the print system Canon varioPRINT DP line...
-
Page 53: Work With The Workflow Profiles
[Custom]. The Use of the Default Workflow Profiles [19] The workflow profiles screen The following sections make recommendations about when to use which default workflow profile. Chapter 5 - Prepare the print system Canon varioPRINT DP line... - Page 54 • The print system selects another Scheduled jobs output tray for each next job. Print production Finishing and delivery Printing Media loading [21] Job by job workflow profile Chapter 5 - Prepare the print system Canon varioPRINT DP line...
- Page 55 • The print system selects another DocBox jobs output tray for each next job. Scheduled jobs Print production Finishing and delivery Printing Media loading [23] Manual planning workflow profile Chapter 5 - Prepare the print system Canon varioPRINT DP line...
- Page 56 [Check first set] [Standard] [Off] [As in job] [Job by job] [On] [As in job] [Check and print] [Off] [On] [Manual planning] [Off] [As in job] [Unattended] [Off] [Off] Chapter 5 - Prepare the print system Canon varioPRINT DP line...
- Page 57 The machine keeps printing all the jobs. The machine does not stop before the next scheduled job, unless there is a reason to stop. For example when a media is not available. Chapter 5 - Prepare the print system Canon varioPRINT DP line...
- Page 58 The jobs themselves are stacked in one straight line. [Off] All the printed jobs or sets are stacked in one straight line. There is no offset between the jobs or sets. Chapter 5 - Prepare the print system Canon varioPRINT DP line...
-
Page 59: Automated Workflows
When this setting is disabled, then the settings of the job ticket will be used. [Number of copies] You can indicate how many copies of a job must be printed. Chapter 5 - Prepare the print system Canon varioPRINT DP line... - Page 60 You can indicate the order in which the sheets will be delivered, for example [Face down - Normal order]. [Feed edge] You can indicate whether the sheets will be fed [Long edge] or [Short edge]. Chapter 5 - Prepare the print system Canon varioPRINT DP line...
- Page 61 You can indicate the type of workflow for the jobs. You can select [Receive, then print while RIP is in progress] or [Streaming]. [PDL type] You can indicate whether PostScript®, PCL, PDF or XPS must be used as page description language. Chapter 5 - Prepare the print system Canon varioPRINT DP line...
- Page 62 You can indicate the account number of the customer that will be used for accounting purposes. [Cost center] [Cost center can be a maximum of 40 characters long.] [Custom] [Custom can be a maximum of 255 characters long.] Chapter 5 - Prepare the print system Canon varioPRINT DP line...
-
Page 63: Add An Automated Workflow
A pop-up window displays the attributes you can specify for the new workflow. Tick the checkboxes of the attributes you want to define. Specify or select the values of the attributes. Click [Ok]. Chapter 5 - Prepare the print system Canon varioPRINT DP line... -
Page 64: Edit An Automated Workflow
Tick the checkbox of the workflow you want to edit. Click the [Edit] button. A pop-up window displays the attributes you can specify for your workflow. Change the attributes. Click [Ok]. Chapter 5 - Prepare the print system Canon varioPRINT DP line... -
Page 65: Delete An Automated Workflow
You cannot delete the factory default automated workflow. Procedure Select [Workflow] -> [Automated workflows]. Tick the checkbox of the workflow you want to delete. Click the [Delete] button. Click [Ok]. Chapter 5 - Prepare the print system Canon varioPRINT DP line... -
Page 66: Restore The Factory Default Workflow
• All the automated workflows you added will be removed • All the changes in the default workflow will be lost. Procedure Select [Workflow] -> [Automated workflows]. Click the [Restore] button. The factory default automated workflow is restored. Chapter 5 - Prepare the print system Canon varioPRINT DP line... -
Page 67: Hotfolders
• On a workstation, the key operator must create a shared network drive that is linked to the hotfolder. • On the desktop of that workstation, the key operator can create a shortcut to the hotfolder, if desired. Chapter 5 - Prepare the print system Canon varioPRINT DP line... -
Page 68: Activate The Hotfolder Function
Make sure that you filled in the user name and password before you continue with the next step. Click [OK] to confirm the activation of the hotfolder function. A confirmation window opens. Click [OK] to restart the controller now. Chapter 5 - Prepare the print system Canon varioPRINT DP line... -
Page 69: Create A Hotfolder
A logical name helps you to recognize the type of jobs you want to process using this hotfolder. Select the automated workflow to which you want to link the hotfolder. Click [OK]. Chapter 5 - Prepare the print system Canon varioPRINT DP line... -
Page 70: Create A Shared Network Folder On A Workstation
Settings Editor. Click 'OK.' The hotfolder is now ready for use. If desired, you can create a shortcut to the shared network folder on the desktop of the workstation. Chapter 5 - Prepare the print system Canon varioPRINT DP line... -
Page 71: Create A Hotfolder Default Ticket ('Default_Ticket.jdf')
Browse to the shared network folder and click [Save]. The template is saved as a hotfolder default ticket. Do not change the name of the hotfolder default ticket ('default_ticket.jdf'). Chapter 5 - Prepare the print system Canon varioPRINT DP line... -
Page 72: Accounting
ID to continue with this job. NOTE In the Settings Editor, navigate to [Configuration] -> [Accounting] for all accounting settings. Only key operators or system administrators can perform actions in the [Accounting] section. Chapter 5 - Prepare the print system Canon varioPRINT DP line... -
Page 73: The Accounting Related Settings In The Settings Editor
You can select [Use ';' (semi-colon)] or [Use ',' (comma)]. [UTF-8 header enabled] This settings allows you to indicate that the account log files must be encoded in UTF-8. Chapter 5 - Prepare the print system Canon varioPRINT DP line... -
Page 74: Enable The Identification And Verification Of Account Ids
Settings Editor are set to [Yes], the control panel displays the account name that corresponds to the account ID as defined in the 'accid.csv' file. When no account name is defined, the control panel displays the account ID. Chapter 5 - Prepare the print system Canon varioPRINT DP line... -
Page 75: The Account Id File
This column is a free text field (maximum 255 characters) where you can enter additional information about an account, for exam- ple the maximum monthly print volume. This information is not displayed on the control panel. Chapter 5 - Prepare the print system Canon varioPRINT DP line... -
Page 76: Download, Edit And Upload The Account Id File
In the Settings Editor, click [Configuration] -> [Accounting]. Click [Upload account ID file]. Browse to the location of the changed 'accid.csv' file. Select the required file and click 'Open'. Click [Upload account ID file]. Chapter 5 - Prepare the print system Canon varioPRINT DP line... -
Page 77: The Account Log File
'documentid' in an OJT. This field keeps the same value when the job is submit- ted multiple times. The field is empty when the at- tribute is not available. Chapter 5 - Prepare the print system Canon varioPRINT DP line... - Page 78 When you open the file in Microsoft® Excel, the date format changes into the date for- mat that is de- fined in Micro- soft® Excel Chapter 5 - Prepare the print system Canon varioPRINT DP line...
- Page 79 255 [Account] tab of the printer driver or in the attribute characters 'custom' in an OJT, for example. This field is empty when the attribute is not availa- Chapter 5 - Prepare the print system Canon varioPRINT DP line...
- Page 80 The estimated total usage of black toner for sheets that are printed or copied in B&W. <tonercolor> Value in milligrams The estimated total usage of toner for sheets that are printed or copied in color. Chapter 5 - Prepare the print system Canon varioPRINT DP line...
- Page 81 The number of punch holes of the prepunched me- count>(1-16)* dia. <nofpunches> A number The number of punched sheets in a job. <noffolds> A number The number of folded sheets in a job. Chapter 5 - Prepare the print system Canon varioPRINT DP line...
- Page 82 16 media types, the remaining fields are empty. If you use more than 16 media types, they are logged as if they were media type 16. The maximum number of media types per job is 16. Chapter 5 - Prepare the print system Canon varioPRINT DP line...
-
Page 83: Save An Account Log File
Click [Save account log files]. Click the link to the required file, then click [Save]. Browse to the location where you want to save the file, then click [Save]. Chapter 5 - Prepare the print system Canon varioPRINT DP line... -
Page 84: Use Accounting
ID for each job. The system clears the account ID used for the previous job. Therefore, the [Account ID] field in the [Job] pane is empty before the next job. Chapter 5 - Prepare the print system Canon varioPRINT DP line... - Page 85 Illustration [26] Select an accounting mode Procedure On the control panel, touch [System] -> [Setup] -> [Accounting]. Press [Accounting mode]. Select the desired setting. Press [OK]. Chapter 5 - Prepare the print system Canon varioPRINT DP line...
-
Page 86: Enter An Account Id Per Job
On the control panel, touch the [Account ID] button in the [Job] pane of print, copy and scan jobs. A numerical keyboard appears. Enter the account ID for the current job (1 - 12 digits). Use the "C" button to correct a wrong entry. Press [OK]. Chapter 5 - Prepare the print system Canon varioPRINT DP line... -
Page 87: Enter An Account Id In The Printer Driver
ID are automatically placed in the [Waiting jobs] section. You must enter a valid account ID to print the jobs. Chapter 5 - Prepare the print system Canon varioPRINT DP line... -
Page 88: Prepare The Jobs
Chapter 6 Prepare the jobs... -
Page 89: Prepare Print Jobs
The advantage of auto- mated workflows is that you do not have to open a file and check the settings before printing. Chapter 6 - Prepare the jobs Canon varioPRINT DP line... - Page 90 NOTE You can only make changes to jobs that are currently not being printed. Chapter 6 - Prepare the jobs Canon varioPRINT DP line...
-
Page 91: Prepare Print Jobs With Remote Printer Driver
When you see a red exclamation mark in this area the printer has stopped printing. Click on the mark to see why the printer stopped. Job name The job name identifies the job on the PRISMAsync Print Server. Chapter 6 - Prepare the jobs Canon varioPRINT DP line... - Page 92 It is also possi- ble to delete stored templates. 10 Submit job to printer With the OK button you submit the document and job ticket to the printer. Chapter 6 - Prepare the jobs Canon varioPRINT DP line...
-
Page 93: Print A Job Using Prismaprepare (Option)
See the online help of PRISMAprepare for all the details. Procedure Prepare the document. [29] Lay out preparation with PRISMAprepare Use the media catalog to define the media. With PRISMAprepare you can export the media catalog to PRISMAsync controllers. Chapter 6 - Prepare the jobs Canon varioPRINT DP line... - Page 94 Print a Job Using PRISMAprepare (Option) [30] The media catalog in PRISMAprepare Define the required finishing options. Chapter 6 - Prepare the jobs Canon varioPRINT DP line...
-
Page 95: Print A File From A Usb Drive
You can print documents (*.pdf, *.ps, *.prn, *.xps files) on a USB drive. You can disable / enable this function in the Settings Editor. Illustration [31] Example of a folder structure on the USB drive Chapter 6 - Prepare the jobs Canon varioPRINT DP line... - Page 96 [Waiting jobs] or a DocBox. Then you can edit the file first and print the file from the other location The locations you can select depend on your system configuration. Remove the USB drive from the control panel when the USB LED on the control panel is off. Chapter 6 - Prepare the jobs Canon varioPRINT DP line...
-
Page 97: Print A Page Number Via Prismasync
Select the job to which you want to add page numbers. Touch [Properties], or double-tap the job. Indicate in the print quality tile the required information for the page numbers. Chapter 6 - Prepare the jobs Canon varioPRINT DP line... -
Page 98: Prepare Copy Jobs And Scan Jobs
[PDF scan job] Scan originals to a PDF job that is stored in the DocBox. Now you can use PDF datapath functionality such as page numbering. Chapter 6 - Prepare the jobs Canon varioPRINT DP line... - Page 99 Reuse the settings of the previous copy job or scan job for your new job. NOTE You cannot use [Last used] when the previous job was a scan job or a combined copy job. Chapter 6 - Prepare the jobs Canon varioPRINT DP line...
-
Page 100: Introduction To The Scan Function
To use the scan-to-file, scan-to-SMB and scan-to-email functions, the following items must be configured in the Settings Editor on the PRISMAsync controller. • Scan to file ([Configuration] -> [Connectivity]) • Scan to SMB ([Workflow] -> [SMB shares]) Chapter 6 - Prepare the jobs Canon varioPRINT DP line... - Page 101 • Manually via the Settings Editor: Access the Settings Editor -> click [Support] -> [Troubleshooting] -> [Clean the scan job export buffer]. • Automatically: The PRISMAsync controller removes a buffered scan job automatically 48 hours after a scan job has finished. Chapter 6 - Prepare the jobs Canon varioPRINT DP line...
-
Page 102: Scanning Information
Placement on the glass plate Placement Illustration Vertical placement Horizontal placement Orientation in the ADF Placement in the ADF Placement Illustration Vertical placement Chapter 6 - Prepare the jobs Canon varioPRINT DP line... - Page 103 Place originals horizontally when you copy with a preset zoom, for example when you enlarge an A4 original to A3 paper. NOTE You must always place A3, B4, B6 and 11" x 17" originals horizontally. Chapter 6 - Prepare the jobs Canon varioPRINT DP line...
-
Page 104: Copy Or Scan Originals And Books Using The Glass Plate
Open the ADF at least 300 mm (11.8"). Otherwise, the size of the originals may not be detec- ted correctly. Sensor = Sensor Place one original face down on the glass plate. Chapter 6 - Prepare the jobs Canon varioPRINT DP line... - Page 105 When the copy or scan job is ready, open the ADF and remove the original from the glass plate. Gently close the ADF to prevent personal injury or damage to the scanner. Chapter 6 - Prepare the jobs Canon varioPRINT DP line...
- Page 106 (opened book). When the copy or scan job is ready, open the ADF and remove the book from the glass plate. Chapter 6 - Prepare the jobs Canon varioPRINT DP line...
- Page 107 Copy or scan originals and books using the glass plate Step Action Illustration Gently close the ADF to prevent personal injury or damage to the scanner. Chapter 6 - Prepare the jobs Canon varioPRINT DP line...
-
Page 108: Copy Or Scan Originals Using The Adf
Define the copy or scan settings on the control panel, and touch [Start] . When scanning is complete, remove the originals from the original output area to avoid paper jams. Chapter 6 - Prepare the jobs Canon varioPRINT DP line... -
Page 109: Access Other Functions During A Copy Job Or Scan Job
The [Copy/Scan] view appears. The navigation buttons at the bottom of the control panel become visible and accessible. Carry out the desired actions. To get back to your job window, touch [Jobs]. Press [Resume job]. Chapter 6 - Prepare the jobs Canon varioPRINT DP line... -
Page 110: Plan The Workload Remotely
Chapter 7 Plan the workload remotely... -
Page 111: Prismasync Remote Manager (Option)
You must enable and configure PRISMAsync Remote Manager in the Settings Editor. Refer to the user manual for the PRISMAsync Remote Manager for the options available when using this product. Chapter 7 - Plan the workload remotely Canon varioPRINT DP line... -
Page 112: Use The Remote Control App To Monitor Printing
4. Register this printer in the Remote Control administration in the Settings Editor. 5. Enable the Remote Control function in the Settings Editor. 6. Administer the users of the Remote Control app in the Settings Editor. Chapter 7 - Plan the workload remotely Canon varioPRINT DP line... - Page 113 1. Download the PRISMAsync Remote Control app from Google Play or the Apple App Store 2. Start the app and log in with your Google or Microsoft account. 3. Change the default settings, if required. Chapter 7 - Plan the workload remotely Canon varioPRINT DP line...
-
Page 114: Chapter 8 Plan The Jobs
Chapter 8 Plan the jobs... -
Page 115: Manage The Jobs In The Queue
To undo the multiple selection and only select one job, you must touch and hold that job for two seconds. Press [Print]. The job is moved to the bottom of the list of [Scheduled jobs]. Chapter 8 - Plan the jobs Canon varioPRINT DP line... -
Page 116: Print An Urgent Job Immediately
The urgent job appears at the top of the list of [Scheduled jobs]. The active print job is paused as soon as the current set is ready and becomes second in the list. Chapter 8 - Plan the jobs Canon varioPRINT DP line... -
Page 117: Give Priority To A Print Job
On the control panel, touch [Jobs] -> [Queues]. If collapsed, first touch to expand the list of [Scheduled jobs]. Touch the job to which you want to give priority. Press [To top]. Chapter 8 - Plan the jobs Canon varioPRINT DP line... -
Page 118: Print A Scheduled Job Later
To undo the multiple selection and only select one job, you must touch and hold that job for two seconds. Press [Move]. The job is moved to the list of [Waiting jobs]. Chapter 8 - Plan the jobs Canon varioPRINT DP line... -
Page 119: Send A Job To Another Printer
Select [Copy to] from the button bar or from the drop-down menu. Select a printer from the list or use [Other printer] to manually enter a printer name. Touch [OK]. Chapter 8 - Plan the jobs Canon varioPRINT DP line... -
Page 120: Bundle Jobs In The List Of [Waiting Jobs]
• Change the order of the jobs in the bundle. [Delete] Delete the job. [Ticket] Print the job ticket of the job. [Proof] Print one copy of the job first to check if the result meets your ex- pectations. Chapter 8 - Plan the jobs Canon varioPRINT DP line... - Page 121 A [Create bundle] window appears that allows you to make some changes. If necessary, use the [Up] and [Down] buttons to change the job order. If necessary, change the generic job settings, such as [Number of bundles]. Press [OK]. Chapter 8 - Plan the jobs Canon varioPRINT DP line...
-
Page 122: Add Extra Sheets To A Job
Go to the location of the job. Select the job to which you want to add separator sheets. Touch [Properties], or double-tap the job. Indicate at the top right corner that you want separator sheets. Chapter 8 - Plan the jobs Canon varioPRINT DP line... -
Page 123: Use The Docbox (Option)
DocBox for each individual customer or department. Illustration [37] The starting page for DocBox jobs When to Use the DocBox For example: • To carry out advanced job preparation actions. Chapter 8 - Plan the jobs Canon varioPRINT DP line... - Page 124 • To correct settings when the proof print is not correct, for example change the print quality or layout of a document. • To combine analogue documents with digital documents. • To store jobs that must be reprinted regularly, for examples reports or books. Chapter 8 - Plan the jobs Canon varioPRINT DP line...
-
Page 125: Create A New Docbox
If you want to secure the new DocBox with a PIN, set [PIN enabled] to [Yes] and enter a PIN to secure the DocBox. Each time you access this DocBox through the operator panel, you must enter this PIN. Confirm the PIN. Click [OK]. Chapter 8 - Plan the jobs Canon varioPRINT DP line... -
Page 126: Handle The Jobs In A Docbox
2. Touch the icon and browse the document. 3. View how the document will look after printing in the document view 4. Use the zoom function to view specific details. Chapter 8 - Plan the jobs Canon varioPRINT DP line... - Page 127 The action buttons indicate the actions you can car- ry out. With the optional [Page programming] function, you can insert pages and define the media and fin- ishing settings for the page ranges in a job. Chapter 8 - Plan the jobs Canon varioPRINT DP line...
- Page 128 • The binding edge of the original is at the [Landscape top] top. • When you turn a sheet over the binding edge, the image or text on the back side of the sheet is in readable form. Chapter 8 - Plan the jobs Canon varioPRINT DP line...
- Page 129 When [Back] is [On], you can indicate which side of the back cover must be printed. You can select: • [Both sides] • [Front side] • [Back side] • [None] Chapter 8 - Plan the jobs Canon varioPRINT DP line...
- Page 130 Use the + and - buttons to reduce or enlarge the size of the image (from 25% to 400%). The preview pane immediately shows the results of your ac- tion. Chapter 8 - Plan the jobs Canon varioPRINT DP line...
- Page 131 [Bottom center] moves the image to the center of the bottom side of the sheet. [Bottom center] [Bottom right] moves the image to the lower right corner of the sheet. [Bottom right] Chapter 8 - Plan the jobs Canon varioPRINT DP line...
- Page 132 By default, the front side and the back side are linked . Then the image on both sides will be shifted the same amount. Touch to terminate the link and shift each side individually. Chapter 8 - Plan the jobs Canon varioPRINT DP line...
- Page 133 It may only be necessary to change the ad- vanced settings when an offline finisher pro- cesses sheets in a non-standard way. Please refer to the finisher manuals for more informa- tion. Chapter 8 - Plan the jobs Canon varioPRINT DP line...
- Page 134 Deliver the prints with the header at the bot- tom side and in portrait position (vertical). [Header down SEF] Deliver the prints with the header at the bot- tom side and in landscape position (horizon- tal). Chapter 8 - Plan the jobs Canon varioPRINT DP line...
- Page 135 • When the area must be darker, then select a val- ue of -1 to -3. • When an area on the output must be lighter, then select a value of 1 to 3. Chapter 8 - Plan the jobs Canon varioPRINT DP line...
- Page 136 However, when you print special data such as CAD drawings, smaller lines may be required. Therefore, you can turn the minimum line width function off. Then even thinner lines will be printed. Chapter 8 - Plan the jobs Canon varioPRINT DP line...
- Page 137 When you select [Normal], the im- ages will become darker and more contrast- rich. NOTE You can also use your own color profiles. Make the required settings in the Settings Editor. Chapter 8 - Plan the jobs Canon varioPRINT DP line...
- Page 138 • [Bottom edge] • [Right edge] [Saddle stitching] Check the preview for the result of the selection. [Folding] This option is only available when you have a folding unit connected. Chapter 8 - Plan the jobs Canon varioPRINT DP line...
- Page 139 • [Print inside] • [Print outside] Check the preview for the result of the selec- tion. [Trimming] This option is only available when you have a trimming unit connected. Chapter 8 - Plan the jobs Canon varioPRINT DP line...
- Page 140 Here you can select the required number and the location of the punch holes. Location: [None] • [Left] • [Top] • [Right] • [Bottom] [2 holes] [3 holes] [4 holes] [Die set dependent] Chapter 8 - Plan the jobs Canon varioPRINT DP line...
- Page 141 You can also indicate the feed di- rection of the separator sheets (long-edge feed or short-edge feed). [Off] No separator sheet will be inserted before each set. Chapter 8 - Plan the jobs Canon varioPRINT DP line...
- Page 142 [Start with page num- The number with which the page numbering ber] starts. [Text before page The text that is printed before or after the page number] number. [Text after page num- ber] Chapter 8 - Plan the jobs Canon varioPRINT DP line...
-
Page 143: Edit A Job In A Docbox
Touch the job you want to edit. Touch [Properties], or double-tap the job to open the [Properties] window. If you want to carry out extended page programming, touch [Page programming]. Change the required settings. Touch [OK]. Chapter 8 - Plan the jobs Canon varioPRINT DP line... -
Page 144: Combine Jobs In A Docbox (Build Function)
A [Create build] window appears that allows you to make some changes. If necessary, use the [Up] and [Down] buttons to change the job order. If necessary, change the generic job settings, such as [Number of sets]. Touch [OK]. Chapter 8 - Plan the jobs Canon varioPRINT DP line... -
Page 145: Split A Combined Job In The Docbox
Touch the DocBox that contains the job you want to split. Touch the job you want to split. Touch the [Split] button, or select [Split] from the drop-down menu. The DocBox displays the original jobs. Chapter 8 - Plan the jobs Canon varioPRINT DP line... -
Page 146: Lock A Job In A Docbox
Touch one or more jobs that you want to lock, or use an option from the [Select] menu to select multiple jobs at once. From the drop-down menu, select [Lock]. indicates that the job is locked. Chapter 8 - Plan the jobs Canon varioPRINT DP line... -
Page 147: Unlock A Job In A Docbox
On the control panel, touch [Jobs] -> [DocBox]. Touch the DocBox that contains the job you want to unlock. Touch the job that you want to unlock. From the drop-down menu, select [Unlock]. Chapter 8 - Plan the jobs Canon varioPRINT DP line... -
Page 148: Move A Job From One Docbox To Another
Touch the DocBox button that contains the job you want to move. Touch the job you want to move. Touch the [Move] button, or select [Move] from the drop-down menu. Touch the destination. Press [OK]. Chapter 8 - Plan the jobs Canon varioPRINT DP line... -
Page 149: Print The Jobs In A Docbox
On the control panel, touch [Jobs] -> [DocBox]. Touch the DocBox that contains the job you want to print. Touch the desired job. Touch [Print] to print the non-urgent job. Chapter 8 - Plan the jobs Canon varioPRINT DP line... -
Page 150: Print An Urgent Job From The Docbox Immediately
On the control panel, touch [Jobs] -> [DocBox]. Touch the DocBox that contains the job you want to print. Touch the desired job. Touch [Print now] to print the urgent job immediately. Chapter 8 - Plan the jobs Canon varioPRINT DP line... -
Page 151: Select And Print Multiple Jobs From The Docbox
These are the jobs that have already been printed be- fore. [New jobs] These are the jobs that have not been printed yet. Manually Touch the required jobs one by one Illustration [43] Select multiple jobs Chapter 8 - Plan the jobs Canon varioPRINT DP line... - Page 152 On the control panel, touch [Jobs] -> [DocBox]. Touch the DocBox that contains the jobs you want to print. Touch the [Select] button. From the drop-down menu, select the required option. Press [Print]. Chapter 8 - Plan the jobs Canon varioPRINT DP line...
- Page 153 Select and Print Multiple Jobs from the DocBox Chapter 8 - Plan the jobs Canon varioPRINT DP line...
-
Page 154: Carry Out Print Jobs
Chapter 9 Carry Out Print Jobs... -
Page 155: Change The Print Job Settings On The Control Panel
1. View the result of the job and imposition settings in the sheet view 2. Touch the icon and browse the document. 3. View how the document will look after printing in the document view Chapter 9 - Carry Out Print Jobs Canon varioPRINT DP line... - Page 156 The action buttons indicate the actions you can car- ry out. With the optional [Page programming] function, you can insert pages and define the media and fin- ishing settings for the page ranges in a job. Chapter 9 - Carry Out Print Jobs Canon varioPRINT DP line...
- Page 157 • The binding edge of the original is at the [Landscape top] top. • When you turn a sheet over the binding edge, the image or text on the back side of the sheet is in readable form. Chapter 9 - Carry Out Print Jobs Canon varioPRINT DP line...
- Page 158 When [Back] is [On], you can indicate which side of the back cover must be printed. You can select: • [Both sides] • [Front side] • [Back side] • [None] Chapter 9 - Carry Out Print Jobs Canon varioPRINT DP line...
- Page 159 Use the + and - buttons to reduce or enlarge the size of the image (from 25% to 400%). The preview pane immediately shows the results of your action. Chapter 9 - Carry Out Print Jobs Canon varioPRINT DP line...
- Page 160 [Bottom center] moves the image to the center of the bottom side of the sheet. [Bottom center] [Bottom right] moves the image to the lower right corner of the sheet. [Bottom right] Chapter 9 - Carry Out Print Jobs Canon varioPRINT DP line...
- Page 161 By default, the front side and the back side are linked . Then the image on both sides will be shifted the same amount. Touch to terminate the link and shift each side individually. Chapter 9 - Carry Out Print Jobs Canon varioPRINT DP line...
- Page 162 It may only be necessary to change the ad- vanced settings when an offline finisher pro- cesses sheets in a non-standard way. Please refer to the finisher manuals for more informa- tion. Chapter 9 - Carry Out Print Jobs Canon varioPRINT DP line...
- Page 163 Deliver the prints with the header at the bot- tom side and in portrait position (vertical). [Header down SEF] Deliver the prints with the header at the bot- tom side and in landscape position (horizon- tal). Chapter 9 - Carry Out Print Jobs Canon varioPRINT DP line...
- Page 164 However, when you print special data such as CAD drawings, smaller lines may be required. Therefore, you can turn the minimum line width function off. Then even thinner lines will be printed. Chapter 9 - Carry Out Print Jobs Canon varioPRINT DP line...
- Page 165 When you select [Normal], the im- ages will become darker and more contrast- rich. NOTE You can also use your own color profiles. Make the required settings in the Settings Editor. Chapter 9 - Carry Out Print Jobs Canon varioPRINT DP line...
- Page 166 • [Bottom edge] • [Right edge] [Saddle stitching] Check the preview for the result of the selection. [Folding] This option is only available when you have a folding unit connected. Chapter 9 - Carry Out Print Jobs Canon varioPRINT DP line...
- Page 167 • [Print inside] • [Print outside] Check the preview for the result of the selec- tion. [Trimming] This option is only available when you have a trimming unit connected. Chapter 9 - Carry Out Print Jobs Canon varioPRINT DP line...
- Page 168 Here you can select the required number and the location of the punch holes. Location: [None] • [Left] • [Top] • [Right] • [Bottom] [2 holes] [3 holes] [4 holes] [Die set dependent] Chapter 9 - Carry Out Print Jobs Canon varioPRINT DP line...
- Page 169 You can also indicate the feed di- rection of the separator sheets (long-edge feed or short-edge feed). [Off] No separator sheet will be inserted before each set. Chapter 9 - Carry Out Print Jobs Canon varioPRINT DP line...
- Page 170 The number with which the page numbering ber] starts. [Text before page The text that is printed before or after the page number] number. [Text after page num- ber] Chapter 9 - Carry Out Print Jobs Canon varioPRINT DP line...
-
Page 171: Change The [Output] Settings
Touch the job you want to change. Touch [Properties], or double-tap the job to open the [Properties] window. Touch the [1- or 2-sided] button. Touch the desired value. Press [OK]. Chapter 9 - Carry Out Print Jobs Canon varioPRINT DP line... -
Page 172: Change The Binding Edge
Touch the job you want to change. Touch [Properties], or double-tap the job to open the [Properties] window. Touch the [Binding edge] button. Touch the desired value. Press [OK]. Chapter 9 - Carry Out Print Jobs Canon varioPRINT DP line... -
Page 173: Select Another Media For A Job
When more than one media was defined for a job, the preview pane displays a separate button for each media. From the list, select the new media. Press [OK]. Chapter 9 - Carry Out Print Jobs Canon varioPRINT DP line... -
Page 174: Change The Settings For Covers
DocBox. Touch the job you want to change. Touch [Properties], or double-tap the job to open the [Properties] window. Touch the [Cover] button. Make the required changes. Press [OK]. Chapter 9 - Carry Out Print Jobs Canon varioPRINT DP line... -
Page 175: Shift The Image Roughly To Create Binding Space
DocBox. Touch the job you want to change. Touch [Properties], or double-tap the job to open the [Properties] window. Touch the [Align] button. Make the required changes. Press [OK]. Chapter 9 - Carry Out Print Jobs Canon varioPRINT DP line... -
Page 176: Shift The Image Precisely To Create Binding Space Or Correct The Layout
You can touch the - and + buttons to change the values. You can also enter the required value directly. Touch the number to enter a value manually. The numeric keyboard appears. There you can enter the required value. Press [OK]. Chapter 9 - Carry Out Print Jobs Canon varioPRINT DP line... -
Page 177: Change The Print Delivery Settings
Touch the job you want to change. Touch [Properties], or double-tap the job to open the [Properties] window. Touch the [Print delivery] button. Make the required changes. Press [OK]. Chapter 9 - Carry Out Print Jobs Canon varioPRINT DP line... -
Page 178: Change The Stacking Method Per Job
Touch [Properties], or double-tap the job to open the [Properties] window. Touch the [Print delivery] button. Touch the [Offset stacking] button to toggle between [On] and [Off]. Press [OK]. Chapter 9 - Carry Out Print Jobs Canon varioPRINT DP line... -
Page 179: Change The Print Quality Settings
However, when you print special data such as CAD drawings, smaller lines may be required. Therefore, you can turn the mini- mum line width function off. Then even thinner lines will be prin- ted. Chapter 9 - Carry Out Print Jobs Canon varioPRINT DP line... - Page 180 On the control panel, touch [Jobs] -> [Queues] -> [Scheduled jobs] or [Waiting jobs], or select a DocBox. Touch the job you want to change. Touch [Properties], or double-tap the job to open the [Properties] window. Touch [Print quality]. Make the required changes. Touch [OK]. Chapter 9 - Carry Out Print Jobs Canon varioPRINT DP line...
-
Page 181: Change The Finishing Method
DocBox. Touch the job you want to change. Touch [Properties], or double-tap the job to open the [Properties] window. Touch the [Binding] button. Make the required changes. Press [OK]. Chapter 9 - Carry Out Print Jobs Canon varioPRINT DP line... -
Page 182: Define The Finishing For Print Jobs
Touch the job you want to change. Touch [Properties], or double-tap the job to open the [Properties] window. Touch the [Binding], [Folding] or [Trimming] button. Make the required settings. Press [OK]. Chapter 9 - Carry Out Print Jobs Canon varioPRINT DP line... -
Page 183: Change The [Job] Settings
Enter the desired number of sets (between 1 and 65,000). If necessary, touch the arrow button <- to correct the previous entry, or touch [Cancel] to close the numerical keyboard without saving the changes. Press [OK]. Chapter 9 - Carry Out Print Jobs Canon varioPRINT DP line... -
Page 184: Check The First Set
The text changes from [Off] to [On]. A check mark indicates that the checking of the first set is enabled. Press [OK]. The [Number of sets] button has a check mark. Press [OK]. Chapter 9 - Carry Out Print Jobs Canon varioPRINT DP line... -
Page 185: Change The Page Range You Want To Print
Touch the [From] button. Enter the number of the first page you want to print. Touch the [To] button. Enter the number of the last page you want to print. Press [OK]. Chapter 9 - Carry Out Print Jobs Canon varioPRINT DP line... -
Page 186: Change The Use Of Separator Sheets
Touch the job you want to change. Touch [Properties], or double-tap the job to open the [Properties] window. Touch the [Separator sheets] button to toggle between [On] and [Off]. Touch [OK]. Chapter 9 - Carry Out Print Jobs Canon varioPRINT DP line... -
Page 187: Change The Print Job Settings On Page Level
Touch [Properties], or double-tap the job to open the [Properties] window. If you want to carry out extended page programming, touch [Page programming]. Change the required settings. Press [OK]. Chapter 9 - Carry Out Print Jobs Canon varioPRINT DP line... -
Page 188: Print Your Jobs Using The Control Panel
Touch [Queues] -> [Waiting jobs]. Touch the job you want to reprint. Touch [Properties] if you want to change the settings, for example the number of sets. Press [Print]. Chapter 9 - Carry Out Print Jobs Canon varioPRINT DP line... -
Page 189: Select More Than One Job For Printing
[Waiting jobs], or go to a DocBox. Touch the jobs you want to print one by one, or make a selection using the [Select] button. The selected jobs are highlighted. Press [Print]. Chapter 9 - Carry Out Print Jobs Canon varioPRINT DP line... -
Page 190: Print A Job Ticket
The job is sent to the bottom of the list of [Scheduled jobs]. The job may not be immediately visible in the list of [Scheduled jobs]. You can recognize the job by the prefix @_ in front of the job name. Chapter 9 - Carry Out Print Jobs Canon varioPRINT DP line... -
Page 191: Make A Proof
A copy of the job goes to the bottom of the list of [Scheduled jobs]. The original job remains in the list of [Waiting jobs] or in the [DocBox]. You can recognize a proof by the magnifying glass on the job icon . Chapter 9 - Carry Out Print Jobs Canon varioPRINT DP line... -
Page 192: Stop The Printer
The buffer can contain up to 50 pages. Be- cause the printer stops when the buffer is empty, it is possible that the last printed set is not complete. Chapter 9 - Carry Out Print Jobs Canon varioPRINT DP line... - Page 193 The [Confirm start of job] setting in a [Work- The printer stops each time at the start of a flow profile] is [On]. new job. You must start each job manually. Chapter 9 - Carry Out Print Jobs Canon varioPRINT DP line...
-
Page 194: Delete Print Jobs
• Touch [Jobs] -> [Printed jobs] Select the jobs you want to delete. Press [Delete]. A message appears. When you are sure that you want to delete the selected job(s), touch [Yes]. Chapter 9 - Carry Out Print Jobs Canon varioPRINT DP line... -
Page 195: Variable Data Printing
• Change the settings of the job. Be aware that when you change settings of a PDF/VT job, these settings are applicable to all records of the job. NOTE Page programming is not available for VDP jobs. Chapter 9 - Carry Out Print Jobs Canon varioPRINT DP line... -
Page 196: Convert A Job To A Variable Data Job
Touch [OK] to start the conversion. After you finish After conversion you can make the job settings and print the variable data job. NOTE You cannot change a VDP job into a normal job. Chapter 9 - Carry Out Print Jobs Canon varioPRINT DP line... -
Page 197: Transaction Printing (Option)
• An overview of the items in the [Transaction] section on the control panel. • The sequence of steps you must perform to print your transaction jobs. Overview of the [Transaction] Section [47] Overview of the [Transaction] section Chapter 9 - Carry Out Print Jobs Canon varioPRINT DP line... - Page 198 • Via the Settings Editor: [Trans- action printing] -> [Setups], or • By the host via the data stream (when the printer is online and connected). Chapter 9 - Carry Out Print Jobs Canon varioPRINT DP line...
- Page 199 [Switch the printer online or off- line]. Switch the printer • Via the control panel: [System] - back to the docu- > [Transaction] -> [Transaction ment printing mode. printing mode] -> [Off]. Chapter 9 - Carry Out Print Jobs Canon varioPRINT DP line...
-
Page 200: Activate Transaction Printing
On the host or mainframe, connect to the printer and start the job. NOTE You can also select a setup and put the printer online via the [Transaction printing] section in the Settings Editor. Chapter 9 - Carry Out Print Jobs Canon varioPRINT DP line... -
Page 201: Deactivate Transaction Printing
Press [Transaction printing mode]. The text on the button changes from [On] to [Off]. NOTE You can also put the printer offline via the [Transaction printing] section in the Settings Editor. Chapter 9 - Carry Out Print Jobs Canon varioPRINT DP line... -
Page 202: Shift The Image In The Transaction Printing Mode
Procedure On the control panel, touch [System] -> [Transaction]. Touch the - or + buttons to shift the image on the front side or back side of the sheet. Chapter 9 - Carry Out Print Jobs Canon varioPRINT DP line... -
Page 203: Transaction Setups
After you changed the settings of a transaction setup, you must load the transaction setup to Activate a Transaction Setup on page make the setup changes active (see 204). Chapter 9 - Carry Out Print Jobs Canon varioPRINT DP line... -
Page 204: Edit A Transaction Setup
After you changed the settings of a transaction setup, you must load the transaction setup to Activate a Transaction Setup on page make the setup changes active (see 204). Chapter 9 - Carry Out Print Jobs Canon varioPRINT DP line... -
Page 205: Activate A Transaction Setup
In the Settings Editor, click [Transaction printing] -> [Settings] -> [Switch the printer online or offline] to switch the printer offline. Click [Transaction printing] -> [Setups], select the setup and click [Load]. The transaction setup is now activated. Chapter 9 - Carry Out Print Jobs Canon varioPRINT DP line... -
Page 206: Exchange All Setups Between Printers
Browse to the location where the setup file is stored. Choose either [Replace] or [Merge]. NOTE After you imported the setup file you must open and load the transaction setup you want to use. Chapter 9 - Carry Out Print Jobs Canon varioPRINT DP line... -
Page 207: Ipds
The Settings Editor displays only the media for which the media name is consistent with the IPDS media name definitions. Valid characters for an IPDS media name are: A-Z, a-z, 0-9, blank. Chapter 9 - Carry Out Print Jobs Canon varioPRINT DP line... -
Page 208: Output Recovery In Case Of An Error (Ipds)
Sheets copied to con- Once the error is re- troller memory (in- solved, the printer re- cluding error pages). starts by printing the first page in the con- troller memory. Chapter 9 - Carry Out Print Jobs Canon varioPRINT DP line... - Page 209 Suppressed output re‐ End up in the output covery location after error re‐ covery Are stacked at one of the output locations. Sheets printed suc- Sheets are in output cessfully location Chapter 9 - Carry Out Print Jobs Canon varioPRINT DP line...
- Page 210 Remain in host mem- ory. Sheets in host memo- Once the error is re- solved, the printer re- starts by printing the first page in the host memory. Chapter 9 - Carry Out Print Jobs Canon varioPRINT DP line...
-
Page 211: Pcl
This [Media message] indicates the name or size of the missing media. Your response to the [Media message] depends on the mode in which the printer works, either: • The tray-to-tray mode, or • The tray-to-media mode. Chapter 9 - Carry Out Print Jobs Canon varioPRINT DP line... -
Page 212: Handle The Media Messages In The Tray-To-Media Mode (Pcl)
Note that the media that was previously allocated to that memory position in the setup will be overwritten. Then that media will no longer be available to the transaction stream. Now you can assign other media or continue the print job. Chapter 9 - Carry Out Print Jobs Canon varioPRINT DP line... -
Page 213: Handle The Media Messages In The Tray-To-Tray Mode (Pcl)
Select the paper tray where you want to load the required media and touch [OK]. Load the media. Close the paper tray. Press [OK]. Now you can assign other media or continue the print job. Chapter 9 - Carry Out Print Jobs Canon varioPRINT DP line... -
Page 214: Chapter 10 Carry Out Copy Jobs
Chapter 10 Carry Out Copy Jobs... -
Page 215: Copy Your Documents
[Auto]. Copy job settings [48] The copy job settings Section Description [Original] The [Original] section contains the settings to define how the original looks. Chapter 10 - Carry Out Copy Jobs Canon varioPRINT DP line... - Page 216 The automatically set value for this setting. Only the front side contains an image or text. [1-sided] Both the front side and the back side contain an im- age or text. [2-sided] Chapter 10 - Carry Out Copy Jobs Canon varioPRINT DP line...
- Page 217 • [Left page]: The left-hand half of the original (opened book) is copied/scanned. • [Right page]: The right-hand half of the original (opened book) is copied/scanned. Chapter 10 - Carry Out Copy Jobs Canon varioPRINT DP line...
- Page 218 The original contains mainly or only text. [Text] The original contains an image with lots of details. [High detail] [Original] Settings - [Background] Setting Values Description [Background] Number Suppression of vague or yellowish background. Chapter 10 - Carry Out Copy Jobs Canon varioPRINT DP line...
- Page 219 This means that every back side of a two-sided print is upside down compared to the front side. Chapter 10 - Carry Out Copy Jobs Canon varioPRINT DP line...
- Page 220 [Print sides] Here you can select the sides of the back cover you want to print on. • [Both sides] • [Front side] • [Back side] • [None] Chapter 10 - Carry Out Copy Jobs Canon varioPRINT DP line...
- Page 221 Use the + and - buttons to reduce or enlarge the size of the image (from 25% to 400%). The preview pane immediately shows the results of your ac- tion. Chapter 10 - Carry Out Copy Jobs Canon varioPRINT DP line...
- Page 222 [Bottom center] moves the image to the center of the bottom side of the sheet. [Bottom center] [Bottom right] moves the image to the lower right corner of the sheet. [Bottom right] Chapter 10 - Carry Out Copy Jobs Canon varioPRINT DP line...
- Page 223 If you want to define a different value for each side, press . The icon changes to the unlocked sta- tus. Now you can define the values for the front side and the back side separately. Chapter 10 - Carry Out Copy Jobs Canon varioPRINT DP line...
- Page 224 This makes it easier to rec- ognize individual sets. [Off] All the sets or jobs that get to an output location are stacked in a straight stack. Chapter 10 - Carry Out Copy Jobs Canon varioPRINT DP line...
- Page 225 Deliver the prints with the header at the bottom side and in portrait position (vertical). [Header down SEF] Deliver the prints with the header at the bottom side and in landscape position (horizontal). Chapter 10 - Carry Out Copy Jobs Canon varioPRINT DP line...
- Page 226 • When the area must be darker, then select a val- ue of -1 to -3. • When an area on the output must be lighter, then select a value of 1 to 3. Chapter 10 - Carry Out Copy Jobs Canon varioPRINT DP line...
- Page 227 • [Right edge] [Saddle stitching] Check the preview for the result of the selection. [Output] Settings - [Folding] This option is only available when you have a folding unit connected. Chapter 10 - Carry Out Copy Jobs Canon varioPRINT DP line...
- Page 228 • [Print inside] • [Print outside] Check the preview for the result of the selection. [Output] Settings - [Trimming] This option is only available when you have a trimming unit connected. Chapter 10 - Carry Out Copy Jobs Canon varioPRINT DP line...
- Page 229 Here you can select the required number and the location of the punch holes. Location: [None] • [Left] • [Top] • [Right] • [Bottom] [2 holes] [3 holes] [4 holes] [Die set dependent] Chapter 10 - Carry Out Copy Jobs Canon varioPRINT DP line...
- Page 230 When you touch the [Job name] button a keyboard appears. Then you can change the name of the job. [49] Change the job name Chapter 10 - Carry Out Copy Jobs Canon varioPRINT DP line...
- Page 231 You can al- so indicate the feed direction of the separator sheets (long-edge feed or short-edge feed). [Off] No separator sheet will be inserted before each set. Chapter 10 - Carry Out Copy Jobs Canon varioPRINT DP line...
-
Page 232: Make An Easy Copy
You select the [Easy copy job] template from the [Jobs] view: touch [Jobs] -> [Copy/Scan]. If required, change the default settings and the required number of copies. Touch The job is added to the list of [Scheduled jobs]. Chapter 10 - Carry Out Copy Jobs Canon varioPRINT DP line... -
Page 233: Create Templates To Use For Recurring Jobs
• [Delete] You cannot delete the [Easy copy job] template. NOTE Touch the [Last used] template for 2 seconds to save the settings of the last job to a template. Chapter 10 - Carry Out Copy Jobs Canon varioPRINT DP line... -
Page 234: Copy Non-Standard Size Originals
The setting [Zoom] determines how the copy will look. When [Zoom] ->[Fit to page] is enabled, the original will be scaled to fit the media size of the output. When [Zoom] -> [Fit to page] is disabled, you can enter a custom zoom percentage. Chapter 10 - Carry Out Copy Jobs Canon varioPRINT DP line... -
Page 235: The Zoom Behavior
Result of a scan with a 50% zoom factor. NOTE The center of the image is fixed. Result of a scan with a 200% zoom factor. NOTE The center of the image is fixed. Chapter 10 - Carry Out Copy Jobs Canon varioPRINT DP line... - Page 236 The upper right-hand corner of the image is fixed. Result on paper of a scan with a 200% zoom factor. NOTE The upper right-hand corner of the image is fixed. Chapter 10 - Carry Out Copy Jobs Canon varioPRINT DP line...
-
Page 237: Staple, Punch, Fold, Or Trim The Output
At the [Trimming] setting, define the trim settings If required, define the other settings for the original document and the output. Enter the generic values in the [Job] section. Touch [Start] . Chapter 10 - Carry Out Copy Jobs Canon varioPRINT DP line... -
Page 238: Rename A Copy Job
In the job window on the control panel, touch [Job name]. A keyboard appears. Touch and hold 'Backspace' until the current name is deleted. Enter a new name. Press [OK]. Chapter 10 - Carry Out Copy Jobs Canon varioPRINT DP line... -
Page 239: Combining Subsets Into One Document
If required, use the optional [Page programming] function to insert pages and define the media and finishing settings per page range. Touch [Ready] again to close the [Page programming] function. Touch Chapter 10 - Carry Out Copy Jobs Canon varioPRINT DP line... -
Page 240: Insert Tab Sheets To Divide Your Document
Place the next subset face up into the ADF, or face down on the glass plate. Repeat the steps three and four for all subsequent subsets. Touch [Ready] when all subsets were scanned. Press [Edit]. A preview pane displays the scanned subsets. Chapter 10 - Carry Out Copy Jobs Canon varioPRINT DP line... - Page 241 Repeat the steps nine to fourteen until all the tab sheets were inserted. Touch [Ready] when all the tab sheets were inserted. Define the general job settings such as [Number of sets]. Press Chapter 10 - Carry Out Copy Jobs Canon varioPRINT DP line...
-
Page 242: Scan Now And Print Later
If required, touch [Job name] to rename the job. This helps you to recognize the job more easily. Touch [Start] . The job is sent to the selected destination. There you can select the job whenever you want to print it. Chapter 10 - Carry Out Copy Jobs Canon varioPRINT DP line... - Page 243 Scan Now and Print Later Chapter 10 - Carry Out Copy Jobs Canon varioPRINT DP line...
-
Page 244: Chapter 11 Carry Out Scan Jobs
Chapter 11 Carry Out Scan Jobs... -
Page 245: Configure The Scan Function
[Password] The password that corresponds with the user name. [Destination directory] The directory on the FTP server to which the scan jobs will be sent. Chapter 11 - Carry Out Scan Jobs Canon varioPRINT DP line... -
Page 246: Configure The Settings For Scan To Smb
The user name that is used to access the SMB server when sending scan jobs. [Password] The password that corresponds with the user name. [Path] The directory on the SMB server to which the scan jobs will be sent. Chapter 11 - Carry Out Scan Jobs Canon varioPRINT DP line... -
Page 247: Configure The Settings For Scan To Email
Configure the Settings for the LDAP Server on page 247 • Select the email address from an address list. Use an address book for scan to email on page 259 Chapter 11 - Carry Out Scan Jobs Canon varioPRINT DP line... -
Page 248: Configure The Settings For The Ldap Server
The type of user identification that must be searched for, for example a telephone number or employee ID. [Attribute with email address] The LDAP attribute that contains the email address of the user, for example 'mail'. Chapter 11 - Carry Out Scan Jobs Canon varioPRINT DP line... -
Page 249: Use The Address List File (Ral.csv)
Maximum 40 characters. Do not use the characters <CR>, <LF>, "," and ";". comments Additional information, if required. NOTE Do not change the header information. Examples of Correct Profiles • 01234,userA@companyX.com • 56789,userB@organizationY.com Chapter 11 - Carry Out Scan Jobs Canon varioPRINT DP line... -
Page 250: Scan Your Documents
Description [Original] The [Original] section contains the settings to define how the original looks. [File] The [File] section contains the settings to define how the resulting file must look. Chapter 11 - Carry Out Scan Jobs Canon varioPRINT DP line... - Page 251 The automatically set value for this setting. Only the front side contains an image or text. [1-sided] Both the front side and the back side contain an im- age or text. [2-sided] Chapter 11 - Carry Out Scan Jobs Canon varioPRINT DP line...
- Page 252 • [Left page]: The left-hand half of the original (opened book) is copied/scanned. • [Right page]: The right-hand half of the original (opened book) is copied/scanned. Chapter 11 - Carry Out Scan Jobs Canon varioPRINT DP line...
- Page 253 Suppression of vague or yellowish background. [File] Settings - [Type] The default settings result in small files with an acceptable quality loss. When higher quality is needed, set the quality factor higher. Chapter 11 - Carry Out Scan Jobs Canon varioPRINT DP line...
- Page 254 [Percent] Use this setting to change the zoom manually within the range 25% to 400%. Chapter 11 - Carry Out Scan Jobs Canon varioPRINT DP line...
- Page 255 [Bottom center] moves the image to the center of the bottom side of the sheet. [Bottom center] [Bottom right] moves the image to the lower right corner of the sheet. [Bottom right] Chapter 11 - Carry Out Scan Jobs Canon varioPRINT DP line...
- Page 256 To make color scans, the color scanning option must be licensed. [Color] [Job name] Setting Values Description [Job name] For scan to USB, you can enter a job name. Chapter 11 - Carry Out Scan Jobs Canon varioPRINT DP line...
- Page 257 [Account ID] Enter the account ID for the current job. The [Ac- count ID] setting is only available when the ac- counting function on the PRISMAsync controller is enabled. Chapter 11 - Carry Out Scan Jobs Canon varioPRINT DP line...
-
Page 258: Scan To File
There is no message on the control panel to inform you that the file was stored successfully. You can access the status information on the controller. Chapter 11 - Carry Out Scan Jobs Canon varioPRINT DP line... -
Page 259: Scan To Email
You can create a template for scan to email. See jobs on page 232. Touch [Start] The scanner scans the originals. The system sends the resulting file to the entered email address or email addresses. Chapter 11 - Carry Out Scan Jobs Canon varioPRINT DP line... -
Page 260: Use An Address Book For Scan To Email
1. In the job window of a scan profile, select email as [Destination]. 2. Do not enter an email address. Touch [Email address] to open the search on the address book. 3. Touch [Add] to add a new email address. Chapter 11 - Carry Out Scan Jobs Canon varioPRINT DP line... - Page 261 4. Enter the email address and a comment. You can use the comment for the name. The comment is optional. 5. Touch [OK] to return to the [Destination] tile. Chapter 11 - Carry Out Scan Jobs Canon varioPRINT DP line...
-
Page 262: Scan To Usb
The scanner scans the originals. The system sends the resulting file to your USB drive. Touch to eject the USB drive. Remove the USB drive from the control panel when the message [USB drive has been successfully ejected.] displays. Chapter 11 - Carry Out Scan Jobs Canon varioPRINT DP line... -
Page 263: Scan To Docbox
Touch the DocBox to which you want to scan the job. Touch [OK]. Touch [Start] . The scanner scans the originals. The system sends the resulting file (bitmap) to the selected DocBox. Chapter 11 - Carry Out Scan Jobs Canon varioPRINT DP line... -
Page 264: Scan To Smb
The job window opens. Change the settings for the original and the file. Press [Start] . The scanner scans the originals. The system sends the resulting file to the shared device. Chapter 11 - Carry Out Scan Jobs Canon varioPRINT DP line... -
Page 265: Pdf Scan Job
Touch [Start] . The scanner scans the originals. The system sends the resulting file to the selected DocBox. In the DocBox you can use PDF datapath functionality such as page numbering. Chapter 11 - Carry Out Scan Jobs Canon varioPRINT DP line... -
Page 266: Create Templates To Use For Recurring Jobs
• [Delete] You cannot delete the [Easy copy job] template. NOTE Touch the [Last used] template for 2 seconds to save the settings of the last job to a template. Chapter 11 - Carry Out Scan Jobs Canon varioPRINT DP line... -
Page 267: Combine Subsets Into One File
If required, use the optional [Page programming] function to insert pages and define the media and finishing settings per page range. Touch [Ready] again to close the [Page programming] function. Press Chapter 11 - Carry Out Scan Jobs Canon varioPRINT DP line... -
Page 268: Optimize The Scan Quality
Define the settings for the [Original] From the [Image type] setting, select the correct type of original ([Photo], [Text] or [Mixed]) Define the settings for the [File]. Select [Exposure]. Chapter 11 - Carry Out Scan Jobs Canon varioPRINT DP line... - Page 269 [Dark]: When an area on the output is dark gray but must be black, then select a value of -1 to -3. When the area must be lighter, then select a value of 1 to 3. Press [OK]. Chapter 11 - Carry Out Scan Jobs Canon varioPRINT DP line...
-
Page 270: Keep The System Printing
Chapter 12 Keep the system printing... -
Page 271: Use The Schedule (Option)
The jobs pane shows the jobs on a timeline. The width of the job corresponds to the (remaining) print time. A vertical line separates the jobs. The vertical line moves to the left as the printing of a job progresses. Chapter 12 - Keep the system printing Canon varioPRINT DP line... - Page 272 The media toolbar displays the following information for the media that is selected in the [Required media] pane. Furthermore, the media type toolbar contains the [Load] button to load and assign the required media. Chapter 12 - Keep the system printing Canon varioPRINT DP line...
- Page 273 The zoom control enables you to adjust the time scale visible in the [Schedule]. When you touch the zoom button, a drop-down list appears. Then you can select the desired time scale (five minutes - eight hours). Chapter 12 - Keep the system printing Canon varioPRINT DP line...
-
Page 274: Load Media Via The [Schedule] View
Special A4 to that paper tray. NOTE You can always change the assigned media type later by touching the [Assign] button. Gently close the paper tray. Chapter 12 - Keep the system printing Canon varioPRINT DP line... -
Page 275: The Dashboard
(Set X of Y). If the sorting method for a job is set to [By page], or when you print stream jobs, the dashboard only displays a sheet count. Chapter 12 - Keep the system printing Canon varioPRINT DP line... - Page 276 The dashboard can only display one message at a time. When there are more messages, the dashboard displays the first required or most important message. The dashboard indicates that there are more messages. Touch this message to display all other messages. Chapter 12 - Keep the system printing Canon varioPRINT DP line...
-
Page 277: The Operator Attention Light
The machine is busy printing. The machine can print longer than the set warning time. Operator attention is not required. All lights off The machine is idle. There are no jobs scheduled for printing. Chapter 12 - Keep the system printing Canon varioPRINT DP line... -
Page 278: Remote Monitor
Every 5 seconds Time line Fixed (30 minutes) Printer information displayed • Host name • System mode • Status panel • Attention light • Operator instruction • Time line Chapter 12 - Keep the system printing Canon varioPRINT DP line... - Page 279 Remote Monitor Chapter 12 - Keep the system printing Canon varioPRINT DP line...
-
Page 280: Chapter 13 Media Handling
Chapter 13 Media Handling... -
Page 281: Introduction
• No more scheduled jobs need this media type • No more printed jobs need this media type • No more DocBox jobs need this media type • This media type is no longer available in the paper trays. Chapter 13 - Media Handling Canon varioPRINT DP line... - Page 282 Introduction to the Media Handling If you plan to use these media more often, you can add these temporary media to the media Add Temporary Media to the Media Catalog on page catalog; 291. Chapter 13 - Media Handling Canon varioPRINT DP line...
-
Page 283: Introduction To The [Trays] View
When your configuration contains more paper modules than the [Trays] view can display in one screen, you can touch the arrow buttons to change the part of the ma- chine displayed. Chapter 13 - Media Handling Canon varioPRINT DP line... - Page 284 The paper tray contains tab sheets that must be processed as inserts. The paper tray contains inserts. The paper tray contains media that are fed over the long edge. The paper tray contains media that are fed over the short edge. Chapter 13 - Media Handling Canon varioPRINT DP line...
-
Page 285: Introduction To The [Media] Section
[To catalog] button Touch the [To catalog] button after selecting a tempora- ry media to add that media to the media catalogue. Add Temporary Media to the Media Catalog on page 291 Chapter 13 - Media Handling Canon varioPRINT DP line... - Page 286 • List of temporary media • Display the temporary • List of all media media that are currently available on the system . • Display the [Media cata- log] and the temporary media. Chapter 13 - Media Handling Canon varioPRINT DP line...
- Page 287 Select which media you [Media catalog], temporary want to display. media or all media. Filter the media. • Filter the list of media • Media size • Media weight • Clear the filters Chapter 13 - Media Handling Canon varioPRINT DP line...
-
Page 288: Media Related Actions
[Assign media]. Select the correct media type from the media catalogue. Press [OK]. Press [Done]. Close the paper tray gently by pushing in the middle of the tray cover. Chapter 13 - Media Handling Canon varioPRINT DP line... -
Page 289: Load And Assign Media Using The [Trays] Softkey
You can order all required supplies at your local authorized dealer. Illustration [59] Load and assign media using the [Trays] softkey Procedure On the control panel, touch [Trays]. Touch the paper tray where you want to put the media. Press [Open]. Chapter 13 - Media Handling Canon varioPRINT DP line... - Page 290 When the list is empty, the media catalog does not contain media that match the position of the paper guides. Touch the new media type. Press [OK]. Chapter 13 - Media Handling Canon varioPRINT DP line...
-
Page 291: Add Media To The Media Catalog
For optimal print quality, define the correct values for the following media attributes. Refer to the packaging of the media for this information. • Size • Weight • Surface type Touch [OK]. Chapter 13 - Media Handling Canon varioPRINT DP line... -
Page 292: Add Temporary Media To The Media Catalog
Press [To catalog]. The media is added to the media catalog. NOTE If required, you can edit the attributes of the media in the media catalog, that is part of the Settings Editor. Chapter 13 - Media Handling Canon varioPRINT DP line... -
Page 293: Media Indicators Black & White
The media is used in a scheduled job and loaded into a paper tray. The warning icon indicates that the media definition needs attention. Check if all important attributes are defined. Chapter 13 - Media Handling Canon varioPRINT DP line... -
Page 294: Use The Separation Enhancer
ORE147x1. Illustration [61] The separation enhancer Procedure Install the separation enhancer Step Action Remarks Touch [System] -> [Maintenance] -> [Go to maintenance tasks] -> [Separation en- hancer] -> [Start]. Chapter 13 - Media Handling Canon varioPRINT DP line... - Page 295 Use the Separation Enhancer Step Action Remarks [Open the tray (tray 3 or 4) and loosen the separation enhancer.] [Place the separation enhancer in the sep- aration unit.] [Lock the separation enhancer.] Chapter 13 - Media Handling Canon varioPRINT DP line...
-
Page 296: Adjust The Size Of The Bulk Tray
3. On the control panel, touch [Open] to open the selected bulk tray. Required tools Socket wrench Illustration [62] Required tools Procedure Adjust the bulk tray Step Action Illustration [Remove the paper.] Chapter 13 - Media Handling Canon varioPRINT DP line... - Page 297 Adjust the Size of the Bulk Tray Step Action Illustration [Use the socket wrench to loosen the bolt at the back side.] [Remove the top paper guide.] Chapter 13 - Media Handling Canon varioPRINT DP line...
- Page 298 Adjust the Size of the Bulk Tray Step Action Illustration [Turn the side paper guide out of the slots.] Chapter 13 - Media Handling Canon varioPRINT DP line...
- Page 299 Adjust the Size of the Bulk Tray Step Action Illustration [Place the side paper guide. Align the 4 pins with the desired slots.] Chapter 13 - Media Handling Canon varioPRINT DP line...
- Page 300 [Place the top paper guide. Align the 4 pins with the desired slot.] [Use the socket wrench to tighten the bolt.] [Adjust other side] Repeat the previous steps for the front side. Chapter 13 - Media Handling Canon varioPRINT DP line...
- Page 301 [Check if all plates are aligned with the corresponding size marks.] [Close the tray.] In the [Trays] view on the control panel, assign the new media size to the bulk tray. Chapter 13 - Media Handling Canon varioPRINT DP line...
-
Page 302: Adjust The Size Of The Optional Bulk Tray For Small Format
Touch the paper tray button at the right-hand side of the control panel. On the control panel, touch the bulk tray of which you want to adjust the size. On the control panel, touch [Open] to open the selected bulk tray. Chapter 13 - Media Handling Canon varioPRINT DP line... - Page 303 (under [Advanced]) -> [System settings] -> [Bulk tray 1 media size] or [Bulk tray 2 media size]. In the [Trays] view on the control panel, assign the new media to the bulk tray. Chapter 13 - Media Handling Canon varioPRINT DP line...
-
Page 304: Use The Jis B5 Adapter (Option)
1 JIS B5 adapter Procedure Place and remove the adapter Step Action Illustration Place the adapter over the front slider at the right- hand side. Slide the adapter against the media. Chapter 13 - Media Handling Canon varioPRINT DP line... - Page 305 Illustration When you place a larger media type, make sure that you remove the adapter. NOTE Do not store the adapter inside the paper tray. Otherwise, an er- ror can occur. Chapter 13 - Media Handling Canon varioPRINT DP line...
-
Page 306: Process Special Media
Contact your local authorized dealer for the latest guidelines. Illustration [63] The [Pre-printed mode] setting Procedure On the control panel, touch [System] -> [Setup] -> [Advanced media settings] (under [Advanced]). Touch the [Pre-printed mode] button. Chapter 13 - Media Handling Canon varioPRINT DP line... - Page 307 [Advanced media settings] section has changed. Result The pre-printed mode is active. At the right-hand side of the dashboard the following icon is displayed. Chapter 13 - Media Handling Canon varioPRINT DP line...
-
Page 308: Process Wax Paper And Use Of The [Wax Mode] Setting
• Select wax mode [1] when you have print quality issues with wax paper. • Only select wax mode [2] when wax mode [1] is not sufficient to solve the print quality issues. Chapter 13 - Media Handling Canon varioPRINT DP line... - Page 309 [Advanced media settings] section has changed.. The control panel does not display any other reminder that helps you to remember that the [Wax mode] setting is active. Chapter 13 - Media Handling Canon varioPRINT DP line...
-
Page 310: Deal With Paper Dust And Use Of The [Paper Quality] Setting
When you change a value of the [Paper quality] setting, a restart of the printer is required. The restart takes 2-3 minutes. Illustration [65] The [Paper quality] setting IMPORTANT Make sure that you put the [Paper quality] setting back to [Normal] when you have finished using fiber-rich media. Chapter 13 - Media Handling Canon varioPRINT DP line... - Page 311 [Advanced media settings] section has changed. The control panel does not display any other reminder that helps you to remember that the [Paper quality] setting is active. Chapter 13 - Media Handling Canon varioPRINT DP line...
-
Page 312: Media Registration
Example 1 - Images and Text When you print images and text on a sheet, the following deviations can occur: The lines on the front and back are not aligned (front-to-back side registration). Chapter 13 - Media Handling Canon varioPRINT DP line... - Page 313 Examples of when to Perform Media Registration The image is not in the center of the sheet (shifted image). The image is skewed (skewed image). The image is tilted (diamond shape image). Chapter 13 - Media Handling Canon varioPRINT DP line...
- Page 314 (trapezoid shape image). The image is reduced or shrunk in the feed di- rection (elongation). NOTE Combinations of two or more deviations can occur. Chapter 13 - Media Handling Canon varioPRINT DP line...
- Page 315 Amount Sub-total Payment Check payable to Credit Card American Express Grand Total Mastercard Visa Card Number: Internal Use Only Expiration Date: Order Cardholder Name: Completed: Data is not secure. Ship Date: Chapter 13 - Media Handling Canon varioPRINT DP line...
-
Page 316: How To Perform A Media Registration
You can start a media registration from the trays view (touch [Trays] -> [Optimize]), or from the media catalog (touch [System] -> [Media]). There you can select the required media. [66] Perform the media registration via the trays view Chapter 13 - Media Handling Canon varioPRINT DP line... - Page 317 8. In the manual registration adjustment, you can adjust the registration parameters for the front side and the back side separately. Only use [Advanced settings] in exceptional cases. Use [Advanced settings] carefully because these settings influence each other. Chapter 13 - Media Handling Canon varioPRINT DP line...
- Page 318 • You can also perform a manual media registration via the Settings Editor. The manual media registration via the control panel is preferred because you can print the verification chart immediately after you changed a setting. Chapter 13 - Media Handling Canon varioPRINT DP line...
-
Page 319: Order Of The Media Registration Actions
If the media registration is not optimal, continue with step 2 below. Perform a manual media registration adjustment via the control panel (preferred) or via the Settings Editor. Only needed in incidental cases. E.g. media registration is not optimal, media is 1-sided. Chapter 13 - Media Handling Canon varioPRINT DP line... -
Page 320: Print The Verification Chart For Media Registration
Before you print the verification chart, make sure that the printer is warmed up. The printer must have printed for at least 20 minutes. [68] Front side (circles) and back side (dots) of the verification chart for media registration Chapter 13 - Media Handling Canon varioPRINT DP line... - Page 321 You are not charged for the blank sheets. Result You must use the lines in the corners of the verification chart to measure the registration for manual registration adjustment. Chapter 13 - Media Handling Canon varioPRINT DP line...
-
Page 322: Option 1 - Automatic Media Registration Adjustment
You must only enter the actual sheet size via the manual adjustment for this media. The scanner cannot detect the actual sheet size and assumes the nominal sheet size. Chapter 13 - Media Handling Canon varioPRINT DP line... - Page 323 5. Enter the maintenance PIN to start the wizard. 6. Touch [Next]. Start a Media-Specific Registration from the Media Catalog 1. On the control panel, touch [System] -> [Media] to open the Media Catalog. Chapter 13 - Media Handling Canon varioPRINT DP line...
- Page 324 You can use a stack of paper to reduce the curl. You must close the ADF / cover for each scan. Chapter 13 - Media Handling Canon varioPRINT DP line...
- Page 325 (perpendicular to the feed direction). Only if the media registration is not opti- Print the verification chart to verify if the mal, continue with the next option. media registration is optimal now. Chapter 13 - Media Handling Canon varioPRINT DP line...
-
Page 326: Option 2 - Manual Media Registration Adjustment (Only Needed In Incidental Cases)
• X offset; in the feed direction • Z offset; perpendicular to the feed direction • Advanced settings for front side and back side. Touch [Advanced settings] to display these settings. • Trapezoid • Diamond • Skew Chapter 13 - Media Handling Canon varioPRINT DP line... - Page 327 6. Touch [Next]. You can also select the media via the media catalogue, instead of via the trays view. 1. On the control panel, touch [System] -> [Media] to open the media catalog. Chapter 13 - Media Handling Canon varioPRINT DP line...
- Page 328 5. At [Manual registration], touch [Start]. When a maintenance PIN is defined in the Settings Editor, a numerical keyboard appears. 6. Enter the maintenance PIN to start the manual adjustment. 7. Touch [Next]. Chapter 13 - Media Handling Canon varioPRINT DP line...
- Page 329 For most situations you can correct the media registration with the standard settings. Only in exceptional cases, you need the advanced settings. Chapter 13 - Media Handling Canon varioPRINT DP line...
- Page 330 4. If the angles in the corners are straight then continue with the next step. If not, repeat step 1 - 5. If needed, correct the image shift and / or elongation. Use the corresponding manual actions described in this document. Elongation When to do Elongation occurs in the feed direction. Chapter 13 - Media Handling Canon varioPRINT DP line...
- Page 331 Print the verification chart again and verify if the media registration is optimal. If the media registration is not optimal, change the value or use another setting depending on how the registration looks. Values for the Media Registration Chapter 13 - Media Handling Canon varioPRINT DP line...
- Page 332 • The distance between the leading edge of the sheet and the image on the sheet re- mains the same. • The dots on the right-hand side of the verifi- cation chart move to the left (leading edge). Chapter 13 - Media Handling Canon varioPRINT DP line...
- Page 333 On the verification chart, determine if the image on the back side is shifted or the image on the front side. Change the back side if the image on the back side is shifted. Chapter 13 - Media Handling Canon varioPRINT DP line...
- Page 334 • The distance between the trailing edge of the sheet and the image on the sheet increa- ses. • The circles on the verification chart move to the left-hand side (leading edge). Chapter 13 - Media Handling Canon varioPRINT DP line...
- Page 335 • The distance between the trailing edge of the sheet and the image on the sheet increa- ses. • The dots on the verification chart move to the left-hand side (leading edge). Chapter 13 - Media Handling Canon varioPRINT DP line...
- Page 336 If the shift is too much, the image be printed over the edges of the sheet. • Risk of reprinting. • Risk of system pollution. Trapezoid Shape Image When to do The trapezoid shape is perpendicular to the feed direction. Chapter 13 - Media Handling Canon varioPRINT DP line...
- Page 337 Print the verification chart again and verify if the media registration is optimal. If the media registration is not optimal, change the value or use another setting depending on how the registration looks. Chapter 13 - Media Handling Canon varioPRINT DP line...
- Page 338 -2.5 to +2.5 -0.098 to +0.098 Diamond Shape Image When to do The diamond shape is perpendicular to the feed direction. You can measure the diamond shape via the diagonal of the image. Chapter 13 - Media Handling Canon varioPRINT DP line...
- Page 339 Print the verification chart again and verify if the media registration is optimal. If the media registration is not optimal, change the value or use another setting depending on how the registration looks. Chapter 13 - Media Handling Canon varioPRINT DP line...
- Page 340 • The diagonal from the top-left corner of the image to the bottom-right corner of the im- age increases. • The distance between the circle at the top- left corner and the circle at the bottom-right corner increases. Chapter 13 - Media Handling Canon varioPRINT DP line...
- Page 341 Setting Range (mm) Range (inches) Diamond -2.5 to +2.5 -0.098 to +0.098 Skewed Image When to do The image is skewed (rotated) on the front side and/or on the back side. Chapter 13 - Media Handling Canon varioPRINT DP line...
- Page 342 Print the verification chart again and verify if the media registration is optimal. If the media registration is not optimal, change the value or use another setting depending on how the registration looks. Chapter 13 - Media Handling Canon varioPRINT DP line...
- Page 343 • The distance between the leading edge of the sheet and the dot at the bottom-left cor- ner is increased. Ranges Setting Range (mm) Range (inches) Skew -2.5 to +2.5 -0.098 to +0.098 Chapter 13 - Media Handling Canon varioPRINT DP line...
- Page 344 Print the verification chart again and verify if the media registration is optimal. If the media registration is not optimal, change the value or use another setting depending on how the registration looks. Chapter 13 - Media Handling Canon varioPRINT DP line...
- Page 345 • [X image shift back ({0})] • [Z image shift front ({0})] • [Z image shift back ({0})] 8. When the media registration is ready, the icon appears behind the media registered. Chapter 13 - Media Handling Canon varioPRINT DP line...
- Page 346 0.1 mm (0.001 inches). [Z image shift front ({0})] The image is shifted in Z direction (perpendic- ular to the feed direction) in steps of 0.1 mm (0.001 inches). Chapter 13 - Media Handling Canon varioPRINT DP line...
- Page 347 [X image shift back ({0})] -500 to +500 -1969 to +1969 [Z image shift front ({0})] -500 to +500 -1969 to +1969 [Z image shift back ({0})] -500 to +500 -1969 to +1969 Chapter 13 - Media Handling Canon varioPRINT DP line...
-
Page 348: Media Registration: Troubleshooting
• Perform an automatic media registration on the same media without the preprinted information. • Perform an automatic media registration on a media similar to the preprinted media. The similar media must not contain any preprinted information. Chapter 13 - Media Handling Canon varioPRINT DP line... -
Page 349: Automatic Media Registration Of Long Sheets Is Not Satisfactory
The automatic media registration cannot handle sheets longer than 420 mm (16.5"). The automatic media registration assumes the nominal sheet length of the media. Solution Measure the actual sheet length and enter this value via the manual media registration. Chapter 13 - Media Handling Canon varioPRINT DP line... -
Page 350: Shifted Image After Paper Path Registration (Only If Poc Is Applicable)
• Make sure that the printer is warmed up. The printer must have printed for at least 20 minutes. Perform the paper path registration again. • Perform a manual media registration adjustment for the bulk media. Chapter 13 - Media Handling Canon varioPRINT DP line... -
Page 351: Media Registration: Frequently Asked Questions
You cannot print the verification chart for 1-sided media because the verification chart is 2-sided. Use your own job to determine the required values and to verify the media registration. Chapter 13 - Media Handling Canon varioPRINT DP line... -
Page 352: Maintain The Print System
Chapter 14 Maintain the print system... -
Page 353: System Configuration
[72] The system configuration settings on the control panel Maintenance tasks for operators Operators are responsible for refilling the consumables, the removal of staple and punch waste, and manual cleaning tasks. Chapter 14 - Maintain the print system Canon varioPRINT DP line... - Page 354 Furthermore, they are responsible for mechanical maintenance tasks and maintenance procedures via the control panel. For some procedures you must have the rights to perform maintenance tasks to prevent unauthorized use. [73] Maintenance tasks on the control panel Chapter 14 - Maintain the print system Canon varioPRINT DP line...
-
Page 355: Change A Number Of Settings In The Settings Editor Via The Control Panel
PRIS- munication] MAsync system working state, it can happen that security settings are lost. You can configure the HTTP/HTTPS traffic and the IPsec communication. Chapter 14 - Maintain the print system Canon varioPRINT DP line... - Page 356 For example you can use the user config- configuration] uration for fleet management. • [Restore user con- Only service can restore the complete configu- figuration] ration or the service configuration. Chapter 14 - Maintain the print system Canon varioPRINT DP line...
- Page 357 • [Proxy server port] • [Proxy server au- thentication] • [Proxy server au- thentication type] • [Username for proxy authentica- tion] • [Password for proxy authentica- tion] • [Proxy server do- main] Chapter 14 - Maintain the print system Canon varioPRINT DP line...
- Page 358 Procedure NOTE The key operator PIN or the system administrator password is required to make changes in this section. Touch [System] -> [Setup] -> [System configuration] (under [Advanced]). Chapter 14 - Maintain the print system Canon varioPRINT DP line...
- Page 359 Touch the button of the group that contains the setting you want to change or view. Touch the required setting. Look up the required information or make the required changes. If you make a change, touch [OK] to confirm. Press [Close]. Chapter 14 - Maintain the print system Canon varioPRINT DP line...
-
Page 360: Introduction To The [Setup] Section
[Job name truncation] Define the way the system shortens the job name when the job name is too long to display fully. Chapter 14 - Maintain the print system Canon varioPRINT DP line... - Page 361 Settings Editor on the PRIS- MAsync controller is set to [Yes]. [System configuration] Get direct access to a number of important key operator settings in the Settings Editor on the PRISMAsync con- troller. Chapter 14 - Maintain the print system Canon varioPRINT DP line...
-
Page 362: Backup And Restore
AWF and DocBox and other settings that are not related to the hardware of the system. For example you can use the user configuration for fleet management. Only service can restore the complete configuration or the service configuration. Chapter 14 - Maintain the print system Canon varioPRINT DP line... -
Page 363: Counters
A4/Letter. Media with a length of 364 mm (14.3") or more are referred to and counted as large media, for example A3/Tabloid. Chapter 14 - Maintain the print system Canon varioPRINT DP line... -
Page 364: Reset The Day Counters
On the control panel, touch [System] -> [Maintenance] -> [Reset day counters]. A dialog box will ask you to confirm that you really want to reset the day counters. Touch [Yes] to reset the day counters to 0. Chapter 14 - Maintain the print system Canon varioPRINT DP line... -
Page 365: Print The Billing Counters Report
Illustration [75] Print the billing counters report Procedure On the control panel, touch [System] -> [Maintenance] -> [Print billing counters report]. Chapter 14 - Maintain the print system Canon varioPRINT DP line... -
Page 366: Software Upgrade
If no version is visible, the service organization has not made a version available. After you downloaded the version, you must install this version. When the upgrade is completed you must restart the system. Chapter 14 - Maintain the print system Canon varioPRINT DP line... -
Page 367: Upgrade Prismasync
After you upgraded the software, you can downgrade to the previous installed version. In the [PRISMAsync upgrades] section, click [Downgrade]. You must restart the system once the the upgrade or downgrade is complete. Chapter 14 - Maintain the print system Canon varioPRINT DP line... -
Page 368: Upgrade Microsoft Windows
In the [Windows updates] section, click [Install]. Browse to the operating security patches of Microsoft Windows you downloaded. Follow the instructions on the screen to upload the required files. When the upgrade is completed you must restart the system. Chapter 14 - Maintain the print system Canon varioPRINT DP line... -
Page 369: Install Software From A Usb Installation Drive
The master boot record of the hard disk will be cleaned. Touch [Install software from USB installation drive]. When the installation is completed you must restart the system. Chapter 14 - Maintain the print system Canon varioPRINT DP line... -
Page 370: Printer Operation Care (Poc)
Maintenance is required now. The printer stops. The required mainte- nance must be carried out before you can resume printing. CAUTION Only trained personnel is allowed to carry out POC actions. Chapter 14 - Maintain the print system Canon varioPRINT DP line... - Page 371 You can find more assistance on how to replace the consumables at the following places: • On the control panel. The control panel shows and describes the required actions step by step. • In this User Manual. Chapter 14 - Maintain the print system Canon varioPRINT DP line...
-
Page 372: Perform A Paper Path Registration
Only trained personnel is allowed to carry out POC actions. Follow the instructions on the screen. If the printer has not warmed up, the registration starts with warming up the printer. Chapter 14 - Maintain the print system Canon varioPRINT DP line... - Page 373 Previously performed media specific registration can influence the media registration for bulk media. To verify the paper path registration, we therefore recommend to set all media specific registration settings to 0. Chapter 14 - Maintain the print system Canon varioPRINT DP line...
-
Page 374: Replace The Separation Rollers
3. Touch [Open] to open the tray. Required tools Socket wrench New separation rollers CAUTION Only trained personnel is allowed to carry out POC actions. Illustration [77] Required tools Chapter 14 - Maintain the print system Canon varioPRINT DP line... - Page 375 Replace the separation rollers Step Action Illustration [Turn the upper separation roller until the roller is face up.] [Use the socket wrench to loosen the bolt.] [Remove the cover plate.] Chapter 14 - Maintain the print system Canon varioPRINT DP line...
- Page 376 Replace the Separation Rollers Step Action Illustration [Remove the 3 fixation clips.] Chapter 14 - Maintain the print system Canon varioPRINT DP line...
- Page 377 Replace the Separation Rollers Step Action Illustration [Remove the upper separation roller.] [Push the lower separation roller down to remove the middle separation roller.] [Remove the lower separation roller.] Chapter 14 - Maintain the print system Canon varioPRINT DP line...
- Page 378 [Place a new lower separation roller. Turn the roller into position.] [Place a new middle separation roller. Turn the roller into position.] [Place a new upper separation roller. Turn the roller into position.] Chapter 14 - Maintain the print system Canon varioPRINT DP line...
- Page 379 Replace the Separation Rollers Step Action Illustration [Place the 3 fixation clips.] Chapter 14 - Maintain the print system Canon varioPRINT DP line...
- Page 380 Replace the Separation Rollers Step Action Illustration [Place the cover plate back.] [Use the socket wrench to tighten the cov- er plate.] [Turn the upper separation roller back in- to position.] Chapter 14 - Maintain the print system Canon varioPRINT DP line...
- Page 381 Replace the Separation Rollers Step Action Illustration Gently close the tray. It is advised to push at the centre of the tray. Chapter 14 - Maintain the print system Canon varioPRINT DP line...
-
Page 382: Replace The Heat Exchanger Foils
New heat exchanger foils CAUTION Only trained personnel is allowed to carry out POC actions. Illustration [78] Required tools Procedure Replace the heat exchanger foils Step Action Illustration [Open the front door.] Chapter 14 - Maintain the print system Canon varioPRINT DP line... - Page 383 Replace the Heat Exchanger Foils Step Action Illustration [Use handle 3 to slide out the transport unit.] [Use handle 4 to open the turn unit.] Chapter 14 - Maintain the print system Canon varioPRINT DP line...
- Page 384 Replace the Heat Exchanger Foils Step Action Illustration [Remove the 2 plugs from the heat ex- changer.] [Use the socket wrench to loosen the 2 fixation pens.] Chapter 14 - Maintain the print system Canon varioPRINT DP line...
- Page 385 Replace the Heat Exchanger Foils Step Action Illustration [Use the red handle to remove the heat exchanger.] [Place the heat exchanger on a clean, flat surface.] [Turn the pressure plate over.] Chapter 14 - Maintain the print system Canon varioPRINT DP line...
- Page 386 Replace the Heat Exchanger Foils Step Action Illustration [Remove the 2 heat exchanger foils.] [Discard the foils into a common dustbin.] Chapter 14 - Maintain the print system Canon varioPRINT DP line...
- Page 387 [Place the wrapper with the new foils in the heat exchanger.] [When the new foils are in place, remove the wrapper.] [Caution: Do not touch the foils to keep the new foils clean.] Chapter 14 - Maintain the print system Canon varioPRINT DP line...
- Page 388 Replace the Heat Exchanger Foils Step Action Illustration [Turn the pressure plate back.] [Place the heat exchanger back.] Chapter 14 - Maintain the print system Canon varioPRINT DP line...
- Page 389 Illustration [Use the socket wrench to tighten the 2 fixation pens.] NOTE Push the fixation pens down during the fastening. [Place the 2 plugs of the heat exchanger back.] Chapter 14 - Maintain the print system Canon varioPRINT DP line...
- Page 390 [New] to confirm that you installed new heat exchanger foils. When you did not replace the heat ex- changer foils, touch [Existing]. Chapter 14 - Maintain the print system Canon varioPRINT DP line...
-
Page 391: Replace The Spiral Cleaner
3. [Touch Next to unlock the door.] Wait until the printer is turned off. 4. Put on the heat-resistant gloves in case the machine is warm. Required tools Heat-resistant gloves Chapter 14 - Maintain the print system Canon varioPRINT DP line... - Page 392 Illustration [79] Required tools CAUTION You must wear the heat-resistant gloves when you replace the spiral cleaner. Procedure Replace the spiral cleaner Step Action Illustration [Open the front door.] Chapter 14 - Maintain the print system Canon varioPRINT DP line...
- Page 393 Replace the Spiral Cleaner Step Action Illustration [Use the socket wrench to loosen the 2 fixation pens.] [Turn the red handle counter-clockwise.] Chapter 14 - Maintain the print system Canon varioPRINT DP line...
- Page 394 Replace the Spiral Cleaner Step Action Illustration [Slide the TTF unit out of the frame.] [Pinch both fixation springs.] [Slide the fixation caps from the cleaner ends.] Chapter 14 - Maintain the print system Canon varioPRINT DP line...
- Page 395 NOTE [When the spiral cleaner has cooled down, discard the clean- er into a common dustbin.] Or return the cleaner to your serv- ice organization. Chapter 14 - Maintain the print system Canon varioPRINT DP line...
- Page 396 Replace the Spiral Cleaner Step Action Illustration [Place the new spiral cleaner in the TTF.] Chapter 14 - Maintain the print system Canon varioPRINT DP line...
- Page 397 Illustration [Slide both fixation caps over the cleaner ends until the caps click in place.] Check if the spiral cleaner can rotate free- [Align the TTF with the rail.] Chapter 14 - Maintain the print system Canon varioPRINT DP line...
- Page 398 Replace the Spiral Cleaner Step Action Illustration [Slide the TTF unit back.] [Turn the red handle clockwise.] Chapter 14 - Maintain the print system Canon varioPRINT DP line...
- Page 399 Answer the question [Which spiral clean- er did you put back?] with [New] to con- firm that you installed a new spiral clean- When you did not replace the spiral clean- er, touch [Existing]. Chapter 14 - Maintain the print system Canon varioPRINT DP line...
-
Page 400: Remove Paper From The Ttf
Socket wrench New spiral cleaner CAUTION You must wear heat-resistant gloves. Illustration [80] Required tools CAUTION You must wear the heat-resistant gloves when you remove paper from the TTF. Chapter 14 - Maintain the print system Canon varioPRINT DP line... - Page 401 Remove Paper from the TTF Procedure Remove paper from the TTF Step Action Illustration [Open the front door.] [Use the socket wrench to loosen the 2 fixation pens.] [Turn the red handle counter-clockwise.] Chapter 14 - Maintain the print system Canon varioPRINT DP line...
- Page 402 Remove Paper from the TTF Step Action Illustration [Slide the TTF unit out of the frame.] [Pinch both fixation springs.] [Slide the fixation caps from the cleaner ends.] Chapter 14 - Maintain the print system Canon varioPRINT DP line...
- Page 403 [When the spiral cleaner has cooled down, discard the clean- er into a common dustbin.] Or return the cleaner to your serv- ice organization. [Remove paper underneath the spiral cleaner.] Chapter 14 - Maintain the print system Canon varioPRINT DP line...
- Page 404 Remove Paper from the TTF Step Action Illustration [Use handle 2 to open the flap and check for paper.] [Remove sheets underneath the TTF.] Chapter 14 - Maintain the print system Canon varioPRINT DP line...
- Page 405 Remove Paper from the TTF Step Action Illustration [Place the new spiral cleaner in the TTF.] Chapter 14 - Maintain the print system Canon varioPRINT DP line...
- Page 406 Illustration [Slide both fixation caps over the cleaner ends until the caps click in place.] Check if the spiral cleaner can rotate free- [Align the TTF with the rail.] Chapter 14 - Maintain the print system Canon varioPRINT DP line...
- Page 407 Remove Paper from the TTF Step Action Illustration [Slide the TTF unit back.] [Turn the red handle clockwise.] Chapter 14 - Maintain the print system Canon varioPRINT DP line...
- Page 408 Answer the question [Which spiral clean- er did you put back?] with [New] to con- firm that you installed a new spiral clean- When you did not replace the spiral clean- er, touch [Existing]. Chapter 14 - Maintain the print system Canon varioPRINT DP line...
-
Page 409: Remove Paper From The Heat Exchanger
When the control panel displays the message [Touch Next to unlock the door.], touch [Next]. Wait until the printer is turned off. Follow the instructions on the screen. The actions displayed on the screen, depend on the type of the heat exchanger foils. Chapter 14 - Maintain the print system Canon varioPRINT DP line... -
Page 410: Advanced Maintenance Actions For High Capacity Stacker-G1 And High Capacity Stacker-H1
Four new flip rings CAUTION Only trained personnel is allowed to carry out this action, if supported by your service organization. Illustration [81] The location of the flip rings Chapter 14 - Maintain the print system Canon varioPRINT DP line... - Page 411 If required, rotate the flip wheel to get ac- cess to the flip rings. Put an A3/Tabloid sheet on the stack tray to prevent parts from falling into the stacker. Chapter 14 - Maintain the print system Canon varioPRINT DP line...
- Page 412 Replace the Flip Rings in the Flip Unit Step Action Illustration Remove the flip rings one by one. Place the new flip rings one by one. Check if the flip rings can rotate freely. Chapter 14 - Maintain the print system Canon varioPRINT DP line...
- Page 413 Replace the Flip Rings in the Flip Unit Step Action Illustration Remove the sheet from the stack tray. Close the front cover. Chapter 14 - Maintain the print system Canon varioPRINT DP line...
-
Page 414: Clear A Paper Jam In The Lower Input Paper Path Of The Registration Unit
Clear a paper jam in the lower input paper path of the registration unit Step Action Illustration Open the front door. Caution: When you turn the knob, be careful not to get your fingers caught. Turn A7 to remove the jammed paper. Chapter 14 - Maintain the print system Canon varioPRINT DP line... - Page 415 Close the front door. The control panel will display the mes- sage [Did you remove all sheets from the paper path?] Touch [Yes] to confirm that all paper was removed. Chapter 14 - Maintain the print system Canon varioPRINT DP line...
-
Page 416: Clear A Paper Jam In The Registration Unit
Only trained personnel is allowed to carry out this action, if supported by your service organization. Illustration [83] Indication at the stacker control panel Procedure Clear a paper jam in the registration unit Step Action Illustration Open the top cover. Chapter 14 - Maintain the print system Canon varioPRINT DP line... - Page 417 Open B2 to remove the jammed paper. Caution: When you close the top cover, be careful not to get your fingers caught. Close the top cover. Open the front door. Chapter 14 - Maintain the print system Canon varioPRINT DP line...
- Page 418 Clear a Paper Jam in the Registration Unit Step Action Illustration Use the socket wrench to loosen the screw and open the cover. Open the 2 retaining clips and disconnect the flat cable. Chapter 14 - Maintain the print system Canon varioPRINT DP line...
- Page 419 Attention: Do not pull the flat cable. Pull out the registration unit. Remove any pieces of paper from the reg- istration unit. Place the registration unit back. The ar- rows must be on top. Chapter 14 - Maintain the print system Canon varioPRINT DP line...
- Page 420 Close the front door. The printer control panel will display the message [Did you remove all sheets from the paper path?]. Touch [Yes] to confirm that all paper was removed. Chapter 14 - Maintain the print system Canon varioPRINT DP line...
-
Page 421: Remote Service (Ors) (Option)
Remote Service is an application that runs on a printer or a separate server in the customer's network. Remote Service requires a working Internet connection to establish a secure connection between the customer's site and Canon. In case a proxy server is present, Remote Service must be configured correctly. - Page 422 • If required, you can change a number of connectivity settings via the control panel ([System] -> [Setup] ->[System configuration] -> [Connectivity]). • You can verify the communication with Canon by downloading the audit log files via the Settings Editor ([Support] -> [Logging] > [Save the log files of the remote service connection]).
-
Page 423: Add Toner And Staples
• Operator attention light: Red lamp lights up. Procedure On the control panel, touch [System] -> [Printer]. The [Supplies] pane displays the current filling level. [84] Check the status of the toner reservoir Chapter 14 - Maintain the print system Canon varioPRINT DP line... -
Page 424: Add Toner
• Only use toner bottles that are intended for use with this printer. • Be aware that there are counterfeit Canon toners are available on the market. The use of counterfeit toners can result in a poor print quality or machine performance. Canon is not responsible for any malfunction, accident or damage caused by the use of counterfeit toner. - Page 425 Pull the slide to the right. Wait until the toner bottle stops shaking, then push the slide to the left. Remove the toner bottle. Close the cover of the toner reservoir. Chapter 14 - Maintain the print system Canon varioPRINT DP line...
-
Page 426: Check The Status Of The Staple Cartridges
An orange staple icon indicates that one of the staple cartridges is al- most empty. A red staple icon indicates that one of the staple cartridges is empty. The printer stops when a job requires staples from the empty staple cartridge. Chapter 14 - Maintain the print system Canon varioPRINT DP line... - Page 427 Check the staple icon in the dashboard. When the staple icon is orange or red, go to the [Printer] section of the [System] view to check which staple cartridge must be refilled. Chapter 14 - Maintain the print system Canon varioPRINT DP line...
-
Page 428: Replace The Staple Cartridge Of The Stapler Unit
Pull out the staple cartridge. Insert the new staple cartridge (Staple N1). Chapter 14 - Maintain the print system Canon varioPRINT DP line... - Page 429 Caution: When you close the front door of the stacker/stapler, be careful not to get your fingers caught, because this may re- sult in personal injury. Close the front door of the stacker/stapler. Chapter 14 - Maintain the print system Canon varioPRINT DP line...
-
Page 430: Replace The Staple Cartridge Of The Saddle Stitch Unit
Hold the cover of the staple case by its left and right sides Lift the cover and slide the cover off. Chapter 14 - Maintain the print system Canon varioPRINT DP line... - Page 431 Follow the steps 3 to 7 to re- place the other staple cartridge in the saddle stitch unit. Gently push the saddle stitch unit back in- to the printer. Chapter 14 - Maintain the print system Canon varioPRINT DP line...
- Page 432 Caution: When you close the front door of the stacker/stapler, be careful not to get your fingers caught, because this may re- sult in personal injury. Close the front door of the stacker/stapler. Chapter 14 - Maintain the print system Canon varioPRINT DP line...
-
Page 433: Cleaning
When to do When copies contain stains. Required tools Soft tissue Procedure Clean the scanner sensors Step Action Illustration [Open the main cover.] [Use a tissue to clean the scanner sensor.] Chapter 14 - Maintain the print system Canon varioPRINT DP line... - Page 434 Clean the Scanner Sensors Step Action Illustration [Open the white plate.] [Open the lower right-hand guide.] [Use a tissue to clean the scanner sensor.] Chapter 14 - Maintain the print system Canon varioPRINT DP line...
- Page 435 Clean the Scanner Sensors Step Action Illustration [Close the lower right-hand guide.] [Close the white plate.] [Close the main cover.] Chapter 14 - Maintain the print system Canon varioPRINT DP line...
-
Page 436: Clean The Z Sensor
In case of error code 16718. Required tools Soft tissue. Procedure Clean the Z sensor Step Action Illustration [Open the front door.] [Use handle 3 to slide out the transport unit.] Chapter 14 - Maintain the print system Canon varioPRINT DP line... - Page 437 [Use handle 4 to open the turn unit.] [Use handle 5 to open the flap.] [Use a tissue to clean the sensor and the sensor box on the inner side.] [Close the flap.] Chapter 14 - Maintain the print system Canon varioPRINT DP line...
- Page 438 Clean the Z Sensor Step Action Illustration [Use handle 4 to close the turn unit.] [Use handle 3 to slide the transport unit back.] [Close the front door.] Chapter 14 - Maintain the print system Canon varioPRINT DP line...
-
Page 439: Manually Start A Drum Cleaning
On the control panel, touch [System] -> [Maintenance] -> [Go to maintenance tasks] -> [Clean the drum] -> [Start]. [Enter the maintenance PIN.] Follow the instructions on the control panel. Chapter 14 - Maintain the print system Canon varioPRINT DP line... -
Page 440: Automatic Drum Cleaning
Possible values: • [On] • [Off] Factory default value: [Off]. NOTE The drum cleaning can take a couple of minutes. The control panel provides feedback. Chapter 14 - Maintain the print system Canon varioPRINT DP line... - Page 441 Now you can check the output. Possible values: • [Yes] • [No] Factory default value: [No]. Chapter 14 - Maintain the print system Canon varioPRINT DP line...
- Page 442 On the control panel, touch [System] -> [Setup] -> [Advanced media settings] (under [Advanced]). Touch the [Automatic drum cleaning] button to enable the setting. If required, change the values of the settings described in the table. Touch [Apply] to confirm the changes. Chapter 14 - Maintain the print system Canon varioPRINT DP line...
- Page 443 Automatic Drum Cleaning Chapter 14 - Maintain the print system Canon varioPRINT DP line...
-
Page 444: Chapter 15 Troubleshooting
Chapter 15 Troubleshooting... -
Page 445: Solving Errors
Paper jams or Make sure that the horizon- dog ears because tal transport unit is always the horizontal completely pushed in until transport unit in- locked. side the printer is not closed com- pletely. Chapter 15 - Troubleshooting Canon varioPRINT DP line... - Page 446 • When you define the job settings on the [Jobs] view on the con- control panel, the control panel displays a trol panel. message that the defined combination is not possible. The [OK] button is disabled. Chapter 15 - Troubleshooting Canon varioPRINT DP line...
-
Page 447: Store The Logging In Case Of Software Errors
If one or more jobs caused the software error, the system restarts without an error. NOTE If the system experiences three identical software errors, one after another the system reinstalls the software upon restarting. Reinstallation will take a while. Chapter 15 - Troubleshooting Canon varioPRINT DP line... -
Page 448: Appendix A Specifications
Appendix A Specifications... -
Page 449: General
General Specifications Specification Value Description Light to mid production, B&W printer / scanner / copier Toner Canon varioPRINT 135 Series Toner Black Imaging technology ® DirectPress ; mono-component toner Warm-up time 150-270 seconds, depending on amount of toner in cleaner First copy time One-sided: 3.9 seconds... -
Page 450: Environmental
Operation mode (USA, LTR, 75 g/m², two-sided): 1.9 kW / 2.0 kW / 2.2 kW (vari- ® oPRINT 115 / 130 / 140 respectively) TEC value ® USA, LTR, 75 g/m²: 20.3 kWh / 21.2 kWh / 22.8 kWh (varioPRINT 115 / 130 / 140 respectively) Appendix A - Specifications Canon varioPRINT DP line... -
Page 451: Printer Speed
One-sided, less than 220 g/m² (80 lb cover) Two-sided, 120 g/m² - 220 g/m² (31 lb bond - 80 > 220 g/m³ (80 lb cover) LEF: Long-edge feed SEF: Short-edge feed Appendix A - Specifications Canon varioPRINT DP line... -
Page 452: Paper Modules
50 - 300 g/m² (13 lb bond - 110 lb cover) Detection Automatic paper size detection, tray-empty detection Paper feed technology Vacuum feed, air separation Features Paper Logic, tray linking, paper level indication, on-the-fly loading, tab sheet processing (one side only) Appendix A - Specifications Canon varioPRINT DP line... -
Page 453: Finishing And Delivery Specifications
Lower tray: 200 sets; maximum of 3000 sheets Stacking capacity for sta- pled sets Features Corner stapling, two-point stapling also for A4R and LTRR Staple-cut function depends on thickness set Appendix A - Specifications Canon varioPRINT DP line... - Page 454 Optional: can be combined with 1 or 3 knife trimming Power requirement 120 V, 8 A Dimensions (WxDxH) 800 mm x 792 mm x 1239 mm / 31.5" x 31.18" x 48.78" Weight 182 kg / 401 lb Appendix A - Specifications Canon varioPRINT DP line...
-
Page 455: Media Specifications
60 - 300 g/m² (16 lb bond - 110 lb) Coated media Not recommended* 80 - 300 g/m² (20 lb bond - 110 lb) NOTE * Some coated media can be used when you install the separation enhancer. Appendix A - Specifications Canon varioPRINT DP line... -
Page 456: Printing, Copying And Scanning
75, 100, 150, 200, 300 (default), 600 dpi Pull scan Not available Color scanning Optional license Destination Scan to email, Scan to FTP, Scan to USB, Scan to DocBox, Scan to SMB, Scan to PDF (DocBox) Appendix A - Specifications Canon varioPRINT DP line... - Page 457 Thumbnail preview (DocBox), scan profiles, status overview, gray level scanning, scan once print many, scan-in-warmup, scan- while-print, subset-scanning, multi-tasking user interface, RGB col- or scanning, scan to file with mixed original sizes Appendix A - Specifications Canon varioPRINT DP line...
-
Page 458: Prismasync Controller
Diagnostics, remote software upgrade, Remote Monitor. Hardware options Generic USB mouse support, Section 508 kit (video, attention sig- nal), copy control device interface for accounting, operator atten- tion light, removable hard disk. Appendix A - Specifications Canon varioPRINT DP line... -
Page 459: Printer Driver Support
2012/Windows 8.1/Windows 2012 R2 SAP Device Type (SAP R/3 4.6 and higher) Implementation & support via C&SS Remote Printer Driver 5.2.0.0 PostScript, PCL and PDF NOTE ® All UPD drivers are Microsoft certified Appendix A - Specifications Canon varioPRINT DP line... -
Page 460: Index
Billing counters Automated workflow........Description............362 Add temporary media to the Media catalog..Print the report..........Add toner.............. Binding edge............171 Address book Book copy..............216 e-mail.............. Glass plate............Address list file Booklet finisher Download............248 specifications..........453 Edit..............Brightness Canon varioPRINT DP line... - Page 461 Accounting mode..........83 Create 1 file.............266 adjustment of readability........ Create one file..........brightness............Components contrast............. Booklet maker...........14 Enter an account ID per job......85 Commercial names.......... error recovery transaction print jobs....40 Control panel............ image shift transaction print jobs....40 Canon varioPRINT DP line...
- Page 462 Jobs with available media......193 Sheet order............. Jobs with label..........Sheet orientation..........223 List of Printed jobs......... Shift..............List of Scheduled jobs........Size..............List of Waiting jobs........Sort by page........... New jobs............Sort by set............223 One by one............. Staples............Canon varioPRINT DP line...
- Page 463 Minimum line width........135 book copy............Number of sets..........140 copy..............103 Offset stacking..........132 Output location..........132 Page numbering..........141 Page range............140 Host name............. Print order............132 Hotfolder Punching............Activate............. raster............135 Create..............RIP resolution..........Create shared network drive......Rotation............132 Default ticket.............70 Separator sheets..........Canon varioPRINT DP line...
- Page 464 Software............355 Reprint.............187 Link speed and connection type......356 Separator sheets..........Load media Shift the image..........Schedule view..........Shift the margin..........Local key operator settings........354 To top.............. Lock settings in DocBox........145 Job management Logging other printer............118 Configuration report........Canon varioPRINT DP line...
- Page 465 Output tray Elongation..........329, parts..............FAQ..............350 Front-to-back side....328, 332, 333, Manual............Order............... Page number............96 Preprinted media..........347 ..............96 Quick start............315 Page programming..........Settings Editor..........344 Page range Shifted image......... 332, All pages............Skewed image........ 340, 341, Indicate the range.......... Canon varioPRINT DP line...
- Page 466 DocBox............149 Split bundled jobs.......... Print color images on a B&W printer....178 transaction printing mode.......39 Print delivery settings Print settings Offset stacking..........176 transaction printing mode.......40 Output location..........176 Print system Print order............176 language............Rotation............176 transaction printing mode.......40 Canon varioPRINT DP line...
- Page 467 Job settings............ usage of............Margin erase...........255 Remote Diagnostics..........Media size............Remote Manager..........Optimize scan quality........description............Original 1- or 2-sided........Remote Meter Reading........Original type........... Remote Monitor............277 Resolution............253 Remote Printer Driver Size..............preparation..........90 User code............256 Canon varioPRINT DP line...
- Page 468 Subnet mask............Shifted image..........332, Subsets Troubleshooting..........349 Tab sheets..........238, Shut down the system........... System Skew..............Restart............... Skewed image........340, 341, Shut down............Skewing..............341 Turn on..............44 Skewness............340, system administrator Sleep button............42 media configuration.........37 location............. System administrator settings......Canon varioPRINT DP line...
- Page 469 User groups Image shift............overview............Media messages..........Username ...............31 Printer offline..........200 Users Printer online..........description............Transaction printing mode configuration............ description............Variable data printing...........194 image adjustment..........convert from normal job....... secure error recovery........40 VDP..............194, Transaction setup Canon varioPRINT DP line...
- Page 470 X image shift back........343, X image shift front........343, X offset............332, Z image shift back........343, Z image shift front........343, Z offset............332, Z sensor Clean............... Error code............Zoom Fit to page............Percentage............Zoom behavior............. Canon varioPRINT DP line...
- Page 471 Index Canon varioPRINT DP line...
- Page 473 CANON INC. 30-2, Shimomaruko 3-chome, Ohta-ku, Tokyo 146-8501, Japan CANON U.S.A., INC. One Canon Park, Melville, NY 11747, U.S.A. CANON CANADA INC. 8000 Mississauga Road Brampton, ON L6Y 5Z7, Canada CANON EUROPA N.V. Bovenkerkerweg 59, 1185 XB Amstelveen, The Netherlands CANON AUSTRALIA PTY.
Need help?
Do you have a question about the varioPrint 115 and is the answer not in the manual?
Questions and answers
how can i stop a job in progress
You can stop a job in progress on a Canon varioPrint 115 manually in two ways:
1. Press the Stop button – The printer will stop after completing the currently printed set of the active job.
2. Press the [Stop after job] button – This will stop the printer after the active print job is completed.
When stopping manually, the dashboard will display the [Resume] button with a vertical green bar and the message [Stopping after set...]. Once the set is completed, the green bar turns red, indicating that the printer has stopped.
This answer is automatically generated
accidentally told printer to stop after job how to restart
varioprint 115 thinks it needs staples just put a new cartridge in it won't resume what to do pls?
Check the staple icon on the dashboard. If it remains orange or red after replacing the staple cartridge, go to the [Printer] section of the [System] view to verify which staple cartridge needs attention. Ensure the cartridge is properly installed and the printer recognizes the replacement.
This answer is automatically generated