
Related Manuals for Raw Thrills King Kong of Skull Island


Summary of Contents for Raw Thrills King Kong of Skull Island
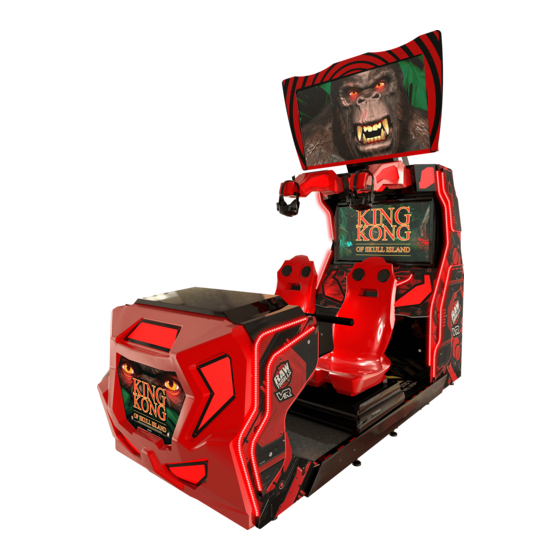
- Page 1 040-00078-01 REV5 King Kong of Skull Island™ Operator’s Manual Skull Island, Kong: King of Skull Island, King Kong of Skull Island © DeVito ArtWorks, LLC, 1997, 2004, 2017 Software™ & © 2020 Raw Thrills, Inc. All Rights Reserved.
- Page 2 This Page Left Blank Intentionally...
-
Page 3: Table Of Contents
King Kong of Skull Island™ Table of Contents Safety ................................5 Operation ..............................5 Transporting .............................. 5 Handling Components ..........................5 Disconnect Power ............................. 5 Grounding ..............................5 Electrical Shocks ............................5 Monitor ..............................5 Power Selector ............................5 Power Cord ............................... 5 Surge Suppressor ............................ - Page 4 King Kong of Skull Island™ Upper Monitor Installation ......................... 10 Headset Arm Setup ..........................12 Positioning Cabinets for Harness and Air Line Connections ............... 13 Joining the Four Cabinets Together ....................14 Card Reader Installation and Setup ......................15 Check Electrical Settings ......................... 16 Startup Game ............................
-
Page 5: Safety
King Kong of Skull Island™ Safety Operation Before operating game, read this manual. Failure to properly install and operate this game could result in malfunction or accident. Operate the game in accordance with the manual. Transporting The upper monitor assembly weighs approximately 95 lbs. and the installation requires a minimum of three people, using two 6-foot step ladders (minimum height). -
Page 6: Surge Suppressor
Keep this manual available and ready for use. If the game fails to function properly, turn off the machine and unplug the AC line cord. Contact your local distributor. You may not reproduce this document or any of its contents without written authorization from Raw Thrills, Inc. P a g e... -
Page 7: Specifications
King Kong of Skull Island™ Specifications For reasons such as performance, this product’s specifications may change without notice. Federal patent, copyright and other intellectual property laws protect the content, devices and design of the game and its equipment. CAUTION •... -
Page 8: Product Specifications
King Kong of Skull Island™ Product Specifications Electrical Power MULTIPLE POWER SUPPLY ENTRIES Warning: Before obtaining access to terminals, all supply circuits must be disconnected. Attention: Avant d’accéder aux bornes, tous les circuits d’alimentation doivent être déconnectés. United States, Canada (ETL) -
Page 9: Setup
4. T-25 tamper resistant Torx bit 5. T-20 tamper resistant Torx bit 6. 3/8” ratchet wrench 7. 3/4” socket 8. 10mm socket Check the King Kong of Skull Island™ game page for the most up to date info! rawthrills.com/king-kong-of-skull-island/ P a g e... -
Page 10: Cabinet Assembly
King Kong of Skull Island™ Cabinet Assembly CAUTION UNDER NO CIRCUMSTANCES SHOULD THIS GAME BE OPERATED UNLESS ALL INSTALLATION PROCEDURES HAVE BEEN COMPLETED AND ALL SAFETY FEATURES HAVE BEEN POSITIVELY TESTED AND ARE FULLY FUNCTIONAL! Upper Monitor Installation The upper monitor assembly weighs approximately 95 lbs. and the installation requires a minimum of three people, using two 6-foot step ladders (minimum height). - Page 11 King Kong of Skull Island™ 4. Make sure the brackets are mated properly and install two bottom 6MM x 20MM VESA mount screws and washers (fig. c items A, below) in the lower back mounting brackets and then install remaining six 1/4-20 x 3/4' perimeter screws and washers (fig. c items B, below).
-
Page 12: Headset Arm Setup
King Kong of Skull Island™ Headset Arm Setup 1. Remove the right cover plate (fig. f item C, below). Remove the 1/2-13 x 7" bolt from the slotted hole of the bracket arm with a 3/4" socket (fig. f item A, below). -
Page 13: Positioning Cabinets For Harness And Air Line Connections
King Kong of Skull Island™ Positioning Cabinets for Harness and Air Line Connections 1. Align the cabinets for harness and air line connections (fig. h below). fig. h 2. From the spacer cabinet, lift up the door and prop open with the attached prop bar. -
Page 14: Joining The Four Cabinets Together
King Kong of Skull Island™ 6. Lower the door on the spacer cabinet and install the spacer screws through the mating holes in the top of the door and tighten. Joining the Four Cabinets Together 1. Make sure all cables, harnesses, and air lines are connected, and push the cabinets together so there is minimal space between each one. -
Page 15: Card Reader Installation And Setup
Due to the rising popularity of aftermarket debit card systems for cashless or coinless operation of amusement machines (i.e., Embed, Intercard, Semnox), this King Kong of Skull Island™ cabinet is equipped with UCL compatible harnessing to ensure that the installation process is easier and less prone to miswiring. -
Page 16: Check Electrical Settings
King Kong of Skull Island™ Check Electrical Settings 1. Verify the voltage in the nearest AC outlet. 2. Verify the AC outlet ground connection is present and working. Startup Game 1. Plug the two line cords into an AC outlet (Recommended: plug the line cords into separate breakers to prevent capacity overload). -
Page 17: Headset Calibration Guide
King Kong of Skull Island™ Headset Calibration Guide ***MACHINE IS NOT OPERATIONAL WITHOUT FIRST CALIBRATING THE HARDWARE*** 1. In the test menu, select the “Calibration” menu item. (see below) 2. In the Calibration menu, select “Headset Calibration”. (see below) 17 |... - Page 18 King Kong of Skull Island™ 3. Press Test to begin calibration. (see below) 4. Hold Player 1 headset in the player head position. (see below) 18 | P a g e...
- Page 19 King Kong of Skull Island™ 5. Press Test again to start Player 1 calibration. (see below) (IMPORTANT: MAKE SURE THE HEADSET CAMERAS ARE NOT COVERED, images a (front) & b (left and right sides) BELOW) image a image b 19 |...
- Page 20 King Kong of Skull Island™ 6. Then wait 20 seconds for the calibration process to initialize, during that time please make sure player 1 headset is held in player 1 head position and the headset cameras are not blocked. (see below) 7.
- Page 21 King Kong of Skull Island™ 8. After pressing Test again, the wizard will instruct you to perform the same steps however this time with the player 2 headset. Hold the player 2 headset in player head position and press test, wait 20 seconds and press test again.
-
Page 22: Diagnostics And Adjustments
King Kong of Skull Island™ Diagnostics and Adjustments The Service Button Panel has four buttons, three of which can navigate the menu system. Navigating the Test Menu Button Action TEST (Not in Test Menu) Enters Test Menu TEST (In Test Menu) -
Page 23: Basic Functional Test On Initial Power Up
King Kong of Skull Island™ Basic Functional Test on Initial Power Up 1. Enter the Input Test and verify all switch inputs are working. 2. Enter the Video Test and verify the monitors are working properly. 3. Enter the Audio Test and verify the audio works and is not distorted. -
Page 24: Test Menus
King Kong of Skull Island™ Test Menus Main Menu Choose from all available operator settings and menus here. You can use the test menu bracket and volume buttons to navigate. MAIN MENU DIAGNOSTICS PRICING ADJUSTMENTS GAME SETTINGS SYSTEM SETTINGS AUDITS... -
Page 25: Diagnostics
King Kong of Skull Island™ Diagnostics Verify or diagnose the operations of all game functions. DIAGNOSTICS INPUT TEST VIDEO TEST AUDIO TEST CABINET LIGHTS TEST METER TEST WATCHDOG TEST MOTION TEST MOTION STRESS TEST BLOWER TEST LEAP MOTION TEST WATCHDOG TEST EXIT •... -
Page 26: Pricing And Payout Adjustments (Cash)
King Kong of Skull Island™ Pricing and Payout Adjustments (Cash) Set pricing and payout adjustments for game operation. PRICING AND PAYOUT ADJUSTMENTS (CASH) CURRENCY INPUT CURRENCY TYPE COIN VALUE COINS TO PLAY MAX CREDITS FREE PLAY EXIT • Currency Input: Change the currency input. -
Page 27: Pricing And Payout Adjustments (Tokens)
King Kong of Skull Island™ Pricing and Payout Adjustments (Tokens) Set pricing and payout adjustments for game operation. PRICING AND PAYOUT ADJUSTMENTS (TOKENS) CURRENCY INPUT CURRENCY TYPE TOKEN VALUE TOKENS TO PLAY MAX CREDITS FREE PLAY EXIT • Currency Input: Change the currency input. -
Page 28: Pricing And Payout Adjustments (Swipes)
King Kong of Skull Island™ Pricing and Payout Adjustments (Swipes) Set pricing and payout adjustments for game operation. PRICING AND PAYOUT ADJUSTMENTS (SWIPES) CURRENCY INPUT CURRENCY TYPE SWIPE VALUE (IMPORTANT SETTINGS) NUMBER OF CARD READERS MAX CREDITS FREE PLAY EXIT •... -
Page 29: Game Settings
King Kong of Skull Island™ Game Settings Adjust game settings for operation. GAME SETTINGS INTERACTIVITY ENABLED CHAPTER 1 ENABLED CHAPTER 2 ENABLED CHAPTER 3 ENABLED ATTRACT MUSIC FREQUENCY EXIT • Interactivity Enabled/Disabled: Enable interactive sequences and Leap Motion hands for a fully interactive experience. -
Page 30: System Settings
King Kong of Skull Island™ System Settings Adjust system settings for operation. SYSTEM SETTINGS SHOW COMPRESSOR WARNINGS SHOW LEAP MOTIONS ERRORS CABINET LED BRIGHTNESS TRADESHOW MODE DATE & TIME LANGUAGE EXIT • Show Compressor Warnings: Toggle whether compressor related errors will be displayed on monitors. -
Page 31: Audits
King Kong of Skull Island™ Audits View machine statistics such as games played, money earned, etc. AUDITS SYSTEM AUDITS COIN AUDITS GAME AUDITS EXIT • System Audits: Tracks system information including boots, resets, game times, and more. • Coin Audits: Tracks income related information. -
Page 32: Resets
King Kong of Skull Island™ Resets Reset various machine settings and audits. RESETS RESET CREDITS RESET PRICING ADJUSTMENTS RESET GAME ADJUSTMENTS RESET GAME AUDITS RESET SYSTEM AUDITS RESET COIN AUDITS RESET ALL AUDITS FACTORY RESTORE EXIT • Reset Credits: Reset credits to zero (0). -
Page 33: Volume
King Kong of Skull Island™ Volume Adjust all volume settings. VOLUME GAME VOLUME ATTRACT VOLUME CREDIT VOLUME MINIMUM VOLUME EXIT • Game Volume: Adjusts the volume level during gameplay. • Attract Volume: Adjusts the volume level during the attract mode sequences. -
Page 34: Calibration
King Kong of Skull Island™ Calibration Calibrate the VR headsets and cabinet motion. ***MACHINE IS NOT OPERATIONAL WITHOUT FIRST CALIBRATING THE HARDWARE*** CALIBRATION HEADSET CALIBRATION HEIGHT SENSOR CALIBRATION SERVER - MIXED REALITY CALIBRATION SIZE CLIENT - MIXED REALITY CALIBRATION SIZE EXIT •... -
Page 35: Utilities
King Kong of Skull Island™ Utilities Miscellaneous operator tools. UTILITIES COPY AUDITS, LOGS, & SCORES TO USB VIEW GAME LOG VIEW ERROR LOG VIEW UNITY LOG TEST COINUP CONNECTION EXIT • Copy Audits, Logs, & Scores to USB: Copy all audits and diagnostics to USB drive. -
Page 36: System Information
King Kong of Skull Island™ System Information View hardware and software information • Serial Number • Software Rev • Build Date • RIO2 A Serial Number • RIO2 A Firmware Version • RIO2 A Primary MCU Version • RIO2 B Serial Number •... -
Page 37: Choosing The Right Pricing Adjustments For Your Location
King Kong of Skull Island™ Choosing the Right Pricing Adjustments for Your Location Card Swipe Locations • Make Sure Your Game is Set to Swipes Mode: 1. Hold the Test Button for 2 seconds to enter the Test Menu. 2. Select “Pricing Adjustments” from the menu. -
Page 38: Pc Hardware
King Kong of Skull Island™ PC Hardware Your King Kong of Skull Island™ game uses two HP Z1G5TWR Desktop PC computers. One is the SERVER (Player 1 PC) and the other is the CLIENT (Player 2 PC). (above: HP Z1G5TWR Desktop PC) -
Page 39: Pc Hard Drive Recovery
King Kong of Skull Island™ PC Hard Drive Recovery Symptoms requiring a PC hard drive recovery include: • File test reports bad or missing files. • Game fails to finish loading during setup. • After resetting the AC power, an error is reported. -
Page 40: Troubleshooting
King Kong of Skull Island™ Troubleshooting Warning: Review the Safety section before making any adjustments to the game. Problem Possible Cause Solution Game not plugged in. Plug game into AC outlet. Game not turned on. Turn on main power switch. - Page 41 King Kong of Skull Island™ Problem Possible Cause Solution Bad connection. Check connection to speakers. Volume set too low. Use VOL UP button on Test panel to raise volume Verify all wires are firmly connected to the speakers Faulty wiring.
- Page 42 King Kong of Skull Island™ Problem Possible Cause Solution Message on screen: Disconnect and reconnect the USB cable from the Headset USB Loose or disconnected headset to the PC (must be plugged into a USB 3.0 connection not USB cable.
- Page 43 King Kong of Skull Island™ Problem Possible Cause Solution Turn PC power switch on. Ensure IEC cable tightly PC not turned on. plugged in. Trace cable back to source to ensure continuity. Check and secure DVI or HDMI connector to Video cable not secure.
- Page 44 King Kong of Skull Island™ Problem Possible Cause Solution Leap is sensitive to infrared light, including sunlight, Camera captures please make sure the game is not positioned in the interferences from way of direct or reflected sunlight, and any other external sources.
- Page 45 King Kong of Skull Island™ Technical Support For an authorized distributor near you, check the Raw Thrills website at www.rawthrills.com Betson’s Raw Thrills Technical Support Hotline Phone: 1-800-753-2513 FAX: 1-201-438-5019 Email: rtsupport@betson.com All Raw Thrills assembly and service videos: rawthrills.com/assembly-and-service-videos/...
-
Page 46: Electrical And Mechanical Illustrations
King Kong of Skull Island™ Electrical and Mechanical Illustrations 46 | P a g e... - Page 47 68in KING KONG OF SKULL ISLAND VR 1.73m 12.00in RECOMMENDED FOOT PRINT, SPACE AND POWER 0.30m CLEARANCE AREA CLEARANCE FOR ENTRY AND EXIT REQUIREMENTS. AREA FOR GAME VENTILATION!! MINIMUM 10 FOOT (3 M) CEILING RECOMMENDED AND 1 FOOT (.3 M) REAR WALL CLEARANCE REQUIRED.
- Page 48 Date: 16W-1007-RED #025 ANSI D 3-350819-2 2020.12.30 16W-1007-ORG #026 16W-1007-YEL #027 TITLE AC_EARTH 16W-1007-GRN #006 Raw Thrills, Inc. VR System Diagram 2-32952-1 1-480708-0 1-480709-0 3-350819-2 AC_EARTH 5441 Fargo Ave. rawthrills.com GROUNDING STUD Skokie, IL 60077 tel: 847.679.8373 fax: 847.679.8538 INITIAL 2020.12.30...
- Page 49 LOWER SHAPE LEFT - BLU 03-06-1042 03-06-2042 [811-00110-01] [380-00010-01] 5.1 Audio Amp Designed: Date: ANSI D 2020.12.30 TITLE Raw Thrills, Inc. VR System Diagram PC Compartment From: PC (PAGE-4) 5441 Fargo Ave. rawthrills.com Skokie, IL 60077 tel: 847.679.8373 [MONITOR CAB I/O] fax: 847.679.8538 INITIAL /4.F1...
- Page 50 #367 22W-1007-BLK #367 39-01-3023 39-01-2020 Designed: Date: ANSI D 2020.12.30 TITLE Raw Thrills, Inc. VR System Diagram From: PC Compartment (2) [Monitor Cab Mid] Montior Cabinet Mid / Compressor Compartment 5441 Fargo Ave. rawthrills.com /2.B7 Skokie, IL 60077 tel: 847.679.8373 fax: 847.679.8538...
- Page 51 #479 UPPER SHAPE RIGHT - BLU 22W-1007-BLU #494 Designed: Date: ANSI D 2020.12.30 TITLE Raw Thrills, Inc. VR System Diagram Monitor Cabinet Top / PCs & Headsets 5441 Fargo Ave. rawthrills.com Skokie, IL 60077 tel: 847.679.8373 fax: 847.679.8538 INITIAL 2020.12.30...
- Page 52 Designed: Date: F-LT DIST SENS CBL52 CBL49 R-LT DIST SENS ANSI D 2020.12.30 CBL52 CBL49 TITLE Raw Thrills, Inc. VR System Diagram CBL52 CBL49 PHR-3 PHR-3 Seat Pedestal & Spacer Pedestal 5441 Fargo Ave. rawthrills.com Skokie, IL 60077 tel: 847.679.8373 fax: 847.679.8538...
- Page 53 #627 LT FLOOR DOWN - GRN 22W-1007-BRN-BLU #628 LT FLOOR DOWN - BLU Designed: Date: ANSI D 2020.12.30 TITLE Raw Thrills, Inc. VR System Diagram Front Lower 5441 Fargo Ave. rawthrills.com Skokie, IL 60077 tel: 847.679.8373 fax: 847.679.8538 INITIAL 2020.12.30...
- Page 54 CBL53 CBL29 CBL53 CBL30 CBL54 CBL30 CBL54 Designed: Date: ANSI D 2020.12.30 39-01-3043 39-01-2040 TITLE Raw Thrills, Inc. VR System Diagram Front Main 5441 Fargo Ave. rawthrills.com Skokie, IL 60077 tel: 847.679.8373 fax: 847.679.8538 INITIAL 2020.12.30 SHEET SHEETS DESCRIPTION DATE...
- Page 55 18W-1007-BRN #861 P1 BLOWER P2 BLOWER 18W-1007-BRN #860 Designed: Date: ANSI D 2020.12.30 TITLE Raw Thrills, Inc. VR System Diagram Front Main Left / Right 5441 Fargo Ave. rawthrills.com Skokie, IL 60077 tel: 847.679.8373 fax: 847.679.8538 INITIAL 2020.12.30 SHEET SHEETS...
- Page 56 KING KONG OF SKULL ISLAND VR CABINET ASSEMBLY MAIN CAB UPPER RIGHT FRAME/601-00902-01 MOTION BASE CABINET DECAL/606-01845-01 (SEE MOTION BASE EXPLODED VIEWS FOR DETAILS) MAIN CABINET/601-00872-01 MAIN CAB UPPER LEFT RIGHT DECAL/606-01736-01 FRAME/601-00903-01 (SEE MAIN CAB EXPLODED DECAL/606-01846-01 VIEWS FOR DETAILS) MAIN CAB WOOFER PANEL MAIN CABINET (SEE VIEW FOR DETAILS)
- Page 57 KING KONG OF 55" UPPER LCD UPPER 55"MONITOR SKULL ISLAND VR RIGHT UPPER LED PLATE UPPER MID DISPLAY ASSEMBLY BRACKET ASSEMBLY ILLUMINATION 600-02634-01 SEE EXPLODED VIEW SEE EXPLODED VIEW PANEL/603-01014-01 -MAIN CABINET- GRILL/600-02486-01 LEFT UPPER ILLUMINATION PANEL/603-01014-01 LED PLATE UPPER R&L (2) GENERAL ASSEMBLY AIRFLOW OUT (4) GRILL/600-02488-01...
- Page 58 ITEM NO. PART NUMBER DESCRIPTION QTY. ITEM ITEM PART NUMBER DESCRIPTION QTY. PART NUMBER DESCRIPTION QTY. 600-02480-01 Upper LCD Bracket Assy 55" LCD Monitor MT55W-887F3- 809-00004-01- 43" LCD Display- 600-02481-01 Monitor Pivot Bracket 809-00012-01 B-2017.03.22 (90-AP-413) VR-55-LCD-ASSY ASSY-55-LCD-ALIENS 1/16"T X 3/4"W X 120"Total Length- JP-55-LCD-FRAME LCD Foam Tape JP-55-LCD-FRAME ASSY...
- Page 59 KING KONG OF * NOTE: 600-2485-01-A,-B,-C WELDED TOGETHER TO CREATE ONE PART. SKULL ISLAND VR -HEADSET ARM ASSEMBLY- ITEM NO. PART NUMBER DESCRIPTION QTY. 600-02485-01-A WELDED ASSEMBLY (SHOWING RIGHT ARM) 600-02485-01-B WELDED ASSEMBLY 600-02485-01-C WELDED ASSEMBLY RIGHT ARM BRACKET/ 93560A180 93560A180_MCMASTER 600-02485-01 (SHOWN HERE)
- Page 60 KING KONG OF SECURE DOOR PANEL WITH SKULL ISLAND VR 1/4-20 x 1 -1/2" SCREWS LOCK AND FLAT WASHERS -SPACER CABINET- HOUSES MANIFOLD, AIR LINES AND WIRE HARNESS CONNECTIONS. 22.25in 56.51cm 8.25"H X 48"W X 24"D DOOR DETAIL B SCALE 1 : 5 SPACER DOOR PANEL DECAL 606-01741-01...
- Page 61 SEAT ASSEMBLY NO STEP CAUTION DECAL/ KING KONG OF (SEE EXPLODED VIEW) 606-01909-01 MOTION STOP SKULL ISLAND VR BUTTON ASSEMBLY HEALTH CAUTION DECAL/ (SEE EXPLODED VIEW) -MOTION CABINET- 606-01908-01 52"H X 49.5"W X 32.5"D STEEL HANDLE BAR (SEE EXPLODED VIEW) Skirt Angle Bracket-B 600-02573-01 UPPER SHEET METAL...
- Page 62 ITEM ITEM NO. PART NUMBER DESCRIPTION QTY. PART NUMBER DESCRIPTION QTY. 603-00523-01 ROTO MOLDED SEAT-RED 600-02593-01-ASSM TBar Support Weldment 600-02521-01 VR-Seat Box Motion Stop Button SEE EXPLODED VIEW Assy 807-00003-00 6 1/2" WOOFER SPEAKER 600-02609-01- EDGE MOLDING 600-00106-01- REAR SEAT WOOFER GRILL 5/16-18 BUTTON HEAD HEX DRIVE 92949A591 SCREW...
- Page 63 WITH ADJOINING PANELS, BRACKETS AND CABLES. FACE DESPENSER/600-02631-01 DRILL THROUGH PANEL AS PER DISPENSER TRAY/603-01017-01 MANUFACTURERS SPECIFICATIONS. (CARD READERS NOT INCLUDED). GRILL/ 600-02516-01 WHITE PANEL/ 603-01012-01 KING KONG OF SKULL ISLAND VR CLEAR LENS/ GRILL / 42.59in FRONT CABINET 49.5in 600-02514-01 600-02517-01 108.17cm 125.76cm...
- Page 64 LEFT SIDE KING KONG OF SKULL ISLAND VR WEIGHTS AND DIMENSIONS 114.25" H x 58.25" W x 122.25" D REAR FRONT Approximate Assembled Weight 58.38in 1500 lbs 148.28cm 55" LCD MONITOR REMOVE UPPER MONITOR RIGHT SIDE AND ROTATE BRACKET WITH...
Need help?
Do you have a question about the King Kong of Skull Island and is the answer not in the manual?
Questions and answers