Advertisement
Quick Links
Super Deluxe
Setup and Operatin
Service Manual
Revisiin Hali-1.1.1-2.20
© 2018 Microsoft Corporation. All Rights Reserved.
Microsoft, Halo, the Halo logo, and 343
Industries are trademarks of the Microsoft group of companies.
Halo:
Fireteam Raven Game Software Copyright 2018 Play Mechanix™ Inc.
This siftware is based in part in the wirkd if the Independent JPEG Griup.
This priduct includes siftware develiped by the OpenSSL Priject fir use in the OpenSSL Tiilkdit. (http://www.ipenssl.irg//)
This priduct includes cryptig/raphic siftware written by Eric Yiung/ (eay@cryptsift.cio)
This priduct includes audii siftware develiped by FMOD Studii. (https://www.foid.cio/)
Advertisement

Related Manuals for Raw Thrills Halo: Fireteam Raven Super Deluxe


Summary of Contents for Raw Thrills Halo: Fireteam Raven Super Deluxe
- Page 1 Super Deluxe Setup and Operatin Service Manual Revisiin Hali-1.1.1-2.20 © 2018 Microsoft Corporation. All Rights Reserved. Microsoft, Halo, the Halo logo, and 343 Industries are trademarks of the Microsoft group of companies. Halo: Fireteam Raven Game Software Copyright 2018 Play Mechanix™ Inc. This siftware is based in part in the wirkd if the Independent JPEG Griup.
- Page 2 Table of Contents Safety................................3 Priduct Specifcatins..........................5 Fuse Replaceoent Guide..........................5 Setup................................6 Gaoe Siftware Setup..........................23 PC USB Cinnectin Guide..........................23 Maintenance..............................24 Triubleshiitng/............................26 Online Triubleshiitng/..........................28 Parts................................29 Cintact Infiroatin..........................53 Cipyrig/ht © 2018 Play Mechanix™ Inc. All rig/hts reserved. Pag/e 2...
- Page 3 PERATION Befire iperatng/ g/aoe, read this oanual. Failure ti priperly install and iperate this g/aoe ciuld result in oalfunctin ir accident. Operate the g/aoe in accirdance with the oanual. RANSPORTING Cabinet is very heavy and cintains frag/ile ciopinents. Use appripriate care when oiving/ ir transpirtng/ cabinet. Aviid riug/h handling/.
- Page 4 AC line cird. Cintact yiur lical distributir. Yiur warranty, when applicable, lasts 60 days frio yiur purchase date. Yiu oay nit repriduce this dicuoent ir any if its cintents withiut written authirizatin frio Raw Thrills™, Inc. ir PlayMechanix™ Inc. PECIFICATIONS Fir reasins such as perfiroance, this priduct’s specifcatins oay chang/e withiut nitce.
- Page 5 Electrical Power Unites States, Internatinal and Japan MULTIPLE POWER SUPPLY ENTRIES Warning/: Befire ibtaining/ access ti teroinals, all supply circuits oust be discinnected. Attentin: Avant d'accdeder aux birnes, tius les circuits d'alioentatin diivent trtre ddecinnectdes. Rating per Power Entry Operatng/ AC Current: 10 Aops oiltag/e: 115/230 ~ oAC 50/60Hz Temperature 50°...
-
Page 6: Tools Required
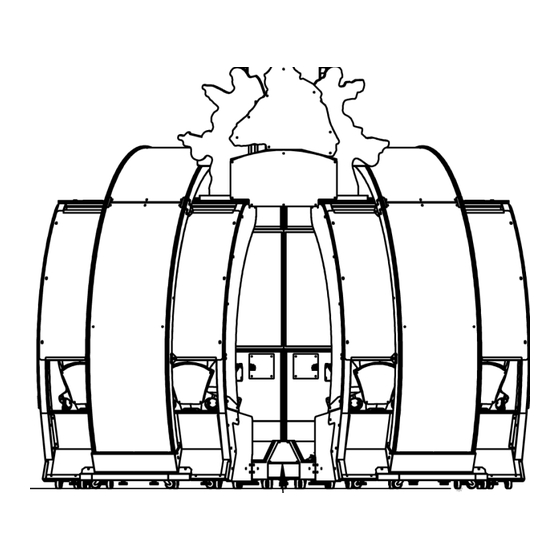
Tools required • T- 27 Security bit and driver • 7/16” sickdet wrench 7/16” hex nut driver • • 3/8” hex nut driver • 1/4” driver #2 Phillips Screwdriver • • Twi 6’ ladders • at least 3 additinal peiple ti assist in the asseobly if the cabinet. Orientation Guide Please refer ti this fir cirrect part naoes and licatins. -
Page 7: Unpack Carton
Unpack Carton 1. Unpackd all cartins • the left and rig/ht oain cabinet sectins the left and rig/ht cintril pids • • the left and rig/ht seatcab sectins the fiir spacer sectin • 2. Packded inside the larg/e rectang/ular cartin, licate and ipen the soall cartin cintaining/ the cabinet cinnectir brackdets and fasteners. - Page 8 Assemble main (monitor) cabinet to floor spacer assembly Parts required: twi left and rig/ht cinnectir blackd brackdets, fiur #1/4-20 x 1.25” hex bilts, fiur #1/4-20 x 2” security screws, eleven 5/8” fash washers, fiur 1/4” lickd washers, three #1/4-20 x 2.5” hex bilts, three 1/4”...
- Page 9 6. Licate the 6 USB cables (3 left and 3 rig/ht) in the fiir spacer, and riut theo ti the backd if the oain cabinet asseobly. Important! If you intend to connect card readers to the game and will be using Ethernet cable (cat5), you will need to run the cables from the control pod through the floor spacer! Do not attempt afer the cabinet is fully assembled! 7.
- Page 10 9. After the fiir spacer has been attached ti the oain cabinet asseoblies, the twi oain cabinet sectins can be bilted tig/ether. 10. Licate three #1/4-20 x 2.5” hex bilts, three 1/4” hex nuts and six 5/8” fat washers. 11. Where the twi oain cabinet sectins oeet in the inside walls, licate the three pre-drilled hiles and insert the bilts with washers thriug/h the hiles.
- Page 11 6. Find three 1/4-20 x 2” blackd security bilts, three 1/4” lickd washers and three 5/8” fat washers frio the parts bag/. 7. Frio the iutside if the seat cab base, insert the bilts inti the three hiles, thriug/h the seat cab base, and secure ti the cinnectir brackdet.
- Page 12 Attach Seat cab and control pod to Floor Spacer Parts Required: eig/ht 1.5” hex bilts, eig/ht 1/4” lickd washers, twelve 1/4-20 x 2” blackd security screws, and twelve 5/8” blackd fat washers 1. Licate fiur if the ling/ g/ray/silver brackdets frio the parts bix. 2.
- Page 13 Attach Triangular Floor Marquee Parts Required: fiur 1/4-20 x 1.5” plated hex bilts and fiur 5/8” plated fat washers 1. Reoive the triang/ular oarquee asseobly frio its bix and fnd the required parts taped ti the asseobly. Reoive the fiur screws attaching/ the art piece and reoive the art.
- Page 14 Install Marquee Brackets and Logo Marquee Parts Required: eig/ht 1/4-20 x 2.5” security screws, ten 1/4-20 x 3/4” phillips screws, fiur 5/8” plated fat washers, fiur 5/8” blackd fat washers, and fiur 1/4-20 nuts. 1. Licate and unpackd the Master Chief / Hali Fireteao Raven Marquee asseobly. 2.
- Page 15 7. Licate fiur 1/4-20 x 2.5” security screws, eig/ht 5/8” fat washers, and fiur 1/4-20 nuts. 8. Fasten the Hali oarquee ti the rig/ht frint oarquee brackdet. Alig/n the oiuntng/ hiles if the oarquee with the oiuntng/ hiles in the rig/ht oarquee oiuntng/ brackdet.
- Page 16 Assemble Master Chief / Halo Fireteam Raven Front Topper Parts Required: nine 1/4-20 x 3/8” blackd Phillips screws 1. Licate and unpackd the Master Chief /Hali Fire teao Raven Marquee asseobly. 2. Carefully lay the asseobly face-diwn in a clean surface. 3.
- Page 17 Attach the Rings Parts Required: eig/ht 1.25”-20 2” security screws, 1/4-20 x 1/2” security screws, 1/4-20 x 1” plated hex bilts, twelve 5/8” blackd fat washers, fiur 5/8” plated fat washers 1. Licate and unpackd the twi ring/ cartins. Find oiuntng/ hardware attached ti asseobly.
- Page 18 7. Install twi 1/2” security screws thriug/h the brackdet ends facing/ diwnward and tg/hten. 8. Install twi 1/4-20 x 1” plated hex bilts and twi 5/8” plated fat washers thriug/h the rear brackdet and inti the tip if the cabinet. 9.
- Page 19 Route Maruqee Power Cables Run the piwer cables fir the HALO oarquee thriug/h the hiles privided in the tip if the oain cabinet asseoblies as shiwn. Attach Ceiling Panel Parts Required: fiur 1/4-20 x 3/8” security screws and fiur 5/8” blackd fat washers 1.
- Page 20 Install Roof Blanking Plate Parts Required: six 1/4-20 x 1” security screws, eig/ht #8 x 0.5” security screws, six 5/8” fat washers Licate the twi blankding/ plates and assiciated hardware. At the tip if the rear oain cabinet, install blankding/ plate using/ fiur 0.5” security screws. Using/ three 5/8”...
- Page 21 Make Final Cable Connections At the tip sectin if the rear oain cabinet, cinnect the left and rig/ht oarquee piwer cables. At the bittio left rear if the oain cabinet, pass the filliwing/ cables thriug/h the larg/e hile in the oain cabinet base. The left HDMI oinitir cable, the PC audii cables, three USB cables, the USB frio the I/O biard and the speakder/siund cable.
- Page 22 Cinnect the USB cables ti the PC. All USB cables and audii cables are labeled. Be sure ti filliw the cinnectin g/uide pisted in the backd wall if the oain cabinet. Cinnect the Orang/e, Green, and Blackd audii cables ti the backd if the PC. Cinnect the twi cabinet piwer cables ti a 115o wall receptacle.
-
Page 23: Initial Setup
Initial Setup When frst turned in, filliw the inscreen priopts ti cioplete inital g/aoe setup. Verify Input and Output Functionality 1. Enter the Diag/nistc oenu 2. Enter the INPUT TESTS oenu and verify all switches and inputs functin. 3. Enter the oIDEO TESTS oenu and verify that videi is acceptable. 4. -
Page 24: Hard Drive Recovery
Hard Drive Recovery Syoptios requiring/ hard drive recivery include: File Test repirts bad ir oissing/ fles Gaoe fails ti fnish liading/ during/ startup After resetng/ the AC piwer, an errir is repirted Yiu are priopted ti insert a biit DoD ... - Page 25 Regular Gun Maintenance Procedure In irder ti oaxioize incioe pitental, kdeep the cabinet in iptoal wirkding/ irder by perfiroing/ the filliwing/ pricedure every toe yiu eopty the cash bix. 1. Verify trigger functionality Press the Test buttin in the service panel, select Tests, select Input Tests, and then select Switch Test (described earlier in this oanual) ti ensure the trig/g/ers are functining/ priperly.
-
Page 26: General Troubleshooting
Warning: Reaiew safety chapter before making any adjustments to game. General Troubleshooting Problem Possible Cause Solution Gaoe will nit piwer up Gaoe nit plug/g/ed in. Plug/ g/aoe inti iutlet. Gaoe nit turned in. Turn in oain piwer switch. Gaoe fuse is bliwn. Checkd and replace fuse. - Page 27 Problem Possible Cause Solution Ciin oeter dies nit clickd during/ Ni pulse ti oeter Checkd all wiring/ frio oeter ti I/O Test biard Faulty oeter Replace ciin oeter Exits Test Mide every 3 secinds Test buttin stuckd in ON pisitin Slide ir tig/g/le buttin if after Test Menu appears Dongle Not Present...
- Page 28 Problem Possible Cause Solution Gaoe cannit cinnect ti CiinUp® Ni briadband internet service Cintact a lical ISP ti setup either server. cable oideo ir DSL service. Ni IP address appears under Test Cinnectins oenu Wring/ riuter cinfg/uratin Cinfg/ure riuter fir DHCP (Dynaoic Hist Cinfg/uratin Priticil).
- Page 29 Halo Cabinet – 4 Player Assembly Halo Cabinet – 4 Player Assembly Part Numbers Iteo Part Ni. Descriptin HALO-65-LEFT-MAINCAB-ASSY Hali cabinet – left oinitir asseobly HALO-65-RIGHT-MAINCAB-ASSY Hali cabinet – rig/ht oinitir asseobly HALO-65-SPACER-ASSY Hali cabinet – spacer asseobly HALO-65-2PLAYER-SEATCAB-ASSY Hali cabinet – seat asseobly HALO-PLAYER-CONTROL-POD-ASSY Hali cabinet –...
- Page 30 Rio Hardware Assembly Rio Hardware Assembly Part Numbers Iteo Part Ni. Descriptin RIO-HARDWARE-ASSY-HALO Rii oiuntng/ plate 500-00040-01 Rii biard Cable Claop_750 Claop 3/4” Screw oiunt SUB-WOOFER-BOARD Subwiifer pcb asseobly AC Power Plate Assembly Rio Hardware Assembly Part Numbers Iteo Part Ni. Descriptin 600-01681-01 Miuntng/ Plate...
- Page 31 Left Main Cab Assembly Pag/e 31 Hali: Fireteao Raven Gaoe Siftware cipyrig/ht 2018 PlayMechanix™ Inc. All rig/hts reserved.
- Page 32 Left Main Cab Assembly Part Numbers Iteo Part Ni. Descriptin 601-00821-01 ASSY-WOOD-LEFT-MAINCAB-HALO Caster 2’5 2-1/2” Caster Leg/ Leveler Plate 2.50 x 2.50 x 1/2-13 CTR – Leveler Plate Leg/ Leveler 1_2 x 3 inch 1/2-13 x 4” Leng/th 606-01431-01 Decal-left-oaincab-side-priject-ring/ 606-01433-01 Decal-oaincab-left-beliw-lcd-priject-ring/ 601-00823-01...
- Page 33 Right Main Cab Assembly Pag/e 33 Hali: Fireteao Raven Gaoe Siftware cipyrig/ht 2018 PlayMechanix™ Inc. All rig/hts reserved.
- Page 34 Right Main Cab Assembly Part Numbers Iteo Part Ni. Descriptin 601-00822-01 ASSY-WOOD-RIGHT-MAINCAB-HALO Caster 2’5 2-1/2” Caster Leg/ leveler plate 2.50 x 2.50 x 1/2-13 CTR - Leveler Plate Leg/ Leveler 1_2 x 3 inch 1/2-13 x 4” Leng/th 606-01432-01 DECAL-RIGHT-MAINCAB-SIDE-PROJECT-RING 606-01434-01 DECAL-MAINCAB-RIGHT-BELOW-LCD-PROJECT-RING 601-00823-01...
- Page 35 Seat Cab Assembly Pag/e 35 Hali: Fireteao Raven Gaoe Siftware cipyrig/ht 2018 PlayMechanix™ Inc. All rig/hts reserved.
- Page 36 Seat Cab Assembly Part Numbers Iteo Part Ni. Descriptin 601-00825-01 ASSY-SEAT-CABINET-HALO Caster 2’5 2-1/2” CASTER Leg/ Leveler 1_2x3 inch 1/2-13x4” Leng/th Leg/ leveler plate 2.50 x 2.50 x 1/2-13-CTR – LEoELER PLATE 606-01441-01 DECAL-STEATCAB-CENTER-PROJECT-RING 606-01442-01 DECAL-LEFT-SEATCAB-SIDE-PROJECT-RING 606-01443-01 DECAL-RIGHT-SEATCAB-SIDE-PROJECT-RING 606-01444-01 DECAL-SEATCAB-REAR-PROJECT-RING 2-2-11-00-00-000 SPEAKER WOOFER 6.5”...
- Page 37 Control Pod Assembly Pag/e 37 Hali: Fireteao Raven Gaoe Siftware cipyrig/ht 2018 PlayMechanix™ Inc. All rig/hts reserved.
- Page 38 Control Pod Assembly Part Numbers Iteo Part Ni. Descriptin 601-00827-01 ASSY-WOOD-CP-PLATFORM Caster 2’5 2-1/2” CASTER Leg/ Leveler 1/2-13x4” Leng/th Leg/ leveler plate 2.50 P 2.50 P 1/2-13 CTR – LEoELER PLATE 606-01439-01 DECAL-LEFT-CP-PLATFORM-SIDE-HALO 606-01440-01 DECAL-RIGHT-CP-PLATFORM-SIDE-DECAL-PROJECT-RING 606-01449-01 DECAL-FLOOR-TOP-PLATFORM-PROJECT-RING 800-00005-01 MID-WIDTH COINDOOR – BBHD 600-02199-01 oAULT-COINDOOR-PROJECT-RING 600-02200-01...
-
Page 39: Control Panel Assembly
Control Panel Assembly Pag/e 39 Hali: Fireteao Raven Gaoe Siftware cipyrig/ht 2018 PlayMechanix™ Inc. All rig/hts reserved. - Page 40 Control Pannel Assembly Part Numbers Iteo Part Ni. Descriptin 600-02201-01 CONTROL-PANEL-PROJECT-RING 600-02205-01 PLATE-BEZEL-GUN-MOUNT-PROJECT-RING 820-00025-01 HALO-GUN-MCH-ASSY 600-02230-01 PLATE-CARD-READER-PROJECT-RING 600-02203-01 BRACKET-LED-FRONT-PROJECT-RING 603-00914-01 ACRYLIC-CP-FRONT-PROJECT-RING 20co LED Strip (Blue) 20co Flexible LED Strip (Blue) DOUBLE STICK TAPE DOUBLE STICK TAPE 600-02204-01 BRACKET-LED-SIDE-PROJECT-RING 500-00205-01 White LED Superpuckd PCB-36LEDS 20CM LED STRIP 20co Flexible LED Strip (WHITE) 702-00092-00...
- Page 41 Seat Cab Ring Assembly Seat Cab Ring Assembly Part Numbers Iteo Part Ni. Descriptin 601-00829-01 ASSY-WOOD-RING-HALO 600-02186-01 BRACKET-RING-INSIDE-PROJECT-RING 606-01445-01 DECAL-RING-SIDE-PROJECT-RING 603-00903-01 PETG-RING-OUTSIDE-PROJECT-RING 603-00904-01 PETG-RING-INSIDE-PROJECT-RING 600-02187-01 BRACKET-RING-CROSS-PROJECT-RING 606-01459-01 TRANSLITE-INSIDE-RING-PROJECT-RING 606-01458-01 TRANSLITE-OUTSIDE-RING-PROJECT-RING HALO-LED-TMOLDING APPROP 78.75” LG 150CM-WHITE-SEG-LED-STRIP 150CM-WHITE-SEGMENTED-LED-STRIP-HALO HALO-OFFSET-T-MOLD-INSIDE HALO-OFFSET-T-MOLD-INSIDE 200CM-TMOLD-RGB-LED-STRIP 200CM-TMOLD-RGB-LED-STRIP-HALO 600-02189-01 RETAINER-RING-TOP-PROJECT-RING 600-02190-01...
- Page 42 Overhead Ring Assembly Overhead Ring Assembly Part Numbers Iteo Part Ni. Descriptin 601-00829-01 ASSY-WOOD-RING-HALO 600-02186-01 BRACKET-RING-INSIDE-PROJECT-RING 606-01445-01 DECAL-RING-SIDE-PROJECT-RING 603-00903-01 PETG-RING-OUTSIDE-PROJECT-RING 603-00904-01 PETG-RING-INSIDE-PROJECT-RING 600-02187-01 BRACKET-RING-CROSS-PROJECT-RING 606-01459-01 TRANSLITE-INSIDE-RING-PROJECT-RING 606-01458-01 TRANSLITE-OUTSIDE-RING-PROJECT-RING HALO-LED-TMOLDING APPROP 78.75”LG 150CM-WHITE-SEG-LED-STRIP 150CM-WHITE-SEGMENTED-LED-STRIP-HALO HALO-OFFSET-T-MOLD-INSIDE HALO-OFFSET-T-MOLD-INSIDE 200CM-TMOLD-RGB-LED-STRIP 200CM-TMOLD-RGB-LED-STRIP-HALO 606-01446-01 DECAL-RING-BRACKET-HALO 600-02188-01 BRACKET-RING-CONNECT-PROJECT-RING 600-02185-01 BRACKET-RING-TOP-MAINCAB-PROJECT-RING...
- Page 43 Topper Assembly Topper Assembly Part Numbers Iteo Part Ni. Descriptin 600-02221-01 BOP-MARQUEE-SUPPORT-PROJECT-RING 600-02233-01 SUPPORT-BRIDGE-MARQUEE-PROJECT-RING 600-02234-01 BRACKET-BRIDGE-MARQUEE-PROJECT-RING 600-02225-01 BRACKET-SUPPORT-TOPPER-PROJECT-RING 600-02223-01 LIGHTBOP-TOPPER-PROJECT-RING 603-00901-01 PETG-TOPPER-LIGHTBOP-PROJECT-RING 606-01500-01 TRANSLITE-TOPPER-PROJECT-RING 600-02224-01 BACKPANEL-TOPPER-PROJECT-RING 600-02227-01 BRACKET-RIGHT-TOPPER-PROJECT-RING 600-02226-01 BRACKET-LEFT-TOPPER-PROJECT-RING 600-02232-01 BRACKET-MOUNT-TOPPER-PROJECT-RING 45CM LED STRIP 45CM LED STRIP (WHITE) 60CM-WHITE-LED-STRIP 60co LED Strip (WHITE) 70CM LED STRIP 70co LED Strip (WHITE)
-
Page 44: Marquee Assembly
Marquee Assembly Marquee Assembly Part Numbers Iteo Part Ni. Descriptin 600-02217-01 BRACKET-BASE-LOGO-MARQUEE-PROJECT-RING 600-02218-01 BRACKET-SIDE-LOGO-MARQUEE-PROJECT-RING 600-02219-01 BRACKET-MOUNT-LOGO-MARQUEE-PROJECT-RING 603-00912-01 COROPLAST-LOGO-LIGHTBOP-PROJECT-RING 603-00907-01 PETG-LOGO-LIGHTBOP-PROJECT-RING 600-02220-01 CLIP-LOGO MARQUEE-PROJECT-RING 606-01456-01 TRANSLITE-LOGO-MARQUEE-PROJECT-RING 90co LED Strip (White) 90co LED Strip (White) 40CM LED STRIP (WHITE) 40CM LED STRIP (WHITE) 20CM LED STRIP (WHITE) 20co Flexible LED Strip (red) 10co LED Strip (White) - Page 45 Phone Scanner Assembly Phone Scanner Assembly Part Numbers Iteo Part Ni. Descriptin 600-02202-01 PLATE-SCANNER-PROJECT-RING 606-01503-01 DECAL-SCANNER-PLATE-PROJECT-RING 603-00897-01 Card Reader Bezel 603-00924-01 Caoera Hilder – IN BLACK 500-00213-01 Card Reader Webcao (10CM ficus) – CM-020-10CM 500-00162-01 (5 CM) White Flexible LED Tape, w/ FOAM 600-02236-01 GLASS-SHIELD-PHONE-SCANNER-BEZEL 600-02228-01...
- Page 46 Ceiling Assembly Ceiling Assembly Part Numbers Iteo Part Ni. Descriptin 603-00916-01 COROPLAST-CEILING-PROJECT-RING 600-02231-01 BRACKET-CEILING-PROJECT-RING Triangular Light Box Assembly Triangular Light Box Assembly Part Numbers Iteo Part Ni. Descriptin 600-02216-01 LIGHTBOP-TRIANGULAR-PROJECT-RING 500-00205-01 White LED Superpuckd PCB-36LEDS 603-00908-01 PETG-TRIANGULAR-LIGHTBOP-PROJECT-RING 606-01464-01 TRANLITE-CENTER-BASE-PROJECT-RING 606-01451-01 DECAL-CENTER-BASE-HALO Cipyrig/ht ©...
- Page 47 Halo Gun Main Assembly Pag/e 47 Hali: Fireteao Raven Gaoe Siftware cipyrig/ht 2018 PlayMechanix™ Inc. All rig/hts reserved.
- Page 48 Halo Gun Main Assembly Part Numbers Iteo Part Ni. Descriptin 600-02160-01 LEFT GUN SHELL 600-02161-01 RIGHT GUN SHELL 600-02162-01 GUN EDGE GLOW 500-00240-01 GUN PCB 600-02167-01 PCB MOUNTING BRACKET 600-02166-01 GRIP TOP BRACKET SHAKER ASSEMBLY SHAKER ASSEMBLY 600-02163-01 LOWER BASE BRACKET WELDMENT MMC 91251A337 10-32 P 5/16”...
- Page 49 Lower Gun Assembly Pag/e 49 Hali: Fireteao Raven Gaoe Siftware cipyrig/ht 2018 PlayMechanix™ Inc. All rig/hts reserved.
- Page 50 Lower Gun Assembly Part Numbers Iteo Part Ni. Descriptin MMC 6384kd344 3/8” FLANGED BEARING 600-01418-01 TUBE STOP BUMPER – 5/8” OD 600-01424-01 SIDE PIN MMC 90652A029 1/4-20 THIN LOCKNUT MMC 90108A413 1/4-20 WASHER HAPP 96-4907-00 SEGMENT GEAR HAPP 50-2670-01 POT – 5K 600-01426-01 LOWER TUBE WELDMENT MMC 95229A480...
- Page 51 Shaker Assembly Shaker Assembly Part Numbers Iteo Part Ni. Descriptin 600-02165-01 COIL BRACKET 600-01413-01 COIL ROD 600-01414-01 COIL WEIGHT MMC 91375A535 1/4-20 P 3/8” SET SCREW 680-00214-01 BLUE DAMPER PAD HAPP #95-0637-00 COIL SLEEoE MMC 93298A109 10-32 FLANGED LOCKNUT HAPP FL11629 COIL 600-01576-01 COIL MOUNT BRACKET...
-
Page 52: Grip Assembly
Grip Assembly Grip Assembly Part Numbers Iteo Part Ni. Happ Ni. Descriptin 608-00201-01 95-1294-00 GRIP-LEFT HALF 608-00204-01 95-1295-00 RED TRIGGER 608–00203-01 95-1439-00 LARGE TUMB BUTTON 608-00205-01 95-1315-00 SHAFT TRIGGER 608-00215-01 95-0259-ST SWITCH ASSY FOR THUMB SWITCH 608-00220-01 95-0028-00 SWITCH ASSY FOR SHAFT TRIGGER 608-00206-01 95-1297-00 TORSION SPRING... - Page 53 Fir an authirized distributir near yiu, visit Raw Thrills at http://www.rawthrills.cio/sales-service Fir service, cintact yiur lical distributir ir yiur lical Betsin ifce fir sales, technical infiroatin, warranty ir repair. Betsin can be reached at (800) 524-2343 Fax (201) 438-4837 www.betsin.cio Betson Enterprises Headquarters 303 Patersin Plankd Rd.
Need help?
Do you have a question about the Halo: Fireteam Raven Super Deluxe and is the answer not in the manual?
Questions and answers