
Subscribe to Our Youtube Channel
Related Manuals for Cyrus Pre-XR


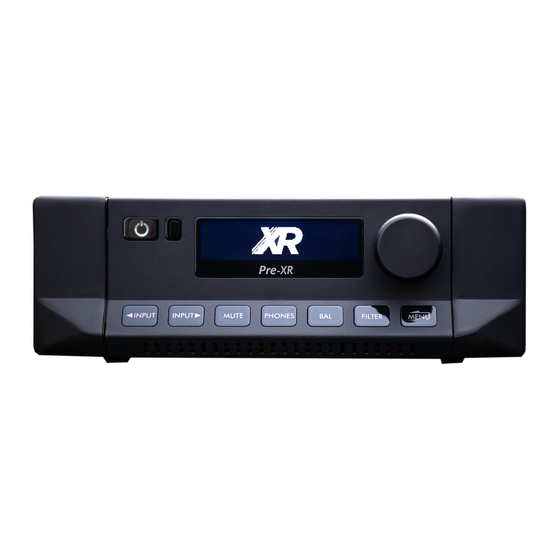
Summary of Contents for Cyrus Pre-XR
- Page 1 Cyrus Pre-XR User guide for firmware version V1.0.1 An updated user guide may be available from www.cyrusaudio.com for newer firmware revisions...
-
Page 2: Table Of Contents
Touch pad controls ..............10 Power ..................10 Mains power................10 Standby..................10 Auto-standby ................10 Selecting an input ..............10 Input source type ‘Cyrus AV’ or ‘AV’ ........10 Playing DSD audio from a computer........11 Volume level ................11 Volume ..................11 Headphone volume ..............11 Safe volume levels after standby ..........11 Balance ..................11... -
Page 3: Important! Read Before Operating This Equipment
Cyrus Pre-XR User Instructions IMPORTANT! Read before operating this equipment! CAUTION: The exclamation mark is to draw your ATTACHMENTS: Do not use attachments not recommended attention to important instructions and safety by the product manufacturer as they may cause hazards. -
Page 4: Power Supply
Product service centres For product service or technical advice, contact only authorised Cyrus service centres. Contact details for Cyrus distributors may be found on the Cyrus website at www.cyrusaudio.com. -
Page 5: Welcome To The World Of Cyrus
After removing these items, please retain the packaging. Now is a good time to register your new Cyrus product. To Install the amplifier in a well ventilated location away from register, visit www.cyrusaudio.com/support and click the sources of high temperature, dust or humidity. -
Page 6: Installation
Cyrus Pre-XR User Instructions Installation RIGHT LEFT PHONO MM GROUND BALANCED PRE OUT BALANCED PRE OUT MC BUS PRE OUT FIXED OUT AN 1 AN 2 AN 3 AN 4 HEADPHONES DIG 1 DIG 2 DIG 3 DIG 4 MADE IN ENGLAND UPGRADE 1&... -
Page 7: Important - Read Before Making Any Connections
Cyrus Pre-XR User Instructions Important – read before making any connections Digital audio inputs • Using a suitable Toslink optical or digital phono To avoid possible damage to your audio system, it interconnect, connect each digital audio source to one is essential to disconnect all system components of the inputs ‘DIG1 - DIG4’. -
Page 8: Connecting A Power Amplifier/Speakers
User Instructions Connecting a power amplifier/speakers Unbalanced connection The Pre-XR requires an external power amplifier to drive the system loudspeakers. Two types of connection • Connect a phono interconnect from the ‘PRE OUT’ are provided for power amplifiers - balanced via XLR sockets to the unbalanced inputs of the power connectors and unbalanced via phono connectors. -
Page 9: Connecting A Power Amplifier/Speakers
Bi-amping. a bi-amped system. The Cyrus range of power amplifiers is recommended for Refer to the wiring plan of a bi-amplified system below. this application as they will have the correct matching Take care to connect each of the amplifier output channels gain. -
Page 10: Using The Fixed Output Of Your Amplifier
Cyrus surround decoder must be included in an MC-BUS You can now record the source you are playing on the connection loop and the ‘Cyrus AV’ Source Type must be tape/disc recorder. set in the menu for the input used (see ‘MC-BUS’ section and ‘Source Type’... -
Page 11: Mc-Bus System
How it works Cyrus amplifier The PSU-XR contains five separate power supplies. When a PSU-XR is connected to a Cyrus product, the power from MC-BUS out the PSU-XR is applied to specific parts of the connected MC-BUS in product. -
Page 12: Operation
When unattended for a long period (holidays etc) mains for the selected input. This enables the surround decoder power should be disconnected. to share the front left and right speaker channels of a Cyrus Standby stereo system. When mains power is connected, the standby touchpad The volume control on the amplifier will be locked at -6dB ( ) is used for power control. -
Page 13: Playing Dsd Audio From A Computer
Cyrus Pre-XR User Instructions Playing DSD audio from a computer Mute Playback of DSD files will require the installation on the • Touch ‘MUTE’ to mute the volume to minimum level computer of a specialist music playback app that supports without disturbing the existing volume setting. -
Page 14: Tape Playback And Recording
Cyrus Pre-XR User Instructions Tape playback and recording Playback You can play back a recording by selecting the input to which you connected your tape recorder. Recording If you have connected the ‘Fixed Out’ sockets to the input of your tape recorder, you can make recordings from the input sources connected to your amplifier. -
Page 15: Remote Control Operation
User Instructions Remote control operation Sending commands to Cyrus components Remote control introduction • Press the CYRUS The iR14 remote control will send commands to Cyrus key to switch on amplifiers, CD players and audio streamers*. CONTROL a Cyrus amplifier. -
Page 16: Cyrus Amplifier Commands
Cyrus Pre-XR User Instructions Cyrus amplifier commands • Press the CYRUS key to set the remote control to Cyrus amplifier mode. You can now control a Cyrus amplifier. The CYRUS key will flash red when commands are being sent in Amplifier mode. -
Page 17: Cyrus Cd Player Commands
• Press the key to set the remote control to CD mode. The key will light red. You can now control both a Cyrus CD player and amplifier. The key will flash red when commands are being sent in CD mode. -
Page 18: Cyrus Audio Streamer Commands
• Press the key to set the remote control to audio streamer mode. The key will light red. You can now control both a Cyrus audio streamer and amplifier or an audio streamer that includes an amplifier. The key will flash red when CONTROL commands are being sent in audio streamer mode. -
Page 19: Cyrus Phono Signature Commands
CONTROL This page lists commands that will control the Phono Signature. SOURCE • Press the CYRUS key to set the remote control to Cyrus mode. Display off You can now control both a Cyrus amplifier and the Phono Signature. The CYRUS key will flash red when commands are being sent in this mode. -
Page 20: Setup Menus
Cyrus Pre-XR User Instructions Setup menus Setup menus enable extensive customisation of the user interface. Setup options The next two pages show a map of the menu options available. Navigating the menu from the front panel • Touch to open the settings menu. -
Page 21: Menu Maps
MC-BUS commands. For example, if an input source type is set to ‘Streamer’, and the system is cabled for MC- BUS control, a connected Cyrus streamer will switch on when that input is selected. Choose ‘Unspecified’ to disable MC-BUS from the selected input. - Page 22 Cyrus Pre-XR User Instructions Menu maps Setup General See the previous page for ‘General’ menu options Input See the previous page for ‘Input’ menu options Aesthetic Display Polarity Sets the display polarity to positive (dark characters on a light background) or negative (light characters on a dark background).
-
Page 23: Firmware Updates
The operational firmware may be upgraded from time to time to add new features and to fix operational issues. New firmware versions will be available from the ‘Support’ pages of the Cyrus website www.cyrusaudio.com. If new firmware is available, this will be packaged with other documents including - •... -
Page 24: Remote Control Learning
6. Release the key on the reference remote control. 1. Set the two remote controls up facing each other, 7. Press a key on the Cyrus remote control (volume up spaced by about 5cm. in this example) to select where you want to save that command. -
Page 25: Checking Programmed Commands
Cyrus Pre-XR User Instructions Checking programmed commands Sending TV or SAT commands • Select the mode that you just programmed and check Once you have programmed all the keys with the that the commands were learned successfully. commands you want, you can use the remote control to send commands to your TV or Satellite receiver etc. -
Page 26: Troubleshooting Guide
Spurious noises from speakers If a fault condition still remains, return the amplifier to Interconnects or Check, replace where your Cyrus appointed retailer or an authorised Service connections faulty. necessary. Centre. Standby is activated randomly Auto standby may have To save energy, the unit operated. -
Page 27: Specifications
Audio formats (USB) ..DSD64, DSD128, DSD256, DSD512 information about recycling. DoP, PCM S/N ratio (Pre-out, 0dB FS) ........>113dBA THD (Pre-out, 0dB FS) ..........<0.001% Cyrus reserves the right to change all specifications without notice. E &OE Cyrus Pre-XR english v1.2... - Page 28 Cyrus Audio Ltd., Ermine Business Park, Huntingdon, PE29 6XY, U.K.
Need help?
Do you have a question about the Pre-XR and is the answer not in the manual?
Questions and answers