Table of Contents
Advertisement
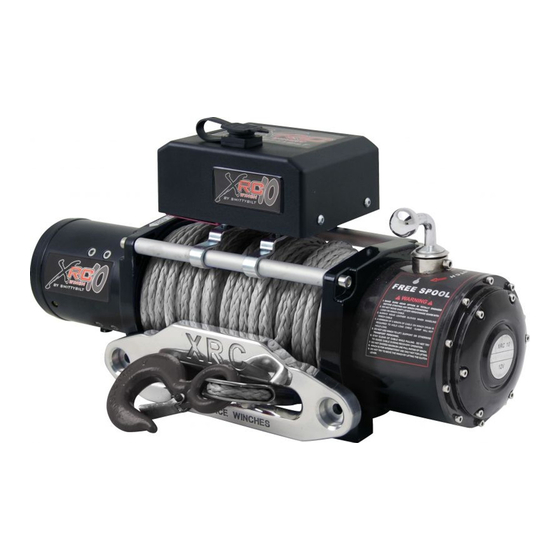
PARTS INCLUDED
Winch
Solenoid Box
Hardware Bag
Warning! Observe safety precautions for personal safety and the safety of others. Improper equipment operation may
cause personal injury and equipment damage.
Read the following carefully before attempting to operate your winch and keep the instructions for future reference.
1. Dress Properly:
- Don't wear loose clothing or jewelry. They can be caught in moving parts.
- Wear leather gloves when handling winch cable. Do not handle cable with bare hands as broken wires can cause
injuries.
- Non-skid footwear is recommended.
- Protective hair covering to contain long hair.
2. Keep a Safe Distance:
- Ensure that all persons stand well clear of winch cable and load during winch operation, 1.5 times the cable length
recommended. If a cable pulls loose or breaks under load it can lash back and cause serious personal injury or death.
- Don't step over the cable.
- All visitors and onlookers should be kept away from the work area.
- Keep proper footing and balance at all times.
3. Don't Abuse the Cord:
- Never carry your winch by the cord or yank it to disconnect it from the receptacle.
- Keep cord from heat, oil and sharp edges.
4. Don't Overwork the winch:
- If the motor becomes uncomfortably hot to touch, stop and let it cool for a few minutes.
- Don't maintain power to the winch if the motor stalls.
- Don't exceed maximum line pull ratings shown in tables. Shock loads must not exceed these ratings.
5. Avoid Unintentional Starting:
- Winch clutch should be disengaged when not in use and fully engaged when in use.
6. Check Damaged Parts:
- Before using, you should check your winch carefully. Any part that is damaged should be properly repaired or
replaced by an authorized service center.
7. Repair Your Winch:
- When repairing, use only identical replacement parts or it may cause considerable danger to the user.
8. Re-spool the cable:
- Leather gloves must be worn while re-spooling. To re-spool correctly, it is necessary to keep a slight load on the
cable. Hold the cable with one hand and the remote control switch with the other. Start as far back and in the center
as you can .Walk up keeping load on the cable as the winch is powered in.
- Do not allow the cable to slop through your hand and do not approach the winch too closely.
- Turn off the winch and repeat the procedure until all the cable except 1m is left.
- Disconnect the remote control switch and finish spooling in cable by rotating the drum by hand with clutch
disengaged.
- On hidden winches, spool in cable under power but keep hands clear.
Installation Manual
QTY
PARTS INCLUDED
1
Roller Fairlead
1
Clevis Hook
1
Remote Control
SAFETY PRECAUTIONS
QTY
1
1
1
Advertisement
Table of Contents

Related Manuals for Smittybilt XRC8


Summary of Contents for Smittybilt XRC8
- Page 1 Installation Manual PARTS INCLUDED PARTS INCLUDED Winch Roller Fairlead Solenoid Box Clevis Hook Hardware Bag Remote Control SAFETY PRECAUTIONS Warning! Observe safety precautions for personal safety and the safety of others. Improper equipment operation may cause personal injury and equipment damage. Read the following carefully before attempting to operate your winch and keep the instructions for future reference.
- Page 2 Installation Manual Warning: The use of any other accessory or attachment other than those recommended in the Fitting Instructions may present a risk of personal injury. WINCH OPERATION WARNINGS Read the following carefully before attempting to operate your winch and keep the instructions for future reference. 1.
- Page 3 Installation Manual Do not replace the cable with a cable of lesser strength. The life of cable is directly related to the use and care it receives. Following its first and subsequent uses, a cable must be wound onto the drum under a load of at least 500lbs (230kg) or the outer wraps will draw into the inner wraps and severely damage the cable during winching.
- Page 4 2. Smittybilt manufactures winch mounting frames and / or Frontal Protection Systems to suit most popular vehicles. Winch frames are packaged with detailed instructions.
- Page 5 Installation Manual...
- Page 6 Installation Manual LUBRICATION INSTALLATION All moving parts in the winch are permanently lubricated with high temperature lithium grease at the time of assembly. Under normal conditions factory lubrication will suffice. Lubricate cable periodically using light penetrating oil. Inspect for broken strands and replace if necessary. If the cable becomes worn or damaged, it must be replaced. CABLE INSTALLATION Unwind the new cable by rolling it along the ground, to prevent kinking.
- Page 7 Installation Manual NOTE: 1. Your battery must be kept in good condition. 2. Be sure battery cables are not drawn taught across any surfaces, which could possibly damage them. 3. Corrosion on electrical connections will reduce performance or may cause a short. 4.
- Page 8 Installation Manual WINCH OPERATION SUGGESTION: The best way to get acquainted with how your winch operates is to make a few test runs before you actually need to use it. Plan your test in advance. Remember you can hear your winch as well as you can see it operate.
- Page 9 5m and then power back in. This will keep all components in good working condition so that the winch can be relied on when needed. Contact your authorized outlet for technical assistance and repairs. SPARE PARTS: A comprehensive range of spare parts is available. For further information please contact Smittybilt Automotive Products.
- Page 10 Installation Manual XRC 8 Specifications Rated Line Pull: 8000Lbs (3630kgs) single-line Motor: 5.5hp /12V, Series Wound Control: Remote Switch, 12’ (3.7m) lead Gear Train: 3-Stage Planetary Gear Ratio: 172.8:1 Clutch: Rotating Ring Gear Brake: Automatic In-The-Drum Drum Size: (Diameter x Length) 2.5” x 8.82” (63.5mm x 224mm) Wire Rope: (Diameter x Length) 21/64”...
- Page 11 Installation Manual XRC 8 WINCH PARTS LIST No. Parts No. Description Qty No. Part No. Description 97281-01 Sun Gear-Input 97281-27 Inner Gear 97281-02 Gear Carrier-Input 97281-28 Clutch Gear 97281-03 Gear Carrier-Intermediate 97281-29 Gear Box Tube 97281-04 Washer-1.2mm thickness 97281-30 Gasket 97281-05 Gear Carrier-Output 97281-32 Gear Box End Cover...
- Page 12 Installation Manual XRC 8 DRAWING...
- Page 13 Installation Manual XRC 10 Specifications Rated Line Pull: 10000Lbs (4532kgs) single-line Motor: 5.5hp/12V, Series Wound Control: Remote Switch, 12’ (3.7m) lead Gear Train: 3-Stage Planetary Gear Ratio: 218:1 Clutch: Rotating Ring Gear Brake: Automatic In-The-Drum Drum Size: (Diameter x Length) 2.5” x 8.82” (63.5mm x 224mm) Wire Rope: (Diameter x Length) 23/64”...
- Page 14 Installation Manual XRC 10 WINCH PARTS LIST No. Parts No. Description Qty No. Part No. Description 97210-01 Gear Box End Cover 97210-17 Remote Control 97210-02 Gasket 97210-18 Control Box Assy 97210-03 Bearing 97210-19 Nylon Bearing 97210-04 Sun Gear-Input 97210-22 Tie Rod 97210-05 Inner Gear 97210-21 Drum...
- Page 15 Installation Manual XRC 10 DRAWING...
- Page 16 Installation Manual XRC 12 Specifications Rated Line Pull: 12000Lbs (5440kgs) single-line Motor: 6.6hp/12V, Series Wound Control: Remote Switch, 12’ (3.7m) lead Gear Train: 3-Stage Planetary Gear Ratio: 265:1 Clutch: Rotating Ring Gear Brake: Automatic In-The-Drum Drum Size: (Diameter x Length) 2.5” x 8.82” (63.5mm x 224mm) Wire Rope: (Diameter x Length) 23/64”...
- Page 17 Installation Manual XRC 12 WINCH PARTS LIST No. Parts No. Description Qty No. Part No. Description 97212-02 Sun Gear-Input 97212-26 Gear Box Tube 97212-03 Gear Carrie-Input 97212-27 Clutch Gear 97212-04 Gear Carrier-Intermediate 97212-28 Inner Gear 97212-05 Washer-1.2mm thickness 97212-29 Gasket 9500 97212-06 Gear Carrier-Output 97212-30 Gear Box End Cover...
- Page 18 Installation Manual XRC 12 DRAWING...
- Page 19 Installation Manual XRC 15 Specifications Rated Line Pull: 15000Lbs (6800kgs) single-line Motor: 6.6hp/12V, Series Wound Control: Remote Switch, 12’ (3.7m) lead Gear Train: 4-Stage Planetary Gear Ratio: 395:1 Clutch: Rotating Ring Gear Brake: Automatic In-The-Drum Drum Size: (Diameter x Length) 3.7” x 8.54” (94mm x 217mm) Wire Rope: (Diameter x Length) 25/64”...
- Page 20 Installation Manual XRC 15 WINCH PARTS LIST No. Parts No. Description Qty No. Part No. Description 97215-01 Sun Gear - Output 97215-26 Gasket 97215-02 Gear Carrier Assy - Output 97215-27 Inner Gear 97215-03 Gear Carrier Assy - Intermediate 97215-28 Clutch Gear 97215-04 Washer 97215-29...
- Page 21 Installation Manual XRC 15 DRAWING...
- Page 22 Installation Manual Troubleshooting SYMPTOM POSSIBLE CAUSE SUGGESTED REMEDY Switch Assy not connected properly Insert Switch Assy firmly to the connector. Tighten units on cable connectors Loose battery cable Tap solenoid to free contact, applying 12 volts Solenoid malfunctioning to coil terminal directly. Motor does not turn on Defective Switch Assembly Makes an audible clicking when activating.
- Page 23 SMITTYBILT ADVANTAGE WARRANTY LIMITED LIFETIME WARRANTY FOR MECHANICAL COMPONENTS LIMITED ONE (1) YEAR WARRANTY FOR ELECTRICAL COMPONENTS Smittybilt Automotive Products, LLC (SAP) warrants to the original purchaser that (a) the mechanical components (e.g., gears, clutch, spools, etc.) of any SAP winch will be free of defects in material and workmanship for the lifetime of the winch, and (b) the electrical components (e.g., electric motor, wires, solenoid, etc.) will be free...
- Page 24 Also, some states do not allow the exclusion or limitation of incidental or consequential damages, so the above limitations or exclusions may not apply to you. Smittybilt reserves the right to discontinue product lines and substitute products, or provide other remedies than those listed in this limited...
- Page 25 Rollover and other types of vehicle accidents may result in serious injury or death to you, your passengers and others sharing the road. Smittybilt accessories are decorative and are not intended to reduce or avoid injury or damage in the event of an accident.
- Page 26 Installation Manual 97281/97210/97212 SOLENOID MOUNTING SUPPLEMENT Tie-Rod (over cable) Mounting Instructions STEP 1: Insert the small metal brackets on the bottom of the solenoid bracket. (Fig A) STEP 2: Place long mounting brackets on top (hook facing forward) and secure with included bolts. (Fig B, STEP 3: Place solenoid on top of tie-rods with hooks facing forward in desired location.
- Page 27 Installation Manual Over Motor Mounting Instructions STEP 1: Locate and identify the location for the mounting bracket. (Fig A) STEP 2: Attach the rear part of the bracket to the winch by removing the rear tie rod bolt. Place the bracket over the hole and re-install tie rod bolt.
- Page 28 Installation Manual STEP 5: Tighten the rear tie rod bolt completely now. (Fig F, G) Installation is now complete. Use the wiring diagram in instruction manual for further assembly. (Fig E) (Fig F) (Fig G)
- Page 29 Installation Manual Installation Instructions XRC8 Gear Lever Note: Please read instructions entirely before installing this part. Step1: Remove the 10 allen head bolts around the outside of the gear housing end cap using a 3mm allen tool. (Fig A) Carefully remove end cap from housing. Use care in order not to damage the gasket.
- Page 30 Installation Manual Step 4: Insert new handle upside down through hole in end cap while compressing down the spring and ball bearing. Use care when doing so the ball bearing does not pop out. (Fig D) Step 5: Push the lever all the way in so it’s flush with the end cover, you will hear the bearing click into its place in the cavity hole on the clutch lever.
- Page 31 Installation Manual Step 7: Re-install gasket on cover. (If it was removed) (Fig I) Step 8: Re-install gear cover back onto winch using the previously removed bolts. (Fig J) Step 9: Once all bolts are tighten check operation of new clutch lever by turning between engaged mode and free spool mode.
- Page 32 Installation Manual Winch Motor Clocking (97281/97210) Step 1:To clock the winch motor, which can be achieved without taking the Step 3: Reinstall Long Bolts to complete.
- Page 33 Installation Manual Step3:get gear box rotated,then connect the gear box with the gear box base again.After that connect the gear box with the tie rod.
- Page 34 Who installed or will install your Smittybilt product? ___________________________________________ Is this the first time you have purchase a winch? _______________________________________________ If no, what brand have you brought before? ___________________________________________________ What type of vehicle will this Smittybilt winch be installed on? Year: ______________ Make: ______________Model: ______________ 2WD:______________ 4WD:______________...
Need help?
Do you have a question about the XRC8 and is the answer not in the manual?
Questions and answers
How do I get a replacement contactor for my xrc8 winch?
You can try contacting the vendor you bought the winch from to ask about replacement parts. The Smittybilt website only lists a replacement remote control. If you remove the cover from the contactor box, you may find a manufacturer name on the contactor, which could help in sourcing a replacement. If no direct replacement is available, you might be able to adapt a contactor from Warn or another winch manufacturer. Before purchasing a replacement, ensure you have correctly identified the problem.
This answer is automatically generated