Table of Contents
Advertisement
Quick Links
Advertisement
Chapters
Table of Contents
Troubleshooting

Related Manuals for Samsung SCX4725FN


Summary of Contents for Samsung SCX4725FN
- Page 1 SCX-4725F SCX-4725FN...
- Page 2 © 2006 Samsung Electronics Co., Ltd. All rights reserved. This manual is provided for information purposes only. All information included herein is subject to change without notice. Samsung Electronics is not responsible for any direct or indirect damages, arising from or related to use of this manual.
-
Page 3: Contact Samsung Worldwide
SAMSUNG worldwide If you have any comments or questions regarding Samsung products, contact the Samsung customer care center. COUNTRY CUSTOMER CARE CENTER ARGENTINE 0800-333-3733 AUSTRALIA 1300 362 603 AUSTRIA 0800-SAMSUNG (726- 7864) BELGIUM 02 201 2418 BRAZIL 0800-124-421 4004-0000... - Page 4 444 77 11 U.A.E 800-SAMSUNG (726-7864) 8000-4726 0845 SAMSUNG (726- 7864) U.S.A 1-800-SAMSUNG (726- 7864) UKRAINE 8-800-502-0000 UZBEKISTAN 8-10-800-500-55-500 VENEZUELA 0-800-100-5303 VIETNAM 1 800 588 889 WEB SITE www.samsung.com/es www.samsung.com/se www.samsung.com/ch www.samsung.com/tw www.samsung.com/th www.samsung.com/ latin www.samsung.com/tr www.samsung.com/ae www.samsung.com/uk www.samsung.com/us www.samsung.ua www.samsung.com/ kz_ru www.samsung.com/...
-
Page 5: Table Of Contents
Changing the country ... 2.2 Setting the date and time ... 2.2 Changing the clock mode ... 2.2 Setting sounds ... 2.2 Entering characters using the number keypad ... 2.3 Using the save modes ... 2.3 3. Software overview Supplied software ... 3.1 Printer driver features ... - Page 6 Printing reports ... 12.1 Clearing memory ... 12.1 Cleaning your machine ... 12.2 Maintaining the toner cartridge ... 12.3 Clearing the Toner Empty Replace Toner message ... 12.6 Maintenance parts ... 12.6 Managing your machine from the website (SCX-4725FN only) ... 12.7 13.
- Page 7 14. Specifications General specifications ... 14.1 Printer specifications ... 14.1 Scanner and copier specifications ... 14.2 Facsimile specifications ... 14.2 Index...
-
Page 8: Laser Safety Statement
17 The Power cord supplied with your machine should be used for safe operation. If you are using a cord which is longer than 2 m with 110 V machine, then it should be 16 AWG or bigger. -
Page 9: Power Saver
In some cases, a sum of five may not be usable on your line. If any of your telephone equipment is not operating properly, you should immediately remove it from your telephone line, as... - Page 10 If the wires in the mains lead do not match the colors marked in your plug, do the following: You must connect the green and yellow wire to the pin marked by the letter “E” or by the safety ‘Earth symbol’ or colored green and yellow or green.
-
Page 11: Openssl License
Copyright remains Eric Young's, and as such any Copyright notices in the code are not to be removed. If this package is used in a product, Eric Young should be given attribution as the author of the parts of the library used. This can be in the form of a textual message at program startup or in documentation (online or textual) provided with the package. -
Page 13: Introduction
See the Software Section. Save time and money • You can print multiple pages on one single sheet of paper to save paper. • You can use preprinted forms and letterhead with plain paper. See the Software Section. -
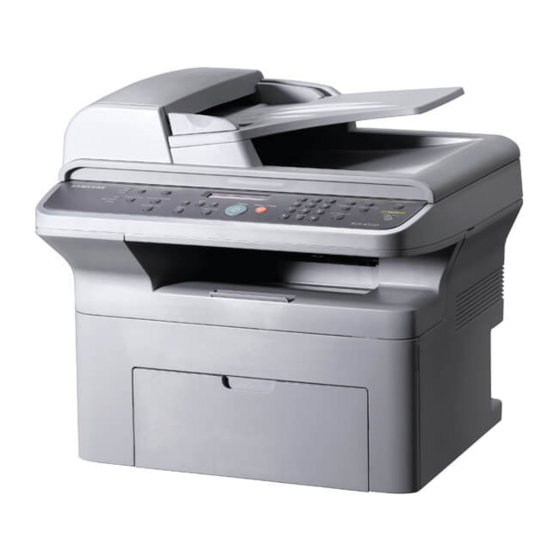
Page 14: Printer Overview
1. Automatic document feeder is used as ADF in this user’s guide. Rear view * The figure above shows an SCX-4725FN. rear cover power switch power receptacle... -
Page 15: Control Panel Overview
Broadcasting: Allows you to send a fax to multiple destinations. Phone Book: Allows you to store frequently used fax numbers in memory or search for stored fax numbers. Also allows you to print a Phone Book list. Redial/Pause: In Standby mode, redials the last number, or in Edit mode, inserts a pause into a fax number. -
Page 16: Finding More Information
The area should be well-ventilated and away from direct sunlight or sources of heat, cold, and humidity. Do not set the machine close to the edge of your desk or table. Clearance space •... -
Page 17: System Setup
System setup This chapter gives you an overview of menus available on your machine and step-by-step instructions for setting up the machine’s systems. This chapter includes: • Menu overview • Changing the display language • Changing the country • Setting the date and time •... -
Page 18: Changing The Display Language
Changing the country clears the setting in memory. Setting the date and time The current date and time are shown on the display when your machine is on and ready to work. All of your faxes will have the date and time printed on them. Note If power to the machine is cut off, you need to reset the correct time and date once the power has been restored. -
Page 19: Entering Characters Using The Number Keypad
For example, to enter the letter O, press 6, labeled with MNO. Each time you press 6, the display shows a different letter, M, N, O, and finally 6. You can enter special characters, such as space, plus sign, and etc. -
Page 20: Power Save Mode
Power Save mode allows your machine to reduce power consumption when it is not in actual use. You can select a length of time for which the machine waits after a job is printed before it switches to a reduced power state. -
Page 21: Software Overview
(SCX-4725FN only) 1. Allows you to edit a scanned image in many ways using a powerful image editor and to send the image by email. You can also open another image editor program, like Adobe Photoshop, from SmarThru. For details, please refer to the onscreen help supplied on the SmarThru program. -
Page 22: Printer Driver Features
Your printer drivers support the following standard features: • Paper source selection • Paper size, orientation and media type • Number of copies In addition, you can use various special printing features. The following table shows a general overview of features supported by your printer drivers: PostScript... - Page 23 • Glibc 2.2 or higher • CUPS • SANE (for MFP device only) Notes • It is necessary to claim swap partition of 300 MB or larger for working with large scanned images. • The Linux scanner driver supports the optical resolution at maximum.
-
Page 24: Network Setup (Scx-4725Fn Only)
Once you have connected your machine to a network with an RJ-45 Ethernet cable, you can share the machine with other network users. You need to set up the network protocols on the machine to use it as your network printer. Protocols can be set up by the following two methods: Via network administration programs You can configure your machine’s print server settings and manage the... -
Page 25: Configuring Ethertalk
Enter a byte between 0 and 255 using the number keypad and press the Scroll buttons to move between bytes. Repeat this to complete the address from the 1st byte to the 4th byte. When you have finished, press Enter. - Page 26 Enter the network card's MAC address, IP address, subnet mask, default gateway, and then click Apply. Note If you do not know the network card's MAC address, print the machine's network information report. Click OK to confirm the settings. 10 Click Exit to close the SetIP program.
-
Page 27: Loading Originals And Print Media
On the scanner glass Make sure that no originals are in the ADF. If an original is detected in the ADF, the machine gives it priority over the original on the scanner glass. To get the best scan quality, especially for colored or gray-scaled images, use the scanner glass. -
Page 28: Selecting Print Media
To load an original into the ADF: Load the original face up into the ADF. Make sure that the bottom of the original stack matches the paper size marked on the document input tray. Adjust the document width guides to the paper size. - Page 29 Maximum size (custom) 1. If media weight is over 90 g/m , use the manual tray. 2. Maximum capacity may differ depending on media weight, thickness, and environmental conditions. Dimensions 216 x 279 mm (8.5 x 11 inches) • 60 to 90 g/m bond) for the tray 216 x 356 mm (8.5 x 14 inches)
-
Page 30: Media Sizes Supported In Each Mode
Use of these types of paper could result in paper jams, chemical smells, and damage to your machine. • Store print media in its ream wrapper until you are ready to use it. Place cartons on pallets or shelves, not on the floor. Do not place heavy objects on top of the paper, whether it is packaged or unpackaged. -
Page 31: Loading Paper
Loading paper In the tray Load the print media you use for the majority of your print jobs in the tray. The tray can hold a maximum of 250 sheets of 75 g/m Open the tray. Squeeze the paper length guide and pull it out to extend the tray. -
Page 32: In The Manual Tray
Adjust the manual tray paper width guides to the width of the paper. Do not force too much, or the paper will be bent, which will result in a paper jam or skew. <Loading originals and print media>... -
Page 33: Setting The Paper Size And Type
Tips on using the manual tray • Load only one sheet of print media at a time in the manual tray. • To prevent paper jams, do not add paper when there is still paper in the manual tray. -
Page 34: Copying
• Setting copy timeout Copying Load originals face up into the ADF, or place a single original face down on the scanner glass. For details about loading an original, see page 5.1. If you want to customize the copy settings including darkness, original type, the number of copies, and copy size, by using the control panel buttons, see the next section. -
Page 35: Reduced Or Enlarged Copy
Reduced or enlarged copy By using the Reduce/Enlarge button, you can reduce or enlarge the size of a copied image from 25% to 400% when you copy original documents from the scanner glass, or from 25% to 100% from the ADF. -
Page 36: Auto Fit
A6-sized paper. When you copy using this feature, the machine prints one side of the original on the upper half of the paper and the other side on the lower half without reducing the size of the original. This feature is helpful for copying a small-sized item, such as a name card. -
Page 37: Poster Copying
Setting copy timeout You can set the time the machine waits before it restores the default copy settings, if you do not start copying after changing them on the control panel. -
Page 38: Basic Printing
For details about printing, see the Software Section. Canceling a print job If the print job is waiting in a print queue or print spooler, such as the printer group in Windows, delete the job as follows: Click the Windows Start menu. -
Page 39: Scanning
Scanning with your machine lets you turn pictures and text into digital files that can be stored on your computer. Then you can fax or email the files, upload them to your website, or use them to create projects that you can print. -
Page 40: Faxing
In some countries, you are required by law to indicate your fax number on any fax you send. The Machine ID, containing your telephone number and name or company name, will be printed at the top of each page sent from your machine. -
Page 41: Sending A Fax Automatically
Note The resolution setting is applied to the current fax job. Darkness You can select the default contrast mode to fax your originals lighter or darker. Press Menu until Fax Setup appears on the top line of the display. Press the Scroll buttons until Darkness appears and press Enter. -
Page 42: Confirming A Transmission
For further details, see page 10.1. Automatic redialing When the number you have dialed is busy or there is no answer when you send a fax, the machine automatically redials the number every three minutes, up to seven times according to the factory default settings. -
Page 43: Receiving Manually Using An Extension Telephone
The machine receives the fax. Press the buttons slowly in sequence. If you still hear the fax tone from the remote machine, try pressing once again. is the remote receive code preset at the factory. The first and the last asterisks are fixed, but you can change the middle number to whatever you wish. -
Page 44: Receiving Faxes In Memory
Re-enter the password to confirm it and press Enter. Press Stop/Clear to return to Standby mode. When a fax is received in secure receiving mode, your machine stores it in memory and shows Secure Receive to let you know that there is a fax received. Printing received faxes Press Menu until Advanced Fax appears on the top line of the display. -
Page 45: Sending A Fax To Multiple Destinations
Sending a delayed fax You can set your machine to send a fax at a later time when you will not be present. Load originals face up into the ADF, or place a single original face down on the scanner glass. -
Page 46: Sending A Priority Fax
The selected fax job is deleted from memory. Sending a priority fax Using the Priority Fax feature, a high priority fax can be sent ahead of reserved operations. The original is scanned into memory and immediately transmitted when the current operation is finished. In addition, priority transmission will interrupt a broadcasting operation between stations (i.e., when the transmission to station A ends, before... -
Page 47: Fax Setup
Setting up Phone Book Changing the fax setup options Your machine provides you with various user-selectable options for setting up the fax system. You can change the default settings for your preferences and needs. To change the fax setup options: Press Menu until Fax Setup appears on the top line of the display. -
Page 48: Using The Advanced Fax Features
1. Error Correction Mode Printing sent fax report automatically You can set the machine to print a report with detailed information about the previous 50 communication operations, including time and dates. Press Menu until Fax Setup appears on the top line of the display. -
Page 49: Setting Up Phone Book
You can then use a group dial number to send a document to all of the destinations within the group. You can set up to 199 group dial numbers using the destination’s existing speed dial numbers. - Page 50 Using group dial numbers When you are prompted to enter a destination number while sending a fax, enter the group dial number at which you stored the number you want. • For a one-digit (0-9) group dial number, press and hold the corresponding digit button on the number keypad.
-
Page 51: Ordering Supplies And Accessories
Ordering supplies and accessories This chapter provides information on purchasing toner cartridge available for your machine. Toner cartridges When the toner runs out, you can order the following types of toner cartridge for your machine: Type Average Yield High yield 3,000 Standard pages 1. -
Page 52: Maintenance
• Multi-communication Report: prints automatically after sending faxes for more than one location. • Power Failure Report: prints out automatically when power is restored after a power failure if any data loss occurs due to the power failure. Clearing memory You can selectively clear information stored in your machine’s memory. -
Page 53: Cleaning Your Machine
Cleaning the outside Clean the cabinet of the machine with a soft lint-free cloth. You can dampen the cloth slightly with water, but be careful not to let any water drip onto or into the machine. Cleaning the inside During the printing process, paper, toner, and dust particles can accumulate inside the machine. -
Page 54: Maintaining The Toner Cartridge
Cleaning the scan unit Keeping the scan unit clean helps ensure the best possible copies. We suggest that you clean the scan unit at the start of each day and during the day, as needed. Slightly dampen a soft lint-free cloth or paper towel with water. -
Page 55: Redistributing Toner
Thoroughly roll the cartridge 5 or 6 times to distribute the toner evenly inside the cartridge. Note If toner gets on your clothing, wipe it off with a dry cloth and wash clothing in cold water. Hot water sets toner into fabric. Caution Do not touch the green underside of the toner cartridge. -
Page 56: Cleaning The Drum
Close the front cover. Make sure that the cover is securely closed. Cleaning the drum If there are streaks or spots on your print, the OPC drum of the toner cartridge may require cleaning. Before starting the cleaning procedure, make sure that paper is loaded in the machine. -
Page 57: Clearing The Toner Empty Replace Toner Message
To avoid print quality and paper feed problems resulting from worn parts and to maintain your printer in top working condition, the following items will need to be replaced at the specified number of pages or when the life span of each item has expired. -
Page 58: Managing Your Machine From The Website (Scx-4725Fn Only)
Managing your machine from the website (SCX-4725FN only) If you have connected your machine to a network and set up TCP/IP network parameters correctly, you can manage the machine via Samsung’s SyncThru™ Web Service, an embedded web server. Use SyncThru™ Web Service to: •... -
Page 59: Troubleshooting
Close the ADF cover. Then load the removed pages, if any, back into the ADF. ADF cover When a paper jam occurs, Paper Jam appears on the display. Refer to the table below to locate and clear the paper jam. Message... -
Page 60: In The Fuser Area Or Around The Toner Cartridge
If the paper does not exit, go to the next step. Remove the jammed paper by gently pulling it straight out. If the paper does not move when you pull, or if you do not see the paper in this area, check the fuser area around the toner cartridge. -
Page 61: Understanding Display Messages
• Do not mix paper types in a tray. • Use only recommended print media. See page 5.7. • Ensure that the recommended print side of print media is facing up in the tray or manual tray. Understanding display messages Messages appear on the Smart Panel program window or the control panel display to indicate the machine’s status or errors. - Page 62 Source in the printer properties. Suggested solutions Message Unplug the power cord Cancel? and plug it back in. If the 1:Yes 2:No problem persists, please call for service. Unplug the power cord and plug it back in. If the problem persists, please call for service.
-
Page 63: Toner Cartridge-Related Messages
Solving other problems Suggested solutions Clear the paper jam. See page 13.1. • Ensure that there is not too much paper in the tray. The tray can hold up to 250 sheets of paper, depending on the thickness of your paper. -
Page 64: Printing Problems
• There is too much paper in the tray. Remove excess paper from the tray. • The paper is too thick. Use only paper that meets the specifications required by the machine. See page 5.7. - Page 65 Try a print job that you have already printed successfully. If possible, attach the cable and the machine to another computer and try a print job that you know works. Finally, try a new printer cable. Check the application’s printer selection menu to ensure that your machine is selected.
-
Page 66: Printing Quality Problems
Printing quality problems If the inside of the machine is dirty or paper has been loaded improperly, you may notice a reduction in print quality. See the table below to clear the problem. Condition Suggested solutions Light or faded print... - Page 67 • Check the paper type and quality. Both high temperature and humidity can cause the paper to curl. See page 5.7. • Turn over the stack of paper in the tray. Also try rotating the paper 180° in the tray. Condition...
-
Page 68: Copying Problems
• In high humidity areas, do not leave paper in the machine for extended periods of time. Frequent copy • Fan the stack of paper, then turn it over in the paper jams occur. tray. Replace the paper in the tray with a fresh supply. -
Page 69: Scanning Problems
• Check to see if the display shows any error messages. If it does, clear the problem. The machine does • Make sure that the original is loaded in the ADF not send. or on the scanner glass. • Sending should show up on the display. -
Page 70: Common Postscript Problems
(32/64bit) User’s Guide that came with your PC for further information on Windows error messages. Common PostScript problems The following situations are PS language specific and may occur when several printer languages are being used. Note To receive a printed or screen-displayed message when PostScript errors occur, open the Print Options window and click the desired selection next to the PostScript errors section. -
Page 71: Common Linux Problems
Common Linux problems Problem Possible cause and solutions The machine does not • Check if the printer driver is installed in your print. system. Open Unified Driver configurator and switch to the Printers tab in Printers configuration window to look at the list of available printers. - Page 72 Problem Possible cause and solutions The machine does not • Check if a document is loaded into the scan. machine. • Check if your machine is connected to the computer. Make sure if it is connected properly if an I/O error is reported while scanning.
-
Page 73: Specifications
16 characters x 2 lines Toner cartridge yield 1,500 or 3,000 pages. Memory 32 MB External dimension 17.2 X 14.7 X 15.2 inches (438 x 374 x 387 mm) (W x D x H) Item Weight (including consumables) Package weight Duty cycle 1. -
Page 74: Scanner And Copier Specifications
Color: 200 x 200 dpi Memory 4 MB Halftone 256 levels Auto dialer Group dialing (up to 200 numbers) 1. Transmission time applies to memory transmission of text data with ECM compression using only ITU-T No.1 Chart. 14.2 <Specifications> Description... -
Page 75: Index
NDEX Numerics 2/4-up, special copy 6.3 accessories, order information 11.1 ADF 1.2 ADF rubber pad, replace 12.6 ADF, load 5.1 alarm sound 2.3 Ans/Fax mode, receiving mode 9.4 auto fit, special copy 6.3 broadcast faxes 9.6 characters, enter 2.3 cleaning drum 12.5... - Page 76 13.1 loading 5.1 output location 5.7 output tray 5.7 paper guidelines 5.4 paper jam, clear fuser area or around toner cartridge 13.2 manual tray 13.2 paper exit area 13.2 tray 13.2 paper load manual tray 5.6 tray 5.5 paper size setting 5.7...
-
Page 77: Software Section
Samsung Printer Software section... - Page 78 Using Help ... 17 DVANCED Chapter 3: Printing Multiple Pages on One Sheet of Paper (N-Up Printing) ... 18 Printing Posters ... 19 Printing a Reduced or Enlarged Document ... 19 Fitting Your Document to a Selected Paper Size ... 19 Using Watermarks ...
- Page 79 Understanding Smart Panel ... 24 Opening the Troubleshooting Guide ... 24 Using Printer Settings Utility ... 25 Using Onscreen Help File ... 25 Changing the Smart Panel Program Settings ... 25 CANNING Chapter 7: Scanning Using Samsung SmarThru ... 26 Uninstalling Samsung SmarThru ...
- Page 80 For a Network-connected Macintosh ... 38 For a USB-connected Macintosh ... 38 Printing ... 39 Printing a Document ... 39 Changing Printer Settings ... 39 Printing Multiple Pages on One Sheet of Paper ... 40 Scanning ... 41 INUX ACINTOSH...
-
Page 81: Installing Printer Software In Windows
Installing Software for Local Printing A local printer is a printer directly attached to your computer using the printer cable supplied with your printer, such as a USB or parallel cable. If your printer is attached to a network, skip this step and go to “Installing Software for Network Printing”... -
Page 82: Custom Installation
• If you don’t want to connect the printer at this time, click Next, and No on the following screen. Then the installation will start and a test page will not be printed at the end of the installation. • The installation window that appears in this User’s Guide may differ depending on the printer and interface in use. - Page 83 • If you don’t want to connect the printer at this time, click Next, and No on the following screen. Then the installation will start and a test page will not be printed at the end of the installation. • The installation window that appears in this User’s Guide may differ depending on the printer and interface in use.
-
Page 84: Installing Software For Network Printing
After the installation is finished, a window asking you to print a test page appears. If you choose to print a test page, select the checkbox and click Next. Otherwise, just click Next and skip to step 9. If the test page prints out correctly, click Yes. - Page 85 Select the printer you want to install from the list and then click Next. • If you do not see your printer on the list, click Update to refresh the list, or select Add TCP/IP Port to add your printer to the network. To add the printer to the network, enter the port name and the IP address for the printer.
- Page 86 Select the printer you want to install from the list and then click Next. • If you do not see your printer on the list, click Update to refresh the list, or select Add TCP/IP Port to add your printer to the network. To add the printer to the network, enter the port name and the IP address for the printer.
-
Page 87: Reinstalling Printer Software
Select the printer you want to install from the list and then click Next. • If you do not see your printer on the list, click Update to refresh the list, or select Add TCP/IP Port to add your printer to the network. To add the printer to the network, enter the port name and the IP address for the printer. -
Page 88: Removing Printer Software
• If you don’t want to connect the printer at this time, click Next, and No on the following screen. Then the installation will start and a test page will not be printed at the end of the installation. • The reinstallation window that appears in this User’s Guide may differ depending on the printer and interface in use. -
Page 89: Basic Printing
Please refer to the OS Compatibility section of Printer Specifications in your Printer User’s Guide. • If you need to know the exact name of your printer, you can check the supplied CD-ROM. The following procedure describes the general steps required for printing from various Windows applications. -
Page 90: Printer Settings
Change all print settings available in the software application first, and change any remaining settings using the printer driver. • The settings you change remain in effect only while you are using the current program. To make your changes permanent, make them in the Printers folder. -
Page 91: Paper Tab
You can select 1 to 999 copies. Size Size allows you to set the size of paper you loaded in the tray. If the required size is not listed in the Size box, click Custom. When the Custom Paper Setting window appears, set the paper size and click OK. -
Page 92: Graphics Tab
• On: Select this option to allow the printer to use less toner on each page. • Off: If you don’t need to save toner when printing a document, select this option. -
Page 93: Extras Tab
Use the About tab to display the copyright notice and the version number of the driver. If you have an Internet browser, you can connect to the Internet by clicking on the web site icon. See “Printing a Document” on page 12 for more information about accessing printer properties. -
Page 94: Using A Favorite Setting
Click Save. When you save Favorites, all current driver settings are saved. To use a saved setting, select the item from the Favorites drop down list. The printer is now set to print according to the Favorites setting you selected. -
Page 95: Advanced Printing
User’s Guide may differ depending on the printer in use. However the composition of the printer properties window is similar. • If you need to know the exact name of your printer, you can check the supplied CD-ROM. This chapter includes: •... -
Page 96: Printing Posters
Printing Posters This feature allows you to print a single-page document onto 4, 9, or 16 sheets of paper, for the purpose of pasting the sheets together to form one poster-size document. To change the print settings from your software application, access printer properties. -
Page 97: Using Watermarks
“DRAFT” or “CONFIDENTIAL” printed diagonally across the first page or all pages of a document. There are several predefined watermarks that come with the printer, and they can be modified, or you can add new ones to the list. Using an Existing Watermark To change the print settings from your software application, access printer properties. -
Page 98: Using Overlays
What is an Overlay? An overlay is text and/or images stored in the computer hard disk drive (HDD) as a special file format that can be printed on Dear ABC any document. Overlays are often used to take the place of preprinted forms and letterhead paper. -
Page 99: Using Windows Postscript Driver (Scx-4725Fn Only)
Change all print settings available in the software application first, and change any remaining settings using the printer driver. • The settings you change remain in effect only while you are using the current program. To make your changes permanent, make them in the Printers folder. -
Page 100: Sharing The Printer Locally
Please refer to the OS Compatibility section of Printer Specifications in your Printer User’s Guide. • If you need to know the exact name of your printer, you can check the supplied CD-ROM. Setting Up a Host Computer Start Windows. -
Page 101: Using Smart Panel
Printer Specifications in your Printer User’s Guide. - Internet Explorer version 5.0 or higher for flash animation in HTML Help. • If you need to know the exact name of your printer, you can check the supplied CD-ROM. Understanding Smart Panel If an error occurs while printing, Smart Panel appears automatically, showing the error. -
Page 102: Using Printer Settings Utility
Right-click the Smart Panel icon on the Windows task bar and select Printer Setting. Change the settings. To send the changes to the printer, click the Apply(or Send) button. If you connect your printer to a network, the OTES SyncThru Web Service window appears instead of the Printer Settings Utility window. -
Page 103: Scanning
Scanning Scanning with your machine lets you turn pictures and text into digital files on your computer. Then you can fax or e-mail the files, display them on your web site or use them to create projects that you can print using Samsung SmarThru software or the WIA driver. -
Page 104: Using Samsung Smarthru
Outlook Express, which has been set up with your e-mail account. •Folder Scanning an image and saving it to a folder. Allows you to scan an image, preview it, and save it to the folder of your choice. •OCR Scanning an image and performing text recognition. -
Page 105: Using Onscreen Help File
Follow the on-screen instructions to edit the picture after it is copied to your computer. : If you want to cancel the scan job, press the Cancel button on the Scanner and Camera Wizard. Scanning ®... -
Page 106: Using Your Printer In Linux
When the Administrator Login window appears, type in root in the Login field and enter the system password. : You must log in as a super user (root) to install the printer software. If you are not a super user, ask your system administrator. -
Page 107: Uninstalling The Unified Linux Driver
When the Administrator Login window appears, type in root in the Login field and enter the system password. : You must log in as a super user (root) to install the printer software. If you are not a super user, ask your system administrator. -
Page 108: Using The Unified Driver Configurator
Printers configuration has the two tabs: Printers and Classes. Printers Tab You can see the current system’s printer configuration by clicking on the printer icon button on the left side of the Unified Driver Configurator window. Switches to Printer configuration. -
Page 109: Scanners Configuration
Allows you to monitor the activity of the scan drivers. Ports Configuration In this window, you can view the list of available ports, check the status of each port and release a port that is stalled in busy state when its owner is terminated for any reason. Switches to ports configuration. -
Page 110: Configuring Printer Properties
By clicking Options, you can set the default device options. • Jobs: shows the list of print jobs. Click Cancel job to cancel the selected job and select the Show completed jobs check box to see previous jobs on the job list. -
Page 111: Printing Files
• Text - allows you to specify the page margins and set the text options, such as spacing or columns. • Graphics - allows you to set image options that are used when printing images/files, such as color options, image size, or image position. -
Page 112: Using The Image Manager
Advanced button enables you to set the page size manually. If you want to use one of the preset scan option settings, select from the Job Type drop-down list. For details about the preset Job Type settings, see page 35. - Page 113 You can use the following tools to edit the image: Tools Function Saves the image. Cancels your last action. Restores the action you canceled. Allows you to scroll through the image. Crops the selected image area. Zooms the image out.
-
Page 114: Using Your Printer With A Macintosh (Scx-4725Fn Only)
Your machine supports Macintosh systems with a built-in USB interface or a 10/100 Base-TX network interface card. When you print a file from a Macintosh computer, you can use the PostScript driver by installing the PPD file. Some printers do not support a network interface. -
Page 115: Setting Up The Printer
Click Add. If Auto Select does not work properly, select Samsung in Printer Model and your printer name in Model Name. Your machine appears on the Printer List and is set as the default printer. For a USB-connected Macintosh Follow the instructions on “Installing Software for Macintosh”... -
Page 116: Printing
• You can check your printer name in the supplied CD- ROM. Printing a Document When you print with a Macintosh, you need to check the printer software setting in each application you use. Follow these steps to print from a Macintosh. -
Page 117: Printing Multiple Pages On One Sheet Of Paper
Fit to Page This printer feature allows you to scale your print job to any selected paper size regardless of the digital document size. This can be useful when you want to check fine details on a small document. Paper Type Set Type to correspond to the paper loaded in the tray from which you want to print. -
Page 118: Scanning
Scanning If you want to scan documents using other software, you will need to use TWAIN-compliant software, such as Adobe PhotoDeluxe or Adobe Photoshop. The first time you scan with your machine, select it as your TWAIN source in the application you use. - Page 119 33 printing 33 scanning 34 Macintosh driver install 37 uninstall 37 printing 39 scanning 41 setting up the printer 38 MFP driver, install Linux 29 n-up printing Macintosh 40 Windows 18 orientation, print 34 Windows 13 overlay create 21...
- Page 120 Linux 34 SmarThru 26 TWAIN 28 WIA driver 28 scanning from Macintosh 41 setting darkness 15 favorites 17 image mode 15 resolution Macintosh 40 Windows 15 toner save 15 true-type option 15 software install Macintosh 37 Windows 4 reinstall Windows 10...
- Page 121 Rev. 3.00...