Table of Contents
Advertisement
Quick Links
Advertisement
Table of Contents

Related Manuals for Apec Water ESSENCE ROES-PHUV75


Summary of Contents for Apec Water ESSENCE ROES-PHUV75
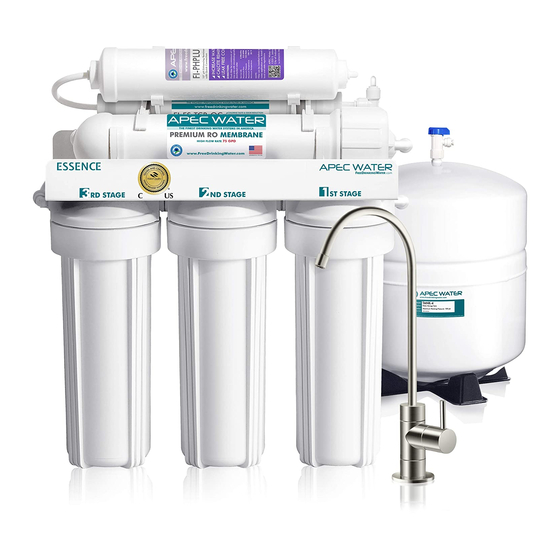
- Page 1 ESSENCE REVERSE OSMOSIS SYSTEM ROES-PHUV75 INSTALLATION INSTRUCTION & OWNER’S MANUAL Ver 1.0 Ver 1.0 www.FreeDrinkingWater.com www.FreeD kingWater.com All Rights Reserved © APEC Water Systems All Rights Reserv rved © © © C Water Systems...
- Page 3 Please keep this Owner’s Manual for future reference. Please keep this O n er’s Manual for future reference. It contains useful information on how to maintain and care for your It contains useful information on how to maintain and care for your APEC Reverse Osmosis water filter system.
- Page 4 (This manual is constructed for standard APEC Essence ROES-PHUV75 System.) (This manual is constructed for standard APEC Essence ROES-PHUV75 System.) BEFORE INSTALLATION: BEFORE INSTALLATION: Inspect the system: Inspect the system Please take the system and all the components out of the box.
-
Page 5: Icemaker And Multiple Outp Tput Points
Components included with the ROES-PHUV75 system: Compone i ncluded with the ROES-P 7 5 system: Make sure you have all these parts before starting installation. sure you have all these before starting insta 1 RO system head 1 RO system head UV Transformer UV Trans nsfo form... - Page 6 Component Itemization: Compone t emization: Bracket Bracket Membrane and housing (4 Membrane and housing (4 -stage filter) -sta tage filter) UV Light (5 UV Light (5 -stage filter) -stage filter) Inline carbon filter (6 Inline carbon filter (6 -stage filter) -s -sta tage filter) Inline pH plus filter(7...
- Page 7 THERE ARE TWO PARTS TO INSTALLING THE RO SYSTEM: THERE E TWO PARTS TO INSTALLING RO SYSTEM: Part I. Part Assemble the filters and housings onto the main system Assemble the filters and n gs onto the main system Part II. Part II.
- Page 8 PART II. INSTALLING THE SYSTEM PART II. IN N ST STAL ALLING THE SYSTEM Space: Make sure there is sufficient space under the counter for installation (an area of about 17”L x Spac a ke sure there is sufficient space und er t h e counter for installation (an ar area...
- Page 9 Fig. 4A - Needle Valve Installation. Fig. 4A - Ne Need edle Valve Installation. Attach the needle valve (C) to water supply adapter (A). Please apply 4-5 wraps of Atta tach the needle valve (C) to water sup uppl adapter (A). Please apply 4-5 wrap teflon tape to needle valve prior to connecting it to the water supply adapter (A).
- Page 10 3. Recommend Connection For Flex Line Riser: See Fig. 5A. & Fig. 5E Loosen nut and separate cold 3. Recomm C onnection For Flex Line Riser: S g . 5A. & Fig. 5E Loosen nut and sepa para rate cold water riser tube from shut off valve.
- Page 11 Insert Insert Sleeve Slee e ve Compression Nut Compre pressi ssio o n Nut Push the tubing all the way into the needle valve Push the tubing all th h e way into the nee dle valve while tightening compression nut. while tightening com m pression nut.
- Page 12 Test for leaks after the system is completely installed: Close the Needle Valve (turn needle handle clock- Test for l ea eaks fter the system is completely instal le led: C lo lose the Needle Valve (turn need h an andl e clock- wise all the way in to close).
- Page 13 3. See Fig. 8, 8A. Make sure to align the drain saddle hole to the drilled hole perfectly. 3. See Fig. 8A. Make sure to align the drain sadd ddle le hole to the drilled hole perf rfec ectl tly. Mis-aligning these two holes will block the drain water and cause membrane damage.
- Page 14 3. For Porcelain Sink: Porcelain enameled sinks can readily be chipped if care is not exercised when 3. For Porc el elai n Sink: Porcelain enameled sinks ca read adily be chipped if care is not exer cise drilling the hole. Before starting the drill motor, apply firm downward pressure on the bit until a drilling hole.
- Page 15 Option: Mounting The Faucet (Metal Compression Fitting) Option: Mo Moun unti n g The Faucet (Metal Compres si sion on F F itting) 1. Make sure the tube insert is pushed all the way into the tubing. Fig. 9C 1. Mak ake sure the tube insert is pushed all the w into the tubing.
- Page 16 Step 6: Connecting The System Step 6: Co Conn e cting The System IMPORTANT INSTALLATION NOTICE! T ANT INSTALLATION N ICE! The Quick connect fittings come with an Th The Q uick connect fittings come with end plug that needs to be removed be- d plug that needs to be removed b b e- fore the tubing can be connected.
- Page 17 To Disconnect the Tubing: Disconn nnec ect the Tubing: g See Fig.10B. Push in and hold down on the collet ring square See Fi Fig.10 B. Push in and hold down on the col olle let ng square against the fitting. With the collet held in this position the tube can agai ains t he fitting.
- Page 18 Option 1 Diagram p tion 1 Diagram DRINKING WATER FAUCET DRINKING WATER FAUCET SINK SINK TO ICEMAKER OPTION T ICEMAKER OPTION INPUT WATER INPUT WATER WASTE WATER WASTE WATER Fig. 11A Fig. 11A P P P DRINKING DRINKI Stage Stag Stage WATER WATER...
- Page 19 3. Point W - Drain water connection: 3. Point W - Dr a in water connection: Tubing color: Black tubing. Connect the BLACK tubing from the RO to the Drain Saddle. Tu Tubi bing olor: Black tubing. Connect the BL tubing from the RO to the Drai Sadd ddle...
- Page 20 Install UV BULB into UV Light: Install UV B i nto UV Light: 1) Please connect UV bulb to transformer. 1) Ple connect UV bulb to transformer. Fig. 13A Fig. 13A 2) Connect the UV bulb pins to the transformer (Fig. 13A) C on n ect the UV bulb pins to the trans nsfo...
- Page 21 Step 7: System Start-Up Step 7: Sys yste tem m Start-Up 1. Turn on feed water: Slowly, turn on your Cold water supply. Open the Needle Valve (turn counter- 1. Tu n feed water: Slowly, turn on your C ol old water supply.
- Page 22 To ensure the long ngev evit a nd integrity of your drinking water system, please use genuine APEC Water replacement filter at please use genuine APEC Water replacement filter at www.freedrinkingwater.com/parts/ www.freedrinkingwater.com/parts/ Stages 1, 2, 3 Pre-Filters: Replace every 6-12 months.
- Page 23 2) Open housing: Have the RO standing upright. Slip the plastic wrench onto the #1 housing. Looking 2) Open h ousi sing ng: Have the RO standing upright. S e plastic wrench onto the #1 hou sing L ooking down from a top view, you should open the housing turning clockwise. If necessary, lay RO down on the down f f ro rom a top view, you should open the ho...
- Page 24 4) Important! Make sure the “double-ring” end of the membrane goes into the housing first as shown in 4) Importan ant! t! M ake sure the “double-ring” end of th the e me membrane goes into the housing fi h own in Fig.15B.
- Page 25 Fig. 15G Fig. 15G How to Replace Stage-6 Carbon Filter: eplace Stage-6 Carbon Filter: Replace this last filter at the same time you replace the stage-4 membrane. Repl pla a ce this last filter at the same time e yo r eplace the stage-4 membrane.
- Page 26 How to Replace Stage-7 pH Mineral Filter: How to Rep epla lace ce Stage-7 pH Mineral Filter: 1) Turn OFF cold water supply to RO system. Turn OFF tank ball-valve by turning the blue handle clockwise 1) Tur n OF F cold water supply to RO system.
-
Page 27: Table Of Contents
OWNER’S MANUAL Please read this section for useful RO system and mainte- Please read this s f or useful RO system an inte- nance information. n ce information. TABLE OF CONTENT TABLE OF CONTENT Part I: Part I: RO Basics RO Basics Basic terms ................. -
Page 28: Ba Basic Terms
Part I: RO BASICS Part I: R ASICS This section provides basic concepts on how an ROES system works, how it performs in relation to your This s e ction provides basic concepts on how an O ES system works, how it perfo e lation to your house’s water condition. -
Page 29: P O Ta Or Tant Nt Factor
3) Water Pressure – The Most Important Factor! 3) Water Pr Pres essu sure – The Most Important Factor! RO systems run on water pressure. Therefore your water pressure has the most direct effect on how RO sys ystems ms run on water pressure. Therefore yo your ur w w ater pressure has the most direc ect effe on how... -
Page 30: Tank -- Fill Up Time. Fill Up Volume. Delivery Pressure
6) How Full Can My Tank Fill Up? 6) How Full ll C an My Tank Fill Up? Your water pressure and temperature will determine how full and how fast the storage tank will be filled Your w ater er pr essure and temperature will dete e rm i ne how full and how fast the storage... -
Page 31: Insufficient Water Pressure -- Problems With Non-Pump Systems
10) Insufficient Water Pressure – Problems with Non-Pump RO Systems: 10) Insuffici cien t Wa ter Pressure – Problems with N on-P -Pum p RO Systems: The 3 most common problems caused by low input water pressure: The 3 most common problems caused by low inp nput water pressure:... -
Page 32: Part Ii: Trouble-Shoot Guide
Part II: Trouble-Shoot Guide Part II: Troub h oot Guide For Newly Installed RO System For Newly I l led RO System After installation, if you encounter any of the problems described below, please follow this guide to trouble- r in inst stal lation, if you encounter any o th the pr prob l ems described below, please... -
Page 33: Air Bubbles Air Bubbles
1) Air Bubbles: Lots of Air bubbles in cup or bottle when filling 1) Air Bubb bble les: s: Lots of Air bubbles in cup or b ottl when filling It is quite normal to see air bubbles in a cup of pure water. This mainly occurs when a RO unit is first It i quit normal to see air bubbles in a cup... -
Page 34: Slow Output Slow Output
2) Sluggish Flow At Dispensing Faucet 2) Sluggish w At Dispensing Faucet Insufficient water pressure (see “ Insu s ff ffic icie ient water pressure (see “ ” for explanation) —> Check water pressure. If too low for this ” fo e xplanation) —>... -
Page 35: D Lved Solids) Level Reads Higher Than Norma Mal L
Step 3. Step 3. Re-attach the filter housing to the RO head. Hand tighten the housing, then use the filter Re-a -attach the filter housing to the RO h ea ead. d. H H and tighten the housing, then u u se he filter housing wrench and simply give an additional quarter inch turn. -
Page 36: There Is A Leak At The Tank Ball Valve Connection
7) There is a leak at the Tank ball valve connection 7) There is is a l ea eak at the Tank ball valve conne nect ctio If you are experiencing a leak from where the tank ball valve attaches to the tank stem, you may not If y r e experiencing a leak from where the ta tank ball valve attaches to the tank stem,... -
Page 37: How To Test Ro's Shut-Off Function How To Test Ro's Shut-Off Function
10) How to Test RO’s Shut-Off Function: 10)How to T est RO’s Shut-Off Function: The RO system should shut off automatically when the tank is filled. When the RO fails to shut off after Th The R O system should shut off automa mati tical l ly... -
Page 38: Uv Light Does Not Turn On Uv Light Does Not Turn On
11) Pure water still tastes like Tap water: 11) Pure re w a ter still tastes like Tap water: If the RO system is newly installed, please make sure the first 1-2 tanks of water have been completely If t RO system is newly installed, le leas ke sure the first 1-2 tanks of... -
Page 39: Makes Hum Ro Makes Humming Noise
14) RO Makes Humming Noise 14) RO Mak akes H umming Noise When RO makes a humming noise, most likely it’s caused by air bubbles being trapped in the “Check When O makes a humming noise, most like i t’s caused by air bubbles being trappe d in the “Check Valve”... - Page 40 OTHER INFORMATION OTHER INF ATION AirGap Faucet Installation (Optional) AirGap Fau auce I nstallation (Optional) There are 3 colored tubings on your Air-Gap faucet. At the end of each 1/4” tubing there is a Th Ther ere are 3 colored tubings on your Ai Air- f aucet.
- Page 41 LIMITED PRODUCT WARRANTY Scope Sc Scope APEC takes pride in selling a superb line of products, including this reverse osmosis system (“Product”). As such, APEC expressly APEC takes pride in selling a superb line of products, including this reverse osmosis system (“Product”). As such, APEC expressly warrants to the original purchaser that, for a period of one (1) year from the date of purchase, the Product will be reasonably free of warrants to the original purchaser that, for a period of one (1) year from the date of purchase, the Product will be reasonably free of defects in materials and workmanship.
- Page 42 CONDITIONS THAT RENDER THIS LIMITED PRODUCT WARRANTY VOID NDIT ITIONS THAT RENDER THIS LIMITED PROD D UC UCT WARRANTY VOID THIS LIMITED PRODUCT WARRANTY SHALL BE VOID IF: THIS L IMITED PRODUCT WARRANTY SHALL BE 1. The Product is not operated in compliance with normal municipal water conditions for which the particular model of this Product 1.
- Page 44 Advanced Purification Engineering Corp. d Purification Engineering Corp. 1320 S Johnson Drive 1320 S Johnson Drive City of Industry, CA 91745 City of Industry, CA 91745 For questions or comments please visit our website at: For questions o mments please visit our we i te at: www.FreeDrinkingWater.com w .FreeDrinkingWat...
Need help?
Do you have a question about the ESSENCE ROES-PHUV75 and is the answer not in the manual?
Questions and answers
Leaking through the uv filter
The manual does not provide specific instructions for fixing a leak in the UV filter of the Apec Water ESSENCE ROES-PHUV75. However, general troubleshooting steps for leaks include:
1. Turn Off Water Supply – Shut off the main water supply to prevent further leakage.
2. Check Fittings and Connections – Ensure all fittings are properly tightened and not cross-threaded.
3. Inspect O-Rings and Seals – Check for damaged or misaligned O-rings and replace if necessary.
4. Verify Tubing Connections – Ensure all tubing is fully inserted into the quick-connect fittings.
5. Replace Faulty Components – If the UV filter housing is cracked or damaged, it may need replacement.
6. Contact APEC Support – If the issue persists, reach out to APEC or your distributor for further assistance or replacement parts.
Always follow the manufacturer’s guidelines when performing maintenance or repairs.
This answer is automatically generated