Advertisement
Advertisement
Table of Contents

Related Manuals for Feelworld F5Pro


Summary of Contents for Feelworld F5Pro
- Page 1 5.5″ Touchscreen Monitor F970 Install and Power Kit User Manual...
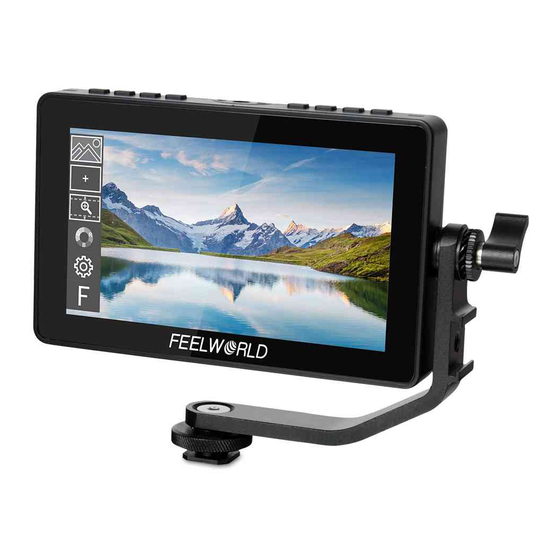
- Page 2 Product Overview Thank you for purchasing our 5.5 inch Full HD touch screen monitor. This monitor has HDMI input and output, auxiliary power output, touch screen menu operation, support user 3D LUT upload, etc. It has small size, simple operation, portable convenience and wide application range.
- Page 3 ● In order to better maintain the LCD screen and protect the cover, please follow the following ways to avoid damages. 1. Please refrain from using the hard objects to hit the screen. 2. Please do not force to wipe the screen. 3.
-
Page 4: Table Of Contents
● Pixel to Pixel ● Ratio Marker, Safe Frames and Center Marker ● Brightness, Contrast, Sharpness, Tint, Saturation and Color Temp Adjustment. ● 3.5mm earphone output ● DC 8.4V power out to power your DSLR camera or mirrorless camera ● External sunshade, sunlight readable CONTENTS 1. -
Page 5: Product Description
1. Product Description Front Panel Back Panel ... -
Page 6: Button Instruction
1.1 Button Instruction Function when OSD is not Function when OSD is Button displayed displayed Custom button F1 Custom button F2 Decrease the volume or Decrease or adjust value of < backlight selected parameter Increase the volume or Increase or adjust value of >... -
Page 7: Port Instruction (Left)
LP-E6 Canon&DMW-BLF19 Panasonic). More adapters coming soon. : 3.5mm earphone port output DC IN 5V (Type-C): Type-C power input. It is recommended to be used for local power supply only. It is not recommended to connect other devices to provide loop-out power. 1.3 Port Instruction (Left) HDMI IN: V1.4, HDMI signal input, up to 4K@30Hz. -
Page 8: Power Supply Way
1.4 Power Supply Way (1) The rear cover of the monitor is equipped with a F970 battery plate, which is applicable to F970 series of batteries. ● Sony F970 battery plate for battery of Sony DV: Sony F970 F960 F950 F930 F770 F750 F730 F570 F550 F530 QM91D QM91 QM90D QM90 QM71D QM71 QM70D QM70 QM51D QM51 FM71 FM70 series When using battery power supply: two power output interfaces (DC OUT... -
Page 9: Sony F970 Install And Power Kit
1.5 Sony F970 Install and Power Kit A Sony F970 external install and power kit design is added to the back of the monitor. The external kit can be used to install and install the external equipment, like wireless transmitter, LED light, video converter and others which can be powered by Sony F970 battery. - Page 10 (3) Steps to remove the kit: ①. Loosen the 2 screws. ②. Use both hands to move the kit up. ③. Move the round holes to the corresponding 2 screws. (You can also install the kit upside down.) ④. Then gently lift the kit upwards and carefully disassemble the 2P power cord. ⑤.
-
Page 11: Mount Points
1.6 Mount Points (1) ¼-20 Thread Points There are (4) ¼-20 thread points (top, bottom, right side & Back center) can be easily connected to the hot shoe mount, tripod fixed installation. (2) Tilt Arm Mounting The monitor secures to your camera using the included Tilt Arm via shoe mount or 1/4"-20 thread. -
Page 12: Sunshade
1.7 Sunshade ① Sunshade ② Sunshade Frame ③ Fixed Frame ④ Sunshade Application First lock the Sunshade Frame ②with the monitor tight ③. Open the sunshade ①, and match the sticker on the sunshade inside to the marked part of the sunshade frame ②, smooth and press 3 sides on the sunshade, and then complete the sunshade installation ④. -
Page 13: Menu Operation Instruction
2. Menu Operation Instruction After the monitor is correctly connected to the power supply, the indicator light is on (red), long press (manual power-on mode), turn on the monitor, the indicator light turns yellow, and after the HDMI signal is input, the indicator light turns green. (The default is auto power-on mode, no need to long press buttons.) (1). - Page 14 (2) Button Menu Operation ①.When the menu is not displayed, directly press the "<" or ">" button to adjust the volume or backlight. You can set the left and right buttons in the menu Left Right Key Set to set the volume or backlight. ②.Press the "MENU"...
-
Page 15: Menu Function Instruction
3. Menu Function Instruction Off, On Histogram Off, On Focus Assist Red, Green, Blue Peaking Color Off, On Embedded Audio Over Exposure Off, On Exposure Level IRE10~IRE100 Check Field Off, Mono, Red, Green, Blue False Colors Off, On Nine Grid Off, On Safe Frames... - Page 16 Scan Mode Under Scan, Over Scan Aspect Ratio Auto., 4:3, 16:9, Just Scan, Panorama, P2P Off, 1.3X, 2.0X, 2.0X MAG, User Anamorphic Under the User, the Anamorphic nX can be customized. Anamorphic nX 1.20X~2.00X Off, On Open the Nine Grid function in the to divide the image into nine grid, then turn on the Nine Grid Zoom function, select one of the screens by pressing the "<"...
- Page 17 OFF, ON Lut Switch After the LUT Switch is turned on, you can use the Lut (SLOG2, SLOG3, LOGC, VLOG). Lut Table Show the 4 built-in Lut and the custom load Lut After copying the 3D LUT file to the U disk and inserting it into the TYPE-C to USB Connector, you can click the Lut Import (type C) “<”...
- Page 18 Volume, Backlight You can set the Left Right Key Set as shortcut keys for Left Right Key Set volume or backlight adjustment. After setting, when the menu is not displayed, you can directly press the "<" or ">" key for quick adjustment. Language English, 简体中文, Español, Português, Français, Nederlands, Deutsch,日本語, 繁體中文...
-
Page 19: Technical Parameters
Reset Press “>” button to confirm, back to original setting. Safe Frames, Check Field, Focus Assist, Aspect Ratio, Image Flip, Image Freeze, Histogram, False F1/F2 Colors, Over Exposure, Embedded Audio, Nine Grid, Zoom, Anamorphic, Center Marker 4. Technical Parameters 5.5”... -
Page 20: Trouble Shooting
480i/576i/480p/576p 720p (60/59.94/50/30/29.97/25/24/23.98) HDMI Input/ Output 1080i (60/59.94/50) Support Format 1080p (60/59.94/50/30/29.97/25/24/23.98) 3840×2160p (30/29.97/25/24/23.98) 4096×2160p (24Hz) 7~24V Power Input Voltage ≦9W Power Consumption 148Lx93Hx20D (mm) Unit Size (mm) 245g (with F970 install and power kit) Unit Weight ¼-20 thread points Mount Points Working Temperature -20℃~50℃... - Page 21 ■ If there are still other problems, please contact with our related technologists. ★ As we are improving product features and product performance, so if there is any change on the specification without prior notice.
Need help?
Do you have a question about the F5Pro and is the answer not in the manual?
Questions and answers