Advertisement
Table of Contents
Advertisement
Table of Contents

Related Manuals for Feelworld FW568


Summary of Contents for Feelworld FW568
- Page 1 5.5" Super Lightweight Field Monitor Stabilizer Gimbal Best Partner User Manual...
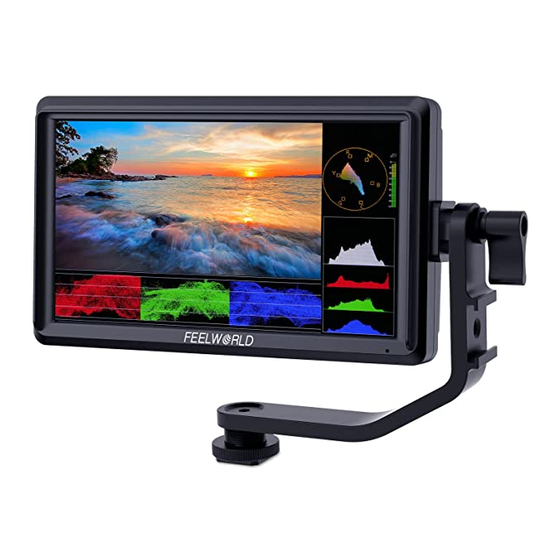
- Page 2 Product Overview Thank you for purchasing our color LCD monitor, which adopts advanced integrated digital signal processing circuits and professional IPS LED panel, which makes it high brightness, low power consumption, stable performance, etc. It is equipped with HDMI input and output, which make it wide application, casing compact, simple operation, portable convenience and strong compatibility.
- Page 3 ● Keep the product away from the heat source, such as the radiator, the water heater, the stoves and the other heating products. ● Avoid the prolonged exposures to the sun as the LCD screen will be damaged. ● To avoid damaging the product, please do not take apart or repair the unit by yourself without the adjustable components in the unit.
- Page 4 Features ● IPS LCD panel, support 4K HDMI input and output UHD 4K 3840×2160p (30/29.97/25/24/23.98Hz) DCI 4K 4096×2160p (24Hz) ● Histogram is a quantitative tool to inspect the image brightness, to guide the exposure control ● Focus Assist (Focus edge can be Red, Green, Blue) ●...
-
Page 5: Table Of Contents
CONTENTS 1. Product Description ----------------------------------------- 5 1.1 Button Instruction --------------------------------------------- 6 1.2 Port Instruction (bottom) ------------------------------------ 6 1.3 Port Instruction (left) ----------------------------------------- 7 1.4 Power Input ----------------------------------------------------- 7 1.5 Mount Points --------------------------------------------------- 8 1.6 Sunshade ------------------------------------------------------- 9 2. Menu Operation Instruction ------------------------------ 10 3. -
Page 6: Product Description
1. Product Description Front Panel Back Panel ... -
Page 7: Button Instruction
1.1 Button Instruction Button Function when OSD is Function when OSD is not displayed displayed Decrease the volume Decrease or adjust value of < selected parameter Increase the volume Increase or adjust value of > selected parameter MENU Display OSD Main menu Return to previous OSD menu F1/∨... -
Page 8: Port Instruction (Left)
: 3.5mm Earphone port output USB UPGRADE: Firmware USB upgrade port 1.3 Port Instruction (left) HDMI IN: V1.4, HDMI signal input, up to 4K@30Hz. HDMI OUT: V1.4, HDMI signal output, up to 4K@30Hz. DC IN 12V: DC power input interface, polarity as the input power 1.4 Power Input (1) The rear cover of the monitor is equipped with F970 and E6... -
Page 9: Mount Points
capability. The working time for the monitor will be different. Higher capability (working time) will be longer. Please take off the battery from the monitor if you don’t use the monitor in a long time. 1.5 Mount Points (1) 1/4" Screw Lock Installation The 1/4 screw lock can be installed on the monitor (bottom, right side). -
Page 10: Sunshade
1.6 Sunshade ① Velcro ② Sunshade Frame (Paste Velcro) ③ Sunshade ④ Sunshade Application Attach the Velcro (hook side) ① to the outside of the sunshade frame of the monitor, open the sunshade ③, and align the Velcro (loop side) on the inside of the sunshade with the Velcro (hook side) ②... -
Page 11: Menu Operation Instruction
2. Menu Operation Instruction After correctly connect to the power supply, the indicator will turn (Red), press to turn on monitor power, the indicator will be Yellow, and then input HDMI signals, the indicator will turn Green from Yellow. 2.1 Press “MENU” button to enter OSD main menu, and press “<”... -
Page 12: Menu Function Instruction
3. Menu Function Instruction Image (Including 2 pages) ★ Pic. Mode: Standard, Mild, User, Dynamic Select ‘user’ to adjust Brightness, Contrast, Saturation, Sharpness. ★ Brightness: 0~100 To adjust image's brightness. ★ Contrast: 10~100 To adjust the brightest and the darkest ratio of the image, please note the sense of picture when adjust,... - Page 13 proportion too high or too low will make the picture lose the color. ★ Saturation: 0~100 To adjust color concentration. ★ Sharpness: 0~100 Also called ‘Resolution’, is an indicator for the image plane definition and image edge sharpness. If sharpness is higher, then the details contrast on the image is higher, the image is more clearly.
- Page 14 ★ Language: English, 简体中文, Español, Português, Français, Nederlands, Deutsch,日本語, 繁體中文 To select the display menu language. ★ Aspect Ratio: Auto., 4:3, 16:9, Just Scan, Panorama, P2P To select the image aspect ratio. ★ No Signal: Blue Screen, Red Screen, Green Screen, Black Screen, White Screen To select the screen background color when no signal.
- Page 15 (Note: OLED screen has no backlight adjustment function) ★ Power On: Auto., Manual When select the Auto., the monitor will turn on when input power. But if select the manual, it is standby when input power, need to press button to turn on the power. ★...
- Page 16 image, and then press “F1/∨” or “F2/∧” button to zoom the image to full screen. Press “F1/∨” or “F2/∧” to exit the local zoom function. (To achieve this function, you need to first open the Nine Grid function.) ★ Zoom: Off, 4X, 9X, 16X Image Zoom function, to help the photographer observe more careful image by changing it.
- Page 17 Function (Including 3 pages) Menu of Page One ★ Center Marker: Off, On To set center mark (cross mark) display. ★ Safe Frames: Off, 80%, 85%, 90%, 96%, 93%, 2.35:1 To select the screen marker. ★ Nine Grid: Off, On To make the image segmented into nine grids.
- Page 18 the real proportion of scene. Under the "user" adjustment item, the Anamorphic nX can be customized. ★ Anamorphic nX: 1.20X~2.00X Customizable anamorphic adjustment is available. Menu of Page Two ★ Check Field: Off, Mono, Red, Green, Blue To switch among Color, Mono, Red, Green, Blue. ★...
- Page 19 focusing operation. ★ Peaking Color: Red, Green, Blue Due to the image color is colorful when shooting in natural light, so the user may react to the edge of the single line not too sensitive, at this time to change the auxiliary focal edge line color will improve the sensitivity of the image contour.
- Page 20 Menu of Page Three ★ Ratio Marker: Off, 4:3, 13:9, 14:9, 15:9, 16:9, 1.85:1, 2.35:1 Image display ratio marker. ★ Mark Color: Red, Green, Blue, Black, White To select the above high contrast mark color according to different image. ★ Mark Width: 1~7 To select the above mark color display width.
- Page 21 Custom Button Setting F1~F3 ★ F1/ F2/F3: Center Marker, Safe Frames, Check Field, Focus Assist, Aspect Ratio, Image Flip, Image Freeze, Histogram, False Colors, Over Exposure, Embedded Audio, Nine Grid, Zoom, Anamorphic To set the 3 shortcut custom button F1, F2, F3 on the panel. For example: When in OSD menu “...
-
Page 22: Technical Parameters
4. Technical Parameters Panel Size 5.5" OLED 5.5" IPS 5.5" IPS Resolution 1280 x 720 pixels 1920x1080 pixels 1280 x 720 pixels Dot Pitch 0.096 x 0.032 mm 0.0639 x 0.0213 mm 0.0945 x 0.0315 mm Aspect Ratio 16:9 16:9 16:9 Brightness 300cd/m... -
Page 23: Trouble Shooting
5. Trouble Shooting Only black and white or monochrome picture ① please check saturation, brightness & contrast adjustment. ② Please check "Check Field" is in black, white or monochrome image or other condition. NO Image after put on the power ①...
Need help?
Do you have a question about the FW568 and is the answer not in the manual?
Questions and answers