ResMed ApneaLink Air Clinical Manual
Hide thumbs
Also See for ApneaLink Air:
- Patient instructions (9 pages) ,
- Instructions (4 pages) ,
- Test instructions (2 pages)
Table of Contents
Advertisement
Advertisement
Table of Contents

Related Manuals for ResMed ApneaLink Air


Summary of Contents for ResMed ApneaLink Air
- Page 1 Clinical Guide English ApneaLink Air ApneaLink Plus...
-
Page 2: Table Of Contents
Fitting the belt Fitting the accessories Using the ApneaLink Air device ......13 Starting the test... -
Page 3: Introduction
HCP. Contraindications The ApneaLink Air system must not be used in the vicinity of an MRI device. • Explosive Hazard: Do not use the ApneaLink Air system in an explosive •... - Page 4 If the packaging is damaged, the respective product must not be used, and should be disposed of along with the packaging. ApneaLink Air is now supported by EasyCare Online in some regions. To find • out whether this service is available in your region contact your local ResMed Customer service.
-
Page 5: Equipment
Reusable oximeter finger sensor* Oximeter belt clip* Nasal cannula Bag (not shown) *This item may only be available as accessory in some countries. Test complete Xpod Delivery schedule ApneaLink Air basic set • ApneaLink Air device • Nasal cannula • Belt •... -
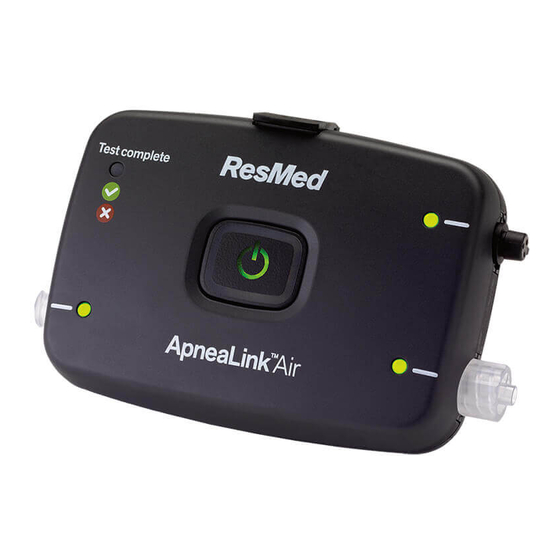
Page 6: Device
The “test complete” light simply shows whether or not the test is done. The ApneaLink Air device considers the test done with the evaluation time of the flow or the flow and oximetry analysis. The evaluation time can be set in the software. -
Page 7: Assembling The Apnealink Air System
The physician or healthcare provider is responsible for explaining to the • patient the functions of the ApneaLink Air system and how to operate it safely with the help of the Patient Instruction and the Clinical Guide. To ensure that recording results are accurate, only equipment recommended •... -
Page 8: Putting The Device On The Belt
Putting the device on the belt 1. Thread one end of the belt through 2. Flip the device over. Thread the end the slots on the back of the device. of the belt closest to the device Check that the device is positioned through one of the slots on the as shown. - Page 9 1. Attach the oximeter finger sensor 2. Attach the belt clip to the oximeter. to the oximeter. Test complete Test complete 3. Attach the oximeter to the oximeter connector on the device by pushing it on. Assembling the ApneaLink Air system...
-
Page 10: Fitting The Belt
The ApneaLink Air respiratory effort sensor is proprietary ResMed technology using a simple pneumatic technology. The tube inside the effort sensor gets deformed by pulling the belt. This volume change results in a pressure change which gets recorded by the pressure sensor. -
Page 11: Fitting The Accessories
3. Pull the slider up towards the chin until the plastic tubing is secure and comfortable. Note: If the nasal cannula does not stay in the nose, use medical tape or adhesive bandages on the cheeks to hold it in place. Assembling the ApneaLink Air system... - Page 12 Oximeter finger sensor WARNING Ensure that the oximeter clip is positioned on the same side of the body • as the finger sensor so as not to pose a strangulation risk. The pulse oximeter module is designed to determine the percentage of •...
- Page 13 5. The sensor should be positioned as shown. Note: If the oximeter finger sensor is uncomfortable, you can move it to a different finger or the other hand. Assembling the ApneaLink Air system...
- Page 14 Reusable oximeter finger sensor To fit the reusable finger sensor, slip it over the fourth finger on the non- dominant hand as shown. Note: If the oximeter finger sensor is uncomfortable, you can move it to a different finger or the other hand.
-
Page 15: Using The Apnealink Air Device
Using the ApneaLink Air device Starting the test Test complete When properly set up, the full system looks like this. Test complete Test complete 1. Press and hold the power button in 2. Check that lights next to the the centre of the device for about... -
Page 16: Stopping The Test - Check If Test Complete
Stopping the test - check if test complete Test complete Test complete 1. Press the power button for about 2. Check that the test complete light is three seconds. lit and green. This means the test is complete. If the test complete light is red, replace the batteries and repeat the test tomorrow night. -
Page 17: Disassembly
7. Place everything else back in the bag and return it to the physician or healthcare provider as requested. The physician/HCP must do the following: Clean device and multiuse sensors. • Disinfection (if necessary). • Using the ApneaLink Air device... -
Page 18: Using The Apnealink Software Application
Using the ApneaLink software application Starting the program After installing the ApneaLink software the first time, a shortcut is created on the desktop. Double-click to run the program. Preparing a recording 1. Connect the device to the computer. 2. Run the ApneaLink program. 3. - Page 19 • Check that the driver files in the Windows device manager have been correctly installed. • Contact ResMed or an authorized ResMed distributor if the problems continue. Battery voltage too low Replace the batteries or rechargeable batteries in the device.
-
Page 20: Downloading Data From The Device
Downloading data from the device 1. Plug the USB cable into the mini USB connector on the device and into an available USB port of your computer. 2. Run the ApneaLink program. 3. Click Download ApneaLink Notes: If the device was not allocated to a patient during customisation, the •... -
Page 21: User Interface And Software Features
User interface and software features Menu bar with main menus: The various program functions are located in the separate main menus. Toolbar: The functions available in the toolbar depend on which view has been selected. View windows: The ApneaLink program displays patient record cards, database, and signal and report views. - Page 22 File menu Icon Name/description Database: Opens the database. Patient details, recordings, and reports are managed in the database. Patient record cards, recordings, and reports may be opened or deleted. Archive: Opens the archive dialog box with the archived records. Selected recordings can be marked for archiving with media type, media name, and a target directory.
- Page 23 View menu Icon Name/description Patient record card: Opens the patient’s record card selected in the database. Personal details and information on the patient are recorded on the patient record card. Report view: Opens the report selected in the database. The report contains the analysis of the recording.
- Page 24 Send Event Log by When an error occurs, the Event log can be sent to ApneaLink Air email support. Database transfer Starts the database transfer tool.
-
Page 25: Database
Database In the database patient details, recordings (analyses), and reports can be opened in different views or deleted. To open the database Click Database on the toolbar. • Click Database in the File menu. • In the database view you have the following options: Click once on a file to show related files. -
Page 26: Signal View
Signal view The signal view shows the recording signals as curves together with the events that have occurred. To open the signal view: 1. Click on the toolbar to open the database. 2. Select a recording. 3. On the toolbar click Signal view Upper window Event Time period marking for lower window... - Page 27 Editing events Inserting events 1. Move the cursor to a channel at the start of the event to be inserted. 2. Click the left mouse button and drag the cursor to either right or left at the end of the event to be inserted. A context menu appears showing a list of the event types.
- Page 28 Deleting events 1. Click the event to be deleted in the signal view. 2. Press Delete on the keyboard. 1. On the signal view toolbar click Event list 2. In the event list, select the event to be deleted. 3. Press Delete on the keyboard. Notes: If an event is deleted inadvertently, restore it using the Undo function in the Edit •...
- Page 29 Notes: Invalid data can be a result of the incorrect application of the sensors, an • inadequate power supply or when a recording is continued within 15 minutes after it has been stopped. Event overlaps are checked both during automatic analysis and when events •...
- Page 30 Displaying event list The event list shows all events for the recording that is currently open. When working with the signal view, the event list helps in analyzing a recording by selecting and displaying specific events quickly. The event list consists of event groups and events that have been analyzed in the recording.
- Page 31 Editing event groups To create an event group: 1. On the Tools menu, click New event group. 2. Select the checkbox next to an event to allocate the event type to the new event group. 3. Click OK. To edit an event group: 1.
- Page 32 ESOLUTION The drop-down lists contain various time ranges that you can set to display the recording. A recording can be displayed for a time range of one second up to a whole night. HANNELS Channels displayed in the signal view can be set and signal curve color can be changed using the Channels function.
- Page 33 VENTS Events are shown in color in the signal view and are assigned to a fixed channel. You can use the Events function to define the color of an event. The dialog box distinguishes between standard events and advanced events. Standard events are taken into consideration when determining the risk indicator and the ODI.
- Page 34 Analysis parameters Analysis parameters are specifications for analyzing the recording. The default parameters set by ResMed may be applied, or individually modified parameters may be set. Modified parameters can be reset to the default values. To open the settings dialog box for the analysis parameter select Settings in the Tools menu.
- Page 35 The following schematic figures are examples for the different apnea classes: Note: Apnea differentiation only is available if the effort signal has been recorded. If none or insufficient effort information is available ApneaLink Air scores corresponding apneas as unclassified apneas.
- Page 36 HYPOPNEA A hypopnea is a reduction of airflow that lasts 10 seconds or longer ApneaLink Air may identify a hypopnea in the recording according to one of the following criteria: If no oximetry data is available, or is missing for a significant portion of the •...
- Page 37 ApneaLink Air derives the snoring signal from the sensing device and filters the signal to allow a 0-60 Hz waveform to be analysed as snoring.
- Page 38 The following table explains the snoring settings in the analysis parameter dialog box: Threshold for snoring in percent Indicates the minimum amplitude threshold Default setting: 6 % necessary for the event to be classified as snoring. Range: 1.5–10 % Min. length of a snoring event in Minimum duration of noise when breathing in for it to seconds: Default 0.3 s be classified as a snoring event.
- Page 39 The following table explains the desaturation setting in the analysis parameter dialog box: Threshold for oxygen desaturation If the saturation level decreases by 4%, eg, from Default setting: 4 % 97% to 93% or less, a desaturation event is Range: 3–5 % entered in the signal view.
- Page 40 The following is an example of a Cheyne-Stokes breathing pattern: LOW LIMITATION The form of the breathing flow curve is crucial in the detection of the flow limitation During inspiration, the breathing flow increases. After an amplitude peak is reached, the breathing curve flattens out until expiration begins. In order to make a comparison between normal and flow-limited breathing, the two curves are superimposed.
- Page 41 Flow limitation and flow limitation with snoring are calculated and are used to adjust the RI (Risk Indicator) using slightly different weighted factors. ApneaLink Air does not detect RERAS (respiratory effort related arousals) and UARS (upper airway resistance syndrome), but patients suffering from them show a high percentage of flow limited breathing patterns that will be detected by the ApneaLink software.
-
Page 42: Report View
Report view ApneaLink Air reports are generated as PDF files and are displayed in a separate PDF window with its own toolbar. For more information about this application please read the instruction manual for Acrobat Reader. To open a report double-click on the report in the database. - Page 43 AHI and RI values differ by the score for flow limitations found. The indicator graphic is driven by the AHI value or the RI value depending on your settings. Note: Selecting the “Use AHI” option (see “Report settings” on page 45) alters the calculation of the indicator.
- Page 44 The analysis status shows whether a recording was analysed automatically or was manually post-edited. If no oximetry data is available, or is missing for a significant portion of the recording, this dialog box indicates that the automatic hypopnea analysis is based on flow only (classic ApneaLink Air definition).
- Page 45 Analysis parameters used This section contains a brief summary of details on the analysis parameters that were set (see also “Analysis parameters” on page 32). Apnea [20 %, 10 s, 80 s, 1.0 s, 20 %, 60 %, 8 %] Amplitude threshold for central apnea Time threshold for central apnea Time threshold for obstructive apnea...
- Page 46 Graphs The extended report contains the following graphs: respiratory events • epochs with identified Cheyne-Stokes breathing • pulse oximetry signals for pulse and saturation. • In case of bad signal quality in the SpO /pulse channel (eg, dislocated oximeter finger sensor) the corresponding recording time is marked as a red bar on top of the signal curve.
- Page 47 Report settings To open the report settings: On the Tools menu, select Settings, and then click Report. Report setting options Measurement system Size and weight information can be given either in metric or imperial/US units. Show logo on report Select the checkbox and then click Select file. From the Select logo dialog box, select a graphic file in bitmap (BMP) or JPEG format.
- Page 48 Add referral template In this template you can fill in information for the treating physician. You can choose to attach to each report or only if the AHI is above 5. Show quick buttons in report Select the checkbox to display the Referral and view Prescription buttons on the toolbar in the Report view.
-
Page 49: File Transfer
File transfer Archiving data When data is archived, recordings are removed from the database to free space. Archived data remains visible in the database with the archiving date appended. 1. On the toolbar click Archive 2. In the Records available panel, click the recording to be archived. 3. - Page 50 Notes: You can double-click a recording in the Records available panel to move • automatically to the Records to be archived panel. It is not possible to write an archive file directly onto a CD within the ApneaLink • program. The archive file has to be moved first into the target directory using the archiving function.
- Page 51 Exporting a recording as an EDF or EDF+ file You can export a recording as a European Data Format (EDF) or EDF+ file which are especially for measurement data exchange. Both formats can be displayed in EDF compatible software packages. With both formats the recording information is stored according to the export settings.
- Page 52 5. Click OK to confirm. 6. Click Move database. 7. Click Exit to close the dialog box. The ApneaLink program restarts. You can also open the database transfer dialog box in the Start menu. Select Programs > ResMed > ApneaLink.
- Page 53 • appears to confirm if you want to delete or retain the old database. Sending data by email ApneaLink Air uses the installed email client (Microsoft Outlook and Microsoft Outlook Express) to send reports or recordings by emails. Notes: Recordings and reports contain patient data that must be treated as •...
- Page 54 Notes: To be able to open the OSA file, the email recipient must have the ApneaLink • program installed. The OSA file can be opened in the ApneaLink program using the View external data function or by double-clicking the file. ApneaLink programs older than Version 6.0 cannot display pulse oximetry •...
-
Page 55: Cleaning And Maintenance
Cleaning and maintenance Regular cleaning and maintenance should be carried out on the ApneaLink Air system as described here. The cleaning shall be done by the physician or healthcare provider. CAUTION Never use abrasive agents, alcohol, chlorine-containing substances, • acetone, or other solvents to clean the device. -
Page 56: Disinfection
ResMed. ResMed recommends that the ApneaLink Air system is inspected and serviced by an authorized ResMed Service Centre if there is any sign of wear or any concern with device function. Otherwise, service and inspection of the device should not be required during the five year design life of the device. -
Page 57: Troubleshooting
If any problems arise while using the device or the software, try the following solutions. If the problem cannot be solved, send the log file to the ApneaLink Air support team or contact your equipment supplier or ResMed. Do not attempt to open the device. -
Page 58: Program
USB cable is defective. Contact ResMed or an authorized ResMed distributor to request a new USB cable. Reinstall the ApneaLink program. If The necessary program files are no longer available or are corrupted. - Page 59 USB cable is defective. Contact ResMed or an authorized ResMed distributor to request a new USB cable. Necessary program files are no longer Reinstall the ApneaLink program. If available, or are corrupted.
-
Page 60: Analysis
The internal battery is defective. Contact ResMed or an authorized ResMed distributor. Signal too small. There is a kink in the nasal cannula at Lay the cannula in a regular curve and the connection point. - Page 61 Exchange the nasal cannula. Check the status of the indicator light during recording. The sensor is defective. Contact ResMed or an authorized ResMed distributor. The nasal cannula or the oximeter finger Check the nasal cannula and oximeter sensor is not connected to the device finger sensor connections.
-
Page 62: Technical Specifications
Technical specifications System requirements Software The ApneaLink software is compatible with the following operating systems: Microsoft Windows XP • Microsoft Windows Vista (32 bit and 64 bit versions) • Microsoft Windows 7 (32 bit and 64 bit versions) • Microsoft Windows 8 (32 bit and 64 bit versions) •... - Page 63 (62 x 102 x 30 mm) Pulse oximeter: (length x width x height) 2.1“ x 0.8“ x 0.6“ (53 x 20 x 15 mm) Electromagnetic The ApneaLink Air complies with all applicable compatibility electromagnetic compatibility requirements (EMC) according to IEC60601-1-2, for residential, commercial, and light industry environments.
-
Page 64: Symbols
Symbols Manufacturer Follow instructions for use CE labelling in accordance with EC directive 93/42/EEC, class II a Type BF applied part (this includes the device and accessories). IP 22 Device is protected against ingress of solid foreign objects of 12.5 mm diameter or greater and against ingress of dripping water (15°... -
Page 65: Disposal
(Hg, Cd, Pb) of the metals for which the limit is exceeded. For information on the easiest way to dispose of your ApneaLink Air system, or for further details, please contact your ResMed office, your local distributor, or visit the website: www.resmed.com. -
Page 66: Limited Warranty
• Portable diagnostic/screening devices This warranty is only available to the initial consumer. It is not transferable. If the product fails under conditions of normal use, ResMed will repair or replace, at its option, the defective product or any of its components. - Page 67 ResMed shall not be responsible for any incidental or consequential damages claimed to have resulted from the sale, installation or use of any ResMed product. Some regions or states do not allow the exclusion or limitation of incidental or consequential damages, so the above limitation may not apply to you.
- Page 68 Macarthur Drive Bella Vista NSW 2153 Australia. ResMed Corp 9001 Spectrum Center Boulevard San Diego CA 92123 USA. See www.resmed.com for other ResMed locations worldwide. For patent information, see www.resmed.com/ip. ApneaLink is a trademark of ResMed R&D Germany GmbH and is registered in U.S. Patent and Trademark Office. Nonin and Xpod are trademarks of Nonin Medical.
Need help?
Do you have a question about the ApneaLink Air and is the answer not in the manual?
Questions and answers