
Related Manuals for EPAX X1


Summary of Contents for EPAX X1
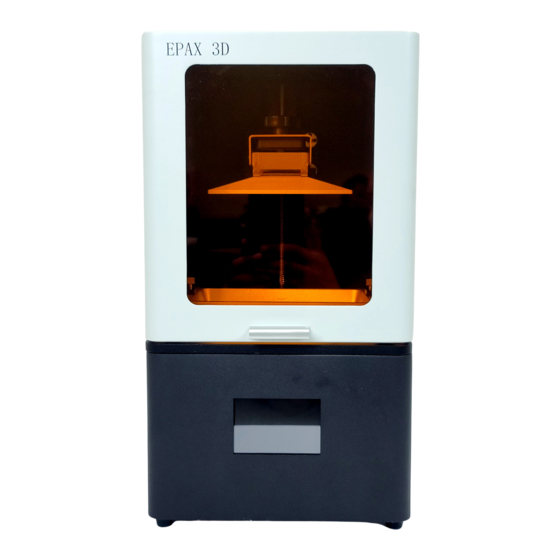
- Page 1 Read the User Manual before operating the product, and keep it at a convenient place near the printer. ...
-
Page 2: Table Of Contents
www.epax3d.com It is strongly recommended that you watch our tutorial videos before operating your printer for the first time. For additional instructions, videos, and resources, please visit ww.epax3d.com and visit the Support section. Contents ... -
Page 3: Technical Specifications
www.epax3d.com 1. Technical Specifications ... -
Page 4: Touchscreen Menu Structure
www.epax3d.com 2. Touchscreen Menu Structure ... -
Page 5: Slicing Software - Chitubox
www.epax3d.com 3. Slicing Software - ChiTuBox Installation For the latest slicer download, please visit: ttps://www.chitubox.com/download.html Slicer Settings The settings for your printer can be found online at: https://epax3d.com/pages/slicer-settings-chitubox Latest ChiTuBox also has settings pre-configured for some models. See below example. ... -
Page 6: Machine Settings
Machine Settings X1/X1-N and X1-DJ/X1-N-DJ with 5.5” 2K COLOR: X1-K with 6” 2K MONO: X10-2Kcolor with 10.1” 2K COLOR: ... - Page 7 www.epax3d.com X10-4Kmono with 8.9” 4K MONO: X133-4Kmono with 13.3” 4K MONO: X156-4Kcolor with 15.6” 4K Color: ...
- Page 8 Please use X133’s settings for this scenario. Resin settings are very different between color screen and mono screen. In general, a mono screen only needs 1/4th of a color screen’s normal exposure time. Below are settings for EPAX hard resin. ...
- Page 9 EPAX hard resin settings for EPAX X1-K 2K m ono screen: EPAX hard resin settings for EPAX X10 2K olor screen: ...
- Page 10 EPAX hard resin settings for EPAX X10 4K m ono screen: EPAX hard resin settings for EPAX X133 4K m ono screen: ...
- Page 11 EPAX hard resin settings for EPAX X156 with 4K 13.3” m ono or 14” m ono screen: Please use X133’s 4K mono screen resin settings. As you can see, the major difference between different sizes of printers and color/mono screens are: ...
-
Page 12: Print Settings
EPAX Resins EPAX developed below resins for our customers. They have been printed continuously in our factory for our printer R&D and testing needs. Print Settings The correct Print Settings are critical for successful and detailed prints, but there is an acceptable ... -
Page 13: Slicer Operations
There are many useful operations in the ChiTuBox slicer. If you need additional assistance, remember that our Facebook page is a great resource. You can also email or phone EPAX directly and we will be glad to help. Here is more information about the most important setting recommendations/ranges: ... - Page 14 Make sure not to remove the USB until your file is completely exported. If ejected before being 100% saved, your model will be incomplete when printed. If you are printing the EPAX test file provided on the USB, you do not need to slice it first. It is ready to print. ...
- Page 15 You will be presented with the option to save or send the file to the network. Select “Network Sending,” and you should see all of the EPAX printers that are connected to your network. If this is your first time, ...
-
Page 16: First Printing
www.epax3d.com 4. First Printing Make sure your machine is placed on a stable, flat surface. Install the Build Platform Install the build platform into the Z-axis platform bracket. Make sure you slide the platform plate right under the black screw knob (do not unscrew it all the way off). - Page 17 www.epax3d.com 2. Load Resin You will notice three lines in the vat that are used for measurement purposes. Pour resin into the vat slowly. We recommend starting with the least amount of resin possible for the test print - just above the first measurement line is sufficient.
-
Page 18: Post-Printing Treatment
www.epax3d.com For the first print/new model, it is a good idea to pause the printing after around 30 minutes to confirm that the first layers stuck to the build platform. Resume printing if it looks good, If the print does not stick to build platform, then you need to modify your design by adding more support, changing orientation, or adjusting the first several layers’ ... -
Page 19: Troubleshooting
www.epax3d.com 6. Troubleshooting There are many troubleshoot resources available online. You can find a list of error codes and tips here: ttps://epax3d.com/pages/troubleshooting You can also join our Facebook Group to get help from other users, especially if you need help tuning slicer settings. -
Page 20: Warnings
● For printer instructions, videos, firmware updates, and more please visit ww.epax3d.com . ● You can also search “EPAX 3D” on Youtube. ● Customer Support Email: support@epax3d.com ● Warranty: 1 year US warranty for the printer and parts, except the LCD curing screen, film, ...
Need help?
Do you have a question about the X1 and is the answer not in the manual?
Questions and answers