
Related Manuals for Yamaha RX-V595aRDS


Summary of Contents for Yamaha RX-V595aRDS
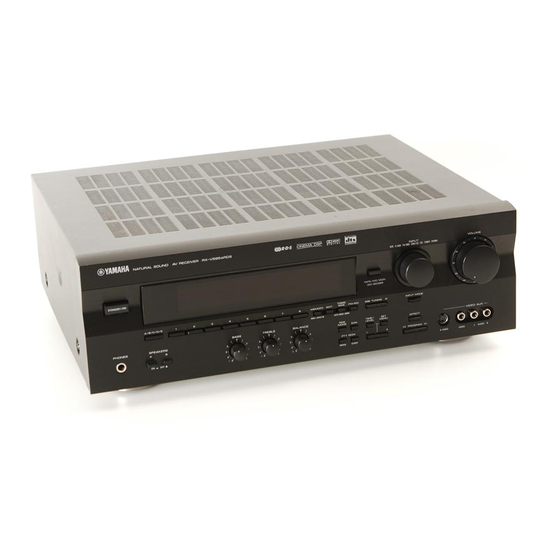
- Page 1 RX-V595aRDS Natural Sound AV Receiver Ampli-Tuner audio-vidéo OWNER’S MANUAL MODE D’EMPLOI BEDIENUNGSANLEITUNG BRUKSANVISNING MANUALE DI ISTRUZIONI MANUAL DE INSTRUCCIONES GEBRUIKSAANWIJZING...
-
Page 2: Supplied Accessories
SUPPLIED ACCESSORIES ACCESSOIRES FOURNIS MITGELIEFERTE ZUBEHÖRTEILE MEDFÖLJANDE TILLBEHÖR ACCESSORI IN DOTAZIONE ACCESORIOS INCLUIDOS BIJGELEVERDE ACCESSOIRES • Indoor FM Antenna • Antenne FM intérieure • UKW-Innenantenne • Inomhus-FM-antenn • Antenna FM interna • Antena FM interior • FM-binnenantenne • AM Loop Antenna •... -
Page 3: Table Of Contents
Dolby Digital Decoder Dolby Pro Logic Decoder DTS Decoder CINEMA DSP: Theater-like Sound Experience by the Combination of YAMAHA DSP Technology and Dolby Digital, Dolby Pro Logic or DTS Automatic Input Balance Control for Dolby Pro Logic decoding SUPPLIED ACCESSORIES ... 2 FEATURES ... -
Page 4: Caution
Using this unit with a higher voltage than specified is dangerous and may result in fire or other accidents. YAMAHA will not be held responsible for any damage resulting from the use of this unit with a voltage other than that specified. -
Page 5: Features Of The Sound Effects
Extensive research into the exact nature of the sonic reflections that create the ambience of a large hall has made it possible for YAMAHA engineers to bring you this same sound to your listening room, so you’ll feel all the sound of a live concert. -
Page 6: Dolby Digital
Dolby Digital Dolby Digital is the next level of the Dolby Surround sound system that was developed for 35 mm-film movies by employing low bit-rate audio coding. Dolby Digital is a digital surround sound system that provides completely independent multi-channel audio to you. Dolby Digital provides five full-range channels in what is sometimes referred to as a “3/2”... -
Page 7: Cinema Dsp
Dolby Stereo theater. Refer to pages 37 to 38 for the DSP program. However, YAMAHA DSP technology allows you to create nearly the same sound experience as that of a large movie theater in your home by compensating for the lack of presence and... -
Page 8: Front Panel
CONTROLS AND THEIR FUNCTIONS FRONT PANEL NATURAL SOUND AV RECEIVER STANDBY/ON A / B / C / D / E PHONES SPEAKERS Refer to pages 44 to 49 for the remote control. STANDBY/ON Press this switch to turn on the power of this unit. Press it again to set this unit in the standby mode. - Page 9 INPUT MODE This button switches between the DVD/LD and TV/DBS input signal modes. VOLUME This control is used to raise or lower the volume level. PHONES jack When you use headphones, connect the headphones to the PHONES jack. You can listen to the sound to be output from the main speakers through the headphones.
-
Page 10: Display Panel
DISPLAY PANEL Multi-information display This displays various information, for example the station frequency, preset station number and name of the selected input source. MEMORY indicator When MEMORY is pressed, this indicator flashes for about five seconds. During this period, the displayed station can be stored in the memory. -
Page 11: Speakers To Be Used
LFE (low frequency effect) sound with high fidelity when playing back a source that is Dolby Digital or DTS-decoded. The YAMAHA Active Servo Processing Subwoofer System is ideal for natural and lively bass reproduction. -
Page 12: Connections
(left) to L, R (right) to R, “+” to “+” and “–” to “–”. Also, refer to the owner’s manual for each component to be connected to this unit. * If you have YAMAHA components numbered as !, #, $, etc. on the rear panel, connections can be made easily by making sure to connect the output (or input) terminals of each component to the same-numbered terminals of this unit. - Page 13 CONNECTING TO DIGITAL (COAXIAL AND/OR OPTICAL) TERMINALS If your DVD (LD) player, TV/DBS tuner, etc. are equipped with coaxial or optical digital audio signal output terminals, they can be connected to this unit’s COAXIAL and/or OPTICAL digital signal input terminals. Digital audio signals are transmitted with less loss than analog audio signals.
-
Page 14: S Video Cable
CONNECTING TO S VIDEO TERMINALS If you have a VCR and a monitor equipped with “S” (high- resolution) video terminals, those terminals can be connected to this unit’s S VIDEO terminals. Connect the VCR’s “S” video input and output terminals to this unit’s S VIDEO VCR OUT and IN terminals, respectively, and connect the monitor’s “S”... -
Page 15: Impedance Selector Switch
CONNECTING TO AN EXTERNAL DECODER This unit is equipped with additional 6-channel audio signal input terminals for inputting signals from an external decoder to this unit. Connect the 6-channel audio signal output terminals of the decoder to the EXTERNAL DECODER INPUT terminals of this unit. -
Page 16: Connecting Speakers
If you have a subwoofer with built-in amplifier, including the YAMAHA Active Servo Processing Subwoofer System, connect the SUBWOOFER OUTPUT terminal of this unit to the input terminal of the subwoofer system. -
Page 17: How To Connect
How to connect Connect the SPEAKERS terminals to your speakers with wire of the proper gauge, cut as short as possible. If the connections are faulty, no sound will be heard from the speakers. Make sure that the polarity of the speaker wires is correct, that is the + and – markings are observed. -
Page 18: Antenna Connections
ANTENNA CONNECTIONS Each antenna should be correctly connected to the designated terminals, referring to the following diagram. Both AM and FM indoor antennas are included with this unit. In general, these antennas will probably provide sufficient signal strength. Nevertheless, a properly installed outdoor antenna will give clearer reception than an indoor one. If you experience poor reception quality, an outdoor antenna may result in improvement. -
Page 19: Adjustments Before Using This Unit
ADJUSTMENTS BEFORE USING THIS UNIT SELECTING THE OUTPUT MODES This unit provides you with the following five functions to determine the method of distributing output signals to speakers suitable for your audio system. When speaker connections have all been completed, select the proper setting for each function to make the best use of your speaker system. -
Page 20: Adjustment Method
ADJUSTMENT METHOD Adjustments should be made while watching the information on this unit’s display. When adjusting with the remote control, set the SELECTOR DIAL to the AMP/TUN or DSP position on the remote control. Turn the power on. Front panel Press SET MENU once or more to select the function “CNTR”... -
Page 21: Speaker Balance Adjustment
SPEAKER BALANCE ADJUSTMENT This procedure lets you adjust the sound output level balance between the main, center and rear speakers by using the built-in test tone generator. When this adjustment is performed, the sound output level heard at the listening position will be the same from each speaker. - Page 22 Set BASS, TREBLE and BALANCE to the “0” position. Front panel Press TEST so that “TEST LEFT” appears on the display. Remote control Turn up the volume. Remote control You will hear a test tone (like pink noise) from each speaker for about two seconds in following order: left main speaker, center speaker, right main speaker, right rear speaker and left rear speaker.
- Page 23 Adjust the sound output levels of the center speaker and the rear speakers so that they become almost the same as that of the main speakers. Press TIME/LEVEL once or more to select the speaker to be adjusted so that “CENTER”, “R SUR.” or “L SUR.” appears on the display.
-
Page 24: Basic Operation
TO PLAY A SOURCE When using the remote control • Set the SELECTOR DIAL to the AMP/TUN position on the remote control. • To operate the CD player, DVD/LD player, tape deck, MD recorder, or other components with this remote control, set the SELECTOR DIAL to the component to be used. - Page 25 For a DVD/LD or TV/DBS source, the current input mode is also shown. * To change the input mode for the DVD/LD or TV/DBS source, press INPUT MODE (or the button that you have pressed to select the input source in step 3 on the remote control) once or more until the desired input mode is shown on the display.
- Page 26 Notes on using INPUT • The audio source selected by INPUT will not be played if the “TAPE/MD MON” indicator lights up or if “EXT. DECDR” is displayed. • If you select a video source by INPUT without canceling the selection of TAPE/MD MON / EXT.
- Page 27 TO RECORD A SOURCE ON TAPE, MD OR VIDEO CASSETTE Select the source to be recorded. Front panel Remote control Play the source and then turn up the volume to confirm the input source. (See page 28 for detailed information on tuning.) Front panel Remote control...
-
Page 28: Automatic Tuning
Quick automatic-search tuning (AUTOMATIC TUNING) is effective when station signals are strong and there is no interference. However, if the signal from the station you want to select is weak, you must tune in to it manually (MANUAL TUNING). AUTOMATIC TUNING Set the SELECTOR DIAL to the AMP/TUN position on the remote control and select TUNER as the input source. -
Page 29: Manual Preset Tuning
MANUAL PRESET TUNING This unit can store station frequencies to be selected by tuning. With this function, you can recall any desired station simply by selecting the preset station number with which it was stored. Up to 40 stations (8 stations x 5 groups) can be stored. To store stations Tune in to the desired station. -
Page 30: To Recall A Preset Station
To recall a preset station Select the group of preset stations. Front panel Select the preset station number. Front panel Notes • A new setting can be stored in place of the former one. • For presets, the setting of the reception mode (stereo or Remote control monaural) is stored along with the station frequency. - Page 31 AUTOMATIC PRESET TUNING (for RDS stations only) You can also make use of the automatic preset tuning function for RDS stations only. This function enables the unit to perform automatic tuning and to sequentially store RDS stations with strong signals. Up to 40 stations can be stored automatically in the same way as that for manual preset tuning on page 29.
-
Page 32: Exchanging Preset Stations
Notes • You can manually replace a preset station with another FM or AM station by simply following the procedure in the section “To store stations” on page 29. • An automatic preset tuning search will be performed through all RDS network frequencies until stations have been stored up to E8. -
Page 33: Receiving Rds Stations
RECEIVING RDS STATIONS Radio Data System (RDS) is a data transmission system gradually being introduced by FM stations in many countries. Stations using this system transmit an inaudible stream of data in addition to the normal radio signal. RDS data contains various information such as PI (Program Identification), PS (Program Service name), PTY (Program Type), RT (Radio Text), CT (Clock Time), EON (Enhanced Other Networks), etc. - Page 34 PTY SEEK By designating a program type, the unit automatically searches all preset RDS stations that are broadcasting a program of that type. * There are 15 program types to classify RDS stations. Press PTY SEEK MODE to set the unit in the PTY SEEK mode.
-
Page 35: Eon Function
EON FUNCTION This function uses the EON data service on the RDS station network. By simply selecting the desired program type (NEWS, INFO, AFFAIRS or SPORT), the unit will automatically monitor all preset RDS stations that broadcast a program of that type and switch from the program being currently received to that program when the broadcast starts. -
Page 36: Setting The Sleep Timer
SETTING THE SLEEP TIMER The SLEEP timer can be used to make this unit automatically switch to the standby mode. When you are going to sleep while enjoying a broadcast or other desired input source, this timer function is useful. The SLEEP timer can only be controlled with the remote control. -
Page 37: Sound Field Program
The operation of built-in decoders (Dolby Pro Logic, Dolby Digital and DTS) can be controlled by selecting a corresponding DSP program incorporating the combined operation of YAMAHA DSP and Dolby Surround, Dolby Digital or DTS. The following list gives you a brief description of the sound fields produced by each of the DSP programs. Keep in mind that most of these are precise digital re-creations of actual acoustic environments. - Page 38 PROGRAM CINEMA DSP Program [1] 70 mm MOVIE THEATER ( • Input source : Dolby Surround 2-ch Dolby Digital • Output channel : 3 channels • DSP : 2 (presence & surround) [2] 70 mm MOVIE THEATER – DOLBY D. ( •...
- Page 39 PLAYING A SOURCE WITH THE DIGITAL SOUND FIELD PROCESSOR (DSP) EFFECT Follow steps 1 to 7 shown in “TO PLAY A SOURCE” on pages 24 to 25. Select the desired DSP program that is suitable for the source. Front panel Remote control Press DSP.
-
Page 40: Adjustment Method
ADJUSTING THE DELAY TIME AND SPEAKER OUTPUT LEVELS When using the digital sound field processor with the Dolby Pro Logic decoder, the Dolby Digital decoder or the DTS decoder, you can adjust the delay time between the main sound and sound effect, and each speaker’s output level as you prefer. Adjustment method When adjusting with the remote control, set the SELECTOR DIAL to the AMP/TUN or DSP position on the... -
Page 41: Adjusting The Delay Time
Adjusting the delay time You can adjust the time difference between the beginning of the sound from the main speakers and the beginning of the sound effect from the rear speakers. The larger the value, the later the sound effect is generated. This adjustment can be individually made to all programs. -
Page 42: Adjustments In The "Set Menu" Mode
ADJUSTMENTS IN THE “SET MENU” MODE The following ten types of functions will maximize the performance of your system and expand your enjoyment for audio listening and video watching. CNTR (CENTER SPEAKER) REAR (REAR SPEAKERS) MAIN (MAIN SPEAKERS) BASS (LFE/BASS OUT) M.LVL (MAIN LEVEL) D.D.LFE (DOLBY DIGITAL LFE LEVEL) - Page 43 C.DELAY [Adjusting the delay of center sounds (dialog, etc.)] Control range: 0 ms to 5 ms (in 1 ms steps) Preset value: 0 ms * This adjustment is effective only when Dolby Digital or DTS is being decoded and the signals of the selected source encoded with Dolby Digital or DTS contain center-channel signals.
-
Page 44: Remote Control
The position name is displayed in this window. REMOTE CONTROL TAPE/MD: The code for a YAMAHA tape deck is preset. (Be sure to preset the proper code when operating a YAMAHA MD recorder.) The code for a YAMAHA CD player is preset. DSP: SELECTOR... - Page 45 The lightly marked buttons do not function. AMP/TUN Indicator window: Displays the names of components which can be controlled. TV POWER Note: TV POWER and TV VOLUME function if you have preset the code for your TV. POWER This button turns the unit on. INPUT Press one of these buttons to select the required input source.
-
Page 46: Disp (Display)
(PAUSE) Press this button to give a pause in operation. This button functions as PAUSE/ STOP* for operating YAMAHA CD players under factory settings. (STOP) Press this button to stop operation. This button functions as PAUSE/STOP* for operating YAMAHA CD players under factory settings. - Page 47 DVD player. (LD) This button turns the unit on if you have preset the code for the YAMAHA LD player. If another code for your LD player whose remote control has a power button is preset, the button will turn on the LD player.
- Page 48 The lightly marked buttons do not function. See “AMP/TUN” on page 45 for those buttons which are not described here. Please refer to the owner’s manual for details of each component. Note: TV POWER, TV VOLUME and TV INPUT function if you have preset the code for your TV.
-
Page 49: Notes About The Remote Control
NOTES ABOUT THE REMOTE CONTROL Battery installation Turn the remote control over and slide the battery compart- ment cover in the direction of the arrow. Insert the batteries (AA, R6 or UM-3 type) according the polarity markings on the inside of the battery compartment. Close the battery compartment cover. -
Page 50: Setup Codes
Factory-set codes POSITION Component Code 0037 CBL/DBS DBS tuner 2455 3072 DVD/LD DVD player 4545 YAMAHA CD player 6187 YAMAHA TAPE/MD Tape deck 8524 YAMAHA We recommend that you write all the code numbers you have preset on the “Quick Reference Card.”... -
Page 51: Troubleshooting
If the unit fails to operate normally, check the following points to determine whether the fault can be corrected by the simple measures suggested. If it cannot be corrected, or if the fault is not listed in the SYMPTOM column, disconnect the power cord and contact your authorized YAMAHA dealer or service center for help. SYMPTOM... - Page 52 SYMPTOM No sound from the effect speakers. No sound from the rear speakers. No sound from the center speaker. The sound field cannot be recorded. The DVD/LD, TV or DBS source cannot be recorded on a tape deck, MD recorder or VCR connected to this unit.
- Page 53 SYMPTOM The remote control does not work. The sound is degraded when listening with the headphones to a CD player or tape deck that is connected to this unit. There is noise interference from digital or high-frequency equipment or the unit. When playing back a source encoded with DTS SYMPTOM A loud hissing noise is heard when you...
-
Page 54: Specifications
AUDIO SECTION Minimum RMS Output Power 8 ohms, 20 Hz to 20 kHz, 0.04% THD MAIN L/R ... 65 W + 65 W CENTER ... 65 W REAR L/R ... 65 W + 65 W 8 ohms, 1 kHz, 0.07% THD MAIN L/R ... -
Page 55: List Of Manufacturers' Codes
LIST OF MANUFACTURERS’ CODES LISTES DES CODES FABRICANT VERZEICHNIS DER HERSTELLER CODES LISTA ÖVER TILLVERKARKODER Elta Emerson Erres Abex 0032 Expert Acura 0009 Ferguson Admiral 0093, 0163, 0213 Adyson 0217, 0032 Akai 0208, 0361 Fidelity Akura 0218, 0264, 0369 Finlandia Alaron 0216 Finlux... - Page 56 Thomson 0109, 0196, 0198, Axis 0205, 0287, 0333, 0343, 0349 Barcom Thorn 0037, 0072, 0035, 0074, Beko 0084, 0190, 0192, 0361 Best Thorn-Ferguson 0343 Blaupunkt Boca Tomashi 0282 Toshiba 0036, 0035, 0070, 0243 Brain Wave Trical 0157 Bush Triumph 0243 Uher 0206, 0320, 0303 Cambridge...
- Page 57 Video Concepts Quarter 3046 Videosonic Quartz 3046 Wards Quasar 3162 Quelle 3081 White Westinghouse 3106, 3042, 3048, 3240 XR-1000 3403 Yamaha Radio Shack 3000, 3037 Yamishi Radiola 3081 Yokan Radix 3037 Yoko Randex 3037 Zenith Realistic 3000, 3037, 3048, 3046, 3047, 3104...
- Page 58 YAMAHA ELECTRONICS (UK) LTD. YAMAHA HOUSE, 200 RICKMANSWORTH ROAD WATFORD, HERTS WD1 7JS, ENGLAND YAMAHA SCANDINAVIA A.B. J A WETTERGRENS GATA 1, BOX 30053, 400 43 VÄSTRA FRÖLUNDA, SWEDEN YAMAHA MUSIC AUSTRALIA PTY, LTD. 17-33 MARKET ST., SOUTH MELBOURNE, 3205 VIC., AUSTRALIA...
-
Page 59: Quick Reference Card
Quick Reference Card AMP/TUN POWER STANDBY SELECTOR DIAL INPUT EXT. DEC. TEST A/B/C/D/E EFFECT ON/OFF PRESET UP DOWN VOLUME TV VOLUME MUTE SLEEP TV POWER REC/PAUSE DIR A (TAPE) REWIND (TAPE) SEARCH (MD) SET MENU TIME/LEVEL DSP program TAPE/MD POWER POWER INPUT DISC SKIP... - Page 60 Quick Reference Card DVD MENU POWER Numeric CHANNEL buttons CLEAR CHANNEL ENTER DISC SKIP CHANNEL UP DOWN TV VOLUME TV POWER TITLE/INDEX TV POWER TV INPUT VCR REC (*1) MENU UP MENU LEFT MENU RIGHT MENU SELECT MENU DOWN SET UP RETURN TITLE MENU...
Need help?
Do you have a question about the RX-V595aRDS and is the answer not in the manual?
Questions and answers