Yamaha S03 Owner's Manual
Yamaha music synthesizer owner's manual
Hide thumbs
Also See for S03:
- Service manual (67 pages) ,
- Data list (28 pages) ,
- Owner's manual (26 pages)
Table of Contents
Advertisement
Quick Links
Advertisement
Table of Contents

Related Manuals for Yamaha S03


Summary of Contents for Yamaha S03
- Page 1 OWNER’S MANUAL...
-
Page 2: Special Message Section
This product should be used only with the components supplied or; a cart, rack, or stand that is recommended by Yamaha. If a cart, etc., is used, please observe all safety markings and instructions that accompany the accessory product. - Page 3 I SAVING USER DATA • Save all data to an external device such as the Yamaha MIDI Data Filer MDF3, in order to help prevent the loss of important data due to a malfunction or user operating error.
-
Page 4: Package Contents
Thank you for purchasing the Yamaha S03 Music Synthesizer. In order to get the most out of your new S03 and its sophisticated functions, we suggest you read through this manual thoroughly. Also keep it in a safe, convenient place so that you can regularly refer to it when necessary. -
Page 5: About This Manual
This manual is basically divided into two sections: I Basics Section (Page 8) Explains how to get started with the S03, it’s overall structure, and how to use its main features and functions. I Reference Section (Page 55) Explains the parameters of the S03’s various modes. -
Page 6: Table Of Contents
Using Multi Mode ... 37 Playing in Multi Mode ... 37 Using the S03 as a Multitimbral Tone Generator (Multi Edit) .. 38 Performing Live While Playing Back a Song File... 40 Splitting the Keyboard — Setting Upper and Lower Ranges for the Voices ... 41 Layering Two Voices (Parts) Together... - Page 7 • Storing the edited Multi to the S03 internal (USER) memory ...Multi Store (Page 69) • Saving S03 settings (Voice/Multi/MIDI/Utility) to an external device such as a computer ... Saving S03 Settings to an External Device (Page 42) Connecting the S03 to other devices •...
-
Page 8: Basics Section
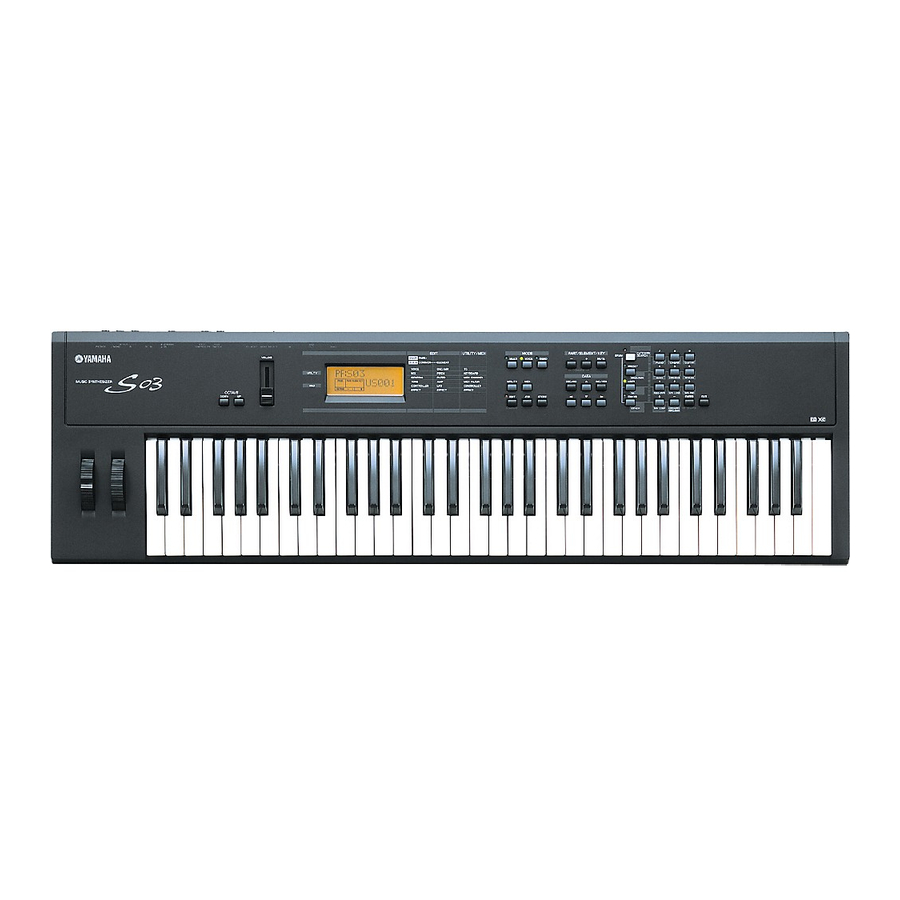
Basics Section The Controls & Connectors Front Panel OUTPUT STANDBY FOOT FOOT PHONES MONO DC IN CONTROLLER SWITCH TO HOST HOST SELECT VOLUME MUSIC SYNTHESIZER OCTAVE DOWN 1 OCTAVE [UP] and [DOWN] buttons (Page 36) Press either of these buttons to shift the note range of the keyboard up or down in octaves. - Page 9 9 DATA buttons (Page 30) These are used during editing for selecting various pages and for setting parameter values. 9-1 [DEC/NO] button (Page 31) Use this to decrease the value of the selected parameter. To decrease the value by 10, simultaneously hold down this button and press the [INC/YES] button.
-
Page 10: Rear Panel
Even when the switch is in the “STANDBY” position, electricity is still flowing to the instrument at a minimum level. When not using the S03 for an extended period of time, be sure to unplug the AC power adaptor from the wall AC outlet. -
Page 11: Before Use
This section explains how to connect to an AC power source, audio and MIDI devices, and a computer system. Only switch the S03 on after you have made all the necessary connections. We strongly recommended you read this section BEFORE using the S03. -
Page 12: Connecting External Midi Equipment
Connecting to a Mixer If you want to integrate the S03 into a larger system with other instruments and additional audio processing capabilities, connect it to a mixer, amplifier and stereo monitor system as shown below. Speaker Amplifier Mixer OUTPUT L... -
Page 13: Connecting To A Personal Computer
MIDI OUT With the included Voice Editor program, for instance, you can edit the Voices of the S03. There are two ways to connect your S03 to a computer: MIDI IN 1: Serial connection (the computer’s serial port to MIDI OUT the S03’s TO HOST terminal) -
Page 14: Connecting Controllers
(sequencer, editor, etc.), compatible with your computer platform. Connecting Controllers The S03 has controller jacks on the rear panel, including FOOT SWITCH and FOOT CONTROLLER. You can connect optional controllers such as a footswitch (the FC4 or FC5) and foot controller (the FC7) to control tone, volume, pitch and other parameters. -
Page 15: Powering Up
When not using the S03 for an extended period of time, be sure to unplug the AC power adaptor from the wall AC outlet. n Before you switch your S03 on or off, first turn down the volume of any connected audio equipment. 1 Press the STANDBY/ON switch... -
Page 16: Demo Playback
Demo Playback The S03 features a variety of demo songs, showcasing its dynamic sound and sophisticated functions. n Make sure synthesizer is ready for playback. Details are given in the section “Before Use” on page 11. At the “Demo” screen, any data in the instrument’s User Voice memory will be overwritten by the data for the demo song. -
Page 17: Overview Of The S03
Overview of the S03 The S03 has a wide variety of advanced and convenient features. This section gives you an overview of these features. The following diagram shows the various component sections or “blocks” of the S03. Tone Generator Controller This block consists of the keyboard, Pitch Bend and Modulation wheels and so on. -
Page 18: Maximum Polyphony
Maximum Polyphony The maximum polyphony of the S03 is 64 notes. However, the actual note polyphony will vary depending on the number of Elements in the Voice. To calculate the actual polyphony, divide the total polyphony of 64 by the number of Elements in the Voice. -
Page 19: About The Modes
About the Modes The S03 has various modes, each covering a different set of operations and functions. Utility Mode Multi Mode (Page 55) Multi Play Mode Select this mode when you want to use the S03 as a multi-timbral tone generator. -
Page 20: Function Tree Chart
Function Tree chart LCD Display (parameter name) Multi Edit Common GENERAL Name Total Vol (Total Volume) Transpose EFFECT RevEF (Reverb Effect Type) Reverb Parameters Rev Return (Reverb Return) Reverb Pan ChoEF (Chorus Effect Type) Chorus Parameters Cho Return (Chorus Return) Chorus Pan SndCho→Rev (Send Chorus to Reverb) VarEF (Variation Effect Type) - Page 21 LCD Display (parameter name) Voice Edit (Drum) Common GENERAL Name OrgKt (Original Kit) OSC/MIX (Oscillator/Mixer) Level Alt.Group (Alternate Group) Key Assign RxNoteOff/On (Receive Note On/Off) PITCH PitchCors/Fine (Pitch Coarse/Fine) FILTER Cutoff/Resonance AMP (Amplitude) EG Attack/Decay1/Decay2(EG Attack/Decay1/Decay2 Rate) EFFECT ReverbSend ChorusSend Voice Job Init (Initialize) CpyElm (Copy Element)/CpyKey (Copy Drum Key)
-
Page 22: Parameter Table
Since the owner’s manual page reference is also provided, you can quickly find the corresponding explanation by checking the currently selected mode and PAGE number on the S03, and referring to this table. n When the parameter is the same for both the Voice mode and Multi mode, the manual page reference is generally for the explanation in the Multi mode. - Page 23 Parameter Type LCD Display (parameter name) OSC/MIX (Oscillator/Mixer) Element Sw (Element Switch) Wave Selection Level Alt.Group (Alternate Group) Key Assign RxNoteOff/On (Receive Note On/Off) PITCH NoteShift/Detune PchSclSns (Pitch Scale Sensitivity) PchSclCN (Pitch Scale Center Note) PEG R (PEG Rate) PEG L (PEG Level) PEGSclSns (PEG Scale Sensitivity) PEGSclCN (PEG Scale Center Note) PEGRtVel (PEG Rate Velocity)
-
Page 24: Multis
A Multi consists of up to 16 Parts, each of which can play a Normal Voice or Drum Voice Part. By assigning different Voices and MIDI channels to each part, and by using a sequencer or computer for song data playback, you can have a complete ensemble of 16 independent instrument sounds. -
Page 25: Voices
Tone Generator Voice Playing a Voice Preset 128 Preset Voice PR001~128 * Drum Voices XG121~128 are not of the GM/XG set, but are original drum kits specifically programmed for the S03. Voices Multi Play Mode Controllers External MIDI sequenser Tone Generator... -
Page 26: Overview Of Voices/Waves
A total of 480 (XG) and 128 (Preset) Normal Voices plus 20 Drum Voices are available as presets. You can create and store your own original Voices; the S03 has User memory space for 128 User Normal Voices and two User Drum Voices. -
Page 27: Waves
Waves Waves (or waveforms) are the basic sonic building blocks, and are used as Elements in making up a Voice. A total of 453 high-quality preset Waves are available. As shown in the following illustration, when creating a Voice, you can select the Wave to be used as an Element and then set its level, pitch, tone and other parameters. -
Page 28: Basic Operations
Basic Operations In this section, you’ll learn the fundamental operations of the S03. Selecting a Mode There are several operation modes — the Multi Play mode, Voice Play mode, etc. — each of which enables you to work efficiently with the S03’s various functions. -
Page 29: Other Modes
3 Voice Edit Mode (Pages 47, 70) Press the [EDIT] button in the Voice Play mode. To exit to another mode, simply press the respective button for that mode. Press the [EXIT] button to return to the Voice Play mode. PAGE PART ELEM... -
Page 30: Selecting A Screen
Selecting a Screen You can switch between screens by using the [L]/[M], [E]/[F], [+]/[–] and [EXIT] buttons. [L]/[M] buttons Many of the displays consist of different screens. Use the [L]/[M] buttons to select the various screens. Previous screen (PAGE) DATA Next screen (PAGE) When selecting the various display pages, an arrow appears at the right of the LCD, indicating the... -
Page 31: Exit Button
[EXIT] button Press the [EXIT] button to move up (exit) in the hierarchical structure and return to the previous screen. PIANO ORGAN GUITAR BASS STRINGS BRASS REED/PIPE SYN LEAD SYN PAD ENTER SYN COMP CHROMATIC KEYBOARD PERCUSSION n Depending on the particular operation, the [EXIT] button performs other functions as well. - Page 32 Numeric keypad, [ENTER] button You can specify the value for the selected parameter by using the numeric keypad, then actually set that value by pressing the [ENTER] button. For example, to set a value of “100,” press (in order) the numeric keypad buttons [1], [0], and [0].
-
Page 33: Playing The S03
Playing the S03 Playing the Voices You can freely select and play Voices from the PRESET, USER and GM/XG memory groups, as explained below. n Details about voice, see page 25. n The user memory can contain up to 128 Normal Voices and 2 Drum Voices. - Page 34 The Drum Voices are stored in separate areas of the User and GM/XG memory sections. • To call up the User Drum memory (USDR1/ USDR2): Press the [USER] button while holding down the [DRUM] button. • To call up the GM/XG Drum memory •...
- Page 35 In this step, the lowest numbered Voice of the category is selected. n The S03 searches in the following order: PRESET, then USER, then GM/XG. 3 Press the [INC/YES] button to increment the Voice number in that category and press the [DEC/NO] button to decrement it.
- Page 36 Transposing the Octave If you need to raise or lower the keyboard note range for the Voice, you can use the OCTAVE[UP] button to raise the range by an octave and the OCTAVE [DOWN] button to lower it by an octave. You can shift the note range by up to three octaves in either direction.
-
Page 37: Using Multi Mode
Using Multi Mode Playing in Multi Mode In the Multi Play mode, you can select and play any of the Multis. n For more details about Multis, see page 24. n Up to 32 Multis can be stored in the USER (internal) memory. These Multi settings are available in Multi Edit mode (page 55). Here, we’ll show you how to get started with Multi Play after selecting a Multi. -
Page 38: Using The S03 As A Multitimbral Tone Generator (Multi Edit)
Multitimbral Tone Generator (Multi Edit) Multi mode lets you configure the S03 as a multitimbral tone generator for use with computer- based music software or external sequencers. If each track in a song file uses a different MIDI channel, then the Parts in a Multi can be each assigned to those MIDI channels correspondingly. - Page 39 1 After pressing the [MULTI] button, press the [EDIT] button (the respective LEDs will light). You are now in the Multi Edit mode. MODE MULTI VOICE DEMO UTILITY MIDI EDIT STORE COMPARE n Before entering the Multi Edit mode, you need to select a Multi for editing.
-
Page 40: Performing Live While Playing Back A Song File
file in the sequencer, the piano track is transmitted through MIDI channel 2. The MIDI data is received by the S03 which then plays the Voice for the Part assigned to MIDI channel 2. ) Repeat steps 3 to 9 above, but set up Part 3 for bass and to receive on MIDI channel 3. -
Page 41: Splitting The Keyboard - Setting Upper And Lower Ranges For The Voices
Splitting the Keyboard — Setting Upper and Lower Ranges for the Voices The illustration below shows an example in which the keyboard has been effectively divided into two spearate key ranges, letting you play one Voice over one range, and a second Voice over the other. In the following example, the Voices change at the note C3, letting you play a string Voice in the lower range and a piano Voice in the upper. -
Page 42: Layering Two Voices (Parts) Together
You can also use this function to record important S03 data at the beginning of a song, so that all your original settings and data are automatically reset when your play back the song. - Page 43 1 In the Multi mode, select the S03 Multi you want to transmit. 2 Press [JOB] to enter the Multi Job mode. 3 From the “BlkDmp” parameter (PAGE 5) in the Multi Job mode, select the data type for transmitting. Here, select “Curnt” (Current) to transmit the currently selected Multi data, then press the [ENTER] button.
-
Page 44: Using Controllers
Using Controllers The S03 is equipped with Pitch Bend and Modulation Wheels. By connecting an optional Foot Controller or Footswitch, you can also control a variety of parameters (such as changing the sound, changing Program Numbers, etc.) with your feet— and leave your hands free to play the keyboard. -
Page 45: Foot Controller
Foot Controller An optional Foot Controller (such as the FC7), connected to the FOOT CONTROLLER jack (page 10) on the rear panel, can be assigned to any one of a number of controller parameters. By using a foot controller for parameter control, both your hands are left free to play the keyboard (or to operate other controllers). -
Page 46: Foot Switch
Foot Switch An optional Yamaha FC4 or FC5 Foot Switch connected to the rear panel FOOT SWITCH jack (page 10) can be assigned to a range of parameters. This is designed for switch-type (on/off) controls such as incrementing/decrementing Voice or Multi numbers, and cannot be used for continuous control of a parameter. -
Page 47: Voice Edit
The following procedure shows you the fundamentals in creating and editing Voices. Of course, this is just one example; you are free to set any parameters in any way you like. Details about each parameter are given in the Reference section of this manual. n All parameter settings are stored along with the Voice itself. - Page 48 Element (1 to 4), press the [ buttons to switch to other screens. DATA The S03 has a huge variety of available parameters. As you change the display pages, an arrow mark on the right side of the display points to the parameter chart printed on the panel, indicating the parameter type and what aspect of the instrument it’s related...
- Page 49 3 Set the Common Parameters Each Voice consists of up to four Elements. Here, the parameters common to all Elements are explained. G GENERAL (Common General) In PAGES 1 to 4, you can set the Voice Name, Voice output settings and other general parameters. PAGE PART ELEM...
- Page 50 NtLmt-L/H (Note Limit Low/High) VelLmt-L/H (Velocity Limit Low/High) Set the note range for each Element (the range of notes on the keyboard over which the Element will sound) and also the velocity response (the range of note velocities within which the Element will sound).
- Page 51 In PAGES 13 to 22, you can use the filter to change the tonal characteristics of each Element, by adjusting overtones (harmonic tones) included in the waveform from the Element. The S03 employs an LPF (low pass filter). Only frequencies below this point are passed. You can also set the Filter Envelope Generator (FEG) for time variance of how the filter works, which results in a dynamic change...
-
Page 52: Storing Edited Voices
About EG Rate and Time (Voice Mode) The EG (Envelope Generator) processes and shapes the output level of the tone generator from the moment you press a key until the sound decays to silence. The level (Y-axis in the illustrations below) is a different aspect of the sound, depending on which EG is being used. -
Page 53: Reverb Section
System Effects apply to the overall sound, whether it is a Voice, a Multi. Insertion Effects, on the other hand, can be applied individually to each Voice. The S03 has two System Effect sections (Reverb and Chorus) plus a Variation Effect section (see below). -
Page 54: Effects In Multi Mode
Can be used as either System or Insertion effect. * The default value of Dry Level is 127. This cannot be set from the panel of the S03; however, it can be set by transmitting appropriate MIDI messages from an external device. -
Page 55: Reference Section
Reference Section Multi Edit In this mode, you can set Multi Edit parameters. These can roughly be divided into Common parameters, which apply to all Parts, and Part-specific parameters. n You need to select the Multi before entering Multi Edit mode (page 37). -
Page 56: Common (Settings For All Parts)
Common (Settings for all Parts) Here we explain how to edit common settings for all Parts in a Multi. There are two types available, each of which consists of multiple pages. n Refer to the Function Tree chart (page 20) or the Parameter Table (page 22). -
Page 57: Chorus Parameters
7. Reverb Pan Set the stereo pan position of the Reverb Effect. PAGE PART ELEM OCTAVE ❏ Settings: L63 (Left) ~ C (Center) ~ R63 (Right) n You can also enter the settings below using the numeric keypad. 1~63: L63~L01 64: C (Center) 65~127: R01~R63 8. -
Page 58: Variation Connection
15. VarConnect (Variation Connection) This determines how the Variation Effect is used in the signal processing chain — as an Insertion effect or as a System effect. PAGE PART ELEM OCTAVE ❏ Settings: INS (Insertion), SYS (System) n The function of the Variation Effect changes depending on this setting, as do the types of parameter changes. -
Page 59: Part (Settings For Each Part)
21. AC1VarCtl (AC1 Variation Effect Control Depth) This determines the degree to which the Assignable Controller 1 controls the Variation Effect. PAGE PART ELEM OCTAVE ❏ Settings: –64~+63 n This can be set only when Variation Connection (above) is set to “INS.” When Variation Connection is set to “SYS,”... - Page 60 USER ❏ Settings: US001~US128, USDR01~USDR02 PAGE PART ELEM OCTAVE GM/XG PAGE PART ELEM OCTAVE Use the [E] and [F] buttons to switch among the different banks for selecting program numbers. ❏ Settings: Bank Select: BK*** (Refer to the XG Voice List and XG Drum List in the separate Data List.
- Page 61 6. Rcv Ch (MIDI Receive Channel) Set the MIDI Receive Channel for each Part. Each Part receives MIDI messages according to the channel set here. Select “off” for Parts that you do not want to respond to MIDI. PAGE PART ELEM OCTAVE ❏...
- Page 62 10-1. VelSnsDpt (Velocity Sensitivity Depth) 10-2. VelSnsOfs (Velocity Sensitivity Offset) Set the Velocity Sensitivity and Velocity Offset for each Part. PAGE PART ELEM PAGE PART OCTAVE OCTAVE ❏ Settings: 0~127 I VelSnsDpt As illustrated below, a large setting will cause large changes in velocity when you play the keyboard.
- Page 63 Filter is the section of the tone generator that changes the tonal qualities of a Voice by passing only a limited frequency range and cutting signals outside that range. The S03 employs an LPF (low pass filter). ❏ Settings: –64 ~ +63 I Cutoff Set the Cutoff frequency of the low pass filter.
- Page 64 13-1. PEGIntL (PEG Initial Level) 13-2. PEGAtkTm (PEG Attack Time) 13-3. PEGRelL (PEG Release Level) 13-4. PEGRelTm (PEG Release Time) You can set PEG (Pitch Envelope Generator) Parameters for each Part. There are four parameters that control how the pitch changes from the moment a note is pressed on the keyboard to the moment it is released or the point at which the level has faded to zero.
- Page 65 15-1. Porta Sw (Portamento Switch) 15-2. PortaTime (Portamento Time) Set the Portamento parameters. Portamento creates a smooth transition from the pitch of the first note played to the pitch of the next. PAGE PART ELEM PAGE PART OCTAVE OCTAVE I Porta Sw Switch Portamento on or off.
-
Page 66: Ac1 (Assignable Controller 1)
19. AC1 CC No (AC1 Control Change Number) Determines the Control Change number for the AC1 (Assignable Controller 1) of each Part PAGE PART ELEM OCTAVE ❏ Settings: 0~95 n The AC1 CC No parameter in the Voice mode is set in the Utility mode (PAGE 7). -
Page 67: Var Send (Variation Send)
For Jobs that take longer to process, you will see the message “Excuting..” during processing. If you switch off the power to the S03 while this message is displayed, you risk corrupting your data. 7Press the [Multi] button to exit the Multi Job mode and return to the Multi Play mode. - Page 68 1. Init (Initialize) You can reset (initialize) all parameters of a Multi to their default settings. You can also selectively initialize certain parameters, such as Common settings, settings for each Part, and so on. Note that this does not return the Multi to its original state prior to editing.
-
Page 69: Multi Store
When you perform this, the settings for the destination Multi will be overwritten. Important data should always be backed up to computer, Yamaha MIDI Data Filer MDF3 or some other storage device. 1Press the [STORE] button after editing a Multi. -
Page 70: Voice Mode
Voice Edit There are two types of Voices: Normal Voices and Drum Voices. The following is an explanation of the parameters used to edit each Voice. n Details about the Voice types and the Voice Memories are given on Page 25. n For more information on playing Voices, see page 33. - Page 71 Common General (PAGES 1 to 4) Common Controller (PAGES 5 to 10) Common Effect (PAGES 11 to 17) The following is an explanation of the Common parameters used to edit each Voice. 1. Name You can set a Voice Name consisting of up to 8 characters.
-
Page 72: Variation Parameters
4-1. VelSnsDpt (Velocity Sensitivity Depth) 4-2. VelSnsOfs (Velocity Sensitivity Offset) The parameters and settings are the same as those for the Multis. For details, see page 62. 5-1. Porta Sw (Portamento Switch) 5-2. PortaTime (Portamento Time) 6. PB Range (Pitch Bend Range) 7. - Page 73 Element Oscillator/Mixer (PAGES 1 to 6) Element Pitch (PAGES 7 to 12) Element Filter (PAGES 13 to 22) Element Amplitude (PAGES 23 to 31) Element LFO (PAGES 32 to 35) The following is an explanation of the Element parameters used to edit each Voice. n The Element settings whose Element Switch is set to “off”...
- Page 74 6-1. VelLmt-L (Velocity Limit Low) 6-2. VelLmt-H (Velocity Limit High) Set the minimum and maximum values of the velocity range within which each Element will respond. Each Element will only sound for notes played within its specified velocity range. PAGE PART ELEM PAGE...
- Page 75 9-1. PEGAtkR (PEG Attack Rate) 9-2. PEGDcy1R (PEG Decay 1 Rate) 9-3. PEGDcy2R (PEG Decay 2 Rate) 9-4. PEGRelR (PEG Release Rate) You can set various Rate parameters (the time it takes for the pitch to change from one level to the next) for the Pitch Envelope Generator (PEG).
- Page 76 11-1. PEGSclSns (PEG Scale Sensitivity) 11-2. PEGSclCN (PEG Scale Center Note) You can set PEG scale parameters for each Element. These parameters control the PEG speed and the degree of pitch change according to the position of the notes played on the keyboard. PAGE PART ELEM...
- Page 77 Filter is the section of the tone generator that changes the tonal qualities of a Voice by passing only a limited frequency range and cutting signals outside that range. The S03 employs an LPF (low pass filter). I Cutoff Set the Cutoff frequency of the low pass filter. Only frequencies below this point are passed.
- Page 78 16-1. Flt BP1 (Filter Scale Break Point 1) 16-2. Flt BP2 (Filter Scale Break Point 2) 16-3. Flt BP3 (Filter Scale Break Point 3) 16-4. Flt BP4 (Filter Scale Break Point 4) Set the Break Points for each Element. BP1 to BP4 will be automatically be arranged in ascending order across the keyboard.
- Page 79 19-1. FEGHoldR (FEG Hold Rate) 19-2. FEGAtkR (FEG Attack Rate) 19-3. FEGDcy1R (FEG Decay 1 Rate) 19-4. FEGDcy2R (FEG Decay 2 Rate) 19-5. FEGRelR (FEG Release Rate) You can set various Rate parameters (the time it takes to get from one Level to the next) for the Filter Envelope Generator (FEG).
- Page 80 22-1. FEGAtkVel (FEG Attack Velocity) 22-2. FEGOthVel (FEG Other Velocity) You can set parameters controlling the sensitivity of the Filter Envelope Generator (FEG) to note velocity. PAGE PART ELEM PAGE PART OCTAVE OCTAVE I FEGAtkVel Determines the velocity sensitivity of the FEG Attack Rate.
- Page 81 25. AEGSclSens (AEG Scale Sensitivity) This determines the AEG scaling parameters for each Element. This parameter controls the degree of the AEG according to the positions of notes on the keyboard. n The availability of the AEG Scale parameter depends on the Break Point and Offset settings in the LvlScl display.
- Page 82 29-1. Lvl Ofs1 (Level Offset 1) 29-2. Lvl Ofs2 (Level Offset 2) 29-3. Lvl Ofs3 (Level Offset 3) 29-4. Lvl Ofs4 (Level Offset 4) Set the Amplitude Scaling Offset Levels. These Offsets are used by the Break Points (BP1/BP2/BP3/BP4). n Details about Amplitude Scaling are given later in the section “Amplitude Scaling Settings”...
-
Page 83: Lfo Speed
S&H I LFO Phase Determines whether or not the LFO is reset each time a note is pressed. ❏ Settings: off, on 33. LFO Speed Determines the speed of the LFO waveform. A larger setting produces a faster speed. PAGE PART ELEM OCTAVE... -
Page 84: Short Delay
I PLFODelay Determines the delay time before the LFO comes into effect. A higher value produces a longer delay time. Short Delay Key on Long Delay Key on I PLFO Fade Determines the time it takes for the LFO effect to fade in (after the Delay time has elapsed). -
Page 85: Drum Common General
Drum Common General (PAGES 1 to 2) For Drum Voices, there are two Common General parameters, shown below. 1. Name The parameters and settings are the same as for Normal Voices. Details are given on Page 71. 2. OrgKt (Original Kit) This selects the Original Kit (the Wave set in which a different sound is assigned to each key). - Page 86 5-1. RxNoteOff (Receive Note Off) 5-2. RxNote On (Receive Note On) PAGE PART ELEM PAGE PART OCTAVE OCTAVE ❏ Settings: off, on I RxNoteOff Select whether MIDI Note Off messages are received by each Drum Key. I RxNote On Select whether MIDI Note On messages are received by each Drum Key.
-
Page 87: Voice Job
9. ReverbSend Determines the send level of the Reverb Effect. PAGE PART ELEM OCTAVE ❏ Settings: 0 ~ 127 10. ChorusSend Determines the send level of the Chorus Effect. PAGE PART ELEM OCTAVE ❏ Settings: 0 ~ 127 Voice Job You can perform various operations (Jobs) in the Voice Job mode. - Page 88 1. Init (Initialize) You can reset (initialize) all parameters of a Voice to their default settings. You can also selectively initialize certain parameters, such as Common settings, settings for each Element/Drum Key, and so on. Note that this does not return the Voice to its original state prior to editing.
-
Page 89: Voice Store
When you perform this, the settings for the destination Voice will be overwritten. Important data should always be backed up to computer, Yamaha MIDI Data Filer MDF3 or some other storage device. 1Press the [STORE] button after editing a Voice. -
Page 90: Master Tune
The Utility mode contains eight parameter pages, including global settings for the entire S03 system, as well as certain controller settings. n For instructions on how to enter the Utility mode, see page 28. n MIDI settings are made from the MIDI mode (page 93). - Page 91 easy This curve is also designed to increase the volume level with a softer playing style. However, the volume level is stable in all registers since the velocity curve in the mid range is close to Normal. Volume Keyboard playing strength wide A softer playing style lowers the volume level and a stronger playing style increases the volume level.
-
Page 92: Utility Job
❏ Settings: off (not bypassed), on Controller/Effect Utility Job In the Utility Job mode, you can restore your synthesizer’s factory default settings of the S03 (Factory Set). Factory Set (Restore Factory Defaults) This lets you restore the synthesizer’s default Internal Voices (User Memory) and Multis, as well as its System and other settings. -
Page 93: Midi Mode
The MIDI mode contains seven parameter pages, including global settings for the entire S03 system, as well as certain controller settings. n For instructions on how to enter the MIDI mode, see page 28. n Refer to the Function Tree chart (page 20) or the Parameter Table (page 22). - Page 94 3. Rcv Ch (Voice Mode MIDI Receive Channel) Set the MIDI Receive channel for using the S03 (in the Voice mode) with an external sequencer, computer and so on, and for using it as a MIDI tone generator. PAGE PART...
-
Page 95: Appendix
Change and various other types of MIDI data, or messages. The S03 can control a MIDI device by transmitting note related data and various types of controller data. The S03 can be controlled by the incoming MIDI messages which automatically determine tone generator mode, select MIDI channels, voices and effects, change parameter values, and of course play the voices specified for the various Parts. -
Page 96: Channel Messages
MIDI messages can be divided into two groups: Channel messages and System messages. Below is an explanation of the various types of MIDI messages which the S03 can receive/transmit. CHANNEL MESSAGES Channel messages are the data related to the performance on the keyboard for the specific channel. - Page 97 Harmonic Content (Control #071) Messages which adjust the filter resonance set for each voice. The value set here is an offset value which will be added to or subtracted from the voice data. Higher values will result in a more characteristic, resonant sound.
-
Page 98: Channel Mode Messages
The S03 does not transmit this data from the keyboard; however, the S03 does properly respond to this data when received from an external device. -
Page 99: System Exclusive Messages
* mm(MSB) = appropriate volume value, ll(LSB) = ignored XG System On When this data is received, the S03 will switch to XG mode and all the parameters will be initialized accordingly, and XG-compatible messages such as NRPN and Bank Select messages can be received. -
Page 100: Display Messages
!BatteryLo ...The memory-backup battery is low; memory cannot be backed up. Store the necessary data to a MIDI data storage device such as Yamaha MIDI Data Filer MDF3, and have the battery changed by your local Yamaha dealer or any other... -
Page 101: Troubleshooting
VOLUME slider and, if a foot controller is connected, press it down to the maximum. 4 If still no sound is output after step 3 above, the problem may be in the global settings of the S03 (UTILITY/MIDI), the settings of any connected MIDI device, and/or the connecting MIDI cable. -
Page 102: The Sound Is Distorted
Relevant Global Settings of the S03 (UTILITY or MIDI) G Have the MIDI receive channels been set correctly? (Pages 61 and 94) G Has the Local switch been set to off? (Page 93) G Has the HOST SELECT switch (page 10) been set appropriately? (Pages 12 to 14) G Is either the Demo mode (page 16) or the Compare function (pages 55 and 70) active? When either of these are active, incoming MIDI data is ignored. - Page 103 Sound is choppy and intermittent. G Has the maximum polyphony been exceeded? (Page 18) Only one note sounds at a time. G Has the Mono/Poly parameter been set to “mono”? (Pages 61 and 71) No effects are applied. G Has the V EfBypass (Voice Effect Bypass) been set to off? (Page 92) G In the case of a Multi, has Var Send in Part Edit been set to off or a value too close to 0? (Page 67) G Has the effect type been set to something other than “Thru”...
- Page 104 Here’s a quick way to check a MIDI cable, to make sure it’s properly conducting signals. n Before starting this, set the S03 to Voice mode and make sure that the S03 is properly outputting sound when you play the keyboard.
-
Page 105: Specifications
CONTROLLER, FOOT SWITCH, TO HOST, MIDI IN/OUT/THRU LCD (Back Lit) Yamaha AC adaptor PA-3B (included)* * May not be included in your area. Please check with your Yamaha dealer. 7W (120V), 7.5W (230V) OUTPUT: +9 ±2dbm (10k ohms), PHONES: +0 ±2dbm (33 ohms) 976 (W) x 285 (D) x 87 (H) mm Specifications and descriptions in this owner’s manual are for information purposes only. -
Page 106: Index
BlkDmp (Bulk Dump) (Multi Job) ...68 BlkDmp (Bulk Dump) (Voice Job) ...88 Bulk Dump (Multi Job) ...68 Bulk Dump (Voice Job) ...88 Bulk Dump Send (Saving S03 Settings to an External Device) ...42 Index Category ...71 Category Search (Using Voice Category Search) ...35 [CATEGORY SEARCH/DRUM] button ...9... - Page 107 OSC/MIX (Oscillator/Mix) (Basics) ... 49 Oscillator/Mix (Basics) ... 49 Other Modes (Selecting a Mode) ... 29 OUTPUT L/MONO and R jack ... 10 Overview of the S03 ... 17 Overview of Voices/Waves ... 26 Package Contents ... 4 Pan (Drum Voice) ... 85 Pan (Multi) ...
- Page 108 Using Multi Mode ...37 Using the Foot Controller to Control Parameters ...45 Using the Foot Switch to Advance Through Programs ...46 Using the S03 as a Multitimbral Tone Generator ...38 Using Voice Category Search ...35 Utility Job ...92 Utility Mode (About the Modes) ...19 Utility Mode (Reference) ...90...
- Page 109 MEMO...
- Page 110 For details of products, please contact your nearest Yamaha or the authorized distributor listed below. Pour plus de détails sur les produits, veuillez-vous adresser à Yamaha ou au distributeur le plus proche de vous figurant dans la liste suivante. NORTH AMERICA CANADA Yamaha Canada Music Ltd.
-
Page 111: Fcc Information (U.s.a.)
1. IMPORTANT NOTICE: DO NOT MODIFY THIS UNIT! This product, when installed as indicated in the instructions contained in this manual, meets FCC requirements. Modifications not expressly approved by Yamaha may void your authority, granted by the FCC, to use the product. 2. IMPORTANT: When connecting this product to accessories and/or another product use only high quality shielded cables. - Page 112 Yamaha Web Site (English only) www.yamahasynth.com Yamaha Manual Library (English versions only) http://www2.yamaha.co.jp/manual/english/ M.D.G., Pro Audio & Digital Musical Instrument Division, Yamaha Corporation © 2001 Yamaha Corporation V654540 101MWCP3.3-01A0 This document is printed on chlorine free (ECF) paper with soy ink.
Need help?
Do you have a question about the S03 and is the answer not in the manual?
Questions and answers