Store It Cold CoolBot Instruction Manual
Blue display digital controller
Hide thumbs
Also See for CoolBot:
- Manual (38 pages) ,
- Instruction manual and troubleshooting manual (20 pages) ,
- Setup (6 pages)
Table of Contents
Advertisement
Advertisement
Table of Contents

Related Manuals for Store It Cold CoolBot


Summary of Contents for Store It Cold CoolBot
- Page 1 -Blue Display Digital Controller- INSTRUCTION MANUAL...
-
Page 2: Table Of Contents
WHAT’S IN THE BOX? ............................ 3 TECHNICAL DATA ............................3 KNOWING YOUR COOLBOT ........................... 4 HOW DOES THE COOLBOT WORK WITH YOUR A/C? ..................5 BEFORE INSTALLING YOUR COOLBOT ......................6 INSTALLING YOUR COOLBOT ........................7 CONNECTING YOUR COOLBOT TO YOUR AIR CONDITIONER ..............7 CHANGING SETTINGS ON THE COOLBOT .................... -
Page 3: Disclaimer And Warranty
CoolBot. User accepts all responsibility in the use of and monitoring of the CoolBot and A/C. User assumes all risk of loss of property or product due to improper functioning of the CoolBot (or A/C). User assumes all risk of injury and warrants that he/she will defend, indemnify and hold the seller harmless for any direct or consequential harm or damage that may result from the use of this product. -
Page 4: What's In The Box
(2) Temperature Sensors - Sensor Cables (Blue) with external 2.5mm jack connector (1) Heater Cable - CoolBot Heater Cable (Red Tip) with external 2.5mm jack connector (1) Power Supply - Mini-USB port connector cable. Input: 110V-240V / Output: 5V, 1Amp... -
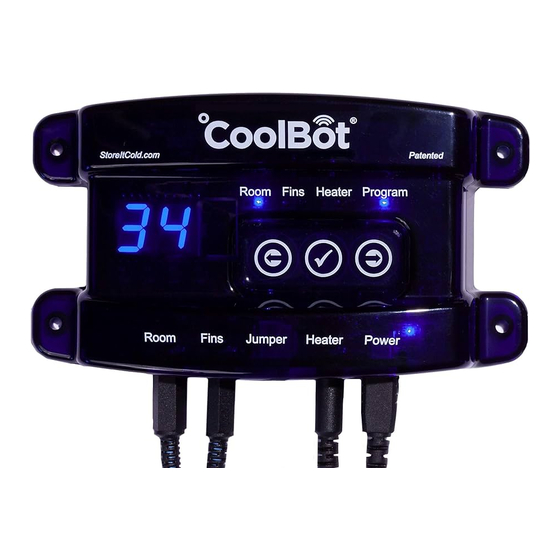
Page 5: Knowing Your Coolbot
“Program” will turn on solid (no blinking). The display will show a number (e.g. 7.9), which will be the firmware version on your CoolBot Pro. POWER INDICATOR LIGHT: This light is constantly on (solid), as long as your CoolBot Pro is plugged in and getting the correct power supply (110V-230V). -
Page 6: How Does The Coolbot Work With Your A/C
By doing this, the compressor on your A/C keeps running and cools down the space. The ROOM and the FINS sensors tell the CoolBot when to turn off the HEATER cable. This will happen when: •... -
Page 7: Before Installing Your Coolbot
This connection is not necessary for the CoolBot to work with your air conditioner. The jumper port (on the blue CoolBot ONLY) enables your CoolBot to be connected to a Wi-Fi network using ONLY an optional radio module “Jumper” (NOT INCLUDED) and a Data Cable (NOT INCLUDED). Have questions? Please contact us at: support@storeitcold.com... -
Page 8: Installing Your Coolbot
The Room Sensor should hang free in the room. STEP 2 Mount the CoolBot on the wall next to the control panel side of the A/C to make it easier to connect the cables. CAUTION! Make sure the wall fasteners are smaller in diameter than the hole in the CoolBot tabs or you will break the plastic tabs. - Page 9 A/C - DO NOT use the plastic mounting clip for this installation! STEP 5 Using ONLY a 2” square piece of regular Aluminum foil, place the CoolBot Heater Cable (red tip) next to the A/C’s Temperature Sensor (from STEP 4). Keep together next to each other, pointing in the same direction, and wrap them tightly with the foil into a bundle.
- Page 10 Use a pen/pencil to open a small gap in the fins about 1” from the bottom and near the center (horizontally), between the bottom and second horizontal cooling pipes. Take the cable sensor coming from the CoolBot port labeled “Fins” and gently insert just 1/4 inch (0.7 cm) of the TIP into the small gap.
-
Page 11: Changing Settings On The Coolbot
CHANGING SETTINGS ON THE COOLBOT The CoolBot will always remember all your last settings even if it has been unplugged for a long time. ROOM TEMPERATURE SETTING This setting is the average temperature you want to maintain in your cooler. -
Page 12: Switching Between Fahrenheit And Celsius
● Clean the plug end of the sensor (jack connector) with a cotton cloth and plug it back in the CoolBot port a couple times making sure it goes all the way in. It should sit firm and snug- shouldn’t wiggle or feel loose. -
Page 13: Ef" Flashes On My Coolbot Display
● Clean the plug end (jack connector) of the sensor with a cotton cloth and plug it back in the CoolBot port a couple times making sure it goes all the way in. It should sit firm and snug- shouldn’t wiggle or feel loose. -
Page 14: Ee" Flashing On The Coolbot Display
Press Checkmark. The CoolBot will reset the selected settings. If you chose P1, CJ, or Fr with the Jumper connected to the CoolBot, the CoolBot will switch to its Wi-Fi Configuration mode. You should see the code “E0” on the display. This means the CoolBot pro and the Jumper are ready to reconfigure the Wi-Fi connection. -
Page 15: Checks On Your Coolbot
Pull the HEATER out of the aluminum foil. Hold the red tip against the inside of your wrist with your fingers. ● Unplug the POWER to the CoolBot, then plug it back in. In ~5 seconds the Heater Activity Indicator light will come on SOLID for about 20 seconds. -
Page 16: Proper Installation And Settings
DOUBLE YOUR WARRANTY! We’d love to hear how your CoolBot is doing and learn more about how you are using it. Just fill out our Testimonials Form online, and as a way to say “Thanks!”, we will double your CoolBot warranty from 1 to 2 years! You can find the Testimonials Form at: https://www.storeitcold.com/testimonials-form/...
Need help?
Do you have a question about the CoolBot and is the answer not in the manual?
Questions and answers