Table of Contents
Advertisement
Quick Links
customerservice@gazebopenguin.com
41212
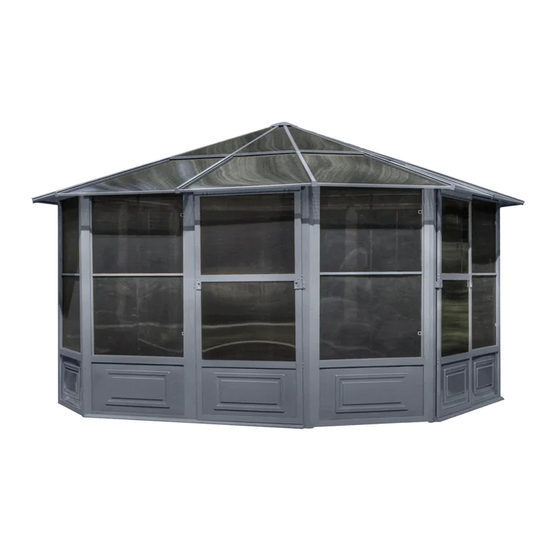
12 X 12 SOLARIUM
ASSEMBLY INSTRUCTIONS
DO NOT DESTROY THE BOXES UNTIL COMPLETELY ASSEMBLED
PLEASE VERIFY THE CONTENT OF EACH BOX AGAINST THE LIST OF PARTS
Two or more adults required for assembly
Base Dimensions 12' ½''x12' ½'', Largest Dimensions 13'6''x13'6'' (see pg.14)
Overall Height 110''
ZZZ-182.41212.1206-18.GP.EN.SUN
WEB VERSION
SUN-HI
Advertisement
Table of Contents

Related Manuals for Gazebo penguin Solarium 41212


Summary of Contents for Gazebo penguin Solarium 41212
- Page 1 customerservice@gazebopenguin.com 41212 12 X 12 SOLARIUM ASSEMBLY INSTRUCTIONS DO NOT DESTROY THE BOXES UNTIL COMPLETELY ASSEMBLED PLEASE VERIFY THE CONTENT OF EACH BOX AGAINST THE LIST OF PARTS Two or more adults required for assembly Base Dimensions 12’ ½’’x12’ ½’’, Largest Dimensions 13’6’’x13’6’’ (see pg.14) Overall Height 110’’...
-
Page 2: Tools Needed
Before you assemble the Solarium Please don't destroy boxes until completely assembled. Please verify the content of each box against the list of parts. It is important that this solarium be installed on a solid base with the provided screws. - Page 3 12x12 Solarium Assembly Instructions Step 1: Before starting to assemble, please decide where you would like to position the door panels. 1. Stand up the two panels (A), using two connecting pieces (E) affix the panels (A) together. 2. Stand up a frame meant to be next to the door (B) and a door frame (D), you can chose to place the door frame on the left side or on the right side, and then use two connecting pieces (E) to affix the panel and door frame.
- Page 4 Step 2: 1. Slide top door rail (F) into wheels of sliding door (C). 2. Slide lower door rail (G) into the plastic guide of the sliding door(C). 3. Use bolt (Bb) to affix the plastic stoppers (H) one on each end of top door rail (F). 4.
- Page 5 Step 4: 1. Attach roof rafters (L) to the central hub (N) using bolt (Bb). (Caution: hub may be heavy, use support if needed. 2. Use screw (Z) to affix the rafters (L) onto the top of panels going through the metal piece attached to the rafter (L).
-
Page 6: Top View
Step 6: Use nut (Hh) and washer (Gg) to affix the top cap (M) to the central hub (N). Step 7: First remove the protective layer from the PC roof panels, then insert them (Y, Aa, Ll) into the roof rafters according to the below drawing instructions. - Page 7 Step 8: After inserting the PC roof panels, insert the aluminum middle roof joints (O, P, Q) into the roof rafters. The below drawing view is from the inside of the solarium, looking up. Notes: The drain holes on the aluminum middle roof joints (O, P, Q) should be at the bottom. ...
- Page 8 Step 10: Once the PC roof is complete, use aluminum edging (S, U, W) to surround the edges of the PC roof using bolts (Bb) to fasten the rafter cap (R) and the edging, tighten securely. Step 11: Use the cross bars (T, V, X) to affix to the roof using bolts (Ff). ZZZ-182.41212.1206-18.GP.EN.SUN WEB VERSION SUN-HI 7...
- Page 9 Step 12: Inside each of the panels (A, B), push two plastic plugs (Ii) into the ground, and then screw down the panels using two screws (Ee) for each panel. Special notes: 1. To remove windows (08-219), pull 1 pin out of the lock position and push the frame to the end of the track, then ease the window out of the tracks one side at a time.
- Page 10 41212-12 SAND PARTS LIST DESCRIPTION DRAWING DESCRIPTION DRAWING 08-129-12 08-130-12 REGULAR FRAME NEXT FRAME TO DOOR 08-131-12 08-132-12 SLIDING SLIDING DOOR DOOR FRAME 08-133-12 08-136-12 CONNECTING TOP DOOR PIECE RAIL Length 200.6 Length 206 cm 08-137-12 08-138-12 BOTTOM PLASTIC DOOR RAIL STOPPER Length 206 cm 08-139-12...
- Page 11 DESCRIPTION DRAWING DESCRIPTION DRAWING 08-145-12 08-146-12 MIDDLE MIDDLE ROOF JOINT ROOF JOINT 08-148-12 08-147-12 ROOF MIDDLE RAFTER ROOF JOINT 08-150-12 08-149-12 ROOF CROSS EDGING Length 120.6 Length 94.5 08-152-12 08-151-12 ROOF CROSS EDGING Length 120.6 Length 94.4 08-154-12 08-153-12 ROOF CROSS EDGING Length 120.6 Length 94.4...
- Page 12 DESCRIPTION DRAWING DESCRIPTION DRAWING 08-165-12 08-161-12 RIGHT DOOR BOLT LATCH Dd-R 08-169-12 08-167-12 LEFT DOOR SCREW LATCH Dd-L 08-168-12 08-187 BOLT WASHER 08-193 08-189-12 PLASTIC ACORN NUT PLUG 08-195 08-196 (47” X47 ½”) (46 ½”x43”) BOTTOM ROOF BOTTOM ROOF CORNER LEFT PANEL PANEL 08-197...
-
Page 13: Available Replacement Parts
AVAILABLE REPLACEMENT PARTS DESCRIPTION DRAWING DESCRIPTION DRAWING 08-219-12 85-417-S PVC WINDOW ROUND SPLINE (in frame) FOR SCREENING 10-493 11-572-12 PVC WINDOW BOTTOM PLASTIC (replacement PANEL (for wall material only) panels) 85-417-P 11-822-12 ROUND SPLINE BOTTOM PLASTIC FOR PVC PANEL (for doors) WINDOW 15-123-12 15-097-12... - Page 14 41212-32 SLATE PARTS LIST DESCRIPTION DRAWING DESCRIPTION DRAWING 08-129-32 08-130-32 REGULAR FRAME NEXT FRAME TO DOOR 08-131-32 08-132-32 SLIDING SLIDING DOOR DOOR FRAME 08-133-32 08-136-32 CONNECTING TOP DOOR PIECE RAIL Length 200.6 Length 206 cm 08-137-32 08-138-32 BOTTOM PLASTIC DOOR RAIL STOPPER Length 206 cm 08-139-32...
- Page 15 DESCRIPTION DRAWING DESCRIPTION DRAWING 08-145-32 08-146-32 MIDDLE MIDDLE ROOF JOINT ROOF JOINT 08-148-32 08-147-32 ROOF MIDDLE RAFTER ROOF JOINT 08-150-32 08-149-32 ROOF CROSS EDGING Length 120.6 Length 94.5 08-152-32 08-151-32 ROOF CROSS EDGING Length 120.6 Length 94.4 08-154-32 08-153-32 ROOF CROSS EDGING Length 120.6 Length 94.4...
- Page 16 DESCRIPTION DRAWING DESCRIPTION DRAWING 08-165-32 08-161-32 RIGHT DOOR BOLT LATCH Dd-R 08-169-32 08-167-32 LEFT DOOR SCREW LATCH Dd-L 08-168-32 08-187 BOLT WASHER 08-193 08-189-32 PLASTIC ACORN NUT PLUG 08-195 08-196 (47” X47 ½”) (46 ½”x43”) BOTTOM ROOF BOTTOM ROOF CORNER LEFT PANEL PANEL 08-197...
- Page 17 AVAILABLE REPLACEMENT PARTS DESCRIPTION DRAWING DESCRIPTION DRAWING 08-219-32 85-417-S PVC WINDOW ROUND SPLINE (in frame) FOR SCREENING 10-493 11-572-32 PVC WINDOW BOTTOM PLASTIC (replacement PANEL (for wall material only) panels) 85-417-P 11-822-32 ROUND SPLINE BOTTOM PLASTIC FOR PVC PANEL (for doors) WINDOW 15-123-32 15-097-32...
- Page 18 ZZZ-182.41212.1206-18.GP.EN.SUN WEB VERSION SUN-HI 17...
-
Page 19: Maintenance Notes
Warranty set forth below, it is warranted to be free of material and manufacturing defects for a period of one year from the date of purchase. Should the product become damaged, or the warranty period has expired, please contact Gazebo Penguin Customer Service Department for a complete schedule of replacement parts and prices.
Need help?
Do you have a question about the Solarium 41212 and is the answer not in the manual?
Questions and answers