Advertisement
Available languages
Available languages
Quick Links
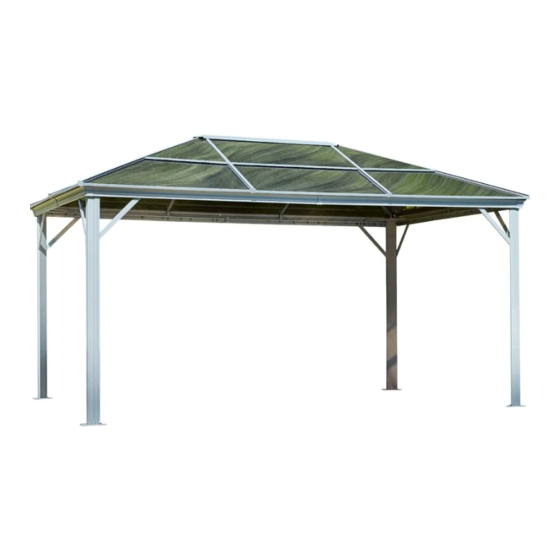
MARSEILLES GAZEBO 10x14
(MODEL# 456201)
INSTALLATION MANUAL
Dimensions:
Overall:
10 ft deep x 14 ft wide x 8 ft 7 in height (305cm x 427cm x 261cm)
Tools required (not provided):
6ft (1.8m) stepladder, Phillips screwdriver, level, tape measure, mallet, safety gloves & glasses, hard
hat, tarp or protective material for placing parts on during assembly
456201.MARSEILLES 10X14.160209.GP.ENG.FR.HOM
HOM-HP
1
Advertisement

Related Manuals for Gazebo penguin MARSEILLES 456201


Summary of Contents for Gazebo penguin MARSEILLES 456201
- Page 1 MARSEILLES GAZEBO 10x14 (MODEL# 456201) INSTALLATION MANUAL Dimensions: Overall: 10 ft deep x 14 ft wide x 8 ft 7 in height (305cm x 427cm x 261cm) Tools required (not provided): 6ft (1.8m) stepladder, Phillips screwdriver, level, tape measure, mallet, safety gloves & glasses, hard hat, tarp or protective material for placing parts on during assembly 456201.MARSEILLES 10X14.160209.GP.ENG.FR.HOM HOM-HP...
- Page 2 Some jurisdictions may require permits for, or otherwise regulate, installation and use. For assistance with assembly, installation, parts, or customer service, contact Gazebo Penguin Customer Service Department at the numbers listed below (English & French, Mon-Fri 8:00AM to 4:00PM EST):...
- Page 3 PART DIAGRAM PART DIAGRAM (16-035) (16-023) RIGHT ROOF JOINT (16-036) (16-024) CENTER ROOF BEAM, 10’ SIDE JOINT, 14’ SIDE (16-037) (16-025) LEFT UPPER BEAM, 10’ SIDE CROSSBAR (16-038) (16-026) RIGHT UPPER BEAM, 14’ SIDE CROSSBAR (16-039) (16-027) CENTER UPPER BEAM, 14’ SIDE CROSSBAR, 14’...
- Page 4 PART DIAGRAM PART DIAGRAM (16-047) (15-040) CORNER COVER CURTAIN HOOKS (16-057) (16-048) SCREEN (sold JOINT COVER CURTAINS separat ely) (11-655) (16-058) CORNER SCREEN (sold BRACKET CURTAINS separat ely) (11-654) (16-059) RAFTER END PRIVACY (sold CURTAINS separat ely) (16-060) (16-049) PRIVACY (sold CENTRAL HUB CURTAINS...
- Page 5 STEP 01: (Pieces: A x4, H x4) (Hardware: U x12) a) Install the legs (A) onto the foot plates (H) using 3 bolts (U) each. STEP 02 (optional): (Pieces: B-1 x2, B-2 x2, B-5 x2, B-6 x2) (Hardware: R x40) NOTE: This step to be done only if curtains have also been purchased.
- Page 6 STEP 03: (Pieces: B-1 x2, B-2 x2, B-5 x2, B-6 x2) (Hardware: U-1 x16) a) Insert beam (B-1) into beam (B-2) and attach with 2 bolts and washers (U-1). b) Insert beam (B-5) into beam (B-6) and attach with 2 bolts and washers (U-1).
- Page 7 STEP 05: (Pieces: J x4, J-1 x4) (Hardware: V x32) a) Install the corner covers (J) using 4 screws (V) at each corner joint. b) Install the joint covers (J-1) using 4 screws (V) at each beam joint. STEP 06: (Pieces: I x4, I-1 x4, I-2 x4) (Hardware: U x8, V x32) a) Install corner brace (I) using 2 bolts and washers (U) at each...
- Page 8 STEP 07: (Pieces: C x6, C-1 x3, C-2 x1) (Hardware: W x20) Insert 2 bolts (W) into the bottom of each rafter (C, C-1, C-2) and slide them towards the center. These will be used in Step 16. STEP 08: (Pieces: L x1, C-1 x3, C-2 x1) (Hardware: U-1 x4) Install the 4 corner rafters (C-1, C-2) at each corner of...
- Page 9 STEP 09: (Hardware: U x4) a) Raise the roof structure assembled in step 8 and hold securely in place (i.e. use a stepladder as support). b) Secure the ends of each corner rafter (C-1, C-2) to the inside of each leg (A) using bolt and washer (U).
- Page 10 STEP 10: (Pieces: C x6) (Hardware: U x6, U-1 x6) a) Attach each rafter (C) to the central hub (L) using 1 bolt and washer (U-1). b) Attach the other end of each rafter (C) to the beams (B-1, B-2, B-5, B-6) using 1 bolt and washer (U).
- Page 11 STEP 11: (Pieces: M x1) (Hardware: U-1 x3) Install the top cap (M) onto central hub (L) using 3 bolts and washers (U). VIEWED FROM BELOW VUE DU BAS 456201.MARSEILLES 10X14.160209.GP.ENG.FR.HOM HOM-HP...
- Page 12 STEP 12: (Pieces: N x4, N-1 x4, P x2) Insert the upper roof panels (N, N-1, P) into the top groove of the rafters (C, C-1, C-2) as per the diagram. Start from one corner of the structure and go around until all panels are in. NOTE: Each roof panel comes covered in protective film, one side of which is printed to show it is UV-treated.
- Page 13 STEP 13: (Pieces: E x4, E-1 x4, E-3 x2) Insert the roof joints (E, E-1, E-3) against the upper roof panels (N, N-1, P), with the ends in the bottom groove of the rafters (C, C-1, C-2) as per the diagram. Start from one corner of the structure and go around until all roof joints are completely inserted against the upper roof panels.
- Page 14 STEP 14: (Pieces: O x4, O-1 x4, P-1 x2) Insert the lower roof panels (O, O-1, P-1) into the bottom groove of the rafters (C, C-1, C-2) as per the diagram. Start from one corner of the structure and go around until all panels are completely in the roof joints.
- Page 15 STEP 15: (Pieces: D x4, D-1 x4, D-3 x2, K x4, K-1 x6) (Hardware: W x10, W-1 x10) a) Starting in one corner, insert a bolt (W) into the bottom slot of the rafter, install the end of an edging (D or D-1), and hold in place with acorn nut (W-1). b) Go around the gazebo, inserting a bolt (W) at each rafter and installing the end of the previous edging plus one end of the next edging, and secure with either a rafter cap (K-1) or corner bracket (K), and an acorn nut (W-1).
- Page 16 STEP 16: (Pieces: F x4, F-1 x4, F-3 x2, G x4, G-1 x4, G-3 x2) (Hardware: W-1 x20) a) Starting in one corner, locate the bolts (W) previously inserted into the bottom slot of the rafter during Step 7, install the end of an upper crossbar (F or F-1) onto the higher bolt, and hold in place with acorn nut (W-1).
- Page 17 STEP 17 (optional): (Pieces: S x2, S-1 x2, T x2, T-1 x2) NOTE: This step to be done only if curtains have also been purchased. Hang each piece of the screen curtain (S, S-1) and/or privacy curtain (T, T-1) from the hooks (R) installed in Step 2, such that the curtain tie aligns with the leg (A), as shown below.
-
Page 18: Maintenance Notes
2. The product is not warranted against damages due to extreme weather conditions, such as thunderstorms, hail, strong wind or snow storms, or any other acts of God. 3. The product is only warranted in the event it is installed in accordance with the Gazebo Penguin’s written instructions enclosed with the product. -
Page 19: Guide D'installation
GAZEBO MARSEILLES 10x14 (MODÈLE # 456201) GUIDE D’INSTALLATION Dimensions: Global: 10 pi profond x 14 pi large x 8 pi 7 po haut (305cm x 427cm x 261cm) Outils requis (pas inclus): Escabeau 6pi (1.8m), tournevis Phillips, niveau, mètre à ruban, maillet, gants, lunettes, et casque de sécurité, une bâche pour placer les pièces durant l’assemblage 456201.MARSEILLES 10X14.160209.GP.ENG.FR.HOM HOM-HP... - Page 20 Certaines juridictions peuvent requérir un permit, ou autrement règlementer, leur installation et utilisation. Pour assistance avec l’assemblage, l’installation, pièces, et service à la clientèle, appelez Gazebo Penguin aux numéros ci-dessous (Anglais et Français, Lun-Ven 8:00 à 16:00 HNE): Montréal: (514) 276-3485...
- Page 21 PIÈCE QTÉ SCHÉMA PIÈCE QTÉ SCHÉMA (16-035) (16-023) JONCTION DE PATTE TOIT DROIT (16-024) (16-036) POUTRE, CÔTÉ JONCTION DE 10’ TOIT, CÔTÉ 14’ (16-025) (16-037) POUTRE, CÔTÉ RENFORT DU 10’ HAUT GAUCHE (16-026) (16-038) POUTRE, CÔTÉ RENFORT DU 14’ HAUT DROIT (16-027) (16-039) POUTRE, CÔTÉ...
- Page 22 PIÈCE QTÉ SCHÉMA PIÈCE QTÉ SCHÉMA (16-047) (15-040) COUVERTURE CROCHET POUR (sold DE COIN RIDEAUX separate (16-048) (16-057) COUVERTURE RIDEAU (sold DE JONCTION MOUSTIQUAIRE separate (11-655) (16-058) CROCHET DE RIDEAU (sold COIN MOUSTIQUAIRE separate (11-654) (16-059) CAPUCHON DE (sold RIDEAU PRIVÉ CHEVRON separate (16-049)
- Page 23 ÉTAPE 01: (Pièces: A x4, H x4) (Quincaillerie: U x12) a) Installez les pattes (A) sur les bases de patte (H) avec 3 boulons et rondelles (U) chaque. ÉTAPE 02 (option): (Pièces: B-1 x2, B-2 x2, B-5 x2, B-6 x2) (Quincaillerie: R x40) NOTE: Cette étape est nécessaire seulement si vous avez aussi acheté...
- Page 24 ÉTAPE 03: (Pièces: B-1 x2, B-2 x2, B-5 x2, B-6 x2) (Quincaillerie: U-1 x16) a) Insérez la poutre (B-1) dans la poutre (B-2) et attachez avec 4 boulons et rondelles (U-1). b) Insérez la poutre (B-5) dans la poutre (B-6) et attachez avec 4 boulons et rondelles (U-1).
- Page 25 ÉTAPE 05: (Pièces: J x4, J-1 x4) (Quincaillerie: V x32) a) Installez les couvertures de coin (J) avec 4 vis (V) à chaque coin. b) Installez les couvertures de jonction (J-1) avec 4 vis (V) à chaque jonction de poutre. ÉTAPE 06: (Pièces: I x4, I-1 x4, I-2 x4) (Quincaillerie: U x8, V x32)
- Page 26 ÉTAPE 07: (Pièces: C x6, C-1 x3, C-2 x1) (Quincaillerie: W x20) Insérez 2 boulons (W) dans le bas de chaque chevron (C, C-1, C-2) et glissez-les vers le centre. Ceux-ci vont être utilisés à l’étape 16. ÉTAPE 08: (Pièces: L x1, C-1 x3, C-2 x1) (Quincaillerie: U-1 x4) Installez les 4 chevrons de coin (C-1, C-2) à...
- Page 27 ÉTAPE 09: (Quincaillerie: U x4) a) Levez le structure de toit assemblé à l’étape 8 et tenez-le de façon sécuritaire (i.e. avec un escabeau comme support). b) Sécurisez les bouts de chaque chevron de coin (C-1, C-2) à l’intérieur de chaque patte (A) avec un boulon et rondelle (U).
- Page 28 ÉTAPE 10: (Pièces: C x6) (Quincaillerie: U x6, U-1 x6) a) Attachez chaque chevron (C) au capuchon central (L) avec 1 boulon et rondelle (U-1). b) Attachez l’autre bout de chaque chevron (C) aux poutres (B-1, B-2, B-5, B-6) avec 1 boulon et rondelle (U).
- Page 29 ÉTAPE 11: (Pièces: M x1) (Quincaillerie: U-1 x3) Installez le capuchon du haut (M) sur le capuchon central (L) avec 3 boulons et rondelles (U). VIEWED FROM BELOW VUE DU BAS 456201.MARSEILLES 10X14.160209.GP.ENG.FR.HOM HOM-HP...
- Page 30 ÉTAPE 12: (Pièces: N x4, N-1 x4, P x2) Insérez les panneaux de toit du haut (N, N-1, P) dans le rail supérieur des chevrons (C, C-1, C-2) comme démontre le schéma. Commencez à un coin de la structure et allez tout autour jusqu'à...
- Page 31 ÉTAPE 13: (Pièces: E x4, E-1 x4, E-3 x2) Insérez les jonctions de toit (E, E-1, E-3) contre les panneaux de toit du haut (N, N-1, P), avec les bouts dans le rail inferieur des chevrons (C, C-1, C-2) comme démontre le schéma. Commencez à...
- Page 32 ÉTAPE 14: (Pièces: O x4, O-1 x4, P-1 x2) Insérez les panneaux de toit du bas (O, O-1, P-1) dans le rail inferieur des chevrons (C, C-1, C-2) comme démontre le schéma. Commencez à un coin de la structure et allez tout autour jusqu'à...
- Page 33 ÉTAPE 15: (Pièces: D x4, D-1 x4, D-3 x2, K x4, K-1 x6) (Quincaillerie: W x10, W-1 x10) a) Commençant à un coin, insérez un boulon (W) dans le bas du chevron, installez le bout d’une bordure (D ou D-1), et tenez-la en place avec un écrou borgne (W-1). b) Allez autour du gazebo, insérant un boulon (W) a chaque chevron et installant le bout de la bordure précédente plus un bout de la bordure suivante, et sécurisez avec soit un capuchon de chevron (K-1) ou crochet de coin (K), et un écrou borgne (W-1).
- Page 34 ÉTAPE 16: (Pièces: F x4, F-1 x4, F-3 x2, G x4, G-1 x4, G-3 x2) (Quincaillerie: W-1 x20) a) Commençant à un coin, localisez les boulons (W) déjà insérés dans les chevrons à l’étape 7, installez le bout d’un renfort du haut (F ou F-1) sur le boulon plus haut, et tenez-le en place avec un écrou borgne (W-1).
- Page 35 ÉTAPE 17 (option): (Pièces: S x2, S-1 x2, T x2, T-1 x2) NOTE: Cette étape est nécessaire seulement si vous avez aussi acheté les rideaux. Installez chaque pièce des rideaux moustiquaires (S, S-1) et/ou rideaux privés (T, T-1) sur les crochets (R) installés à...
- Page 36 Advenant que le produit soit endommagé ou que la période de garantie soit expirée, veuillez contacter le département de service à la clientèle de Gazebo Penguin afin d’obtenir une liste complète des pièces de remplacement et des prix applicables.
Need help?
Do you have a question about the MARSEILLES 456201 and is the answer not in the manual?
Questions and answers