Table of Contents
Advertisement
Quick Links
Quicktionary
Introduction .................................................................. 2
Contact and Support Information .............................. 2
Getting Started ............................................................. 3
Familiarizing Yourself with the Pen ........................... 3
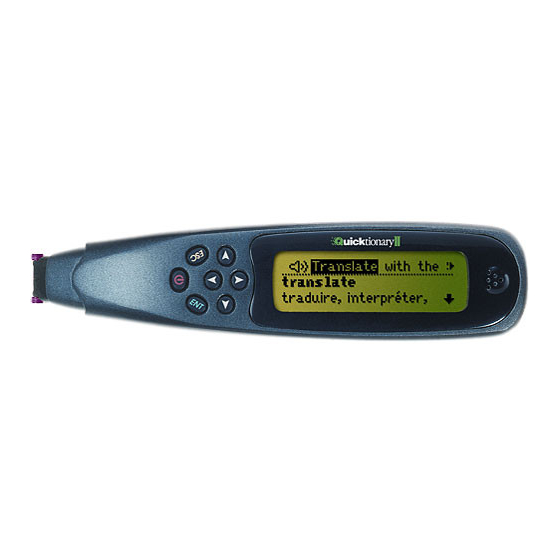
The Pen Parts ...................................................... 3
Setting Up Your Pen ............................................ 3
Basic Pen Commands .............................................. 4
Scanning Guidelines ................................................. 4
Learning to Scan (using the Trainer) ......................... 6
The Quicktionary ......................................................... 7
The Quicktionary Screens ......................................... 7
The Quicktionary Menus ........................................... 9
Editing and Inserting Text ....................................... 12
The Dictionary Entries ............................................. 16
Hear Scanned Text Read Aloud ............................. 20
Using Professional Dictionaries .............................. 21
The Pen Main Menu ................................................... 24
The Preferences Menu ........................................... 24
The Information Menu ............................................. 26
Additional Information .............................................. 27
Batteries .................................................................. 27
Safety Points (Batteries) ......................................... 27
Pen Maintenance .................................................... 27
Product Specification .............................................. 28
User Manual
Table of Contents
®
2 Professional
Table of Contents
1
Advertisement
Table of Contents

Related Manuals for WizCom Technologies Quicktionary 2 Professional


Summary of Contents for WizCom Technologies Quicktionary 2 Professional
-
Page 1: Table Of Contents
Quicktionary Table of Contents Introduction ... 2 Contact and Support Information ... 2 Getting Started ... 3 Familiarizing Yourself with the Pen ... 3 The Pen Parts ... 3 Setting Up Your Pen ... 3 Basic Pen Commands ... 4 Scanning Guidelines ... -
Page 2: Introduction
Introduction Introduction Congratulations on your choice of the state of the art ® Quicktionary 2. Personal, portable scanning Pens assist you when reading, understanding and utilizing text. Use the Quicktionary word-by-word translations, and hear scanned words pronounced aloud. This manual is divided into three sections: Getting Started - This section provides basic information on Pen functions and how to scan. -
Page 3: Getting Started
Getting Started Familiarizing Yourself with the Pen The Pen Parts Your Pen contains the following parts: Important: Before using the headphones, please adjust the volume using the Voice Settings option in the Preferences menu. Setting Up Your Pen To get started: 1. -
Page 4: Basic Pen Commands
Getting Started Note: If you are left-handed, see Right-/Left-Handed on page 55 to change your Pen to left-handed scanning. Basic Pen Commands The Pen Keys and their Functions The keypad contains seven keys for operating your Pen. Use the keys as follows: Power key ENT key a selection or perform an operation. - Page 5 Scanning Restrictions The Pen scans and recognizes printed text in a wide range of languages, font types and point sizes (6-22 points, up to 8mm) and in a variety of colors on contrasting backgrounds (except red on white, white on red, blue on black and black on blue).
-
Page 6: Learning To Scan (Using The Trainer)
Getting Started Learning to Scan (using the Trainer) This tutorial uses the Quicktionary application and the plastic scanning Trainer provided with your Pen. Slide the Trainer onto the tip of the Pen (instead of the cap) and press into place. Turn the Pen on. -
Page 7: The Quicktionary
The Quicktionary Use the Quicktionary application to scan and translate text in various languages. Hear scanned text read aloud from either the Split Screen or the Dictionary Screen. The Quicktionary opens automatically when turning the Pen on. You will reach the Input Screen and the red light at the tip of the Pen will flash. - Page 8 The Quicktionary select GO to view the translation in the Split Screen or the Dictionary Screen. Press ESC to access the Edit Menu while in Edit Mode. Press ESC from the Input Screen to access the Quicktionary Menu. Note: If the icon is visible on screen it indicates that the Quicktionary application is set to scan inverse text (light text on dark background).
-
Page 9: The Dictionary Screen
The Dictionary Screen The Dictionary Screen appears after scanning a single word, or after selecting a word from the Split Screen. Scroll through the dictionary entry using the up/down direction keys. Switch between reduced and full dictionary display using the left/right direction keys. If the selected dictionary contains support for reading aloud, press ENT to hear the word read aloud. -
Page 10: Input Screen
The Quicktionary To select one of these words and view its dictionary entry: Select Dictionary and then select History. Scroll through the list to find the word you want. Press ENT. The word appears in the Dictionary Screen. Press ESC to return to the history list. Adjacent Entries This option displays a list of all the headwords in the current dictionary, placing you on the last word you... -
Page 11: The Edit Menu
ESC. Toggle settings on or off by pressing = on. Inverse: Select this option to scan inverse text (white text on dark background). When inverse text mode is selected, the red light in the tip of Quicktionary blinks rapidly and the on the Input Screen. -
Page 12: Editing And Inserting Text
The Quicktionary The Edit Menu contains three options: Resume Editing Return to the current field without making changes. The field remains in Edit Mode. Activate Overwrite Mode Overwrite the existing text. Overwrite mode highlights the first character after the blinking cursor. Any text that is inserted overwrites the text starting at the highlighted character. - Page 13 Use the direction keys to scroll to the place you wish to insert text and press ENT to access the Character Bar. Press ESC to exit the Character Bar. Using the Character Bar The Character Bar works in two modes: Insert Mode and Overwrite Mode which are determined by the setting in the application's Edit Menu.
-
Page 14: The Opticard
The Quicktionary Insert Punctuation Symbols Scroll to this symbol and press ENT to reveal the punctuation Character Bar. Alphabet Scroll to this symbol and press ENT to return to the default alphabetic Character Bar. Delete Scroll to this option to delete the highlighted character. If you enter the Character Bar from a field that has reached its maximum number of characters, the cursor immediately jumps to the delete symbol and you will be... - Page 15 The Opticard is a scanning keyboard found on the back of the Pen case. Every letter scanned with the Opticard is identified by its unique barcode and converted to the correct character on your Pen. Use the Opticard to edit scanned text, or to insert text that cannot be scanned due to scanning limitations.
-
Page 16: The Dictionary Entries
The Quicktionary When you are finished, scan the Opticard key again to return to normal scanning mode. The Dictionary Entries The dictionary entries contain various elements and indicators. The following examples are taken from the English to German and German to English dictionaries. Note: Not all dictionaries contain all the elements mentioned. - Page 17 Word List The Word List sign appears at the top right of the Dictionary Screen and indicates that there are additional entries for the headword on screen. Press ESC to view the Word List. The Word List appears: When the scanned word corresponds to more than one dictionary entry.
-
Page 18: Parts Of Speech
The Quicktionary Phonetics The phonetic transcription of the headword. This can be seen when the dictionary entries are shown in Full Display. The guide to the phonetic symbols used in the dictionary, is available from the Guides and Glossaries menu in Help in the Quicktionary Menu. Parts of Speech Categories of words that describe their particular function, e.g. - Page 19 Split Verbs If you scan a single word which is part of a split verb: The translation will appear along with the Word List icon. In the Word List, the SPLIT VERB option appears allowing you to scan the first part of the split verb.
-
Page 20: Hear Scanned Text Read Aloud
The Quicktionary To display the dictionary entry for another part of the compound word: Press ENT to go to the Dictionary Screen (if you scanned more than one word). Press ESC to display the word list. Scroll to the word you want to translate and press ENT. -
Page 21: Using Professional Dictionaries
sometimes pronunciation, such as "fair" (pleasing in appearance) and "fair" (market) or "wind" (wĭnd) and "wind" (wīnd). If the selected word is a homonym, Quicktionary will read out all the options for pronouncing the word. Using Professional Dictionaries Some Pens contain dictionaries known as professional dictionaries. - Page 22 The Quicktionary c. Use desired location. d. Press ENT to confirm the location. When viewing the dictionary entry, the icon representing the sub-dictionary from which the entry is derived is displayed after the headword. Press ESC to access the Word List and see the additional entries available from each sub-dictionary within the professional dictionary.
- Page 23 b. Scroll through words within the definition using the direction keys. Each word will be highlighted individually. c. Press ENT to view the cross-reference for the highlighted word. d. Press ESC to return to the original dictionary entry. If pressing ESC takes you to the Word List, press ESC again to access the original entry.
-
Page 24: The Pen Main Menu
The Pen Main Menu The Pen Main Menu Use the Pen Main Menu to change default settings and to view Pen information. The Pen Main Menu contains the following options: Quicktionary, Preferences and Information. To access the Pen Main Menu from the Quicktionary application press ESC to access the Quicktionary Menu from the Input Screen, scroll down to Pen Main Menu and press ENT. - Page 25 1. Select Volume. The adjustment bar appears. 2. Adjust the volume level to the setting you want using Pitch When auto speak is selected, the Pen automatically pronounces the word you select or highlight. 1. Select Pitch. 2. Adjust the pitch using Reading Speed This option enables you to adjust the speed at which the Pen pronounces words.
-
Page 26: The Information Menu
The Pen Main Menu Long-Press Interval Use this option to adjust the amount of time you need to keep a button pressed for a long press. 1. Select Long-Press Interval. The adjustment bar appears. 2. Move the slider to the setting you want using 3. -
Page 27: Additional Information
Additional Information Batteries Your Pen comes with 2 AAA Alkaline batteries. If the batteries are low, the "Replace Batteries" message appears on the Pen. When the batteries are about to run out, the Pen shuts down automatically. Many issues may occur on the Pen due to low batteries. If you encounter strange behavior, check the battery level in the Information menu and replace batteries if relevant. -
Page 28: Product Specification
Additional Information Product Specification Feature Display Information Keypad Optical Scanner Power Size Weight Safety Operating Temperature Range Description Resolution: 122 x 32 pixels Size: 61mm x 20mm / 2.4” x .8” Push Buttons - Power/ESC/ENT/Up/Down/Left/Rig ARM 7 TDMI 128 pixels linear array image sensor 400 DPI resolution 2 x 1.5V AAA Alkaline batteries...
Need help?
Do you have a question about the Quicktionary 2 Professional and is the answer not in the manual?
Questions and answers