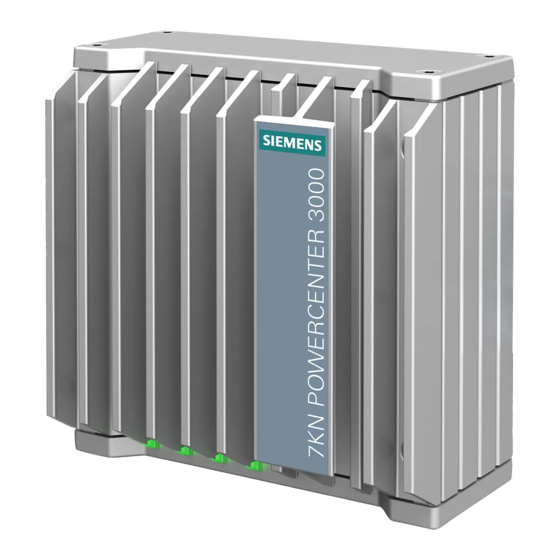
Siemens SENTRON 7KN POWERCENTER 3000 Quick Install Manual
Hide thumbs
Also See for SENTRON 7KN POWERCENTER 3000:
Advertisement
Quick Links
1
Gerät einbauen
Mounting the device
Vor Einbau und Inbetriebnahme – Before mounting and commissioning
1.1
WICHTIG: Beachten Sie alle dem Gerät beiliegenden Dokumente und die Betriebsanleitung, bevor
Sie das Gerät einbauen und anschließen. Die vollständige Dokumentation des Geräts finden Sie im
Internet.
(https://support.industry.siemens.com/cs/ww/de/view/109763838).
IMPORTANT: observe all documents enclosed with the device and the operating instructions manual
before mounting and connecting the device. You find the complete documentation of the device on
the internet.
(https://support.industry.siemens.com/cs/ww/en/view/109763838).
Das Handbuchsymbol weist auf detaillierte Informationen in der Betriebsanleitung hin.
The manual symbol refers to detailed information in the operating instructions.
1.2
Zulässige Einbaulagen – Valid Mounting positions
Erforderlicher Freiraum um das Gerät
Free space required around the device
Stellen Sie sicher, dass die klimatischen Umgebungsbedingungen für die jeweilige Einbaulage
eingehalten werden.
Ensure that the climatic environmental conditions for the specific mounting position are
observed.
Buchmontage
Upright mounting
Basis-Gerät
(Schnittstellen vorne / oben / unten)
Base device
(Interfaces front)
Wandmontage
Wall mounting
Basis-Gerät
(Schnittastellen oben / unten / rechts / links)
Base device
(Interfaces top / bottom / right / left)
Beachten Sie die Orientierung der
Schlüsselloch-Bohrungen beim Anbrin-
gen des Montagewinkels.
Observe the orientation of the keyhole
drill when attaching the mounting bracket.
≥ 50 mm
≥ 50 mm
Buchmontage Hutschiene
Upright mounting on DIN rails
Basis-Gerät
(Schnittstellen vorne / oben / unten)
Base device
(Interfaces front / top / bottom)
Beachten Sie die Position der Feder beim
Anbringen der Hutschienenklammer.
Observe the position of the clip when
attaching the DIN rail clamp.
Hutschienenmontage
Mounting on DIN rails
Basis-Gerät
(Schnittstellen oben / unten / links / rechts)
Base device
(Interfaces top / bottom / left / right)
Beachten Sie die Position der Feder beim
Anbringen der Hutschienenklammer.
Observe the position of the clip when
attaching the DIN rail clamp.
Gerät anbauen – Mounting the device
1.3
Voraussetzungen:
• Stellen Sie sicher, dass die Anschraubfläche an der Wand das Vierfache des Gesamtgewichts des
Geräts einschließlich Befestigungselemente tragen kann.
• Verwenden Sie nur die in der Betriebsanleitung angegebenen Dübel und Schrauben.
• Verwenden Sie zur Befestigung des Montagewinkels ausschließlich die mitgelieferten
Schrauben. Längere Schrauben können das Geräteinnere beschädigen.
Requirements:
• Ensure that the mounting surface on the wall can bear four times the total weight of the
device, including fixing elements.
• Use only the anchors and screws specified in the operating instructions.
• Only use the included screws to fasten the mounting bracket. Longer screws can damage
the inside of the device.
Buchmontage
Upright mounting
T10
Wandmontage
Wall mounting
T10
2
Gerät anschließen
Connecting the device
Schutzleiter anschließen – Connecting the protective earth
2.1
M4
1
²
2.5 mm
2
T20
Stromversorgung anschließen – Connecting the power supply
2.2
Das Gerät darf nur an eine DC 24 V Stromversorgung angeschlossen werden, die den Anforderungen
einer sicheren Kleinspannung (SELV) gemäß der IEC/EN/DIN EN/UL 61010 entspricht.
Im Geltungsbereich UL/CSA 61010-2-201 muss das Gerät beim Betrieb außerhalb eines Gehäuses
nach UL/CSA 61010-2-201 mit NEC Class 2 oder einem energiebegrenztem Stromkreis gemäß
UL/CSA 61010-1 versorgt werden.
The device must only be connected to a 24 VDC power supply which satisfies the requirements of
safety extra low voltage (SELV) according to IEC/EN/DIN EN/UL 61010.
Within the scope of UL / CSA 61010-2-201, the device must be supplied with NEC Class 2 or an
energy-limited circuit according to UL / CSA 61010-1 when operated outside an enclosure according
to UL / CSA 61010-2-201.
1
0.75 ... 2.5 mm
2
M
2
L+
Buchmontage Hutschiene
Upright mounting on DIN rails
T10
Hutschienenmontage
Mounting on DIN rails
T10
4
3
0.5 x 2
Advertisement

Related Manuals for Siemens SENTRON 7KN POWERCENTER 3000


Summary of Contents for Siemens SENTRON 7KN POWERCENTER 3000
- Page 1 • Ensure that the mounting surface on the wall can bear four times the total weight of the Internet. device, including fixing elements. (https://support.industry.siemens.com/cs/ww/de/view/109763838). • Use only the anchors and screws specified in the operating instructions. • Only use the included screws to fasten the mounting bracket. Longer screws can damage IMPORTANT: observe all documents enclosed with the device and the operating instructions manual the inside of the device.
- Page 2 However, the information in this publication is reviewed regularly and any necessary corrections are included in subsequent editions. Schwerwiegender Fehler Gelb Warnung Siemens AG Smart Infrastructure L3 MAINT nicht verwendet Blinkt Gelb (2 Hz) Firmware-Update läuft (nicht ausschalten)