
Related Manuals for Riello MINI LN Series


Summary of Contents for Riello MINI LN Series
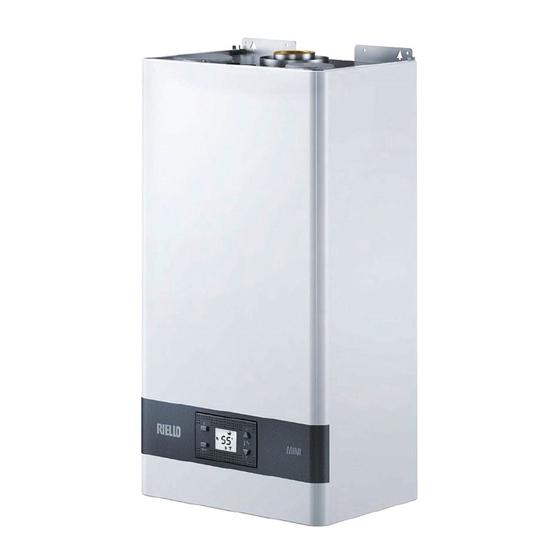
- Page 1 RIELLO MINI 11 - 13 - 17 LN RIELLO MINI EVO EXT 11 - 13 - 17 LN MANUALE INSTALLATORE E UTENTE EN INSTALLATION AND USER MANUAL...
- Page 2 CONFORMITY Gli scaldabagni RIELLO MINI LN e RIELLO MINI EVO EXT LN sono The RIELLO MINI LN and RIELLO MINI EVO EXT LN water heaters comply conformi ai requisiti essenziali delle seguenti Direttive: with the requirements of the following Directives:...
-
Page 3: Table Of Contents
ITALIANO INDICE GARANZIA Il prodotto gode di una garanzia convenzionale (valida per Italia, Repub- AVVERTENZE E SICUREZZE ... . . 4 blica di San Marino, Città del Vaticano), a partire dalla data di acquisto del prodotto stesso. -
Page 4: Avvertenze E Sicurezze 7
ITALIANO Prima di effettuare operazioni di pulizia, scollegare lo scal- 1 AVVERTENZE E SICUREZZE dabagno dalla rete di alimentazione elettrica posizionando l’interruttore bipolare dell’impianto e quello principale del In caso di presenza d'acqua dura ( >18 °f), si consiglia l’in- pannello di comando su “OFF”. -
Page 5: Descrizione Dell'apparecchio
ITALIANO 2 DESCRIZIONE DELL’APPARECCHIO - riposizionare la dima e fissarla con i tasselli in dotazione - viene di seguito descritta la tipologia di scarico posteriore ed orizzon- tale che è la più comune; inserire le feritoie poste sulla dima di carta, nelle alette della dima a muro 2.1 Elementi funzionali dell’apparecchio / - tracciare il centro del foro del condotto... -
Page 6: Evacuazione Dei Prodotti Della Combustione
ITALIANO Vedere Fig. 25 SCARICHI SDOPPIATI (Ø 80) Gli scarichi sdoppiati possono essere orientati nella direzione più adatta Per le distanze minime da materiali combustibili, fare riferimento a alle esigenze del locale. quanto riportato nella Fig. 27 Il condotto di aspirazione dell'aria comburente deve essere scelto tra i due ingressi ( E e F ): rimuovere il tappo di chiusura fissato con le viti e Vedere Fig. -
Page 7: Collegamento Gas
ITALIANO L'uso di qualsiasi componente che utilizza energia elettrica comporta l'os- In caso di installazione esterna utilizzare esclusivamente tubi di servanza di alcune regole fondamentali quali: collegamento idraulici e rubinetteria in materiale metallico in quan- - non toccare l'apparecchio con parti del corpo bagnate o umide e/o piedi to l’utilizzo di kit antigelo potrebbe danneggiare materiali diversi da nudi quelli indicati. -
Page 8: Regolazioni
ITALIANO Per la trasformazione da gas metano a GPL, installare la flangia brucia- Regolazione per il minimo: tore (H). - scollegare uno dei due cavi elettrici dalla bobina Per la trasformazione da GPL a gas metano, rimuoverla. - avvitare e/o svitare la vite a brugola di regolazione del minimo (4) fino ad ottenere il valore di pressione gas indicato in tabella Prima di rimuovere la flangia bruciatore, svuotare lo scaldabagno - rimontare il cappuccio di protezione (2) -
Page 9: Messa In Servizio 7
ITALIANO 4 MESSA IN SERVIZIO Funzione Biberon Selezionando questa funzione è possibile impostare la temperatura massima di erogazione dell’acqua (valore massimo 65°C; valore minimo 36°C). 4.1 Interfaccia comandi Se la funzione non è attiva sul display compare “oF”. Se la funzione è attiva sul display appare la temperatura "biberon"... -
Page 10: Accensione
ITALIANO Confermando col tasto MENÙ (B) si ritorna alla visualizzazione dello Quando "Sb" è visibile, tale indicazione rimane accesa per 10 secondi, stato di on/standby. poi compie 5 lampeggi e poi si spegne per 5 secondi. Successivamente la sequenza di attivazione dei segmenti ricomincia. Nello stato stand-by, se la temperatura letta dalla sonda sanitaria è... -
Page 11: Anomalie Di Funzionamento E Ripristino
ITALIANO 4.5 Anomalie di funzionamento e ripristino 4.7 Spegnimento per lunghi periodi In caso di anomalia sul display appariranno le visualizzazioni riepilogate Il non utilizzo dell'apparecchio per un lungo periodo comporta l’effettua- e descritte in tabella. zione delle seguenti operazioni: - premere il tasto ON-OFF/RESET (A) Transitorio Codice... -
Page 12: Tabella Dei Parametri
ITALIANO 4.8.1 Tabella dei parametri N° UNITÀ DI VALORE IMPOSTATO DESCRIZIONE PARAMETRO VALORI MISURA IN FABBRICA Selezione potenza/litraggio scaldabagno l/min 0 (METANO) 0 (modelli a metano) Selezione metano/GPL 1 (GPL) 1 (modelli a GPL) 0 (FLUSSOSTATO) Selezione flussostato /flussimetro 1 (FLUSSIMETRO) Tempo attesa partenza sanitario (step di 0,5s) 0,5s... -
Page 13: Accesso Alla Scheda Elettronica E Di Modulazione
ITALIANO Per aprire il cruscotto procedere come segue: Modelli 11-13 - togliere le viti C - Per accedere all'apparecchiatura elettronica, togliere il mantello e ruo- - far scorrere il cruscotto verso l’esterno e farlo ruotare fino alla posizione tare il cruscotto di fermo - sganciare il coperchio ed accedere quindi alla scheda. -
Page 14: Dati Tecnici
ITALIANO 8 DATI TECNICI Modello (*) DESCRIZIONE 22,20 25,00 30,00 22,20 25,00 30,00 Portata termica nominale 19.092 21.500 25.800 19.092 21.500 25.800 kcal/h 19,89 22,45 27,60 19,71 22,93 27,63 Potenza termica nominale 17.106 19.307 23.736 16.954 19.716 23.762 kcal/h 7,00 8,30 10,50 7,00... - Page 15 ENGLISH CONTENTS WARNINGS AND SAFETY ....16 DESCRIPTION OF THE APPLIANCE ... 17 At the end of its life, the product should be not Functional elements of the appliance / Max.
-
Page 16: Warnings And Safety 7
ENGLISH Before cleaning, disconnect the water heater from the mains 1 WARNINGS AND SAFETY power supply, flicking the system two-pole switch and the main control panel switch to “OFF”. If there is hard water ( >18 °f) we recommend inserting This appliance should not be operated by children younger suitable antiscalant treatments (e.g. -
Page 17: Description Of The Appliance
ENGLISH 2 DESCRIPTION OF THE APPLIANCE - reposition the template and fix it with the plugs supplied - the most common type of rear and horizontal outlet is described below; Guide the wall template fins into the slots on the paper template - mark the centre of the pipe hole;... -
Page 18: Evacuating Products Of Combustion
ENGLISH See Fig. 25 SPLIT PIPE OUTLETS (80 Ø) Twin outlets can be placed in the most suitable direction according to the For the minimum distances from combustible materials, see what room requirements. is reported in Fig. 27 The combustion air intake pipe must be chosen from the two inlets ( E and );... -
Page 19: Gas Connections
ENGLISH Some basic rules apply to the use of any electrically powered component, When installing outdoors only use metal connecting pipes and taps such as: and fittings since the use of an anti-freeze kit could damage mate- - do not touch the appliance with wet or damp body parts and/or bare rials other than those indicated. -
Page 20: Adjustments
ENGLISH For the conversion from methane gas to LPG, install the burner flange Adjusting to the minimum value: (H). - disconnect one of the two electric cables from the coil For the conversion from LPG to methane gas, remove it. - screw or unscrew the hex head socket screw (4) to adjust the minimum until obtaining the gas pressure value shown in the table Before removing the burner flange, empty the water heater as de-... -
Page 21: Putting Into Service
ENGLISH 4 PUTTING INTO SERVICE Feeder bottle function Selecting this function makes it possible to set the maximum temperature at which the water is delivered (maximum 65°C; minimum 36°C). If the function is not active,“oF appears on the display”. If the function 4.1 Controls interface is active, the "bottle feeder"... -
Page 22: Start-Up
ENGLISH Confirming with the MENU (B) key returns you to the display of the When "Sb" is visible on the display, it remains on for 10 seconds, then on/standby status. it blinks 5 times and switches off for 5 seconds. Then the activation se- quence of the segments restarts. -
Page 23: Operating Faults And Reset
ENGLISH 4.5 Operating faults and reset 4.7 Preparing for extended periods of disuse In the event of a fault, the displays summarised and described in the table If the appliance is not going to be used for a long period of time, the fol- are shown. -
Page 24: Table Of Parameters
ENGLISH 4.8.1 Table of parameters UNIT OF PARAMETER DESCRIPTION MEASURE- VALUES FACTORY SETTING MENT Selecting water heater output/capacity l/min 0 (METHANE) 0 (methane models) Selecting methane/LPG 1 (LPG) 1 (LPG models) 0 (FLOW SWITCH) Selecting flow switch/flow indicator 1 (FLOW INDICATOR) Domestic hot water start wait time (steps of 0.5s) 0.5s... -
Page 25: Accessing The Modulation Circuit Board
ENGLISH To open the instrument panel: Models 11-13 - remove the screws C - To access the electronics of the control box, remove the casing and - slide the instrument panel out and rotate it to the stop position turn the instrument panel - Remove the cover to access the board. -
Page 26: Technical Specifications
ENGLISH 8 TECHNICAL SPECIFICATIONS Model (*) DESCRIPTION 22,20 25,00 30,00 22,20 25,00 30,00 Rated heat input 19.092 21.500 25.800 19.092 21.500 25.800 kcal/h 19,89 22,45 27,60 19,71 22,93 27,63 Nominal heat output 17.106 19.307 23.736 16.954 19.716 23.762 kcal/h 7,00 8,30 10,50 7,00... - Page 27 Mod. 11-13 ø100 ø60 Mod. 17 ø100 ø60 Termostato limite Maximum temperature Bruciatore thermostat Sonda NTC Burner Ventilatore NTC probe Scarico fumi Pressostato aria Exhaust flue duct Pressione/depressione Air pressure switch Scambiatore Pressure/depression Elettrodo accensione/ Exchanger rilevazione Ignition/detection electrode Termostato bruciatore Burner thermostat Valvola gas Gas valve...
- Page 28 Mod. 11-13 Mod. 17 Termostato limite Maximum temperature Bruciatore thermostat Sonda NTC Burner Ventilatore NTC probe Scarico fumi Pressostato aria Exhaust flue duct Pressione/depressione Air pressure switch Scambiatore Pressure/depression Elettrodo accensione/ Exchanger rilevazione Ignition/detection electrode Termostato bruciatore Burner thermostat Termostato antigelo Anti-freeze thermostat Resistenza filo scaldante Heating wire resistor...
- Page 29 Termostato limite Maximum temperature By-pass thermostat Sonda NTC By-pass Scambiatore NTC probe Bruciatore Scambiatore Valvola gas Bruciatore Flussostato Valvola gas Filtro Flussostato Uscita acqua calda Filtro Entrata acqua fredda Uscita acqua calda Entrata acqua fredda Fig. 18...
- Page 30 IWH02 X9 X8 E.A./R. OPE OPE F1=2A Mod. 11-13 T.B. T.L. S.S. F.L. 230 V F= 3.15A -t° 230 V aux Mod. 17 Mod. 11-13-17 (*) 230 V aux T.AG. F= 3.15A F = 3.15A 230 V 230 V Pressostato analogico Domestic hot water S.S.
- Page 31 Mod. 17 Fig. 20 Fig. 23 Fig. 21 Mod. 11-13 Fig. 24 36.7 Fig. 25 Fig. 22...
- Page 32 Mod. 11-13 Mod. 17 condotto fumi flue gases pipe Fig. 28 condotto aspirazione suction line pipe rosone in gomma rubber rose terminale terminal Mod. 11-13 Mod. 17 sede per rosone seat for rose Fig. 26 Fig. 29 Fig. 27...
- Page 33 Mod. 11-13 Mod. 17 Fig. 33 Fig. 30 Mod. 17 Fig. 34 Mod. 11-13 Fig. 31 Mod. 11-13 Fig. 35 Fig. 32...
- Page 34 Mod. 17 7 ±1.5 Fig. 36 Fig. 39 Fig. 37 Fig. 40 Mod. 11-13 Mod. 17 Fig. 38 Fig. 41...
- Page 35 Fig. 42 Fig. 46 Fig. 43 Fig. 47 Fig. 48 Fig. 44 Mod. 11-13 Mod. 17 Fig. 49 Fig. 45...
- Page 36 RIELLO S.p.A. Via Ing. Pilade Riello, 7 37045 - Legnago (VR) www.riello.com The manufacturer strives to continuously improve all products. Appearance, dimensions, technical specifications, standard equipment and accessories are therefore liable to modification without notice.
Need help?
Do you have a question about the MINI LN Series and is the answer not in the manual?
Questions and answers