Amway eSpring Installation Instructions Manual
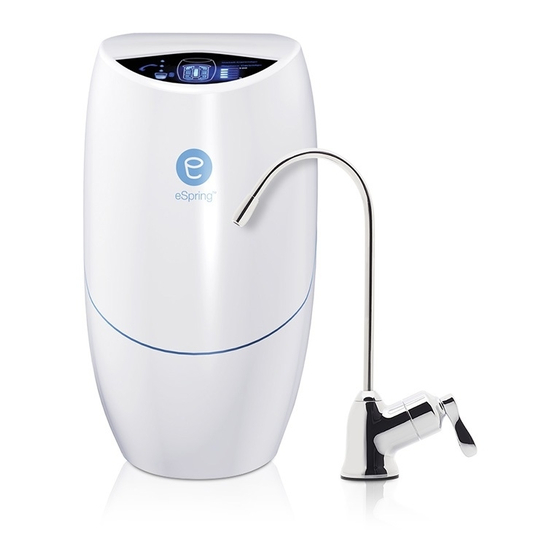
Water treatment system
Hide thumbs
Also See for eSpring:
- Easy installation manual (11 pages) ,
- Cleaning & maintenance manual (5 pages) ,
- Owner's manual (68 pages)
Advertisement
Available languages
Available languages
Quick Links
Below Counter Tap Installation
This installation uses a separate, counter-mounted auxiliary tap. With the
eSpring™ Water Treatment System below the counter, the Auxiliary Tap allows
maximum use of counter space and there is no visible tubing. This installation
requires connection to your cold water supply line and the availability of an
electrical outlet under the sink. Installation of this kit may require professional
assistance.
REVIEW ALL INSTALLATION INSTRUCTIONS TO BE SURE YOU HAVE ALL
PARTS PRIOR TO INSTALLATION.
The Auxiliary Tap Kit is designed specifi cally for use with the eSpring Water
Treatment System.
fi g. 1
c
Auxiliary Tap Components (Fig. 1):
a. Auxiliary tap spout
b. Auxiliary tap body with red, green and blue tubing, foam gasket,
wing nut
c. Hose nipple*
* Hose nipple contains a fl ow control that is essential for
proper operation.
IMPORTANT: If you suspect that your water pressure exceeds 860 kPa a
pressure regulating device will need to be installed prior to the tap.
How to Mount the Auxiliary Tap
1.
Select a location for the auxiliary tap. There may already be an extra,
capped hole in your sink's ledge for a sprayer or extra tap. If so, mounting
your auxiliary tap there will result in the easiest installation. Just remove
the cap and the hole is ready to use, no drilling needed.
2.
If there is no ready-to-use capped hole, you may choose to drill a hole
in the sink ledge or counter where you want to install your auxiliary tap.
The hole must be at least 32mm in diameter and centered no farther
than 150mm from the sink basin. Before drilling, make sure that you
have suffi cient clearance below the sink or counter to accommodate the
tap and allow you to make connections to the eSpring Water Treatment
System.
BELOW COUNTER TAP INSTALLATION
a
b
WARNING: Due to the possibility of shock or electrocution, use extreme care
when operating an electric power drill or other power tools around the sink.
Make sure that no part of you or the drill comes into contact with water or
moisture at any time.
NOTE: If you have a porcelain/ceramic sink, you may want to seek professional
assistance for proper drilling.
3.
Insert the tap spout into the main body and press into place.
4.
Remove the wing nut while keeping the foam gasket in place.
5.
Holding the foam gasket in place, lower the auxiliary tap stem and tubing
through the hole in the sink ledge or counter (Fig. 2).
fi g. 2
6.
Reach up from below the counter and place the wing nut onto the
threaded tap stem above the three attached tubing. Position the tap in
the desired orientation relative to the location of the handle (left-handed
or right-handed). Have a helper hold the tap in place while you tighten the
wing nut.
7.
Mark the end of the blue tubing with a line 14.4mm from the end and the
green tubing with a line 18mm from the end (Fig. 3).
fi g. 3
8.
Remove the top shroud and electronic module from the eSpring
Water Treatment System.
(10-0663-E)
1
Advertisement

Related Manuals for Amway eSpring


Summary of Contents for Amway eSpring
- Page 1 PARTS PRIOR TO INSTALLATION. Remove the wing nut while keeping the foam gasket in place. The Auxiliary Tap Kit is designed specifi cally for use with the eSpring Water Treatment System. Holding the foam gasket in place, lower the auxiliary tap stem and tubing through the hole in the sink ledge or counter (Fig.
- Page 2 System to verify that there are no leaks. fi g. 7 Your eSpring™ Water Treatment System is now ready to serve you whenever you want great-tasting, healthier water. After you have connected your tap to the system and water, check your electronic module display to be sure your water treatment system is functioning properly.
- Page 3 150 mm van de gootsteenbak bevinden. Voordat u begint met het boren, controleert u of er voldoende ruimte onder de goot steen of het aanrecht is voor de kraan en of u de aansluitingen op het eSpring waterzuiveringssysteem kunt verrichten.
- Page 4 14. Verwijder de moer van de slangnippel en schuif hem op de rode slang Uw eSpring™ waterbehandelingssysteem is nu klaar om u wanneer u ook (afb. 7). maar wenst heerlijk smakend, gezonder water te geven.
- Page 5 électrique à proximité de l’évier. S’assurer en travail. Puisque le Système de Traitement de l’Eau eSpring™ se trouve sous le tout temps qu’il n’y a aucun contact entre vous ou la perceuse, et de l’eau ou plan de travail, le robinet auxiliaire permet une utilisation maximale du plan de de l’humidité.
- Page 6 Ouvrir le robinet d’isolement et vérifi er le Système pour voir s’il n’y a pas de fuite. Votre Système de Traitement de l’Eau eSpring™ est maintenant prêt à vous fournir une eau plus saine ayant meilleur goût. 14. Enlever l’écrou du raccord du tuyau et le faire glisser sur le tuyau rouge Après avoir branché...
- Page 7 150 mm vom Spülbeckenrand. Bevor Sie bohren, stellen Abb. 4 Sie sicher, dass Sie genug Platz für die nötigen Verbindungen des eSpring Wasserfi ltersystems unter der Arbeitsfl äche oder Spülbecken haben. WARNUNG: Es besteht ein erhöhtes Risiko einen elektrischen Schlag zu bekommen, wenn Sie mit einem elektrischen Bohrer oder anderen Elektrogeräten am...
- Page 8 überprüfen Sie, ob keine undichten Stellen vorhanden sind. 15. Den roten Schlauch über die Widerhaken der Schnellverbindung schieben und Ihr eSpring Wasserfi ltersystem ist jetzt einsatzbereit, wann immer Sie fortan die Schraubenmutter mit einem Schraubenschlüssel festschrauben (Abb. 8). gut schmeckendes und gesünderes Wasser trinken wollen.
- Page 9 Εγκατάσταση Κάτω από τον Πάγκο Η εγκατάσταση αυτή χρησιµοποιεί µια ξεχωριστή βοηθητική βρύση τοποθετηµένη στον πάγκο. Όταν το Σύστηµα Επεξεργασίας Νερού eSpring™ τοποθετείται κάτω από τον πάγκο, η Βοηθητική Βρύση επιτρέπει τη µέγιστη χρήση χώρου στον πάγκο, και δεν υπάρχουν ορατές σωληνώσεις. Αυτή η εγκατάσταση απαιτεί σύνδεση στη...
- Page 10 Αφαρέστε το παξιµάδι από το ακροφύσιο και σύρετέ το στην κόκκινη σωλήνα το σύστηµα για να βεβαιωθείτε ότι δεν υπάρχουν διαρροές. (Εικ. 7). Το Σύστηµα Επεξεργασίας Νερού eSpring™ είναι τώρα έτοιµο να σας Εικ. 7 εξυπηρετήσει οποτεδήποτε θελήσετε εύγευστο, υγιεινότερο νερό.
- Page 11 Cerciórese de que ninguna parte de su persona superfi cie de la cocina. Con el Sistema de Tratamiento de Agua eSpring™ para ni del taladro entre en contacto con el agua o la humedad en ningún momento.
- Page 12 Cerciórese de que los tubos estén insertados totalmente. Abra la válvula de aislamiento del suministro de agua y verifi que el Sistema eSpring™ para cerciorarse de que no haya fugas. Retire la junta de la boquilla y deslícela por el tubo rojo (Fig. 7).
- Page 13 Neste tipo de instalação é utilizada uma torneira auxiliar, montada na bancada. bancada para fi xar a torneira e para lhe permitir efectuar as ligações do Com o Sistema de Tratamento de Água eSpring™ sob a bancada, a Torneira Sistema de Tratamento de Água eSpring.
- Page 14 Retire a porca do acessório de ligação à rede e encaixe este no tubo vermelho (Fig. 7). O Sistema de Tratamento de Água eSpring™ está agora pronto para o servir, sempre que desejar uma água cristalina e saudável. fi g. 7 Depois de ter procedido à...
- Page 15 NOT: Porselen ya da seramik lavabonuz varsa doğru delme işlemi için profesyonel yardım alın. Bu montajda tezgaha takılan ayrı bir yedek musluk kullanılır. Tezgah altı eSpring™ Musluk ucunu, musluğun gövdesine yerleştirin ve yerine itin. Su Arıtma Sistemi ile, yedek musluk tezgah üzerinde maksimum kullanım alanı...
- Page 16 Su izolasyon vanasını açın ve Sistemde sızıntı olup olmadığını tekrar kontrol edin. 16. Kırmızı hortumu hortum ucundaki kancaya doğru itin ve somunu bir anahtarla eSpring™ Su Arıtma Sisteminiz istediğiniz zaman size içimi lezzetli ve daha sıkın (Şekil 8). sağlıklı su sağlamaya hazırdır.
- Page 17 Systemu Oczyszczania Wody eSpring. Przy tej instalacji stosowany jest dodatkowy kran montowany na blacie kuchennym lub na zlewozmywaku. Przy instalacji Systemu Oczyszczania Wody eSpring™ pod blatem, zastosowanie dodatkowego kranu pozwala na maksymalne wykorzystanie OSTRZEŻENIE: Przy stosowaniu elektrycznej wiertarki lub innych narzędzi powierzchni blatu i równocześnie nie ma widocznych żadnych rurek nad zlewem.
- Page 18 Otworzyć zawór izolacyjny i sprawdzić system, aby potwierdzić, że nie ma żadnych przecieków. System Oczyszczania Wody eSpring™ jest gotowy do używania. W dowolnej chwili można korzystać ze smacznej, zdrowszej wody. Po podłączeniu kranu do Systemu i do wody należy sprawdzić wyświetlacz Pchnąć...
- Page 19 DŮLEŽITÉ UPOZORNĚNÍ: Pokud se domníváte, že tlak vody převyšuje 860 kPa (8,6 bar), je před instalací ke kohoutku nutné nainstalovat zařízení na regulaci tlaku. Sundejte vrchní kryt a elektronický modul ze zařízení na čištění vody eSpring™. Jak namontovat pomocný kohoutek Vyberte si zelenou trubici připojenou k pomocnému kohoutku a volný...
- Page 20 Zkontrolujte, zda jsou trubice úplně zasunuté. Otevřete uzavírací ventil a zkontrolujte, obr. 7 zda nedochází k úniku vody ze zařízení. Vaše zařízení na čištění vody eSpring™ je nyní připravené vám sloužit kdykoli budete chtít chutnou, zdravou vodu. Pokud napojíte kohoutek na zařízení a vodu, zkontrolujte si displej elektronického modulu, abyste si ověřili, zda zařízení...
- Page 21 Această instalare foloseşte un robinet auxiliar separat montat pe blat. Când sistemul pentru Asiguraţi-vă nici o parte a corpului dvs. sau maşina de găurit nu vine în nici un moment în tratarea apei eSpring™ este instalat sub blat, robinetul auxiliar permite folosirea la maximum contact cu apa sau cu umezeala.
- Page 22 şi verificaţi dacă mai sunt pierderi în sistem. Fig. 7 Sistemul dvs. pentru tratarea apei eSpring™ este acum gata de utilizare de câte ori vreţi apă cu gust bun, mai sănătoasă. După ce aţi conectat robinetul la sistem şi la apă, verificaţi afişajul modulului...
- Page 23 PREGLEDAJTE SVE UPUTE ZA UGRADNJU KAKO BI BILI SIGURNI DA IMATE SVE otvor na hrbtu sudopera ili radne ploče (sl. 2). DIJELOVE POTREBNE ZA UGRADNJU. Set za pomoćnu slavinu je dizajniran specifično za uporabu s eSpring sustavom za pročišćavanje vode. Kontaktirajte odjel za odnose sa strankama. sl. 2 NAPOMENA: Ovlašteni vodoinstalater mora osigurati i instalirati ventil za zatvaranje i...
- Page 24 Vaš eSpring™ sustav za pročišćavanje vode sada je spreman da vam bude na usluzi kada god poželite ukusnu, zdraviju vodu. Gurnite crvenu cijev preko kuke na nazuvici cijevi i stegnite maticu vijka s ključem za Nakon što ste povezali slavinu sa sustavom i vodom, provjerite prikaz elektroničkog...
- Page 25 NAVODILA ZA NAMESTITEV, DA PREVERITE, ČE IMATE VSE POTREBNE DELE. odprtino na koritu ali pultu (slika 2). Komplet z dodatno pipo je zasnovan samo za uporabo eSpring sistema za prečiščevanje pitne vode. Pokličite eSpring telefonske informacije. OPOMBA: Vodovodni inštalater mora priskrbeti in namestiti kotni ventil in T-člen, ki slika 2 odgovarja lokalnim standardom vodovodnih sistemov.
- Page 26 Preverite, ali so cevi popolnoma vstavljene. Odprite ventil za dotok vode in ponovno preverite, ali še kje pušča. Vaš eSpring sistem za prečiščevanje pitne vode vam je na voljo, kadarkoli si zaželite bolj očiščeno vodo z zelo dobrim okusom. Rdečo cev potisnite čez zazobke in pritrdite matico s ključem (slika 8).
- Page 27 FONTOS: Ha Ön úgy gondolja, hogy a vízcsapban a víznyomás meghaladja a 860 kP-t, forduljon szakképzett vízszerelőhöz, aki beállítja a szükséges nyomást. Vegye le az eSpring™ víztisztító készülék felső burkolatát és az elektronikus modul. Fogja meg a pótcsaphoz szerelt zöld csövet és határozottan vezesse bele szabad végét a szűrőtartály bemeneti csatlakozójába (9.5mm) (4.
- Page 28 Nyissa meg ismét a bejövő vízcsapot és ellenőrizze a készüléken nem észlelhető -e szivárgás. 8. ábra Az Ön eSpring™ víztisztító készüléke készen áll, hogy Önnek bármikor kellemes ízű, egészséges vizet nyújtson. Ha már rákötötte a pótcsapot a készülékre és a vízre, ellenőrizze az elektronikus modul kijelzőjén, hogy a víztisztító...
- Page 29 Settet for tilleggskran er konstruert for å brukes med vannbehandlingssystemet Fjern vingemutteren mens du holder skumgummipakningen på plass. eSpring. Ta kontakt med kundeservice på telefon 68 81 88 18 om du trenger hjelp. Hold skumgummipakningen på plass, stikk stammen og slangen for tilleggskranen ned gjennom hullet i kanten på...
- Page 30 Åpne vanntilførselsventilen og kontroller at det ikke forekommer lekkasje i systemet. Vannbehandlingssystemet eSpring™ er nå klart til å brukes hver gang du 15. Fjern mutter fra slangenippel og tre på den røde slangen (3/8-tommer) vil ha sunnere vann som smaker godt.
- Page 31 VIKTIGT! Om du misstänker att vattentrycket överskrider 860 kPa (8.6 bar), måste du kontakta rörmokare för installation av en tryckregleringsanordning. Så här monteras extrakranen Ta bort toppskyddet och den elektroniska modulen från eSpring™ Utse en plats för extrakranen. Det kanske redan fi nns ett extra vattenbehandlingssystem.
- Page 32 fi nns några läckor. 15. Ta bort muttern från slangnippeln och trä på den röda slangen (3/8”) Ditt eSpring™ vattenbehandlingssystem är nu klart för att användas (bild 7). varje gång du vill ha hälsosammare och mer välsmakande vatten.
- Page 33 4 vähintään 32 mm eikä se saa olla 150 mm:n ä kauempana pesualtaasta. Varmista ennen poraamista, että pesualtaan tai pöydän alla on hanalle riittävästi tilaa ja että voit tehdä liitännät eSpring-vedenkäsittelyjärjestel- mään. VAROITUS: Ole erittäin varovainen käyttäessäsi sähköporaa tai muita sähkötyökaluja pesualtaan lähellä...
- Page 34 Jos järjestelmä vuotaa, sulje vedensyötön eristysventtiili. Varmista, että letkut on työnnetty riittävän syvälle. Avaa eristysventtiili ja tarkasta järjestelmä vuotojen varalta. eSpring™-vedenkäsittelyjärjestelmä on nyt valmis käyttöösi aina kun haluat hyvänmakuista, terveellistä vettä. 16. Työnnä punainen letku letkun nipassa olevan väkäsen yli ja kiristä mutteri ruuviavaimella (kuva 8).
- Page 35 GENNEMLÆS ALLE INSTALLATIONSINSTRUKTIONER FOR AT SIKRE AT ALLE og slanger gennem hullet i vaske- eller bordkanten (Fig. 2). DELE FOREFINDES, FØR INSTALLATION PÅBEGYNDES. Hjælpehaneudstyret er specielt fremstillet til brug med eSpring Vandbe- handlingssystemet. Fig. 2 BEMÆRK: Der kræves en autoriseret blikkenslager til at levere og installere separat lukke-hane og T-stykke på...
- Page 36 åbnes hanen og systemet undersøges igen for at sikre, at der ikke er lækager. eSpring™ Vandbehandlingssystemet er nu parat til at forsyne dig med velsmagende og rent vand til enhver tid. 16. Skub den røde slange over modhagen på slangenippelen og stram skruen Når hanen er forbundet til systemet og vandet, skal man...
- Page 37 Artwork Legend Final Proof Project Information Artwork No.: Superseded Artwork No.: 1005869 1003331 Product Line: Home Tech - eSpring Water Treatment System Description: Auxiliary Tap Art Developer: Paula Wisener (616) 787-7785 Artwork Information Component Type: Insert Print Dimensions: 8.375 x 10.75 in 16.75 x 10.75 in...
Need help?
Do you have a question about the eSpring and is the answer not in the manual?
Questions and answers