Table of Contents
Advertisement
Advertisement
Table of Contents

Related Manuals for Matsui M100WM10E


Summary of Contents for Matsui M100WM10E
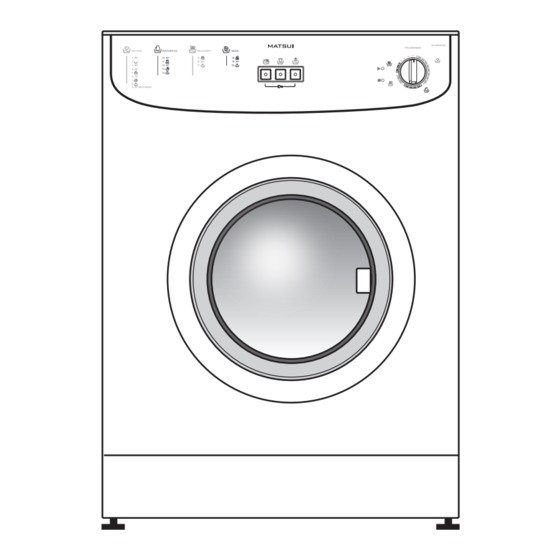
- Page 1 M100WM10E WASHING MACHINE INSTALLATION AND INSTRUCTION MANUAL M100WM10E PROGRAMME COTTON SYNTHETICS DELICATES WOOL 1. 90º 10. 60º 16. 30º 19. 30º 3. 90º 12. 40º 4. 40º 6. 30º 9. 40º MAX WASH 01/11/2011 618346-001 M100WM10E_20100209_without PN.indd 1...
- Page 2 Congratulations on the purchase of your new Matsui Washing Machine. This Installation and Instruction Manual will help you to use it properly and safely. Please make sure you read the Safety Precautions before you use your washing machine. Intended for domestic use only.
-
Page 3: Table Of Contents
CONTENTS CONTENTS..................................3 SECTION.1:.BEFORE.USING............................. 4. • Safety warnings ................................................4 • Recommendations ..............................................4 SECTION.2:.INSTALLATION............................. 5. • Removal of transportation screws ......................................5 • Adjustment of feet ..............................................5 • Electrical connection .............................................6 • Water supply connection ...........................................6 • Water drain connection ............................................7 SECTION.3:.CONTROL.PANEL............................8 •... -
Page 4: Section.1:.Before.using
SECTION 1: BEFORE USING SAFETY.WARNINGS • Do not use a multiple socket or extension cable. • Do not insert a plug with damaged or broken cable into the socket. • If the mains cable is damaged it should be replaced by the manufacturer or appointed service agent in order to avoid a hazard. -
Page 5: Section.2:.Installation
SECTION 2: INSTALLATION Please pay attention to the following issues before using your washing machine. REMOVAL.OF.TRANSPORTATION.SCREWS • Transportation screws, which are located at the back rear of the machine, must be removed before operating the machine. • Loosen the screws by turning them anticlockwise with a suitable spanner. (DIAGRAM-1) •... -
Page 6: Electrical Connection
ELECTRICAL.CONNECTION • Your washing machine requires a 220-240Volts, 50Hz. mains supply. • A specially earthed plug has been attached to the mains cable of your washing machine. This plug must be inserted to a earthed socket. The fuse value of the electricity line attached to this should also be at lease 10 amper. -
Page 7: Water Drain Connection
The end of the drain hose can be connected directly to a drainage stand-pipe or alternatively to a specific connection point designed for that purpose on the waste outlet of a sink unit. • Never attempt to extend the water drain hose by adding extra parts. M100WM10E PROGRAMME COTTON SYNTHETICS DELICATES WOOL 1. -
Page 8: Section.3:.Control.panel
SECTION 3: CONTROL PANEL A3.(.4.buttons,.spin.speed.selector.) Detergent drawer Programme control Start/pause light Start/pause button Function indicator lights Function buttons Programme ready light Programme end light START/PAUSE.BUTTON Used to start a selected programme or pause during operation. It is required for the programme control to be turned to 0 (off) position before selecting the programme or changing a continuing programmeme. -
Page 9: Programmeme Knob
For the programme to continue from the same point, repress the same button. If you do not want your delicate clothes to be spun or you want them to spin gently, turn the programme control to 0 (Off) position. Turn the programme control to the draining or spinning programme you desire and press the Start/Pause button. -
Page 10: Section.4:.Washing.your.laundry
SECTION 4: WASHING YOUR LAUNDRY • Plug in the machine to the mains supply. • Connect hoses to water supply and to drain. First.wash.cycle There may be water left inside your machine after factory testing. It is recommended that the first wash cycle should be made without any laundry to remove this water; pour half a measuring cup of normal all purpose detergent into compartment 2 and select cotton programmeme at 90°C. -
Page 11: Running The Machine
• For excessively dirty clothes, select a programme with pre-washing. Put ¼ portion of detergent into compartment 1 and the remaining portion into compartment 2. • Only use detergents developed especially for automatic washing machines. The quantities that will be used for your clothes are written on the detergent packaging. •... - Page 12 Programme ending • Your machine will automatically stop when the programme you have selected ends. • The programme end light will illuminate. • Turn the programme control to 0 (off) position. • The door will unlock approximately two minutes after the programme ends. You can open the door by pulling the handle of the door towards yourself and take out your clothes.
-
Page 13: Selecting.the.washing.programmes
SELECTING.THE.WASHING.PROGRAMMES. PROGRAMME DETERGENT MAX DRY TYPE OF LAUNDRY EXPLANATIONS COMPART. LOAD CAPACITY (kg) 1-COTTON 90˚ Dirty, boil, cotton and linen textile 2-COTTON 60˚ Very dirty, cotton, (PREWASH) coloured and linen textile 3-COTTON 60˚ Dir t y, cotton,coloured and linen textile 4-COTTON 40˚... - Page 14 PROGRAMME DETERGENT MAX DRY TYPE OF LAUNDRY EXPLANATIONS COMPART. LOAD CAPACITY (kg) 13-SPORT Sport clothes All sports clothes CLOTHES 40˚ and jeans 14-SYNTHETIC Slightly dirty, synthetic Nylon socks, COLD or synthetic mixture blouse sensitive laundry. Washed without heating the tap water. 15-CURTAIN Tulle and curtain as Tulle, curtain,...
-
Page 15: Section.5:.Maintenance.and.cleaning
SECTION 5: MAINTENANCE AND CLEANING • Unplug your machine. • Close the water tap. WATER.INLET.FILTERS On the water tap part of your machine’s water inlet hose and at the water inlet valves, there are filters to prevent the entrance of dirt and foreign materials. If the machine is unable to receive sufficient water even though your water tap is open, these filters should be cleaned. -
Page 16: Detergent Drawer
DETERGENT.DRAWER Detergents may form sediment in your detergent drawer or in the housing of the detergent drawer over time. To clean this sediment, you must remove the detergent drawer. • Pull out the detergent drawer. (DIAGRAM-1) • Press the blue siphon plug in the drawer, and continue to pull the drawer until it is removed. -
Page 17: The Cabinet
THE.CABINET Clean the exterior surface of the cabinet of your machine with lukewarm water and a cleaning substance that will not damage the cabinet. After rinsing with clean water, wipe it with a soft and dry cloth. If the machine is installed in a location where the ambient temperature can fall below 0 ˚C, ensure the following procedure are used when not in use: •... -
Page 18: Section.6:.Practical.information
SECTION 6: PRACTICAL INFORMATION The following information is for reference only. Results may vary depending on the nature of your garment and its stains. Alcoholic beverages: The stain should first be washed with cold water, than should be wiped with glycerine and water. Then rinse with water mixed with vinegar. - Page 19 Ink: Hold the stained area under cold water and wait until the inky water completely runs off. Then rub with water diluted with lemon juice and detergent, wash after waiting for 5 minutes. Fruit: Stretch the stained area of your clothes on the top of a container and pour cold water on it.
-
Page 20: Section.7:.What.to.do.if
SECTION 7: WHAT TO DO IF... If a problem does occur, it may often be due to something very minor. The following table may be able to resolve the problem. FAILURE PROBABLE CAUSE SOLUTION Your machine does not It is unplugged. Insert the plug into the operate. - Page 21 FAILURE PROBABLE CAUSE SOLUTION Your machine is vibrating. There is a small amount of It does not prevent the clothes in the device. operation of the machine. Excessive amount of clothes Do not exceed the are filled in the machine or recommended quantity of the clothes are not placed in clothes and spread your...
- Page 22 FAILURE PROBABLE CAUSE SOLUTION There are residues of The pieces of some By calibrating your machine detergent on the clothes. detergents which do not for “Rinsing” programme, dissolve in water may stick to make an additional rinsing your clothes as white stains. or remove the stains after drying with the help of a brush.
-
Page 23: Section.8:.Automatic.failure.detection.system
SECTION 8: AUTOMATIC FAILURE DETECTION SYSTEM Your machine is equipped with systems which will both take the necessary precautions and warn you in case of any failure by controlling itself constantly during the washing processes. FAILURE CODE FAILURE PROBABLE THE PROCESS TO BE DONE INDICATOR FAILURE Err 01... -
Page 24: Section.9:.International.washing.signs
SECTION 9: INTERNATIONAL WASHING SIGNS 40° Washing Do not wash Lukewarm iron. Medium hot iron. temparature. (hand wash) Hot iron. Do not iron. Do not tumble Hang to dry. dry. Drip dry. Dry at. Do not bleach. Handy to bleach. All of these are dry cleaning symbols. - Page 25 Specifications Model M100WM10E Rated Voltage (VAC) 230V Rated Power (W) 2100 Maximum dry laundry capacity (kg) Recommended loading (kg) Height (cm) Width (cm) 59.6 Depth (cm) Maximum spin cycle ( rpm ) 1000 (*) Maximum spin cycles depend on the model you’ve chosen Visit Partmaster.co.uk today for the easiest way to...
Need help?
Do you have a question about the M100WM10E and is the answer not in the manual?
Questions and answers