
Related Manuals for Sony LMD-X2705N


Summary of Contents for Sony LMD-X2705N
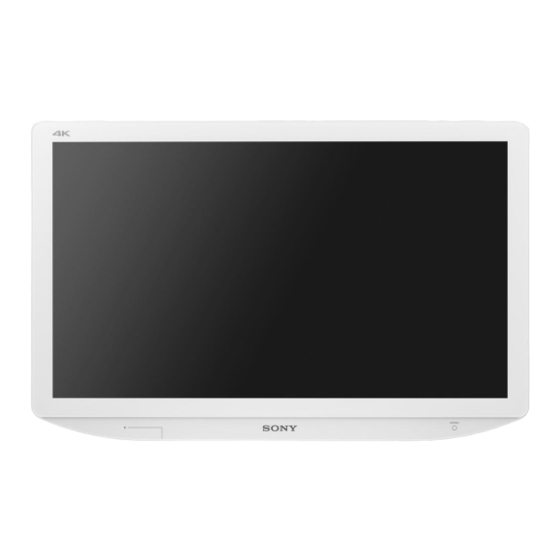
- Page 1 4-747-120-12(1) 2019-12 LCD Monitor Instructions for Use Before operating the unit, please read this manual thoroughly and retain it for future reference. LMD-X2705N LMD-X2700N © 2019 Sony Corporation...
- Page 2 Indications for Use/Intended Use The LCD Monitor is intended to provide 4K 2D color Symbols on the product video displays of images from endoscopic/laparoscopic Safety sign camera systems and other compatible medical imaging Follow the warnings in the instructions for use systems.
- Page 3 IEC 60601-1 standards. If in If you have any questions about this product, you may doubt, consult qualified service personnel. call; Sony Customer Information Service Center 1-800-222- 3. Connecting the unit to other devices may increase the 7669 or http://www.sony.com/ leakage current.
- Page 4 • Portable RF communications equipment should be used no closer than 30 cm (12 inches) to any part of the LMD- X2705N/X2700N. Otherwise, degradation of the performance of this equipment could result. • If the LMD-X2705N/X2700N will be used adjacent to or stacked with other equipment, normal operation of the LMD- X2705N/X2700N under such configurations should be verified via observation.
- Page 5 Guidance and manufacturer’s declaration – electromagnetic immunity The LMD-X2705N/X2700N is intended for use in the electromagnetic environment specified below. The customer or the user of the LMD-X2705N/X2700N should assure that it is used in such an environment. Compliance level IEC 60601 Immunity test Electromagnetic environment –...
- Page 6 Guidance and manufacturer’s declaration – electromagnetic immunity The LMD-X2705N/X2700N is intended for use in the electromagnetic environment specified below. The customer or the user of the LMD-X2705N/X2700N should assure that it is used in such an environment. IEC 60601 Immunity test Compliance level Electromagnetic environment –...
- Page 7 To assess the electromagnetic environment due to fixed RF transmitters, an electromagnetic site survey should be considered. If the measured field strength in the location in which the LMD-X2705N/X2700N is used exceeds the applicable RF compliance level above, the LMD-X2705N/X2700N should be observed to verify normal operation. If abnormal performance is observed, additional measures may be necessary, such as reorienting or relocating the LMD-X2705N/X2700N.
- Page 8 Guidance and manufacturer’s declaration – electromagnetic immunity The LMD-X2705N/X2700N is intended for use in an electromagnetic environment in which radiated RF disturbances are controlled. Portable RF communications equipment should be used no closer than 30 cm (12 inches) to any part of the LMD-X2705N/X2700N.
- Page 9 Caution Warning When you dispose of the unit or accessories, you must Make sure the surface is wide enough so that this obey the laws in the relative area or country and the apparatus’s width and depth don’t exceed the surface’s regulations in the relative hospital regarding edges.
- Page 10 Disposal of Old Electrical & Electronic Equipment For the customers in the U.S.A. (Applicable in Republic of India) SONY LIMITED WARRANTY - Please visit http:// www.sony.com/psa/warranty for important information and complete terms and conditions of Sony’s limited warranty applicable to this product.
-
Page 11: Table Of Contents
Specifications ..........30 Table of Contents Dimensions ............36 Licenses ............37 Precaution ............12 On Safety ...........12 On Installation ...........12 Precautions for using this unit safely ..12 Precautions for connecting this unit with other medical devices ......12 To prolong the life of the unit ....12 Cautions for RESPONSIBLE ORGANIZATION when connecting this equipment to IT- NETWORK ..........12... -
Page 12: Precaution
is a higher possibility that you experience Precaution discomfort. Precautions for connecting this unit with On Safety other medical devices Operate the unit only with a power source as Before you utilize this device and/or connect specified in the “Specifications” section. this device to any other medical device, please The nameplate indicating operating voltage, ... -
Page 13: On Simultaneous Use With An Electrosurgical Knife, Etc
changes in the IT-NETWORK configuration; the physical characteristics of the liquid crystal connection of additional items to the IT- display, such “stuck” pixels may appear NETWORK; spontaneously. These problems are not a disconnecting items from the IT-NETWORK; malfunction. ... -
Page 14: On Fan Error
On Security stained cloth. The protection plate surface/ monitor surface may be scratched. SONY WILL NOT BE LIABLE FOR DAMAGES OF Do not keep the protection plate surface/ ANY KIND RESULTING FROM A FAILURE TO... -
Page 15: On Repacking
Compliance with medical safety standards in LMD-X2700N U.S.A., Canada and Europe The illustration of LMD-X2705N is used for the explanations. Any differences in specifications IEC 60601-1 and product safety standards in the are clearly indicated in the text. U.S.A., Canada and Europe have been obtained for this monitor. -
Page 16: Location And Function Of Parts And Controls
Location and Function of Parts and Controls Front Panel (On)/ (Standby) switch /// buttons Press the side to turn the monitor on. Press the Press to select the items and setting values. side to switch the unit to standby state. ... -
Page 17: Input Signals And Adjustable/Setting Items
SWAP: For swapping between the main When you press PORT A or PORT B when display and the sub display. it is lit in green, a menu for selecting the input connector assigned to the PORT A/B is Input select buttons displayed. -
Page 18: Rear/Bottom Panel
Rear/Bottom Panel HDMI cable holder Note Secures the HDMI cable (Ø7 mm or less). Consult with qualified personnel at using this terminal. Close Caution For safety, do not connect the connector to peripheral device wiring that might have excessive voltage. Cable Follow the instructions for use for this port. - Page 19 If use of such a device is unavoidable, isolate its power supply by connecting an isolation 3G/HD/SD-SDI input/output connector transformer, or by connecting an isolator (BNC type) (LMD-X2705N only) between the connecting cables. input connector After implementing these measures, confirm...
-
Page 20: Preparation
Shutter Preparation AC input connector Connecting Make sure that the (On)/ (Standby) switch is set to (Standby). AC power cord AC plug holder Remove the connector cover. While pressing the lock levers to the direction , slide off the connector cover. When using the AC adaptor (optional) Slide the shutter to show the DC input connector and insert the DC connector to the... -
Page 21: Turning On The Monitor/Switching Input Settings
Initial Setting When you turn on the unit for the first time after purchasing it, select the area and language where you intend to use this unit from among the options. The initial setting may differ according to the model you use. -
Page 22: Using The Menu
Using the Menu If you have selected the wrong area, change the Color Temperature setting (page 24). The unit is equipped with an on-screen menu for making various adjustments and settings such To set the using language as picture control, input setting, setting change, You can select one of seven languages (English, etc. -
Page 23: Adjustment Using The Menus
Press the / button to select the tab. Adjustment Using the Menus The selected tab is shown in blue, and setting items of the selected tab appear. Items Select an item. Press the / button to select the item. The screen menu of this monitor consists of the The item to be changed is displayed in blue. -
Page 24: Adjusting And Changing The Settings
OSD Setting Submenu Setting Power On Setting Color Temperature Select the color temperature from Power Save among “D56,” “D65,” “D93.” Serial Remote Remote Note Ethernet Setting If the setting is changed, Gain R/G/B Custom Button Offset and Bias R/G/B Offset are Panel Display restored to 0 respectively. -
Page 25: Pip / Pop Menu
Set to “Not Skip” or “Skip” for the format signal. Display Port 1, Display Port 2, HDMI, Enhanced Format: DVI-D, SDI (LMD-X2705N only) input Select to use for a high-resolution connector. HDMI format signal or HDR- Port B Input Select Sets the input connector that is compatible HDMI format signal. -
Page 26: System Configuration Menu
Submenu Setting Submenu Setting Auto Input Select Select the auto detection setting of the Off: input signal from “Mode1,” “Mode2,” The Auto Input Select function does “Off.” not operate. Mode1: Inputting signals to the input System Configuration menu connector automatically changes connectors. - Page 27 Submenu Setting Submenu Setting Auto: Power Save The format and scan mode are Energy Saving You can select the energy saving mode displayed temporarily when the Mode from the following options. content of Status Display is Off: changed. Turns the energy saving mode off.
-
Page 28: Initial Setup Menu
Contrast Set to “Not Skip” or “Skip” for the Panel Display Display Port 1, Display Port 2, HDMI, DVI-D, SDI (LMD-X2705N only) Backlight Adjusts the brightness of the display. A connector. higher setting increases the brightness of the display, and a lower setting... -
Page 29: Preset Menu
Submenu Setting Troubleshooting Auto Input Select Mode1: Inputting signals to the input connector automatically changes connectors. This section may help you isolate the cause of a Mode2: problem and as a result, eliminate the need to Gives priority to PORT A and switches the PORT automatically. -
Page 30: Error Messages
HDMI connector (1) HDMI 2.0b, HDCP1.4 correspondence DVI-D input connector DVI-D connector (1) TMDS single link 3G/HD/SD-SDI input connector (LMD-X2705N only) BNC type (1) SD: SMPTE ST 259 compliant HD: SMPTE ST 292-1 compliant 3G: SMPTE ST 424 compliant Remote connector... - Page 31 CD-ROM (including the WARRANTY, OR FOR ANY OTHER REASON Instructions for Use) (1) WHATSOEVER. Service Contact List (1) SONY WILL NOT BE LIABLE FOR CLAIMS OF Information for Customers in ANY KIND MADE BY USERS OF THIS UNIT OR Europe (1) MADE BY THIRD PARTIES.
- Page 32 Pin number Signal REMOTE (stereo mini jack) connector Pin number Signal On (short to sleeve) Off (open) Insert detection 5V 2.0A (DC output) connector Pin number Signal 12V 2.5A (DC output) connector Pin number Signal 12 V...
- Page 33 Available signal formats The unit is compatible with the signal systems shown below: Signal format (LMD-X2705N only) SD-SDI 720×487/59.94i 4:2:2 YCbCr 10bit 720×576/50i 4:2:2 YCbCr 10bit HD-SDI 1920×1080/24p 4:2:2 YCbCr 10bit 1920×1080/25p 4:2:2 YCbCr 10bit ...
- Page 34 Signal format Display Port 1, 2 HDMI DVI-D 4:4:4 RGB 10bit/8bit × 4:4:4 YCbCr 10bit/8bit 1920×1080/60p × × 4:2:2 YCbCr 12bit × × 4:2:2 YCbCr 10bit/8bit × 4:4:4 RGB 8bit ...
- Page 35 PC signal (DVI) Range of DVI input signal (Compatible with up to 1920 × 1080/60 Hz) Vertical frequency: 50.0 Hz to 85.1 Hz Horizontal frequency: 31.0 kHz to 75.0 kHz Dot clock: 25.175 MHz to 148.5 MHz Picture size, phase: automatic discrimination by the DE (Data Enable) signal Displays normally up to a maximum horizontal resolution of 1920 dots.
-
Page 36: Dimensions
Side Dimensions When an optional stand SU-600MD is attached Front When an optional stand SU-600MD is attached Unit: mm (inches) Mass: Approx. 8.8 kg (19 lb 6.4 oz) (when the optional stand is not installed) Rear (VESA Mount Instruction) * Length of M4 screws (4) Monitor cabinet Attached object M4 screw... -
Page 37: Licenses
Licenses This product includes FreeRTOS, Linux, BusyBox, uClibc, U-Boot, and uIP software licensed under modified GNU General Public License, GNU General Public License, GNU Lesser General Public License, and BSD License terms. For details on the license, refer to “Software License Information”...