
Related Manuals for Ifor Williams Trailers HBX


Summary of Contents for Ifor Williams Trailers HBX
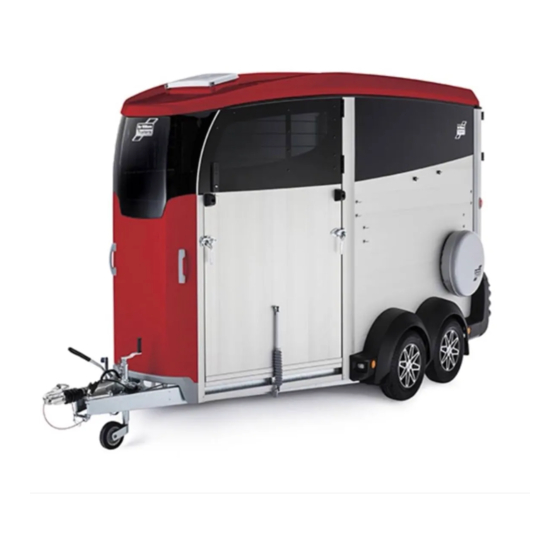
- Page 1 USER HANDBOOK IMPORTANT If you sell your trailer, please pass this handbook BRITAI N’ S L EA D ING onto the new owner T RA I L ER M ANUFACT URER...
- Page 3 HBX USER HANDBOOK All HBX models are fitted with brakes and have a MGW (Maximum Gross Weight) of 1600kg, 2600kg or 2700kg. Used correctly and maintained to this handbook, your trailer should give many years of safe and reliable service. If you are in doubt about any of the instructions, please contact your distributor or our Customer Care department.
- Page 4 THE MANUAL THE MANUFACTURER • Read this manual carefully before Ifor Williams Trailers Ltd. operating this trailer for the first time, Reserves the right to make technical ensure that all instructions are followed changes to the design, equipment and and any safety advice adhered to.
-
Page 6: Table Of Contents
CONTENTS 1 INTRODUCTION Driving Introduction 3.6.1 Driving licence Customer care 3.6.2 Towing speed 3.6.3 Stability Accompanying literature 3.6.4 Snaking Security Warranty 3.6.5 Stabilisers 1.5.1 Warranty claims 4 OPERATION OF RAMPS AND DOORS Safety Operation of ramps and doors 1.6.1 Use Rear ramp operation 1.6.2 Check before every journey 4.1.1 Understanding your rear ramp... - Page 7 5.3.2 Installing the partition centre pole Acrylic windows In the event of a horse becoming stuck 8.4.1 Cleaning the windows Inspection/grooms door 8.4.2 Window maintenance Tack compartment (if fitted) Hinges and catches 5.6.1 Understanding your tack compartment 9 MECHANICAL MAINTENANCE 5.6.2 Adjusting your saddle rack Mechanical maintenance Floors...
-
Page 8: Introduction
1.1 INTRODUCTION 1.2 CUSTOMER CARE Please take the time to read the If you require any help or advice, please do not hesitate to contact our Customer Care team: contents of this manual before you Email care@iwt.co.uk attach the trailer to the towing vehicle, or attempt to load it. -
Page 9: Security
Williams Trailers Ltd. will not accept liability the trailer, who will in many cases be able to for any inaccuracy or incorrectly stated legal rectify the fault quickly on their premises, requirements. or assist in presenting the problem to Ifor Williams Trailers for appraisal. -
Page 10: Use
See 3.5.2. QUALIFICATION OF THE PERSONNEL • With the trailer coupled to the towing Ifor Williams Trailers Ltd. products may only vehicle, the floor of the horsebox should be used and maintained by personnel who be level. -
Page 11: Check Before Every Journey
• Transport of foals or small horses without spare/component parts which are not adaptation to the manufacturer’s design to original Ifor Williams Trailers Ltd. parts are accommodate their smaller size. attached or installed. The Type Approval of the trailer becomes null and void. -
Page 12: Glossary Of Terms
1.7 GLOSSARY OF TERMS • Impact and shock stress of the wheels/axles. • Speed inappropriate for the road conditions TRAILER and the loading status of the trailer, Your new Ifor Williams trailer. especially on sharp bends. • The parked trailer can tilt or sink in on soft Gross Vehicle Weight - Referring to the uneven ground. -
Page 13: Information Stickers
1.8 INFORMATION STICKERS This sticker is located on the inside of the inspection door. ATTENTION No horse or pony to be tethered to the outside of the trailer or transported in the area adjacent to this door INTERNATIONAL STANDARD WIRING DOCUMENT SAFETY &... -
Page 14: Towing
2 TOWING 2.1 UNDERSTANDING YOUR TRAILER Coupling Drawbar & Jockey Wheel: 1. Drawbar 11. Breakaway cable guide 2. Overrun unit (Coupling body) 12. Manoeuvring handle 3. Coupling head 13. Manufacturers type plate 4. Handbrake lever 14. Release button 5. Breakaway cable & clip 15. -
Page 15: Recommended Tow Ball Height
2.1.1 RECOMMENDED 2.2 PRE-HITCHING TOW BALL HEIGHT UP CHECKS Ifor Williams Trailers recommends that the Before hitching up always check the following: ball head on the towing vehicle is ideally 1. Check wheel bolts after first 25 adjustable and is within the range 395mm - miles/40km of service and subsequently 465mm. -
Page 16: Coupling Instructions
3.1.1 COUPLING INSTRUCTIONS Whenever possible, both trailer and towing vehicle should be on level ground. 3.1.2 50MM BALL COUPLINGS If there is no breakaway cable fitted to 1. Check the condition of the breakaway your trailer, or if it or any other part of the cable. -
Page 17: Eye Couplings
13. Test that the ball is engaged by 6. Ensure that the jockey wheel clamp attempting to lift the coupling off the handle is tight and, by turning the jockey ball with the jockey wheel. wheel jack handle, raise the coupling eye to the height of the towing jaw opening. -
Page 18: Mirrors
16. Clamp the jockey wheel in place and engage the jockey wheel R clip. 17. Attach the electrical plug to the towing vehicle’s socket ensuring there is enough slack in the cable for the trailer to correctly negotiate tight turns, without the cable dragging on the road. -
Page 19: Reversing
3.4 REVERSING 5. Release the jockey wheel clamp, lower the jockey wheel to the ground and securely tighten the clamp All trailers are fitted with auto-reverse braking systems. Manual reverse catches 6. Disengage the R clip (if fitted) and turn the are available as optional extras for use in jockey wheel operating handle anticlockwise particularly adverse conditions, e.g. -
Page 20: Driving
Always comply with the driving speed 1. Insufficient nose weight. regulations that apply in the country in which you are towing. Ifor Williams Trailers 2. Incorrect vehicle tow ball height. recommends that when towing horses, you 3. Incorrect loading or weight distribution. -
Page 21: Operation Of Ramps And Doors
4 OPERATION OF The weight of the ramp is counterbalanced by gas springs to RAMPS AND DOORS help reduce the effort required to raise and lower the ramp. Note the counterbalance 4.1 REAR RAMP OPERATION force is not constant, so the weight of the DANGER. -
Page 22: Closing The Ramp
i. For each Ramp handle/latch, move the do not tow the trailer until it has been safety spring so that the handle can rotate replaced. and move the handle towards the outside 5. Raise the prop stands if fitted. of the trailer a full 180 degrees so that the handle is pointing directly upwards as per 4.1.4 OPENING the image below, thus unlatching the ramp. -
Page 23: Front Ramp Operation
the way until they meet the sides of the trailer and latch against the side of the trailer, again using the spring-loaded T-bar to latch in place. 5. Unlatch one side of the ramp only as follows: i. For the Ramp handle/ latch on the side of the side hinging release bolt, move the... -
Page 24: Closing The Ramp
leaning against the ramp and remove if possible. UNDERSTANDING 3. Check windows are in their closed positions THE INSPECTION (refer to section 5.12) and open top doors: DOOR i. Pull down the spring-loaded T-bar to release the top door. The inspection door is a lockable ii. -
Page 25: Operation Of Internal Fitments
10. Linch pin & chain. INNER HANDLE 5 OPERATION OF INTERNAL FITMENTS The HBX uses a system of longitudinal partitions mounted on a central column. They are fixed into place with the breast bars. The partitions can be easily moved and removed with the help of an assistant. -
Page 26: Operation
5.2 OPERATION 5.2.1 OPENING THE STALL 1. Remove the linch pin from the Breast/ Breeching bar pin end. Note that the hook end of the Breast/Breeching bar should engage with the bracket on the partition and the pin end of the Breast/Breeching bar with the wall mounted bracket. -
Page 27: Removing The Partition Leaves
3. Insert breast/breeching bar pin end into wall mounted bracket, ensuring that the breast/breeching bar is level and at right angles to the wall and partition. 4. Insert linch pin through the hole in breast/ breeching bar pin end. 5. Repeat for the other side. 6. -
Page 28: Installing The Partition Centre Pole
5.4 IN THE EVENT OF A HORSE BECOMING STUCK The breast/breeching bars can be removed from outside the trailer by removing the retaining bracket eye-bolts, first the lower one and then if necessary the top one. These eye-bolts can be undone by hand, or by using the supplied Ifor Williams Wheel Brace. -
Page 29: Tack Compartment (If Fitted)
5.6 TACK COMPARTMENT (IF FITTED) Certain models of HBX will have a fitted saddle compartment in the front of the trailer. 5.6.1 UNDERSTANDING 1. Saddle rack post. YOUR TACK 2. Saddle support. COMPARTMENT 5.6.2 ADJUSTING YOUR SADDLE RACK Your saddle rack (2) can be raised or lowered using the holes in the saddle rack post (1). -
Page 30: Straw Bedding
5.8 STRAW BEDDING 5.12 SIDE WINDOW/ TOP DOOR Straw or similar bedding should be used in your horsebox to minimise urine leakage, and The side windows can be opened from the to improve comfort and footing, especially rear, they are also top doors that can be when the floor is wet. -
Page 31: Loading And Unloading
6 LOADING AND UNLOADING For clear guidance on preparing and controlling your horse, make sure you read and understand the relevant pages in ‘Towing Horse Trailers’ supplied with this manual (UK/NI). SINGLE HORSE, FACING FORWARDS, The horses should wear appropriate TRAVELLING ON SIDE FURTHEST FROM ROAD-SIDE (RIGHT HAND DRIVE protective clothing including: head collars,... -
Page 32: Unloading Via The Rear Ramp
6.3 UNLOADING VIA Breeching bars in position and secure, refer to section 5.2. Ensure the rear breeching THE FRONT RAMP bars are ready to hand for when the horse/s loaded. Open the front ramp top doors and open the For ventilation open the windows and roof front ramp, refer to section 4.2. -
Page 33: Safety Precautions
When cleaning is complete thoroughly rinse • Under no circumstances use any abrasive the trailer to remove any chemical residue. agents, T-cut, methylated spirit, white spirit, other solvents or washing up liquid to the exterior of your trailer. 7.1 SAFETY PRECAUTIONS 8.2 GALVANIZED FINISH 7.1.1 FIRST AID... -
Page 34: Window Maintenance
• Use copious quantities of water to rinse dirt non-approved cleaning agent. from your window. This will make the guarantee void. Do not use any agents containing • Use a chamois leather or soft dry cloth to silicones for maintaining the rubber. dry your windows. -
Page 35: Tyre Repairs
9.2.2 JACKING POINTS DO NOT REPLACE WITH LOWER RATED TYRES 1. Outer ends of the axles beside the springs. The maximum gross weight figure given on the trailer plate is always equal to or less than 2. Outer ends of the chassis cross members the approved maximum load for the tyres beside the chassis rails. -
Page 36: Spare Wheel
9.2.4 SPARE WHEEL 9.3.1 BRAKE SERVICE INTERVALS The spare wheel is located on a bracket on the side of the trailer. This is of the same • Brake adjustment should be checked type as the wheel/tyres fitted to the trailer after the first 100 miles and subsequently and is secured in place using two of the every 1000 miles or 2 months (whichever... -
Page 37: Drawtube Reaction Test
• Thoroughly examine all moving parts for place on the coupling head, the coupling ball, wear and correct functioning. or both. • Grease the drawtube bearings by means of If this is the case, make a further check using the grease nipples. a new 50mm ball. -
Page 38: Electrical Diagrams
10 ELECTRICAL DIAGRAMS 10.1 TRAILER LIGHTING DIAGRAM – LH DRIVE COUNTRIES... -
Page 39: Rh Drive Countries
10.2 TRAILER LIGHTING DIAGRAM – RH DRIVE COUNTRIES... -
Page 40: Service Intervals
11 SERVICE INTERVALS 100-MILE INSPECTION WORKSHOP STAMP DATE SIGNATURE 1000-MILE INSPECTION WORKSHOP STAMP DATE SIGNATURE NOTES... - Page 41 2000-MILE INSPECTION WORKSHOP STAMP DATE SIGNATURE 3000-MILE INSPECTION WORKSHOP STAMP DATE SIGNATURE NOTES...
- Page 42 Our distributors have extensive product knowledge and will be pleased to offer assistance in the selection of your trailer. © Ifor Williams Trailers Ltd 2018. All rights reserved. No part of this publication may be reproduced in any form or by any means, without the prior written permission of...
Need help?
Do you have a question about the HBX and is the answer not in the manual?
Questions and answers