
Related Manuals for CENTURION SYSTEMS D5 SMART


Summary of Contents for CENTURION SYSTEMS D5 SMART
- Page 1 SLIDING GATE OPERATORS D5 SMART INSTALLATION MANUAL Centurion Systems (Pty) Ltd www.centsys.com...
- Page 2 Saturdays 08h00 to 16h30 GMT+2 Centurion Systems (Pty) Ltd reserves the right to make changes to the product described in this manual without notice and without obligation to notify any persons of any such revisions or changes. Additionally, Centurion Systems (Pty) Ltd makes no representations or warranties with respect to this manual.
-
Page 3: Table Of Contents
Retro-fit Installations (Existing Sites) Page 26 7.3. Conduit and Cable Length Page 26 7.4. Preparing the D5 SMART for Installation Page 27 7.4.1. Removing the Charger Page 27 7.4.2. Removing the Lower Battery Tray Page 28 7.4.3. Removing the Control Card Page 29 7.5. - Page 4 8.3.2. Closing Infrared Beam Wiring (Photon Infrared Beams) Page 49 8.3.3. External Radio Receiver and Loop Detector Wiring Page 50 8.3.4. Earth Spike Installation Page 51 8.3.5. G-ULTRA to D5 SMART Wiring Page 52 8.4. Commissioning the System Page 52 8.5.
-
Page 5: Introduction
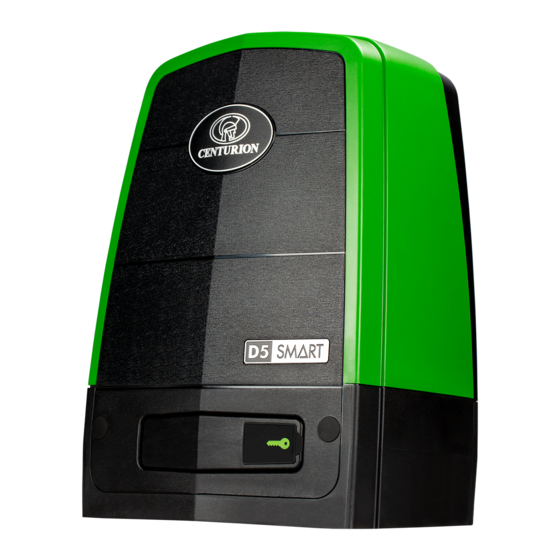
INTRODUCTION 1. Introduction The D5 SMART is a domestic and light-industrial operator designed to open and close sliding gates weighing up to 500kg. A custom-designed gearbox moulded from robust engineering polymers, coupled to a powerful 24V DC motor, provides fast and reliable automation for entrances to homes and small housing estates. -
Page 6: Important Safety Information
• Make sure that an earth leakage circuit breaker with a threshold of 30mA is fitted upstream of the system • Never short-circuit the battery and do not attempt to recharge the batteries with power supply units other than that supplied with the product, or manufactured by Centurion Systems (Pty) Ltd page 6 www.centsys.com... - Page 7 Always check the obstruction detection system, and safety devices for correct operation • Neither Centurion Systems (Pty) Ltd, nor its subsidiaries, accepts any liability caused by improper use of the product, or for use other than that for which the automated system was intended •...
-
Page 8: Lightning Protection
1.3. Theft Protection While care has been taken in the design of the D5 SMART to prevent unauthorised removal (theft) of the unit, an optional steel theft-deterrent cage is also available for added peace of mind. -
Page 9: Specifications
When the WiZos are removed from their packaging, it is important to remember the following: The WiZos are ready to be used; they have just not been configured or added to a network. Configuration is what the user / installer needs to do. 31mm 181mm 275mm FIGURE 1. D5 SMART PHYSICAL DIMENSIONS 2.2. Technical Specifications Input voltage 90V - 240V AC +/-10% @ 50Hz Current consumption (mains) 200mA Battery charger current output 1.3A... - Page 10 SECTION 2 SPECIFICATIONS 2.2. Technical Specifications Continued Fuse Protection Type Rating Main Control Card Serviceable 12V 600mA Aux. Supply Resetable Fuse 24V 3A (10sec Pulse) Charger (Mains Supply) Non-serviceable 3A slow-blow Motor push force - starting 30kgf Motor push force - rated 17kgf Gate mass - maximum 500kg...
-
Page 11: Product Identification
23. Top Battery Stabiliser 11. Heavy Duty M12 Washer 24. Release Handle 12. M10 Half-Nut 25. Camlock 13. D5 SMART Foundation Plate 1. Batteries are not supplied with the D5 SMART. The D5 SMART supports both 6Ah and 7.2Ah variants. page 11 www.centsys.com... -
Page 12: Required Tools And Equipment
SECTION 4 REQUIRED TOOLS AND EQUIPMENT 4. Required Tools and Equipment Hammer Screwdrivers Ratchet and 6mm Phillips Socket set 3.5mm Flat (17mm and 19mm) with extensions Electric Drill Smartphone with app installed Connector Crimping tool block and Pin lugs G-clamps (x2) Angle grinder Pin punch... -
Page 13: New Site Installation Preparation
SECTION 5 NEW SITE INSTALLATION PREPARATION 5. New Site Installation Preparation 5.1. General Considerations for the Installation Always recommend the fitment of additional safety equipment such as safety edges and safety beams, for additional protection against entrapment or other mechanical risks. Check that no pipes or electrical cables are in the way of the intended installation. Check that enough space is available for the gate operator, specifically for the release handle (See Section 7.1.2. -
Page 14: Endstops
SECTION 5 NEW SITE INSTALLATION PREPARATION 5.2. Endstops Fit opening and closing endstops capable of stopping the gate at rated speed. Refer to the specifications at the beginning of this manual for the operating speed. Make H1>H2 to ensure gate will not jump over the endstop. Opening and closing endstops are mandatory and must be fitted to prevent death or accidental injury as the operator uses and confirms these limits during operation. -
Page 15: Starting And Running Forces
SECTION 5 NEW SITE INSTALLATION PREPARATION 5.4. Starting and Running Forces Test the starting force of the gate as per the diagram. Use a pull scale in both directions to determine the maximum amount of pull force required to set the gate in motion. Determine the running force of the gate by continuing to pull on the scale with just sufficient force to keep it running. -
Page 16: Cabling Requirements
SECTION 5 NEW SITE INSTALLATION PREPARATION 5.5. Cabling Requirements FIGURE 7. CABLING REQUIREMENTS Legend MAINS SUPPLY CABLE: 90V - 240V AC mains cable via double-pole mains isolator-switch (3 core L.N.E. 1.5mm SWA) Optional intercom cable from motor to dwelling (n1 + 6 core 0.22mm multi-strand shielded cable) Optional intercom cable from motor to entry panel... -
Page 17: Lubrication
LUBRICATION 6. Lubrication The internal gearset of the D5 SMART is lubricated by means of an oil bath. The D5 SMART is supplied with oil in its gearbox. The D5 SMART does not require routine oil changes. However, in the event of the unit losing oil due to stripping down or mechanical damage, the correct replacement oil is Castrol Syntrax Long Life 75W-90. -
Page 18: Operator Installation
When installing the D5 SMART, it is important to take note of the information found in Sections 7.1.1. and 7.1.2. when determining the position of the Foundation Plate, and the height of the D5 SMART in relation to the gate that is to be automated. -
Page 19: Minimum Clearances
SECTION 7 OPERATOR INSTALLATION 7.1.2. Minimum Clearances Below are site plan examples illustrating the minimum clearances required when installing the D5 SMART. Gate Rack Pillar Pillar 80mm 80mm Foundation Theft-deterrent Cage D5 SMART FIGURE 10. MINIMUM CLEARANCES - SIDES Gate Rack... -
Page 20: Locate The Operator's Position
Rack teeth face up vertically, potentially collecting dirt • Could require the use of a custom bracket The measurements given below are based on the three different racks supplied by Centurion Systems (Pty) Ltd and are to be used as guidelines only. Steel Rack 25mm... - Page 21 SECTION 7 OPERATOR INSTALLATION 25mm (Typical Steel Rack Width) Minimum space from edge of foundation plate to reference point of edge that protrudes the furthest. (Section 7.1.1.) 49mm-51mm Foundation Plate Raised Concrete Foundation FIGURE 13. STEEL RACK BELOW PINION 1. Includes 3mm clearance required between rack and pinion 2.
- Page 22 SECTION 7 OPERATOR INSTALLATION 29.5mm (Typical Steel Rack Width) Minimum space from edge of foundation plate to reference point of edge that protrudes the furthest. (Section 7.1.1.) 53mm-55mm Foundation Plate Raised Concrete Foundation FIGURE 15. RAZ RACK BELOW PINION 1. Includes 3mm clearance required between rack and pinion 2.
- Page 23 SECTION 7 OPERATOR INSTALLATION 29mm (Typical Nylon Rack Width) Minimum space from edge of foundation plate to reference point of edge that protrudes the furthest. (Section 7.1.1.) 53mm-55mm Foundation Plate Raised Concrete Foundation FIGURE 17. NYLON RACK BELOW PINION 1. Includes 3mm clearance required between rack and pinion 2.
-
Page 24: Foundation Plate Installation
SECTION 7 OPERATOR INSTALLATION 7.1.4. Foundation Plate Installation The foundation plate can either be set into a new concrete foundation, as in Section 7.1.4.1, or bolted down onto an existing concrete plinth as in Section 7.1.4.2. Mounting Bolt Cutouts for Conduit (New and Existing Installations) Bolt-down point for existing Concrete Plinth... - Page 25 SECTION 7 OPERATOR INSTALLATION Lay the cabling conduit so that it routes the cables to the back of the Foundation Plate. Ensure that 30mm of conduit protrudes above the concrete. Using medium-strength concrete (25MPa), cast the plinth according to the dimensions as shown in Figure 21. Cabling conduit exiting at the back of the Foundation Plate...
-
Page 26: Retro-Fit Installations (Existing Sites)
If the existing foundation plate is in a good condition, it is not necessary to replace it with the D5 SMART Foundation Plate. However, if the existing foundation plate is corroded or needs to be replaced for whatever reason, the D5 SMART foundation plate can accommodate the existing footprint without the need to re-route cable conduits. -
Page 27: Preparing The D5 Smart For Installation
SECTION 7 OPERATOR INSTALLATION 7.4. Preparing the D5 SMART for Installation Open the Camlock Cover, and insert the Operator Key into the Camlock. Unlock it by turning the key anti-clockwise. There is no need to open the Release Handle to... -
Page 28: Removing The Lower Battery Tray
"A"). Open the release handle until the Camlock Cam is visible. Using a flat screwdriver, lever the left and right Tabs inward, lift the Lower Battery Tray up, and then out towards the front of the D5 SMART. Lower Right Tab Battery Tray FIGURE 31 page 28... -
Page 29: Removing The Control Card
Harnesses harness retainers when removing the Control Card from the platform. Harness Retainer Store the Control Card in a safe place. FIGURE 34 The D5 SMART is now ready to be mounted onto the foundation plate. page 29 www.centsys.com... -
Page 30: Mounting The Gearbox
SECTION 7 OPERATOR INSTALLATION 7.5. Mounting the Gearbox D5 SMART Foundation Plate For a new site installation, place Bottom Height Adjuster a Half-nut and a Bottom Height Adjuster onto each Mounting Bolt as Washer shown in Figure 35. Half-nut Note the orientation of the Bottom Height Adjusters. - Page 31 Shield FIGURE 38 Once the Cable Shield has been removed, place the D5 SMART into position over the three Mounting Bolts, aligning them with the three slots at the bottom of the gearbox and rest the D5 SMART onto the Bottom Height Adjusters.
-
Page 32: Routing The Cables
SECTION 7 OPERATOR INSTALLATION 7.6. Routing the Cables Route cables as determined in Section 5.5 - "Cabling Requirements". POINT A is the entry point for cables with the conduit installed at the back of the unit for new installations as shown in Figure 42. - Page 33 "Point B" to accommodate the shorter length. Note that routing the cables through "Point B" as shown in Figure 44, may make it more challenging to remove the D5 SMART for whatever reason at a later stage. Section View A-A FIGURE 44.
-
Page 34: Manual Override
SECTION 7 OPERATOR INSTALLATION 7.7. Manual Override Before mounting the rack to the gate, ensure that the D5 SMART is in Manual Override. Follow the instructions below. Release To disengage(manual override) the Handle motor, ensure that the Camlock is in the "unlocked"... -
Page 35: Height Adjustment
OPERATOR INSTALLATION 7.8. Height Adjustment The D5 SMART's unique Height Adjustment System adjusts from the top of the gearbox. This adds further security to the system, as it is not possible to access the lock nuts from the outside of the gearbox. -
Page 36: Mounting The Rack
2-3mm gap between the Pinion and the gate's rack. Fit the Pinion Spyder onto the Pinion of the D5 SMART by aligning its teeth with the gaps between the teeth of the D5 SMART's Pinion. Ensure that the D5 SMART Gearbox is in Manual Override. -
Page 37: Fitting Different Types Of Rack To The Gate
SECTION 7 OPERATOR INSTALLATION Slide the gate halfway along the first section and level the unsecured end, ensuring that the rack is resting on the Pinion Spyder, not pressing down. Continue this way to fix all sections. Before fully fixing each section of rack, slide the gate backwards and forwards along the section, checking that the rack is only resting on the Pinion Spyder, and not pressing down onto it. Spirit Level First Secured End Pinion Spyder Level this end of the rack, and fix it to the gate Foundation Plate... - Page 38 SECTION 7 OPERATOR INSTALLATION RAZ Rack Gate Fix the RAZ Rack to the side of the gate using the TEK screws provided. Use the vertical slots in order to allow for adjustment. TEK screw (Self-drilling and -tapping) Rack FIGURE 59 When fitting RAZ Rack, it is easier to start on the right and work towards the left.
- Page 39 SECTION 7 OPERATOR INSTALLATION Nylon Angle Rack Fix the Rack to the side of the gate using TEK screws. Ensure that all the Gate mounting holes provided in the angle section are used. TEK screw Nylon (Self-drilling and -tapping) Angle Rack FIGURE 62 When joining two lengths together, simply butt each section firmly...
-
Page 40: Finalising The Height Adjustment
SECTION 7 OPERATOR INSTALLATION 7.9.2. Finalising the Height Adjustment Once the rack has been fixed to the entire length of the gate, use a screwdriver to carefully remove the Pinion Spyder from the Pinion of the D5 SMART. Gate Slide the D5 SMART away Screwdriver from the gate so that the rack is centred above the Pinion. - Page 41 Cable Route the Earth Harness up to Management the left and place it into the Cable Clip Management Clip as shown in Figure 67. The Earth Harness will need to be routed under the battery at a later stage. Earth Harness Gearbox FIGURE 67...
-
Page 42: Re-Assembling The D5 Smart
SECTION 7 OPERATOR INSTALLATION 7.10. Re-assembling the D5 SMART 7.10.1. Override Sensor If the Override Sensor has previously been removed, take note of how it is placed back into position correctly, before continuing with the installation. Override Sensor Override Sensor... -
Page 43: Placing The Lower Battery Tray And Charger Back Into Position
Lower Battery Tray back into the Gearbox. Cam Driven Slide i.e. Push it to the left. Refer to Section 7.4 - Unlocked "Preparing the D5 SMART for Installation" for further information on locked and unlocked positions Cam Driven Slide Note the position of the Override Sensor Harness. -
Page 44: Placing The Control Card Back Into Position
SECTION 7 OPERATOR INSTALLATION Electric Motor Slots Place the Charger back into position by aligning the three feet at the Lower Battery bottom of the Charger with the three Tray slots found on top of the Lower Battery Tray. Charger Place the studs of the Charger into the three holes on the Lower Battery Tray. -
Page 45: Reconnecting The Harnesses To The Control Card And Charger
7.10.5. Reconnecting the Harnesses to the Control Card and Charger Reconnect the Motor Wires at Position "A" and the Override Harness at Point "B" on the Control card. The black motor wire is connected on the far Left of the Control Card, and the blue on the immediate right of the black. -
Page 46: Completing The Installation
SECTION 8 COMPLETING THE INSTALLATION 8. Completing the Installation 8.1. Fitting the Batteries Push the left tab Swing the upper backwards assembly forward Gently push the left tab behind the Control Card backwards. This will allow the entire upper assembly to hinge forward. -
Page 47: Accessory Installation And Storage
Control Card. Charger FIGURE 81 8.2. Accessory Installation and Storage There are dedicated trays below the D5 SMART Control Card to conveniently install and store any accessories connected to the Operator. Control Right Card... -
Page 48: Wiring The Control Card On Its Default Settings
SECTION 8 COMPLETING THE INSTALLATION 8.3. Wiring the Control Card on its Default Settings The D5 SMART Control Card's Input / Output terminals are defaulted with the following configuration; Control Card Control Card Default Setting Default Setting Terminal Terminal I/O1... -
Page 49: Closing Infrared Beam Wiring (Photon Infrared Beams)
SECTION 8 COMPLETING THE INSTALLATION 8.3.2. Closing Infrared Beam Wiring (Photon Infrared Beams) D5 SMART Control Card Receiver 12V/24V - 12V/24V + Wireless IRB Transmitter Please contact Centurion Systems (Pty) Ltd for directions on wiring Infrared Beams in an opening configuration. -
Page 50: External Radio Receiver And Loop Detector Wiring
SECTION 8 COMPLETING THE INSTALLATION 8.3.3. External Radio Receiver and Loop Detector Wiring D5 SMART Control Card 12V/24V - 12V/24V + Loop Detector External Radio Receiver 12V/24V - 12V/24V + FIGURE 86 page 50 www.centsys.com... -
Page 51: Earth Spike Installation
Route the earth cable from the Earth Spike around to the back of the D5 SMART, and under the Gearbox by the Cable Shield. Connect it to the Mounting Bolt on the right of the Gearbox where the Charger Earth is located by means of a Ring Lug. -
Page 52: G-Ultra To D5 Smart Wiring
SECTION 8 COMPLETING THE INSTALLATION 8.3.5. G-ULTRA to D5 SMART Wiring G-ULTRA RELAY 1 RELAY 2 + VDC - +12V D5 SMART Control Card FIGURE 88 8.4. Commissioning the System 1. Scan the QR Code in Figure 89. Download on the App Store 2. -
Page 53: Apply Warning Decal
Once all the necessary accessories and harnesses have been connected, ensure that the Camlock is in the "unlocked" position, and place the D5 SMART cover onto the gearbox. Once the cover is secured in place, lock the Camlock to lock the cover in place. -
Page 54: General Maintenance
Every 6 months If the wheels and/or guide-rollers Check wheels and are excessively worn, contact an guide-rollers for signs 9.1. D5 SMART Maintenance installer to replace of wear Check the track for If the track is damaged, contact an Every 6 months... -
Page 55: D5 Smart Maintenance
SECTION 9 GENERAL MAINTENANCE 9.2. D5 SMART Maintenance Before performing any maintenance, ensure that the D5 SMART is isolated! Description Frequency Corrective Action Clean and remove any nests that are settling in and around the motor and Control Card Check for insect... -
Page 56: Installation Handover
Centurion Systems (Pty) Ltd does not accept any liability caused by improper use of the product, or for use other than that for which the automated system was designed. -
Page 57: Warranty Information
4. Has been repaired by any workshop and / or person NOT previously authorised by the manufacturer. 5. Has been repaired with components not previously tested, passed or authorised by Centurion Systems (Pty) Ltd, South Africa or one of its subsidiary companies. page 57 www.centsys.com... - Page 58 Notes page 58 www.centsys.com...
- Page 59 Notes page 59 www.centsys.com...
- Page 60 The CENTURION and CENTSYS logos, all product and brand names in this document that are accompanied by the TM symbol are trademarks of Centurion Systems (Pty) Ltd, in South Africa and other territories; all rights are reserved. We invite you to contact us for further details.
Need help?
Do you have a question about the D5 SMART and is the answer not in the manual?
Questions and answers
Wearing diagram for vedio intercoms connected with century D5