Table of Contents
Advertisement
Quick Links
Advertisement
Table of Contents

Related Manuals for Husqvarna 131RB


Summary of Contents for Husqvarna 131RB
- Page 1 Workshop manual 131RB English 627 - 002 - 23.04.2018...
-
Page 2: Table Of Contents
Contents 1 Introduction 8 Repair instructions 1.1 Document description..........3 8.1 Product overview for repair instructions....23 1.2 Target group............3 8.2 To clean and examine the product parts....23 1.3 Revisions..............3 8.3 Starter..............24 1.4 Safety..............3 8.4 Ignition system............. 29 1.5 Servicing tools............3 8.5 Handle and throttle trigger........34 8.6 Air filter.............. -
Page 3: Introduction
1.5 Servicing tools The manual gives information about necessary servicing tools. Always use original tools from Husqvarna. 627 - 002 - 23.04.2018 Introduction - 3... -
Page 4: Safety
2 Safety 2.1 Safety definitions Use a protective helmet in locations where objects can fall on you. Use approved Warnings, cautions and notes are used to point out hearing protection. Use approved eye specially important parts of the manual. protection. WARNING: Used if there is a risk of injury or death for the operator or bystanders if the instructions in the manual are not obeyed. -
Page 5: Prepare And Do Servicing On The Product
3 Prepare and do servicing on the product 3.1 Assembly 4. Put the locking pin (C) in the hole to lock the shaft. 5. Put the blade (D), support flange (G) and support 3.1.1 Introduction cup (F) on the output shaft. WARNING: Read and understand the safety 6. -
Page 6: Function Test On The Model 967 84 33-Xx
3.1.5 To install the transport guard 4. Put the liner (E) straight and align the flexible shaft (D) with the angular hole (G) on the side of the 1. Attach the transport guards on the blade. clutch drum. 3.1.6 To install the liner 5. - Page 7 3. Turn the knob counterclockwise to a vertical position CAUTION: Do not pull all the starter rope to open the valve of the fuel tank. out. Do not let go of the starter rope handle when the cord is fully extended. 6.
-
Page 8: Function Test On The Model 967 84 32-Xx
3.2.4 To stop 4. Set the choke control in the choke position. • Push the stop switch to stop the engine. 3.3 Function test on the model 967 84 32-xx 5. Hold the body of the product to the ground with the 3.3.1 To examine before start left hand. - Page 9 3.3.3 To start a warm engine 1. Set the stop switch to the start position. 2. Press the air purge 10 times. The bulb must not be fully filled. 3. Set the choke control to the run position. 4. Pull the cord quickly and powerfully. Keep doing it until the engine starts.
-
Page 10: Servicing Schedule
3.4 Servicing schedule The descriptions of the maintenance procedures are in the operator's manual. Maintenance task Before After Every 10 Every 25 each use hours hours Clean the external surfaces. √ Clean the air filter. Replace if it is necessary. √... -
Page 11: Technical Data
4 Technical data 4.1 Technical data Cylinder displacement Cylinder bore Stroke Max. power/rpm Model /cubic inch Ømm/Øinch mm/inch kW/hp / rpm 967 84 32-xx 32,6/1.99 36/1.42 32/1.26 0.9/7500 967 84 30-xx 967 84 33-xx 32,6/1.99 36/1.42 32/1.26 0.9/7000 967 84 31-xx Electrode gap Model Compression ratio... - Page 12 Max speed Idle speed Clutch diameter Engage speed Model mm/inch 967 84 32-xx 7000 3000±300 76/3 4500±300 967 84 30-xx 967 84 33-xx 7000 3000±300 76/3 4500±300 967 84 31-xx Control disc drive Shaft diameter Model Drive gear angle Bevel gear ratio mm/inch Ømm/Øinch 967 84 31-xx...
- Page 13 Vibration levels Unit 967 84 33-xx 967 84 32-xx Equivalent vibration level (ahv, eq), equipped with grass 4.58/2.58 5.42/2.89 blade, front/back handle Equivalent vibration level (ahv, eq) equipped with trimmer 6.58/6.86 2.72/3.94 head, front/back handle Noise emissions Sound power level, guaranteed (L dB(A) Sound power level, measured dB(A)
-
Page 14: Servicing Data
5 Servicing data 5.1 Servicing data for the model 967 84 33-xx 3 - 5 Nm 8 - 10 Nm 5 mm 3 - 5 Nm 4 mm 3 - 5 Nm 4 mm 6 - 8 Nm 4 mm 6 - 8 Nm 4 mm 6 - 8 Nm... - Page 15 1.2 - 2 Nm 3 - 5 Nm 5 mm 1.2 - 2 Nm 6 - 8 Nm 5 mm 3 - 5 Nm 4 mm 1.2 - 2 Nm 1.5 - 2.5 Nm 4 mm 4 - 6 Nm 5 mm 18 - 20 Nm 19 mm...
-
Page 16: Servicing Data For The Model 967 84 32-Xx
5.2 Servicing data for the model 967 84 32-xx 3 - 5 Nm 8 - 10 Nm 5 mm 3 - 5 Nm 4 mm 4 - 6 Nm 4 mm 3 - 5 Nm 4 mm 6 - 8 Nm 4 mm 6 - 8 Nm 4 mm... - Page 17 3 - 5 Nm 5 mm 1.2 - 2 Nm 1.2 - 2 Nm 6 - 8 Nm 5 mm 1.2 - 2 Nm 3 - 5 Nm 4 mm 1.5 - 2.5 Nm 4 mm 4 - 6 Nm 5 mm 18 - 20 Nm 19 mm...
-
Page 18: Servicing Tools
6 Servicing tools 6.1 Servicing tools for 967 84 33-xx and 967 84 32-xx 18 - Servicing tools 627 - 002 - 23.04.2018... - Page 19 Item Description Use for Article number Driver Removing the drive 510 13 90-01 Piston stop Locking the piston 522 43 18-01 Test spark plug Checking the ignition spark 502 71 13-01 Ignition cable plier Repairing the ignition cable 502 50 06-01 Flywheel removal tool Removing the flywheel 502 51 49-02...
-
Page 20: Function Overview
• Speak to your dealer when you select an oil. • If Husqvarna two-stroke oil is not available, you can use another two-stroke oil of good quality that is intended for air cooled engines. Contact your dealer when you select oil. -
Page 21: Cutting Equipment
7.4.2 Trimmer head Note: Do not make more than 30 days quantity of fuel mixture. WARNING: Always make sure the trimmer line is wound tightly and evenly around the drum to prevent harmful vibration. 1. Add half of the gasoline quantity. 2. -
Page 22: To Sharpen Grass Cutters And Grass Blades
• Do not use a damaged cutting attachment. • Attach the transport guard to the grass blade when you transport or store the product. 7.4.4 Blade thrust • A blade thrust is a sudden movement of the product to the side, forward or rearward. A blade thrust occurs when the grass blade or saw blade hits an object that cannot be cut. -
Page 23: Repair Instructions
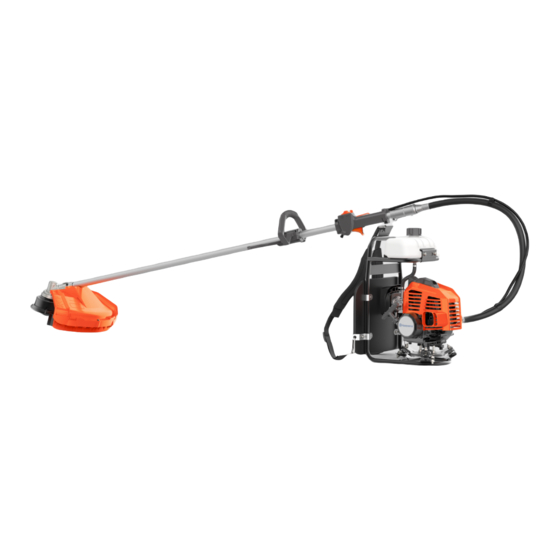
8 Repair instructions 8.1 Product overview for repair instructions 8.2 To clean and examine the product parts 1. Starter 2. Ignition system • Clean and examine all parts fully. You find more 3. Air filter instructions in the chapter for each part if special 4. -
Page 24: Starter
8.3 Starter 4. Remove the starter assembly (I) and the gasket (J). 8.3.1 To disassemble the starter on 967 84 33-xx WARNING: Use protective glasses to prevent injury to the eyes if the recoil spring ejects. 1. Pull up the knob and remove the shaft. 5. - Page 25 6. Remove the screw (M) and remove the pulley (N). 8.3.2 To disassemble the starter on 967 84 32-xx Remove the torsion spring (O). Remove the starter WARNING: Use protective glasses to prevent pulley (P) to access the recoil spring (Q). Carefully injury to the eyes if the recoil spring ejects.
- Page 26 3. Move your thumb around the edge of the starter WARNING: The recoil spring can cause housing and push down the recoil spring turn after injury to your thumb when the starter pulley turn. rotates in reverse. 4. Remove the screw (M) and remove the pulley (N). Remove the torsion spring (O).
- Page 27 3. Put the pulley on the starter pulley and attach the 7. Attach the gasket (J) and the starter assembly (I). screw. 4. Pull the starter rope through the starter rope handle. 8. Put the engine on the support plate on the harness 5.
- Page 28 3. Put the pulley on the starter pulley and attach the 7. Put the gasket (K) on the crankcase and attach the screw. screws (H) to the starter housing (J) and crankcase. Attach screws (G) to the support plate and the bracket (I).
-
Page 29: Ignition System
a) On the model 967 84 33-xx a) For the model 967 84 33-xx: Open the holder and disconnect the throttle wire from the carburetor connection. b) On the model967 84 32-xx b) For the model 967 84 32-xx: Remove the cap and disconnect the throttle wire. - Page 30 6. Disconnect the cables. b) For the model 967 84 32-xx: Remove the 2 screws (A) and 2 washers. Remove the 4 screws (B) and pull out the clutch drum assembly (C). 7. Remove the clutch drum and clutch drum cover. a) For the model 967 84 33-xx: Remove the 2 screws (A), the 4 screws (B) and pull out the clutch drum assembly (C).
- Page 31 10. Attach the puller on the flywheel. Hold the puller to 2. Assemble the cables (E) to the ignition module. Use loosen and remove the nut. the 2 screws (D) and the 2 washers (G) to assemble the ignition module on the frame. 11.
- Page 32 a) For the model 967 84 33-xx: Attach the clutch 5. Connect the cables. drum assembly (C) with the 4 screws (B). Attach the 2 screws (A). 6. Assemble the throttle wire. a) For the model 967 84 33-xx: Connect the throttle wire to the carburetor connection and close the holder.
- Page 33 b) For the model 967 84 32-xx: Connect the throttle 3. Examine the spark plug. If the electrodes are worn wire and attach the cap. more than 50%, replace the spark plug. Make sure that the electrode gap is 0.6 mm. Adjust the space with the side electrode.
-
Page 34: Handle And Throttle Trigger
8.5 Handle and throttle trigger 6. If no spark occurs, examine the spark plug connection. Remove the spark plug cover and make sure that the ignition cable is not damaged. If it is 8.5.1 To disassemble the handle necessary, remove a part of the cable to get 1. - Page 35 5. Remove the screw (I) and connection plate (J) that 8.5.2 To assemble the handle are attached below the stop switch (H). 1. Assemble the black cable (G) and red cable (F) in the cable retainer (K). Install the cable retainer on the left handle half.
-
Page 36: Air Filter
4. Put the spring (C) on the throttle lock (D) and put it 5. Remove the air filter holder (E), if it is dirty or in the correct position on the handle half. Put the damaged. throttle trigger (A) on the handle, make sure the end of the spring (B) is in the correct position in the handle. -
Page 37: Fuel Tank
8.6.3 To clean and examine the air filter 4. Connect the fuel hose to a pressure tester. Refer to Servicing data for the model 967 84 33-xx on page CAUTION: Do not use gasoline to clean the air 14 . filter, it will damage the air filter. -
Page 38: Fuel Filter
8.8 Fuel filter 3. Tighten the hose clamp. Make sure that the filter cannot move off the tube. 8.8.1 To remove the fuel filter 8.9 Carburetor on 967 84 33-xx 1. Loosen the hose clamp (A). 8.9.1 To disassemble the carburetor 1. - Page 39 3. Remove the fuel hose from the carburetor (G). 5. Loosen the top cap (H). Remove the piston valve (I), Loosen the screw (F). the throttle wire (J) the spring (K) and the needle valve (L). 4. Pull out the carburetor. 6.
- Page 40 7. Remove the gasket (P). Remove the screw (Q). 8. Remove the idle mixture screw (V). Remove the nut Remove the lever (R), the axle (S) and the needle (X), the choke plate (Y) and the choke lever (Z). valve (T). Remove the main nozzle (U). Remove the screws (AA).
- Page 41 8.9.3 Overview of the carburetor on 967 84 33-xx H. Top cap V. Idle mixture screw I. Piston valve X. Nut J. Throttle wire Y. Choke plate K. Spring Z. Choke lever L. Needle valve AA. Screws M. Screws AB. Fuel cock N.
-
Page 42: Carburetor On 967 84 32-Xx
7. Remove the 2 screws (A) and lift off the throttle 8.9.4 To assemble the carburetor mechanism. Loosen the valve stop screw (B). Make sure that the sealing ring on the connection flange is 1. Assemble the carburetor in the opposite sequence not damaged. - Page 43 10. Carefully remove the pump diaphragm and its 13. Push out the seat of the needle valve for gasket. Examine the diaphragm for wear, where the replacement. Use a correct punch Ø 4.5 mm. illustration show (A). Hold the pump diaphragm up to the light to find holes in the material.
- Page 44 Note: Do not disassemble the plastic pipe in the valve housing. 8.10.2 Overview of the carburetor on 967 84 32-xx A. Sealing ring 8.10.3 To assemble the carburetor Overview of the carburetor on 967 84 32-xx on B. Gasket page 44 for an overview of how the parts of the C.
- Page 45 b) Connect a pressure tester to the fuel inlet on the 5. Connect the fuel hoses and make sure that they are Servicing tools for 967 84 carburetor. Refer to attached correctly. Hold the air filter in position and 33-xx and 967 84 32-xx on page 18 . put the carburetor screws through the air filter holder and carburetor.
-
Page 46: Centrifugal Clutch
8.11 Centrifugal clutch 4. Remove the 2 screws that hold the centrifugal clutch. Remove the clutch. Remove the flat washers that are behind the clutch shoes. 8.11.1 To disassemble the clutch 1. Pull up the knob and remove the shaft. 2. - Page 47 8.11.3 To assemble the clutch 4. Pull up the knob and attach the shaft. 1. Connect the clutch shoes together with the spring. Attach the clutch and the washers on the flywheel. See the turn arrows on the clutch shoes. 8.11.4 To disassemble the clutch drum 1.
- Page 48 3. Use pliers to remove the small snap ring. Remove 8.11.5 To assemble the clutch drum the clutch drum. 1. Attach the bearing. Attach the large snap ring. 2. Attach the clutch drum. Attach the small snap ring. 4. Use pliers to remove the large snap ring. Remove the bearing.
-
Page 49: Bevel Gear
8.12 Bevel gear 4. Pull up the knob and attach the shaft. 8.12.1 To disassemble the bevel gear 1. Remove the trimmer head (A). Remove the support flange (Y). Put a rod through the hole (B) to lock the axle. Remove the protective plate (C). Remove the screw (D), the screws (E) and the bracket (F). - Page 50 3. Put on protective gloves. Use a hot air gun to 8.12.2 To assemble the bevel gear increase the temperature of the angle gear to 1. Put the cogwheel (V) on the output shaft (U). Attach approximately 110°C - 140°C. Hit the gear housing the 2 bearings (T and X).
-
Page 51: Cylinder And Piston
3. Put the input shaft assembly (O) into the housing 5. Attach the gear housing (J) on the shaft and tighten with a pair of pliers or a sleeve. the screw (I). Attach the bracket (H) and tighten the screw (G). Attach the bracket (F) and tighten the screw (E). - Page 52 8.13.2 To disassemble the cylinder and piston 4. Push the wrist pin from the piston with a punch of the correct dimension. If the wrist pin is too tight, To get access to the 1. Remove parts as given in increase the temperature of the piston with a hot air cylinder and piston on page 51 to get access to the gun.
- Page 53 8.13.4 Faults and causes 8.13.4.1 Piston damages 627 - 002 - 23.04.2018 Repair instructions - 53...
- Page 54 Item The piston is not sufficiently lubricated, ex- Cause Procedure ample 1 The piston has small to moderate score The carburetor is incorrectly Examine and adjust the car- marks usually in front of the exhaust port. adjusted. buretor. Very high temperature makes the piston ma- The engine speed is higher terial come off along the piston skirt and cylin- than the recommended...
- Page 55 Item Piston damage because of a too high engine speed Too high engine speed can cause damage to the piston rings, the snap ring on the wrist pin and the bearings. Too high engine speed can also loosen the guide pin for the piston ring. A too lean carburetor setting results in too high speed and a high piston temperature.
- Page 56 Item Particles of unwanted material Cause Procedure Unsatisfactorily filtered air that moves through the carburetor and into the engine causes damage to the cylinder and piston. The increased wear is seen on the inlet side of the piston. The wear starts at the lower edge of the piston skirt.
- Page 57 Other damages on the cylinder/piston Procedure Broken cooling fins, damaged threads or broken bolts by Repair the threads with a thread repair kit. Replace the the exhaust port. cylinder if it cannot be repaired. Score marks in the cylinder bore, especially by the ex- Polish the damaged area with an emery cloth of fine haust port.
- Page 58 8.13.5.3 To measure the piston ring groove and piston 3. Make sure that the pulse channel in the cylinder is ring play open. Put a new cylinder base gasket on the crankcase. Lubricate the piston and the large end 1. Clean and measure the the piston ring groove (A). bearing with some drops of engine oil.
-
Page 59: Crankshaft And Crankcase
8.14 Crankshaft and crankcase 4. Use a hot air gun to increase the temperature of the crankcase and the crankcase cover to 110°C. Hit the crankcase and the crankcase cover against a 8.14.1 To disassemble the crankshaft and wooden block to make the bearings fall out. crankcase To get access to the crankshaft and crankcase, you must remove all components of the product. - Page 60 8.14.2 To clean and examine the crankshaft and a) Put the bearing in the crankcase and the crankcase cover. crankcase b) Use a hot air gun to increase the temperature of The crankshaft can not be repaired, it must be replaced the crankcase and crankcase cover to 110°C.
- Page 61 c) Put a new crankcase gasket (F) on the e) Attach the flywheel. crankcase. Use grease to make sure the gasket stays in position. 4. Prepare the crankshaft. a) Lubricate the crankshaft journal with some drops 6. Attach and lubricate the cylinder. of oil and move the crankcase cover (D) into a) Put the cylinder base gasket (I) in the correct position.
-
Page 62: Muffler
8.15 Muffler 3. Attach the screw (F), the washers (B) and the 2 screws (A). 8.15.1 To disassemble the muffler 1. Remove the 2 screws (A), the washers (B) and the screw (F). 2. Remove the muffler cover (C), the muffler (D) and the heat shield (E). - Page 63 3. Remove the nut (A) and the washers (B and C). 4. Pull up the knob and attach the shaft. 4. Remove the engine from the support plate on the harness frame. 8.16.2 To assemble the harness frame 1. Attach the engine to the support plate on the harness frame.
-
Page 64: Troubleshooting
9 Troubleshooting 9.1 Troubleshooting Starting The engine is hard to start The stop screw for the throttle does not operate correctly Blocked fuel filter Blocked fuel hose Air in fuel pipes Incorrect/unsatisfactory fuel The needle valve is defective The lever arm of the needle valve is damaged The lever arm of the needle valve does not operate correctly The control diaphragm is damaged The control diaphragm has a defective seal... - Page 65 Idle speed (low speed) The idle speed does not become The stop screw for the throttle does not operate correctly stable Blocked fuel filter Blocked fuel hose Air in fuel pipes Incorrect/unsatisfactory fuel The needle valve is defective The carburetor is not attached correctly The lever arm of the needle valve does not operate correctly The needle valve spring is not attached correctly The control diaphragm is damaged...
- Page 66 High speed Unsatisfactory performance at Blocked fuel filter high speed Blocked fuel hose Air in fuel pipes Incorrect/unsatisfactory fuel Vacuum pulse leakage Blocked vacuum pulse pipe Loose screws on the pump cover Defective pump diaphragm The needle valve is defective The carburetor is not attached correctly The lever arm of the needle valve is damaged The lever arm of the needle valve does not operate correctly...
- Page 67 627 - 002 - 23.04.2018 Troubleshooting - 67...
- Page 68 1159786-26 2018-06-25...