Table of Contents
Advertisement
Advertisement
Table of Contents

Related Manuals for Next Wave CNC SHARK SD110


Summary of Contents for Next Wave CNC SHARK SD110
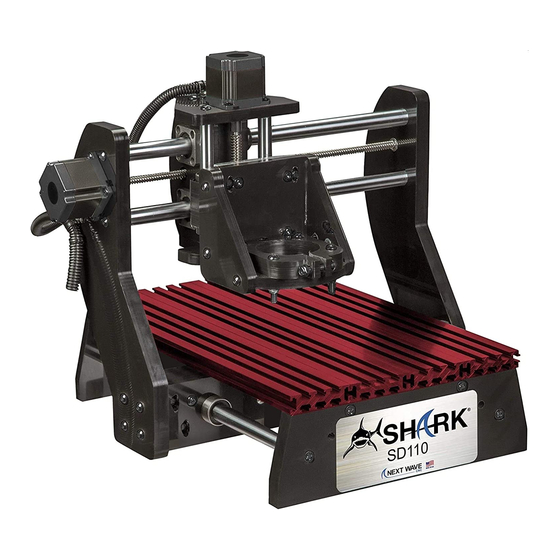
- Page 1 SHARK SD110 and SD120 Owner’s Manual...
- Page 2 FOR THE MOST RECENT MANUALS, DRIVERS, AND OTHER SOFTWARE, PLEASE VISIT THE DOWNLOAD PAGE LOCATED ON OUR WEBSITE AT http://NextWaveCNC.com Shark SD 110 and SD120 are registered trademark of Next Wave CNC. Software copyright by Next Wave CNC. All rights reserved.
-
Page 3: To Our Customers
Again, thank you for purchasing a Shark SD110/SD120. We are confident you will be pleased with its performance and ability to carve and machine a wide variety of signs, doors, and other projects. -
Page 4: Serial Number And Software License Information
Serial Number and Software License Information Record your Shark SD110/SD120 Controller Interface and Vectric software user name and license codes here for safe keeping. Your software may vary depending on the Shark SD110/SD120 model purchased. Controller Serial Number: ____________________________________________ LCD Pendant Serial Number: ____________________________________________... -
Page 5: Table Of Contents
Shark SD120 Exclusive Features ....................20 Shark SD110/SD120 Specifications ....................21 General ..........................21 Rates and Accuracy ........................ 21 Computer Requirements ......................21 Installing the Shark SD110/SD120 Post Processors in Vectric Products ........22 June 2020 Shark SD110/SD120 | 3... -
Page 6: Warranty
This warranty is void if the Shark SD110 or SD120 machine or any portion of the Shark SD110 or SD120 machine is modified without the prior written permission of Next Wave Automation, LLC, or if... -
Page 7: Emergency Stop
Emergency Stop There are 3 ways you can immediately stop your Shark SD110 or SD120. Shark SD110 or SD120 users should use a surge suppress power strip with an on/off switch. Pause or Stop on the Shark SD110/SD120 Power Button on Controller Interface The first is the E-STOP! button on the LCD Pendant when the unit is running The second is the on/off switch on the Shark SD110 or SD120 Controller. -
Page 8: Shark Sd110/Sd120 Operations Safety Instructions
SD110/SD120. Take the time to orient yourself to the Shark SD110/SD120 and the workflow steps. 2. Take small steps early in use – this will enable you to use the Shark SD110/SD120 safely and effectively. Practice each step a few times early on without running the router for example. -
Page 9: Shark Sd110/Sd120 Hardware And Project Safety Instructions
You may also want to use a dedicated electrical circuit for the Shark SD110/SD120. Turning on a shop vac or other power tool on the same leg may cause a momentary change in the power supplied to the Shark SD110/SD120. If you know that the power you receive fluctuates significantly, you may also want to use a power conditioner and battery backup device. -
Page 10: Overview
The Shark SD110/SD120 has impressive power, speed, accuracy and ease of use. The Shark SD110/SD120 has a quality design and its parts have been manufactured using CNC machines to ensure the highest accuracy. The Shark SD110/SD120 is constructed of steel, aluminum, and high-density polyethylene for a robust, long lasting and high tolerance machine. -
Page 11: Two Ways To Control Your Shark Sd110/Sd120
Two ways to control your Shark SD110/SD120 The Shark SD110/SD120 LCD Pendant stores the project’s tap file (instructions) on a flash drive and controls the movement of the X, Y, and Z axis. The LCD Pendant is designed to be a standalone unit and does not require you to take your computer into your shop. -
Page 12: Shark Sd110/Sd120 Assembly Instructions
• 2 Hold Down Clamps • Router ON/OFF Controller (Available Shark SD120 Only) Make sure when removing the Shark SD110/SD120 from its box that you lift it from the base, lifting it by the gantry or table can cause misalignment. - Page 13 ‘laying on top of each other’. • Plug the Shark SD110/SD120 Power Supply into a 120V AC wall outlet, power strip, or surge protector. Once again, we recommend that a power strip with an on/off switch is used.
-
Page 14: Registering Your Shark Sd110/Sd120
Registering your Shark SD110/SD120 Once you power up your Shark SD110/SD120, you will see a screen like the image below. Press Continue. Shark SD110/SD120 Welcome Screen Next you will see your Shark SD110/SD120’s serial number, and firmware information. Record this serial number into your manual on Page 2 then press OK. - Page 15 Please visit www.NextWaveCNC.com to register your Shark SD110 or SD120 CNCL. Once at the home page, choose “Registration,” listed at the top of the page. Fill in the items that are marked in red and then choose Save at the bottom. This will email an access code to the email address provided in the registration form as well as display on your computer screen.
-
Page 16: Workflow Overview
SD110/SD120 via the USB slot on the right side of the pendant. The tap file contains the G-code instructions that will tell the Shark SD110/SD120 where to move in X, Y, Z to make the appropriate cuts using the cutter tool selected. -
Page 17: Operating Your Shark Sd110/Sd120 - Using The Pendant
Operating your Shark SD110/SD120 - Using the Pendant Machining the Part The material to be machined is placed on the Shark SD110/SD120 work table and properly secured – typically by using clamps. The proper cutter tool is placed in the router. Using the Shark SD110/SD120 LCD Pendant Touch Screen, the tool is moved (jogged) to correspond with the starting point of what you have designed, usually a corner or center of the work piece. - Page 18 Pendant. The USB button will now become accessible, press it now. Next select the appropriate tap file. (Tap files only allow 8 characters so be sure you have unique identifying names ) June 2020 Shark SD110/SD120 | 16...
- Page 19 At this point, all the steps necessary to run the toolpath have been taken. Next select the ‘Start’ button and the Shark SD110/SD120 will start to machine the part. You’ll notice you have complete control to pause and resume should you need to check something (remember to turn...
-
Page 20: Using The Touch Plate Accessory
Next press the App button and go to the Touch Plate Setup App. Attach the magnet to the router bit collar and place the plate on top of the material directly under the bit. Then Tap Press to Run and the Shark SD110/SD120 will ask to perform a test as below. - Page 21 The Shark SD110/SD120 will establish the zero/home position the instant the bit contacts the touch plate. You can ABORT the process at any time by pressing the Abort Key. Press OK to accept the results, thus giving you the exact height on your z axis.
-
Page 22: Shark Sd120 Exclusive Features
Do not use any other power cables in this outlet. The other cable connection is for the Homing switches Homing switches power plug Router Power Control plug Attaching cables to the back of the Shark SD120 controller June 2020 Shark SD110/SD120 | 20... -
Page 23: Shark Sd110/Sd120 Specifications
The computer used to connect to the Controller Interface must have a USB 2.0 port. The Controller Interface will not work with a computer connected with a USB 1.0 or 1.1 port, or a USB hub that is not powered. June 2020 Shark SD110/SD120 | 21... -
Page 24: Installing The Shark Sd110/Sd120 Post Processors In Vectric Products
Next Wave CNC (*tap). post processors installed. Currently, there are 2 sets of post processor files: • One set is used with VCarve, Cut 3D, and Aspire - Next Wave CNC (*tap). • One set is unique and used only with Photo VCarve You can update the post processor used by any Vectric product by downloading the latest version from the NextWaveCNC.com downloads page and copying it to the Vectric product’s...
Need help?
Do you have a question about the SHARK SD110 and is the answer not in the manual?
Questions and answers