BMC H-80 Series User Manual
Hide thumbs
Also See for H-80 Series:
- Quick operation manual (2 pages) ,
- Quick operation manual (2 pages)
Table of Contents
Advertisement
Advertisement
Table of Contents

Related Manuals for BMC H-80 Series


Summary of Contents for BMC H-80 Series
- Page 1 User Manual Humidifier H-80 Series 0123...
-
Page 2: Table Of Contents
H-80 Series User Manual V1.0 Table of Contents 1. Symbols ·································································································· 1 1.1 Control Buttons ····················································································· 1 1.2 Device Symbols ····················································································· 1 2. Warning, Caution and Important Tip ······························································· 3 3. Intended Use ···························································································· 3 4. Contraindications ······················································································· 4 5. Specifications ···························································································· 5 6. - Page 3 H-80 Series User Manual V1.0 13.1.10 Confirming Adjustments ································································· 25 13.1.11 Turning Pages ············································································· 25 13.1.12 Exiting the Setup Interface······························································ 25 13.1.13 Accessing the Trend Chart Interface ·················································· 26 13.1.14 Exiting the Trend Chart Interface ······················································ 27 13.2 Options of the Patient Menu and Corresponding Descriptions ·························· 28 14.
-
Page 4: Symbols
H-80 Series User Manual V1.0 1. Symbols 1.1 Control Buttons Mute Button Knob Back Button 1.2 Device Symbols Follow Instructions for Use Operating Instructions Type BF Applied Part (mask) Class II (Double Insulated) AC Power DC Power IP22 ≥ 12.5 mm Diameter, Dripping (15º tilted) - Page 5 H-80 Series User Manual V1.0 SD Card Do Not Re-use Non-sterile Oxygen Inlet Air Inlet Air Outlet WEEE Marking Logo of BMC Medical Co., Ltd. 2 / 46...
-
Page 6: Warning, Caution And Important Tip
Warnings, Cautions, and Important Tips appear throughout this manual as they apply. 3. Intended Use H-80 series humidifier is for the treatment of spontaneously breathing patients who would benefit from receiving high flow warmed and humidified respiratory gases. This device is for patients by prescription in the home or hospital/institutional environment. -
Page 7: Contraindications
H-80 Series User Manual V1.0 4. Contraindications The patients who meet the following conditions can use the device only under the special care of physician and monitoring on schedule. Absolute Contraindications: • Cardiopulmonary arrest, the invasive mechanical ventilation of urgent trachea cannula is required •... -
Page 8: Specifications
H-80 Series User Manual V1.0 5. Specifications Device Size Dimensions: 335 mm × 227 mm × 158 mm Weight: about 4 kg Water capacity: To maximum fill line 235 mL Product Use, Transport and Storage Operation Transport and Storage Temperature: 18° C to 28° C (64.4˚F to 82.4˚F) -25°... -
Page 9: Available Therapies
H-80 Series User Manual V1.0 Display Accuracy ± (5% + 5% set value) Temp Range: 25°C ~ 45°C Temp Display Accuracy ± 2°C Flow Range: 2 L/min ~ 80 L/min Margin of Error: ± (2 L + 10% set value) Flow Display Accuracy ±... -
Page 10: Glossary
H-80 Series User Manual V1.0 7. Glossary Auto Off When this feature is enabled, the device automatically stops outputting flow after the patient removes the nasal cannula. Delay After pressing the stop button, the device stops outputting after continuing to work with the flow of not more than 60 L/min for about 90min. -
Page 11: Model
H-80 Series User Manual V1.0 8. Model Product information Model Maximum flow Adjustment mode Work Mode of FiO (L/min) HFlow H-80M Manual LFlow HFlow H-80A Automatic LFlow HFlow, LFlow H-80AS SmartFlow Automatic AutoFlow 8 / 46... -
Page 12: Package Contents
• Do not pile up the long tube at the head of the bed, as it may wrap around the head or neck of the patient during sleep. • Do not connect any equipment to the device unless recommended by BMC or your health care provider. -
Page 13: System Features
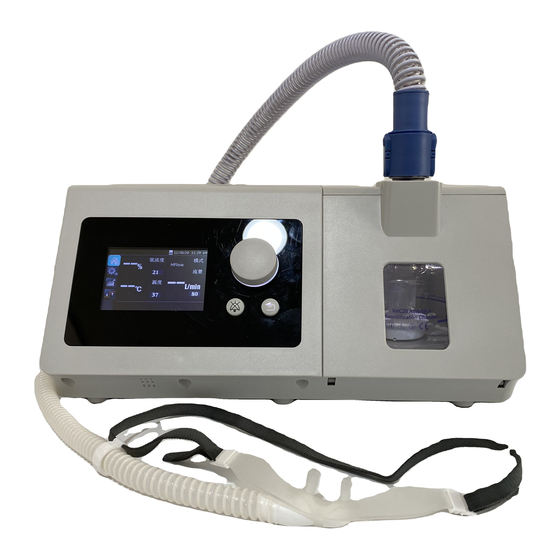
H-80 Series User Manual V1.0 • The pictures in this manual are only for reference, if they are different from the material object, the latter shall prevail. • Nasal cannula is applied part. 10. System Features Air Outlet Knob Display Screen... -
Page 14: First Time Setup
H-80 Series User Manual V1.0 Oxygen Inlet Power Cord Locker SD Card Slot DC Inlet Filter Cap (Air Inlet) Fig. 10-2 Name Function SD Card Slot Insert the SD card into this slot. Power Cord Locker Used to fix the power connector. -
Page 15: Installing The Air Filter And Filter Cap
H-80 Series User Manual V1.0 CAUTIONS! • If the device has been exposed to either very hot or very cold temperatures, allow it to adjust to room temperature (approximately 2 hours) before beginning setup. • Make sure the device is away from any heating or cooling equipment (e.g., forced air vents, radiators, air conditioners). -
Page 16: Connecting To Power
H-80 Series User Manual V1.0 CAUTIONS! • The air filter must be in place when the device is operating. The filter cover can protect the device from liquid being sprinkled on the device by accident. • Installing the air filter and filter cap, device must be unplugged. -
Page 17: Inserting The Sd Card
H-80 Series User Manual V1.0 WARNINGS! • The device is powered on for use when the power cord is connected. The Knob presses the blower On / Off. • Use of the device at an AC voltage beyond the stated range (see Section 5 ―AC Power Consumption‖) may damage the device or cause device failure. -
Page 18: Installing The Water Chamber
H-80 Series User Manual V1.0 11.5 Installing the water chamber (1) Install adapter: Install adapters on two vertical interfaces of water chamber according to the direction shown in the figure and press them tightly with force, as shown in the Fig. -
Page 19: Connecting The Water Bag
H-80 Series User Manual V1.0 (4) Close the cover of water chamber: Close the cover of water chamber along the direction shown in the Fig. 11-9, and buckles on both sides of the cover of water chamber will be stuck in the slot of corresponding position of the device. -
Page 20: Assembling The Tube And Nasal Cannula
H-80 Series User Manual V1.0 CAUTIONS! • It is suggested not to fully use up the water in the water bag, and it had better be replaced before being used up. • Check that water flows into the chamber and is maintained below the fill line. If there is any abnormality, please replace the water chamber in time. -
Page 21: Connecting The Oxygen
H-80 Series User Manual V1.0 WARNINGS! • Prevent the body skin from directly contacting with the breathing tube for a long time. • Do not make any changes to the breathing tube and nasal cannula. • Please check whether the breathing tube is damaged or has foreign matter before using, if any, please clean or replace the breathing tube. - Page 22 Medical Gas Low Pressure Hose Fig. 11-13 WARNINGS! • It is recommended to use the breathing tube and nasal cannula provided by BMC matching with the device. • The oxygen supply must comply with the local standards of medical oxygen.
-
Page 23: Starting Treatment
• Be sure to follow your physician’s instructions on adjusting the settings. To order any accessories not included with this device, contact your equipment supplier. • DO NOT connect any ancillary equipment to this device unless recommended by BMC or your physician. If you suffer from chest discomfort, shortness of breath, stomach bloating, or severe headache when using the device, contract your physician or qualified medical personnel immediately. -
Page 24: Turning On The Airflow
H-80 Series User Manual V1.0 12.3 Turning on the Airflow Press the Knob to turn on the airflow. And the ―WARM-UP...‖ is displayed in the status bar. The prompt ―Warm Up Finished‖ is displayed after preheating, and it disappears after being displayed for 10s. -
Page 25: Parameter Settings
H-80 Series User Manual V1.0 13. Parameter settings 13.1 Parameter setting steps 13.1.1 Accessing the Main Interface Connect the power cord and LH2 Heated breathing tube properly. The screen displays the Main Interface shown in Fig. 13-1. The monitored value and set value of FiO , flow and temperature can be displayed on the interface. -
Page 26: Adjusting Options
H-80 Series User Manual V1.0 Fig. 13-3 13.1.4 Adjusting Options The working parameters can be changed by turning the Knob . As shown in Fig. 13-3, the ―FiO ‖ option is selected. As you turn the Knob clockwise, the value of the FiO option increases. -
Page 27: Accessing The Setup Interface
H-80 Series User Manual V1.0 Fig. 13-7 13.1.7 Accessing the Setup Interface When the cursor stays on the icon , the screen displays the Setup Interface. Access the Setup Interface by pressing the Knob . The first option on the Setup Interface is then displayed in blue, as shown in Fig. -
Page 28: Confirming Adjustments
H-80 Series User Manual V1.0 Fig. 13-10 13.1.10 Confirming Adjustments Press the knob after selecting the parameter, the parameter will be confirmed, and the background color of the option will become blue, as shown in Fig. 13-11. Fig. 13-11 13.1.11 Turning Pages When the cursor is on ―Date‖, the last option shown in Fig. -
Page 29: Accessing The Trend Chart Interface
H-80 Series User Manual V1.0 (2) Returning to the Main Interface Turn the Knob to make the cursor stay on ―Home page‖, and then press the Knob to exit the Setup Interface. The screen will display the Main Interface shown in Fig. -
Page 30: Exiting The Trend Chart Interface
H-80 Series User Manual V1.0 13.1.14 Exiting the Trend Chart Interface Turn the Knob to make the cursor stay on ―Back‖, as shown in Fig. 13-16. And then press the Knob , the background color of icon will become blue, and the initial trend parameter interface will be displayed on the screen, as shown in Fig. -
Page 31: Options Of The Patient Menu And Corresponding Descriptions
H-80 Series User Manual V1.0 13.2 Options of the Patient Menu and Corresponding Descriptions Option Range Description Set FiO by adjusting this option. As you turn the Knob to the nearest point, the numbering increases or decreases by 1%. The default setting 21% ~... - Page 32 H-80 Series User Manual V1.0 Description Option Range Set filter replacement prompt, and it can modify Auto/3 months/ 6 Filter Recur. the service cycle of the filter. months/ 1 year The service time of the filter returns to zero Filter Reset ——...
-
Page 33: Alarm
H-80 Series User Manual V1.0 14. Alarm This chapter describes device alarms and the responses operators make to different alarms. After running, disconnect the device from the power supply by unplugging the power cord, an audible alert sounds like ―beep beep beep, beep-beep, beep beep beep, beep-beep‖ and... -
Page 34: Alarming Silence
H-80 Series User Manual V1.0 In accordance with the requirements of the relevant standards, the volume of the audible alarm signal meets the requirements, and the sound pressure range of the measured auditory alarm signal is described as follows: Measured... -
Page 35: Alarming Information And Description
H-80 Series User Manual V1.0 14.6 Alarming Information and Description Alarm Message Description Alarm Delay An audible alert will sound in 6s if the device is accidentally disconnected from power when it is delivering air. Alarming duration time is no less than 30s. - Page 36 H-80 Series User Manual V1.0 Alarm Message Description Alarm Delay When the device works normally, if the Inlet Port inlet port is blocked, the device will give Give an alarm within Blocked!! the inlet port blockage alarm; the screen will display ―Inlet Port Blocked!!‖...
- Page 37 H-80 Series User Manual V1.0 Alarm Message Description Alarm Delay When the O source is opened before starting the device or O source is not Turn Off the O closed at the time of shutdown, the device Immediately give an...
-
Page 38: Reposition Of Alarming
H-80 Series User Manual V1.0 14.7 Reposition of Alarming After the elimination of the alarming faults, the residual alarming information still exists (alarming information is shown on the top of the screen without any visual and auditory alarming), and turn... -
Page 39: Cleaning And Maintenance
H-80 Series User Manual V1.0 WARNING! • Adjust the device to the appropriate patient settings after the test and before use. 15. Cleaning and Maintenance WARNINGS! • Regular cleaning of the device and its accessories is very important for the prevention of respiratory infections. -
Page 40: Replacing The Nasal Cannula
H-80 Series User Manual V1.0 15.4 Replacing the Nasal Cannula For details, refer to the cleaning instructions in the user manual for the nasal cannula. CAUTION! • It is recommended to replace the nasal cannula every two weeks or before being handed over to the next patient for use. -
Page 41: Reordering
17. Technical Support Please contact BMC directly if you need the circuit diagram of the device and the list of components for certain purposes such as maintenance or connection to other equipment. BMC will provide the circuit diagram and / or other technical documents in whole or in part according to your needs. -
Page 42: Troubleshooting
H-80 Series User Manual V1.0 19. Troubleshooting The table below lists common problems you may have with the device and possible solutions to those problems. If none of the corrective actions solve the problem, contact your home care provider. 19.1 Common Problems in Patients and Corresponding... -
Page 43: Common Problems In The Device And Corresponding Solutions
H-80 Series User Manual V1.0 19.2 Common Problems in the Device and Corresponding Solutions Problem Possible Cause Solution (s) Ensure that the power cord and Power is not connected device connected properly. properly. The device does not Check whether a power outage... -
Page 44: Emc Requirements
H-80 Series User Manual V1.0 20. EMC Requirements Guidance and manufacturer's declaration - electromagnetic emissions The device is intended for use in the electromagnetic environment specified below. The user of the device should ensure that it is used in such an environment. - Page 45 H-80 Series User Manual V1.0 Guidance and manufacturer's declaration - electromagnetic immunity The device is intended for use in the electromagnetic environment specified below. The user of the device should make sure that it is used in such an environment.
- Page 46 H-80 Series User Manual V1.0 Guidance and manufacturer's declaration - electromagnetic immunity The device is intended for use in the electromagnetic environment specified below. The user of the device should make sure that it is used in such an environment.
- Page 47 H-80 Series User Manual V1.0 Recommended separation distances between portable and mobile RF communications equipment and the device The device is intended for use in an electromagnetic environment in which radiated RF disturbances are controlled. The customer or the user of the device can help prevent...
- Page 48 H-80 Series User Manual V1.0 Recommended separation distances between RF wireless communications equipment The device is intended for use in an electromagnetic environment in which radiated RF disturbances are controlled. The customer or the user of the device can help prevent...
-
Page 49: Limited Warranty
(1) year for main unit and three (3) months for all accessories from the date of sale by BMC Medical Co., Ltd. to the dealer. If the product fails to perform in accordance with the product specifications, BMC Medical Co., Ltd. will repair or replace, at its option, the defective material or part. - Page 50 391117...
Need help?
Do you have a question about the H-80 Series and is the answer not in the manual?
Questions and answers