
Related Manuals for Abbott St. Jude Medical Patient Controller 3875


Summary of Contents for Abbott St. Jude Medical Patient Controller 3875
- Page 1 St. Jude Medical™ Patient Controller For Spinal Cord Stimulation Systems Model 3875 User's Guide...
- Page 2 CAUTION: Federal (USA) law restricts this device to sale by or on the order of a physician. ™ Indicates a trademark of the Abbott group of companies. ‡ Indicates a third-party trademark, which is property of its respective owner. Bluetooth® and the Bluetooth logo are registered trademarks of Bluetooth SIG, Inc.
-
Page 3: Table Of Contents
Contents About This Guide ............1 Symbols and Definitions ........1 Terms Used in This Document ......6 Prescription and Safety Information ......7 Intended Use ............7 Indications for Use ..........7 Contraindications ..........7 MRI Safety Information ........8 Warnings ............. - Page 4 Maintaining the Generator and Patient Controller ..59 Checking the Generator Battery Status ....59 Checking the Patient Controller Battery Status ... 61 Caring for the Generator ........62 Caring for the Patient Controller ......62 Troubleshooting ............63 Troubleshooting Messages for MRI Mode ..75 Cybersecurity ............
- Page 5 Radio Transmitter, Cables, Transducers .... 88 Quality of Service for Wireless Technology ..89 Appendix D: Electromagnetic Compatibility Guidelines ............91 Radio Frequency Information ......... 99...
-
Page 7: About This Guide
About This Guide This guide explains how to use the St. Jude Medical™ Patient Controller application (Model 3875) with your neurostimulation system. If you have any questions about your system, contact Technical Support. Symbols and Definitions The following symbols may be used in this document and on some of the products and packaging: NOTE: For symbols and definitions for the patient controller, refer to the user guide... - Page 8 Table 1. Symbols and definitions Symbol Definition Caution, consult accompanying documents Consult this document for important safety- related information (This symbol is blue and white on the device.) Consult instructions for use Follow instructions for use on this website Device contains a type BF applied part to protect you from shock.
- Page 9 Table 1. Symbols and definitions Symbol Definition Magnetic Resonance (MR) Unsafe, an item poses unacceptable risks to the patient, medical staff, or other persons within an MR environment Device contains a radio-frequency (RF) transmitter, which may cause RF interference with other devices near this device.
- Page 10 Table 1. Symbols and definitions Symbol Definition Temperature limits for storage conditions Humidity limits Pressure limits Manufacturer Do not use if the product sterilization barrier or its packaging is compromised Contents quantity Programmer Accessories Serial number Batch code Unique Device Identification Prescription use only...
- Page 11 Abbott Medical. Authorized European representative European conformity, affixed in accordance with the relevant provisions of AIMD directive 90/385/EEC. Hereby, Abbott Medical declares that this device is in compliance with the essential requirements and other relevant provisions of this directive.
-
Page 12: Terms Used In This Document
Table 1. Symbols and definitions Symbol Definition Australian Communications and Media Authority (ACMA) and New Zealand Radio Spectrum Management (RSM) Regulatory Compliance Mark (RCM) This equipment is certified for type certification pursuant of Article 38-24 of the Japan Radio Law Terms Used in This Document This section contains definitions of some of the terms used in this document. -
Page 13: Prescription And Safety Information
Prescription and Safety Information Read this section to gather important prescription and safety information. Intended Use This neurostimulation system is designed to deliver low-intensity electrical impulses to nerve structures. The St. Jude Medical™ Patient Controller app is intended to be used with the generator to help the patient manage prescribed stimulation programs. -
Page 14: Mri Safety Information
MRI Safety Information If you are using a trial system, you should not be subjected to an MRI. The electromagnetic field generated by an MRI may damage the device electronics and induce voltage through the lead that could cause a jolting or shocking sensation. If you are using a permanent system, you may be implanted with the parts that make up a Magnetic Resonance (MR) Conditional system, which allows... -
Page 15: Warnings
Warnings The following warnings apply to these components. NOTE: For nontherapy-related warnings regarding the St. Jude Medical™ Patient Controller, refer to the user guide available at support.apple.com/manuals for the Apple‡ iOS‡ device you are using to run the patient controller app. System Warnings Diathermy therapy. - Page 16 Operation of machines, equipment, and vehicles. If you are using a therapy that generates paresthesia, you should turn off stimulation before operating motorized vehicles, such as automobiles, or potentially dangerous machinery and equipment because sudden stimulation changes may distract you from properly operating them.
- Page 17 Electrosurgery devices. Electrosurgery devices may harm you or damage your neurostimulation system. If you need to receive a procedure using an electrosurgery device, place your generator in Surgery Mode. Your physician may only use bipolar electrosurgery devices and they should keep the device as far away from your neurostimulation system as possible.
- Page 18 Pregnancy and nursing. Safety and effectiveness of neurostimulation for use during pregnancy and nursing have not been established. Additional Warnings Only Applicable to the Trial System Routine medical procedures. If you are using a trial system, inform your healthcare providers and avoid elective medical procedures.
-
Page 19: Precautions
Device modification. This equipment is not serviceable by the customer. To prevent injury or damage to the system, do not modify the equipment. If needed, return the equipment to Abbott Medical for service. Application modification. To prevent unintended stimulation, do not modify the operating system in any way. - Page 20 System Precautions Medical tests and procedures. Before undergoing medical tests or procedures (such as therapeutic radiation or electrolysis), contact your physician to determine if the procedure will cause you injury or damage your neurostimulation system. Specifically, you should be aware that medical devices such as electrohydraulic lithotriptors, therapeutic X rays, computerized tomography (CT) scans, cobalt machines, and linear accelerators may cause damage...
- Page 21 Electromagnetic interference (EMI). Some equipment in home, work, medical, and public environments can generate EMI that is strong enough to interfere with the operation of a neurostimulation system or damage system components. Avoid getting too close to these types of EMI sources, which include the following examples: commercial electrical equipment (such as arc welders and induction furnaces), communication equipment (such as...
- Page 22 well as some tag deactivation devices, such as those used at payment counters at stores and loan desks at libraries, may also affect stimulation. Patients who are implanted with nonadjacent multiple leads and patients who are sensitive to low stimulation thresholds may experience a momentary increase in their perceived stimulation, which some patients have described as uncomfortable or jolting.
- Page 23 Device components. The use of components not approved for use by Abbott Medical may result in damage to the system and increased risk of injury. Magnet usage. The magnet provided with the system is a high-powered magnet intended for use solely with the system.
- Page 24 telephones, cordless telephones, standard wired telephones, AM/FM radios, and some power tools) may unintentionally cause the neurostimulation system to turn on or turn off or affect communication between the device and generator. Wireless use restrictions. In some environments, the use of wireless functions (e.g., Bluetooth wireless ®...
- Page 25 Do not crush, puncture, or burn the device because explosion or fire may result. Return it to Abbott Medical for proper disposal. Control of your device. Keep your device out of the hands of children in order to avoid potential damage...
-
Page 26: Adverse Effects
Adverse Effects The use of a neurostimulation system involves risks. In addition to those risks commonly associated with surgery, the following risks are also associated with use of a neurostimulation system: Unpleasant sensations or motor disturbances, including involuntary movement, caused by stimulation at high outputs (If either occurs, turn off stimulation immediately.) Undesirable changes in stimulation, which may... -
Page 27: Product Description
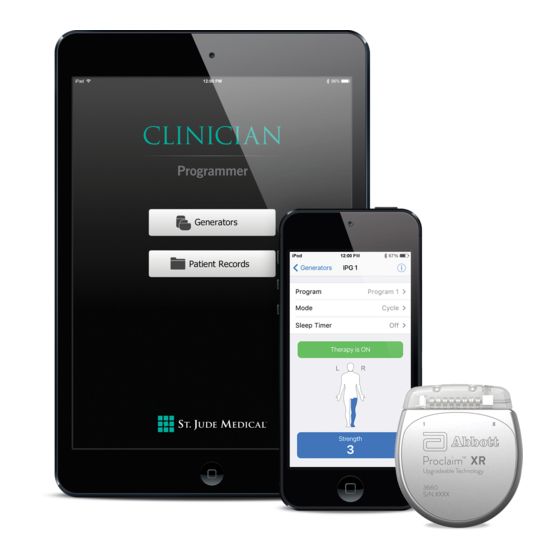
Implant migration or skin erosion around the implant Battery failure Product Description The St. Jude Medical™ Patient Controller application (Model 3875) allows you to view, select, and control the programs that your physician has prescribed. The St. Jude Medical™ Patient Controller communicates wirelessly with the generator. -
Page 28: About Your System
Patient magnet Patient controller (a device provided by Abbott Medical or a compatible personal Apple‡ iOS‡ device) NOTE: For more information on compatible devices, see "Appendix A: Downloading the Patient Controller App" (page 80). The EPG or IPG delivers electrical pulses through the leads to electrodes near selected nerve fibers in order to provide therapeutic stimulation. - Page 29 Figure 1. Interaction between major system components 1. Patient controller 2. EPG or IPG 3. Leads 4. Patient magnet...
-
Page 30: Overview Of The Patient Controller
Overview of the Patient Controller Your patient controller may be a device provided by Abbott Medical or a compatible personal Apple‡ iOS‡ device. Before you begin, be sure you are familiar with how to perform basic operational functions on your patient controller. - Page 31 Using a Provided Device If you are using a patient controller provided by Abbott Medical, refer to the following figure for the patient controller features. Figure 2. Patient controller features 1. Power button 2. Patient controller Home button...
- Page 32 Table 2. Patient controller feature descriptions Power button To turn the patient controller on, press and hold the Power button until the Apple icon appears. To turn the patient controller off, press and hold the Power button until the slide to power off bar appears, and then slide the bar to the right.
- Page 33 Table 2. Patient controller feature descriptions Touch screen To swipe the screen to the right, swipe touch the left side of the screen functionality and briefly drag your finger to the right side, and then lift your finger from the screen. Use the same general steps to swipe the screen left, up, or down.
-
Page 34: Items You Will Receive
Items You Will Receive If you are using a patient controller provided by Abbott Medical, you will receive the following items to use with your system: Patient controller and charging cord Protective case for the patient controller Patient magnet ... -
Page 35: Your Personal Identification Card
Your physician will complete the card and give it to you. Once you or your physician submit a patient registration form, Abbott will mail you a permanent identification card. The registration card does the following things: Identifies you as having an implanted medical ... -
Page 36: Directions For Use
(such as headphones or speakers) may prevent the patient controller from connecting to your generator. Abbott Medical recommends disconnecting these accessories before you attempt to adjust your therapy. While your app starts up, you will see the following Start-up screen. -
Page 37: Overview Of The Therapy Screen
Figure 3. Start-up screen Overview of the Therapy Screen After the patient controller app connects with the generator, the Therapy screen appears. - Page 38 Figure 4. Therapy screen 1. Screen title 2. Generators button 3. Information icon 4. Program name 5. Mode 6. Sleep Timer 7. Therapy button 8. Stimulation map 9. Strength button...
- Page 39 Table 3. Therapy screen descriptions Screen Section Description or Button Name Screen title Displays the name of the screen you are viewing. Generators Tap the Generators button to button display the Generator List screen and end the session with the current generator.
- Page 40 Table 3. Therapy screen descriptions Screen Section Description or Button Name Mode Displays the active dosage (Continuous, Intermittent, or Sleep). Tap to display the Mode screen and enable Airplane Ready mode, Surgery Mode, or MRI Mode. See "Mode" (page 37) for more information.
-
Page 41: Starting And Stopping Stimulation
Starting and Stopping Stimulation You may start and stop stimulation using the patient controller app or the included magnet if your physician has enabled magnet use. Starting and Stopping Stimulation Using the Patient Controller To start or stop stimulation using the patient controller app, do one of the following: Tap the Therapy is ON or Therapy is OFF button ... - Page 42 Starting and Stopping Stimulation Using the Magnet If your physician has enabled magnet use, you may start and stop stimulation with a magnet. To start or stop stimulation using the magnet, follow these steps: 1. Take the keeper bar off the magnet. Figure 5.
-
Page 43: Mode
Mode Depending on the programmed dosage, Continuous, Intermittent, or Sleep is displayed on the Therapy screen. Continuous – provides nonstop stimulation Intermittent – automatically alternates stimulation on and off for the preset periods in the selected program; displays the remaining time in the current on or off period Sleep –... - Page 44 To enable Airplane Ready mode, tap Airplane Ready to view the Airplane Ready screen. Follow the instructions on the screen to turn Airplane Ready on or off. For instructions about turning Bluetooth wireless technology on, see ® "Troubleshooting" (page 63). For more information about Surgery Mode, see ...
-
Page 45: Using The Surgery Mode Feature
Using this feature turns therapy off while you undergo your procedure. NOTE: If you feel uncomfortable completing the following steps, contact Abbott Medical before your procedure. Contact your clinician before your procedure to learn more about any risks. - Page 46 Setting the IPG to Surgery Mode To set your IPG into Surgery Mode, follow these steps: 1. From the Therapy screen, tap Mode to display the Mode screen. 2. Tap Surgery Mode to view the Surgery Mode screen. Figure 7. Surgery Mode screen 3.
- Page 47 Disabling the Surgery Mode After your procedure, you need to disable Surgery Mode to restart stimulation. To disable Surgery Mode, follow these steps: 1. Launch the patient controller app and connect with your generator. You should see the following screen, showing that the IPG is in Surgery Mode. Figure 8.
-
Page 48: Using The Mri Mode Features
Using the MRI Mode Features You may be implanted with the parts that make up a Magnetic Resonance (MR) Conditional system, which allows you to receive an MRI scan if all the requirements for the implanted parts and scanning are met. This section provides information and instructions about what you need to do before and after an MRI scan. - Page 49 Preparing for an MRI Scan If you have an MR Conditional system and will receive an MRI scan, follow these guidelines: Set your IPG to MRI mode within a day before you arrive for your procedure. See "Setting the IPG to MRI Mode"...
- Page 50 Setting the IPG to MRI Mode To set your IPG into MRI mode, follow these steps: 1. From the Therapy screen, tap Mode to display the Mode screen. 2. Tap MRI Mode to view the MRI Mode screen. Figure 9. MRI Mode screen...
- Page 51 3. Tap the MRI Mode toggle button. 4. When the "Set Generator to MRI Mode" message appears, tap Continue. Stimulation stops, and the patient controller app checks the system for any issues. If the checks are successful, the "Proceed with MRI" message appears and the MRI mode is NOTE: If a warning screen appears instead of the "Proceed with MRI"...
- Page 52 Figure 10. MRI Mode screen 2. Tap Exit MRI Mode. The patient controller app disables MRI mode. The Therapy screen appears, showing that stimulation therapy is off. 3. To start stimulation, tap Therapy is OFF.
-
Page 53: Viewing And Selecting A Program
Viewing and Selecting a Program Tap the program name on the Therapy screen to open the Programs screen. On the Programs screen you can view and select any of the saved programs. To navigate between the saved programs, either: Swipe the screen right or left in the area ... - Page 54 Figure 11. Programs screen 1. Cancel button 2. Program name 3. Left arrow 4. Right arrow 5. Program indicator 6. Select This Program button...
- Page 55 Table 4. Programs screen descriptions Screen Section or Description Button Name Cancel button Tap Cancel to return to the Therapy screen. No program changes will be made. Program name Displays the program name of the current Programs screen. A check mark next to the program name indicates the currently selected program.
-
Page 56: Adjusting Program Strength
Adjusting Program Strength Tap Strength on the Therapy screen to open the Strength screen. On the Strength screen you can modify the active program strength or the strength of an individual area. For instructions on modifying the strength of an Area, see "Adjusting Areas Strength" (page 54). - Page 57 Figure 12. Strength screen Program tab – Multiple Areas 1. Done button 2. Program tab 3. Areas tab 4. Increase button 5. Decrease button...
- Page 58 If the active program has only one programmed area, you will see the following screen. Figure 13. Strength screen – One Area...
- Page 59 Table 5. Strength screen descriptions Screen Section Description or Button Name Done button Tap Done to save changes and return to the Therapy screen. Program tab Selected by default. If the program only has one Area, the Program tab will not appear on the screen. Areas tab Tap the Areas tab to open the Areas screen.
-
Page 60: Adjusting Areas Strength
Adjusting Areas Strength Tap Strength on the Therapy screen to open the Strength screen, and then tap the Areas tab to open the Areas portion of the Strength screen. On the Areas screen you can modify the stimulation strength for each Area in the active program (a program may contain multiple areas). - Page 61 Figure 14. Strength screen Areas tab 1. Done button 2. Program tab 3. Areas tab 4. Selected Area 5. Stimulation map 6. Increase button 7. Decrease button...
-
Page 62: System Information
Table 6. Areas screen descriptions Screen Section Description or Button Name Done button Tap Done to save changes and return to the Therapy screen. Program tab Tap the Program tab to open the Program screen. See "Adjusting Program Strength" (page 50) for more information. Areas tab Modify the strength of each Area in the active program on this screen. - Page 63 Figure 15. System information Generator screen 1. Done button 2. Manuals button 3. Generator button 4. Leads/Extensions button 5. Patient Controller button...
- Page 64 Table 7. System information descriptions Screen Section Description or Button Name Done button Tap Done to save changes and return to the Therapy screen. Manuals button Tap to view information about how to download the MRI Procedure Information manual. Generator button Tap to view information about your generator, such as the generator model number.
-
Page 65: Maintaining The Generator And Patient Controller
Maintaining the Generator and Patient Controller This section provides tips and other information about maintaining and caring for your generator and patient controller. Checking the Generator Battery Status Refer to the IPG and EPG information below for instructions on viewing your generator battery status. How long the battery lasts depends on the programmed stimulation settings, how often stimulation is used, and how often you communicate... - Page 66 To view the EPG battery status: As the battery is used, the generator battery indicator on the System screen shows the remaining life (the figure below shows the EPG battery indicator progression). NOTE: When using a trial system, contact your physician for replacement batteries if your battery indicator shows 2 or less as shown in the figure below.
-
Page 67: Checking The Patient Controller Battery Status
Recharge the patient controller using only the Apple‡ charging cord and wall outlet plug provided with your device. When using the trial system, Abbott Medical does not recommend charging the provided patient controller with a computer since personal information may be transferred to the patient controller, which will be returned to Abbott Medical. -
Page 68: Caring For The Generator
Caring for the Patient Controller If you are using a patient controller provided by Abbott Medical, clean the protective case by wiping off the outer surface using a moist cloth and a small amount of mild soap. Do not use a cloth that is saturated. -
Page 69: Troubleshooting
NOTE: If you encounter problems other than those described in this section, contact Technical Support. NOTE: Refer to the terms and conditions for repair or replacement of Abbott Medical neurostimulation system components as stated in the Limited Warranty card included in your product documentation. - Page 70 System Problem Try the action again. If you continue to encounter The system encountered this problem, contact a problem. Contact Abbott Technical Support. if this problem persists.
- Page 71 Table 8. Troubleshooting messages Message Solution Generator Unavailable Make sure your generator is in range and the battery Make sure the generator has enough charge (see is in range and has "Checking the Generator enough battery power. Battery Status"), then try connecting to your generator again.
- Page 72 Table 8. Troubleshooting messages Message Solution Connection Lost Try connecting to your generator again. A magnet was used to place the generator in the If you continue to Bluetooth pairing mode. encounter this problem, contact Technical Support. Connection Not Ready Try connecting to your generator again.
- Page 73 Table 8. Troubleshooting messages Message Solution Replace Generator Soon Contact your physician. The generator is approaching its end of service and will need to be replaced soon. Contact your physician to schedule a replacement. Replace Generator Contact your physician. The generator has reached the end of its service.
- Page 74 Table 8. Troubleshooting messages Message Solution Invalid Program Tap Dismiss and select a valid program. If you continue to encounter this problem or do not have valid programs, contact your physician. Therapy is OFF Tap Dismiss. Therapy was turned off because the program needed to be reset.
- Page 75 Recommended modify your program. Contact your clinician to modify the program if necessary. Unsupported Device Use the device provided by Abbott Medical or a This application is not compatible personal compatible with this Apple‡ iOS‡ device. device. NOTE: For more information on compatible devices, see "Appendix A:...
- Page 76 Table 9. Possible causes and solutions for potential issues Problem Possible Possible Solution Cause Cannot locate Patient Swipe through patient controller app screens from the controller app. is not on patient controller patient Home screen to controller locate app. Home screen. Search for the app using the iOS search function.
- Page 77 Table 9. Possible causes and solutions for potential issues Problem Possible Possible Solution Cause Correct plug Connect the adapter appropriate plug (voltage adapter (voltage converter) is converter) to the not connected charger. to the charger. Charger is Replace the defective. charger.
- Page 78 Table 9. Possible causes and solutions for potential issues Problem Possible Possible Solution Cause Screen is If the patient damaged or controller appears malfunctioning. to be powered on but without display, the screen may be defective. Contact Technical Support. Patient Patient Perform a soft reset controller will...
- Page 79 Table 9. Possible causes and solutions for potential issues Problem Possible Possible Solution Cause Patient Charge the patient controller controller battery. battery is drained. Bluetooth Decrease the ® wireless distance between technology the devices. connection is Move the devices not strong or away from other turned off.
- Page 80 Table 9. Possible causes and solutions for potential issues Problem Possible Possible Solution Cause Disconnect any Bluetooth wireless ® technology media accessories (such as headphones or speakers). Wait a few minutes and try connecting again. Turn on Bluetooth ® wireless technology using the instructions in the "Troubleshooting...
-
Page 81: Troubleshooting Messages For Mri Mode
Troubleshooting Messages for MRI Mode The following tables show issues you may encounter while setting MRI mode. The first table shows possible issues that you may see on the Mode screen while trying to open the MRI Mode screen. The second table shows messages that you may see while setting MRI mode. - Page 82 Table 10. Possible causes and solutions for potential issues with opening the MRI Mode screen from the Mode screen Problem Possible Cause Solution Cannot access The IPG is not Try connecting the Mode connected to the to the IPG again. screen.
-
Page 83: Cybersecurity
Cybersecurity To protect the devices, products, and systems that connect patients to healthcare professionals and institutions, Abbott takes a broad and deep approach to ensuring safety, privacy, and security. Visit the information page available at www.NMCybersecurity.Abbott to learn more about the Abbott neuromodulation cybersecurity program. -
Page 84: Guidelines For Secure Use
Only one patient controller may communicate with the generator at the same time. A unique key for each unit that is checked during each transmission. Built-in pairing that specifies valid and legitimate pairing among units. Proprietary authentication in addition to the ... -
Page 85: Technical Support
Controller App via www.NMmobiledevicesync.com/cp. Technical Support For technical questions and support for your product, use the following information: +1 855 478 5833 (toll-free within North America) +1 651 756 5833 For additional assistance, call your local Abbott Medical representative. -
Page 86: Appendix A: Downloading The Patient Controller App
You must download the patient controller app to your patient controller (either a device provided by Abbott Medical or a compatible personal Apple‡ iOS‡ device) in order to use the patient controller with your generator. The patient controller app is compatible... - Page 87 1. Make sure the device is connected to a Wi-Fi‡ network. 2. Tap the App Store icon on the patient controller Home screen. 3. Enter Abbott Patient Controller in the Search field. 4. Once you locate the correct app, follow the onscreen prompts.
-
Page 88: Appendix B: Pairing The Patient Controller To The Generator
Appendix B: Pairing the Patient Controller to the Generator The following instructions outline the steps for pairing the patient controller to the generator. 1. Place the magnet perpendicular to the generator for 10 seconds. 2. Tap the patient controller app. The patient controller app launches. -
Page 89: Appendix C: Regulatory Statements
Appendix C: Regulatory Statements NOTE: These statements are applicable to the generator. For Regulatory Statements regarding the patient controller, refer to the user guide available at support.apple.com/manuals for the Apple‡ iOS‡ device you are using to run the patient controller app; or, on the patient controller Home screen, tap Settings >... -
Page 90: Statement Of Compliance With License-Exempt Rss Standard (Canada)
Reorient or relocate the receiving antenna. Increase the separation between the equipment and receiver. Connect the equipment into an outlet on a circuit different from that to which the receiver is connected. Consult the dealer or an experienced radio/TV ... -
Page 91: Declaration Of Conformity (Industry Canada) Notice To Users Of Radio And Television
Declaration of Conformity (Industry Canada) Notice to Users of Radio and Television This Class B digital apparatus meets all the requirements of the Canadian interference-causing equipment regulations. Identification Information for Product Registration This device has a label that contains, among other information, a product identifier in the following format: Table 12. -
Page 92: Product Classification Statement (Cispr 11, Class B)
Table 13. Proclaim™ Registration identification information Identifier Type Registration Identifier FCC Registration Number RIASJMRFC Industry Canada (IC) 8454A-M3660123 Registration Number Product Classification Statement (CISPR 11, Class B) This product is class B equipment, which is intended primarily for use in the domestic environment. Wireless Technology Information The following table summarized the technical details of the Bluetooth... - Page 93 Table 14. Bluetooth Smart wireless technology information EPG Antenna dimensions 4 mm x 3 mm x 1.1 mm IPG Antenna dimensions 8.1 mm x 5.1 mm x 4.9 mm Modulation GFSK EPG Magnetic Field Strength 0.000145 A/m (at 10 m distance) maximum IPG Magnetic Field Strength 16.3 µA/m...
-
Page 94: Radio Transmitter, Cables, Transducers
Table 14. Bluetooth Smart wireless technology information Data flow Bi-directional Protocol Bluetooth Smart wireless technology *EIRP = Equivalent isotropically radiated power Radio Transmitter, Cables, Transducers The device contains a radio transmitter/receiver with the following parameters. Radio transmitter parameters: Frequency (range): 2.4000 to 2.4835 GHz ... -
Page 95: Quality Of Service For Wireless Technology
The radio receiver in the device is using the same frequency and bandwidth as the transmitter. Cables and transducers: Cables and transducers are not used during normal use of the device nor while programming the device. Quality of Service for Wireless Technology Bluetooth Smart wireless technology enables ®... - Page 96 (2x), and a receive-to-transmit mode (RX-to-TX) time. Data is resent if not successfully received. Each key press may transmit up to 4 data packets with up to 20 bytes per packet, depending on the number of packets that need to be transmitted (i.e., if there is only one packet to transmit, only one packet will be transmitted).
-
Page 97: Appendix D: Electromagnetic Compatibility Guidelines
Wait a few minutes and try connecting again Do not operate other wireless devices (i.e., laptop, tablet, mobile phone, or cordless phone) at the same time NOTE: Wireless communications equipment, such as wireless home network devices, mobile and cordless telephones, and tablets, can affect the device. - Page 98 CAUTION: To avoid increasing emissions or decreasing immunity from a device or system, use only components approved by Abbott Medical with this system. Do not use Abbott Medical components with devices or systems that are not approved by Abbott Medical.
- Page 99 Table 15. Guidance and manufacturer’s declaration – electromagnetic emissions Emissions Compliance Electromagnetic Environment Guidance Test RF emissions Group 1 The device produces RF emissions as a CISPR 11 result of its internal and system interface functions. Its RF emissions are very low and are not likely to cause any interference in nearby electronic equipment.
- Page 100 Table 16. Guidance and manufacturer’s declaration – electromagnetic immunity Immunity Test IEC 60601 Compliance Electromagnetic Test Level Level Environment Guidance Electrostatic ±8 kV contact ±8 kV contact The relative humidity discharge (ESD) should be at least 5%. ±15 kV air ±15 kV air IEC 61000-4-2 Electrical fast...
- Page 101 Table 16. Guidance and manufacturer’s declaration – electromagnetic immunity Immunity Test IEC 60601 Compliance Electromagnetic Test Level Level Environment Guidance Conducted RF 3 Vrms 3 Vrms The device is intended IEC 61000-4-6 for use in the 150 kHz to electromagnetic 80 MHz environment in which 6 Vrms...
- Page 102 Table 16. Guidance and manufacturer’s declaration – electromagnetic immunity Immunity Test IEC 60601 Compliance Electromagnetic Test Level Level Environment Guidance Recommended minimum separation distance for higher immunity test levels where P is the maximum power in watts (W), d is the recommended separation distance in meters (m), and E is the...
- Page 103 Table 17. Guidance and manufacturer’s declaration – proximity fields Proximity Test IEC 60601 Compliance Electromagnetic Test Level Level Environment Guidance IEC 61000-4-3 385 MHz: 27 V/m Recommended 27 V/m @ minimum separation 18 Hz pulse distance d = 0.3 m modulation 450 MHz: 28 V/m...
- Page 104 WARNING: Do not use portable RF communications equipment (including peripherals such as antenna cables and external antennas) closer than 30 cm (12 inches) to any part of the device, including cables specified by Abbott Medical. Otherwise, performance degradation may occur.
-
Page 105: Radio Frequency Information
Radio Frequency Information The effective radiated power is below the limits as specified in: USA: FCC 47 CFR Part 15:2012 Canada: RSS-210 Issue 8 Europe: ETSI EN 301 489 V1.9.2, ETSI EN 301 489-1 and ETSI EN 301 489-17 NOTE: Maintain a reasonable distance between other electronic equipment and the device. - Page 108 Abbott Medical 6901 Preston Road Plano, Texas 75024 USA +1 855 478 5833 +1 651 756 5833 Abbott Medical The Corporate Village Da Vincilaan 11 Box F1 1935 Zaventem Belgium +32 2 774 68 11 2020-04 ARTEN600090481 A *600090481*...
Need help?
Do you have a question about the St. Jude Medical Patient Controller 3875 and is the answer not in the manual?
Questions and answers
I have a neuromodulator model 3875. I lost the charger so it hasn't been charged for several years. Can it still be working?
The manual states that if the patient controller has no power or its battery is drained, it should be recharged using the charger. However, if the controller is damaged or malfunctioning, it may need to be replaced. If the device has not been charged for several years, the battery may no longer function properly, and the controller may not work. In such a case, replacing the controller may be necessary.
This answer is automatically generated