Table of Contents
Advertisement
Advertisement
Table of Contents
Troubleshooting

Related Manuals for Abbott FreeStyle Precision Pro


Summary of Contents for Abbott FreeStyle Precision Pro
- Page 1 Operator’s Manual for Healthcare Professionals...
-
Page 2: Table Of Contents
This Operator's Manual provides basic information about the FreeStyle Precision Pro system. It is organised into three sections. The overview in Chapter 1 describes the components of the FreeStyle Precision Pro system and the physical features of the meter. Chapters 2 to 9 give step-by-step procedures to operate the meter. Chapters 10 to 13 provide additional information to help care for the meter. - Page 3 How to Obtain a Neonatal Capillary Blood Heel Stick Sample (For Glucose Testing) ............3-5 Disposing of Waste .....................................3-6 Patient Test Procedure - FreeStyle Precision Pro Glucose ......................3-7 Patient Test Procedure - Precision Xceed Pro Glucose .......................3-15 Patient Test Procedure - Ketone ..............................3-23 4.
- Page 4 Table of Contents continued 5. Data Review ................................... 5 Data Review for Patient by Operator ID ............................5-4 Data Review for Patient by Patient ID .............................5-6 Data Review for All Patient Data..............................5-8 Data Review for Control Data ................................5-10 Data Review for Proficiency Data ..............................5-12 Data Review for Linearity Data ..............................5-14 6.
- Page 5 Troubleshooting Out-of-Range Linearity Test Results ........................11-3 Troubleshooting Wireless (if enabled) ............................11-4 Troubleshooting Barcode Scanning ...............................11-4 Error Messages ....................................11-5 Technical Support Instructions ..............................11-22 Returning a Meter ..................................11-23 Contacting Abbott for Service ..............................11-24 Questions? Refer to Page 11-22 For Technical Support Instructions.
- Page 6 12. Maintenance ................................12 Cleaning the Exterior Surface .................................12-1 Replacing the Strip Port Module ..............................12-3 Replacing the Batteries..................................12-5 13. Specifications ................................13 FreeStyle Precision Pro Meter .................................13-1 Symbols ......................................13-3 Barcode Types ....................................13-6 Questions? Refer to Page 11-22 For Technical Support Instructions.
-
Page 7: Overview
Overview Intended Use Important Safety Instructions TrueID TrueMeasure TrueAccess Notes and Warnings Meter Display Icons Conventions System Components... -
Page 8: Intended Use
Overview Intended Use The FreeStyle Precision Pro Blood Glucose and β-Ketone Monitoring System is intended for in vitro (outside the body) diagnostic use for the quantitative measurement of glucose (D-glucose) in fresh capillary whole blood (fingertip), and of ketone (beta- hydroxybutyrate) in fresh capillary whole blood samples. - Page 9 READ THIS BEFORE USING THE EQUIPMENT • Do not place the equipment in liquid, nor put it where it could fall into liquid. • Use the equipment only for the purpose described in the instructions for use. • Do not use accessories which are not supplied or recommended by the manufacturer. • Do not use the equipment if it is not working properly, or if it has suffered any damage.
-
Page 10: Trueid
TrueID Easy Data Entry Choose between the built-in barcode scanner, compatible with one dimensional (1D) and two dimensional (2D) barcodes, and the alphanumeric keypad for entering data as required by point- of-care policy. The meter can be configured to accept patient identification, operator identification, test strip lot number, comment code, and up to two free text fields for other data such as physician name. -
Page 11: Trueaccess
ID is set to expire in the near future. Results Storage The FreeStyle Precision Pro meter can store up to 2,500 patient test results and 1,000 control test results, in addition to 20 proficiency test results and 2 linearity panels. All stored data can be... -
Page 12: Notes And Warnings
Results Transmission The FreeStyle Precision Pro meter allows results transmission via a docking station or upload cable. If the agreement with Abbott Diabetes Care Inc. includes wireless functionality on the FreeStyle Precision Pro system and both your data management system and individual meters are enabled, data will be updated in real-time through your facility’s wireless network. -
Page 13: Meter Display Icons
Meter Display Icons Your FreeStyle Precision Pro meter screen may reflect informational icons to indicate system status. Common icons and their meaning are listed in the table below. Icons Indication Explanation For All Meters Indicates current battery strength of the meter. A completely black Battery Strength battery symbol indicates full battery strength. -
Page 14: Conventions
Conventions The glucose unit of measure is set using the data management system. It is not changed via the meter menu. In this manual, when a meter screen shot shows a glucose test result in one unit of measure (e.g. mmol/L) the equivalent value in the other unit of measure (e.g. -
Page 15: System Components
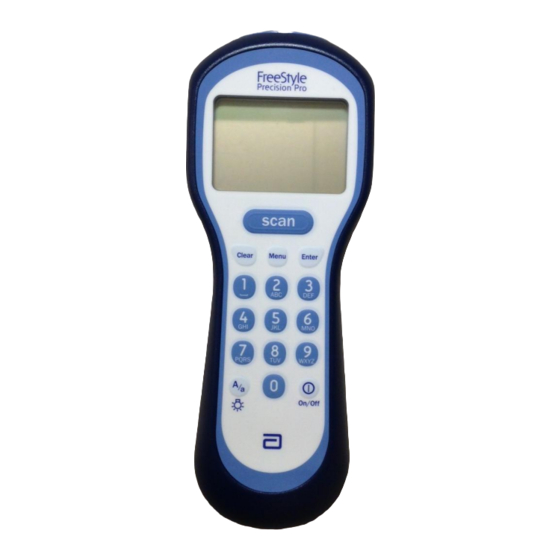
System Components The FreeStyle Precision Pro meter is part of an overall system designed to simplify point-of-care testing. These components are purchased separately and some are optional. FreeStyle Precision Pro System Components The FreeStyle Precision Pro System includes the following items: • M eter... - Page 16 Meter The FreeStyle Precision Pro meter has many features designed to help simplify testing. It can be used with one hand, either the left or the right. The display has large text and is backlit to make reading easy. The keypad is similar to a telephone and each button clicks when pressed.
- Page 17 Test Strips FreeStyle Precision Pro and Precision Xceed Pro Test Strips offer the latest advancements in biosensor technology. The test strips work by first inserting the contact bars into the meter. Then the sample is applied to the target area, covering both the working electrode and the reference electrode.
- Page 18 FreeStyle Precision Pro Blood β-Ketone Test Strips and Precision Xceed Pro Blood β-Ketone Test Strips are also available for use with the FreeStyle Precision Pro system. These test strips have chemistry to specifically measure β-hydroxybutyrate, the primary ketone produced when a patient is developing ketoacidosis.
- Page 19 There are four types of test strips that may be used for testing with the FreeStyle Precision Pro system: the FreeStyle Precision Pro Blood Glucose Test Strips and Precision Xceed Pro Blood Glucose Test Strips (blue foils) for testing glucose levels in fresh whole blood, and the FreeStyle Precision Pro Blood β-Ketone Test Strips and Precision Xceed Pro Blood β-Ketone Test Strips (purple...
- Page 20 Use RNA Medical brand Glucose and β-Ketone Calibration Verification Controls to confirm the calibration and analytical measurement range of the meter for FreeStyle Precision Pro Blood Glucose or Blood β-Ketone Test Strips. This is called linearity testing and requires a kit with 5 levels of control solution. Linearity testing is further described in Chapter 7.
- Page 21 There is no need to prep the meter prior to using the bag and the bag does not affect any meter functions. The FreeStyle Precision Pro system is only compatible with Abbott isolation bags (including the FreeStyle isolation bag).
-
Page 22: Using The Meter
Using the Meter Barcode Scanner Data Entry Keypad Audible Indicator Data Port Battery Compartment Strip Port Module Optional Wireless Network Connection Meter Identification Menu Tree... -
Page 23: Barcode Scanner
Using the Meter Barcode Scanner The barcode scanner enables you to scan barcode information, using specified 1D and 2D barcode formats (please refer to Chapter 13), into the meter instead of manually entering the data using the keypad. Scanning the barcode on the test strip foil packet automatically enters the test strip information (calibration, control range, lot number and expiry date). - Page 24 Step 3: Slowly move the meter, if needed, so that the green beam is directly over the barcode. Step 4: The meter will beep in acknowledgement when it accepts the barcode. Note: If you hold the Scan button for three seconds, the scanner stops. Reposition scanner and try again. Optimal distance depends on barcode type.
-
Page 25: Data Entry Keypad
On/Off Press this button to turn the meter on. Each time the meter is turned on, the Abbott logo screen will appear in black for a few seconds and then will appear in grey. This provides an opportunity to ensure that all the pixels are working correctly. - Page 26 Backlight/Alphanumeric Press and hold this button for about 2 seconds to activate the display backlight. Press this button while manually entering data to toggle between numeric, uppercase alpha mode and lowercase alpha mode during manual data entry. When in alpha mode, enter alpha characters on the screen by pressing the 2 to 9 buttons multiple times to cycle through the characters.
-
Page 27: Audible Indicator
Audible Indicator The meter has an audible indicator that can be turned on or off. This indicator emits two tones, a high pitched tone to indicate success and a low pitched tone to indicate a problem. If enabled, the meter will beep to indicate the following actions: • The operator has successfully scanned a barcode;... -
Page 28: Strip Port Module
Optional Wireless Network Connection If your agreement with Abbott Diabetes Care Inc. includes wireless functionality on the FreeStyle Precision Pro system and both your data management system and individual meters are enabled, your system is capable of automatic and secure wireless data transmission. - Page 29 (pacemakers, hearing aids, etc.) regarding any restrictions on the use of 802.11x wireless technology. Changes or modifications made in this device, which are not expressly approved by Abbott Diabetes Care Inc., could void the user’s authority to operate the equipment.
-
Page 30: Meter Identification
Mode must be configured using a data management system and the Wireless Set-Up Utility (optional). You can visually verify existing meter settings, but cannot change them. The Menu Mode portion of the software is set up like a tree, with various levels of sub-menus. The FreeStyle Precision Pro Menu Tree, shown below, illustrates the multiple sub-menu layers. - Page 31 Questions? Refer to Page 11-22 For Technical Support Instructions. Chapter 2: Using the Meter...
-
Page 32: Patient Test
(For Glucose Testing) How to Obtain a Neonatal Capillary Blood Heel Stick Sample (For Glucose Testing) Disposing of Waste Patient Test Procedure - FreeStyle Precision Pro Glucose Patient Test Procedure - Precision Xceed Pro Glucose Patient Test Procedure - Ketone... -
Page 33: Operating Guidelines For All Samples
• Use only control solutions specified in the test strip instructions for use to verify the performance of the FreeStyle Precision Pro meter. • Use FreeStyle Precision Pro and Precision Xceed Pro Test Strips with the FreeStyle Precision Pro meter. • Refer to the test strip package insert for specific directions on storage and use of the test strips. - Page 34 • Do not use test strips if the strip port module is not fully inserted. User will receive an error message if the strip port module is not secure. • Use each test strip only once. • Do not scan a test strip packet's barcode and then use a test strip from a different packet. This may cause inaccurate results. • Apply a drop of blood to the target area at the end of the test strip.
-
Page 35: Collecting Blood Samples
Collecting Blood Samples How to Obtain a Capillary Blood Sample (For Glucose or Ketone Testing): • Only auto-disabling single use lancing devices should be used. • Use a new pair of clean gloves for each patient. • Use only fresh whole blood samples. • Make sure that the sampling site is clean and dry before lancing. -
Page 36: How To Obtain A Venous Blood Sample (For Glucose Or Ketone Testing)
How to Obtain a Venous Blood Sample (For Glucose or Ketone Testing): • Use a new pair of clean gloves for each patient. • Use only fresh whole blood samples. • Collect the venous blood sample in a collection tube containing heparin or EDTA. Make sure that the tube is filled to the stated volume. -
Page 37: How To Obtain An Arterial Blood Sample (For Glucose Testing)
How to Obtain an Arterial Blood Sample (For Glucose Testing): • Use a new pair of clean gloves for each patient. • Use only fresh whole blood samples. • Clear the arterial line before drawing a blood sample into a heparinised syringe. • Use the sample within 30 minutes of collection. -
Page 38: Disposing Of Waste
• The blood can be collected in a capillary tube coated with heparin, and then applied to the test strip. Mix the blood specimen well immediately before applying the sample to the target area of the test strip. • Alternately, you can use the heel-to-strip method: Allow a hanging drop of blood to form from the heel and apply to the target area of the test strip. -
Page 39: Patient Test Procedure - Freestyle Precision Pro Glucose
Patient Test Procedure - FreeStyle Precision Pro Glucose Use the following procedure to perform a patient test using the FreeStyle Precision Pro Blood Glucose Test Strip. Note: The following section illustrates some common settings. Depending on your facility’s specific settings, some screens will display differently or not at all. - Page 40 What You See on the Display What You Do Comments 3. Press Scan to scan the Operator ID While the Operator ID may be up to 30 barcode or manually enter the Operator digits, not all digits will fit on the display. ID via the keypad, then press Enter.
- Page 41 What You See on the Display What You Do Comments Press 2 to Confirm the Patient ID or 1 to ReEnter the ID. Enter the year of birth (e.g. enter “63” for Press Clear to re-enter the ID. If numbers 1963;...
- Page 42 What You See on the Display What You Do Comments 6. Press Scan to scan the test strip barcode Scanning the barcode identifies the strip type, calibrates the meter, ensures the or manually enter the test strip lot number via the keypad, then press expiry date has not passed, records the strip Enter.
- Page 43 What You See on the Display What You Do Comments 9. With the contact bars facing up, insert Prior to inserting the test strip, ensure that the strip port module is installed and that it the test strip into the test strip port until it stops and Strip Inserted is displayed.
- Page 44 What You See on the Display What You Do Comments 11. Wait for the meter to analyse the sample The meter counts down, then displays the test result. If an error is detected during and display the test result. the assay, the assay is terminated and no result is displayed.
- Page 45 What You See on the Display What You Do Comments Your facility may establish an Action For out-of-range results, refer to your facility’s policy. Range. The meter will display results outside of this range. A comment code may be required for results outside the action range.
- Page 46 What You See on the Display What You Do Comments 13. You can select one of the following The display shows: options: Patient ID or Name (p: prompt) Comment Code (Number in box) Press 1–Next Patient. Date and Time of test Press 2–Patient History.
-
Page 47: Patient Test Procedure - Precision Xceed Pro Glucose
What You Do Comments 1. Press On/Off to turn on the meter. The Abbott logo screen will appear in black for a few seconds and then will appear in grey to ensure that the display is functioning properly. Next, the software version will briefly appear. - Page 48 What You See on the Display What You Do Comments 3. Press Scan to scan the Operator ID While the Operator ID may be up to 30 barcode or manually enter the Operator digits, not all digits will fit on the display. ID via the keypad, then press Enter.
- Page 49 What You See on the Display What You Do Comments Press 2 to Confirm the Patient ID or 1 to ReEnter the ID. Press Clear to re-enter the ID. If numbers Enter the year of birth (e.g. enter “63” for 1963;...
- Page 50 What You See on the Display What You Do Comments 6. Press Scan to scan the test strip barcode Scanning the barcode identifies the strip type, calibrates the meter, ensures the or manually enter the test strip lot number via the keypad, then press expiry date has not passed, records the strip Enter.
- Page 51 What You See on the Display What You Do Comments 8. With the contact bars facing up, insert Prior to inserting the test strip, ensure that the strip port module is installed and that it the test strip into the test strip port until it stops and Strip Inserted is displayed.
- Page 52 What You See on the Display What You Do Comments 10. Wait for the meter to analyse the sample The meter counts down, then displays the and display the test result. test result. If an error is detected during the assay, the assay is terminated and no result is displayed.
- Page 53 What You See on the Display What You Do Comments Your facility may establish an Action For out-of-range results, refer to your facility's policy. Range. The meter will display results outside of this range. A comment code may be required for results outside the action range.
- Page 54 What You See on the Display What You Do Comments 12. You can select one of the following The display shows: options: Patient ID or Name (p: prompt) Comment Code (Number in box) Press 1–Next Patient. Date and Time of test Press 2–Patient History.
-
Page 55: Patient Test Procedure - Ketone
Use the following procedure to perform patient tests with the FreeStyle Precision Pro Blood β-Ketone Test Strip and Precision Xceed Pro Blood β-Ketone Test Strip. The FreeStyle Precision Pro meter recognises the type of test strip based on the scan of the strip barcode. - Page 56 What You See on the Display What You Do Comments 2. When Apply Sample is displayed, When sufficient sample has been applied, the meter beeps, displays Sample apply a drop of blood from the patient's Accepted and automatically starts the test. finger, transfer pipette or syringe to the target area of the test strip.
- Page 57 What You See on the Display What You Do Comments 4. If prompted, scan or manually enter the The meter may be enabled to scan or enter a comment code and press Enter. 1- to 2-digit comment code. The meter may display out-of-range results If there is no prompt to enter a comment code skip down to step 5.
-
Page 58: Control Test
Control Test Operating Guidelines for Control Solution Testing Control Test Procedure - Glucose Control Test Procedure - Ketone... -
Page 59: Operating Guidelines For Control Solution Testing
Operating Guidelines for Control Solution Testing Observe the following guidelines to obtain optimal quality control results using the FreeStyle Precision Pro system: • Use only MediSense Glucose and Ketone Control Solutions with compatible test strips to verify the performance of the FreeStyle Precision Pro meter and test strips. - Page 60 When To Test with Control Solutions • As required by your facility’s quality policy or local regulatory requirements. • To verify the performance of the FreeStyle Precision Pro system. Questions? Refer to Page 11-22 For Technical Support Instructions. Chapter 4: Control Test...
- Page 61 Workflow The meter expects to run control tests in the following order. If a control level is disabled, the meter will expect to skip it. If ketone testing is disabled, the operator will not receive a prompt to perform this test. 1.
-
Page 62: Control Test Procedure - Glucose
What You Do Comments 1. Press On/Off to turn on the meter. The Abbott logo screen will appear in black for a few seconds and then will appear in grey to ensure that the display is functioning properly. Next, the software version will briefly appear. - Page 63 What You See on the Display What You Do Comments 3. Press Scan to scan the Operator ID While the Operator ID may be up to 30 digits, not all digits will fit on the display. barcode or manually enter the Operator ID via the keypad, then press Enter.
- Page 64 What You See on the Display What You Do Comments If the Unexpected Level screen appears, The meter is programmed to expect Low, Mid, and High Glucose, then Low, Mid, and you may either: High Ketone control tests in this order. A 1.
- Page 65 What You See on the Display What You Do Comments 6. Make sure your hands or gloves are clean and dry before opening the foil packet. Open the foil test strip packet at the notch and tear down to remove the test strip.
- Page 66 What You See on the Display What You Do Comments 8. Gently invert the required control When sufficient sample has been applied, the meter beeps, displays Sample solution bottle 3-4 times. Remove the Accepted and automatically starts the test. cap of the control solution bottle and wipe the nozzle with a clean gauze or For a detailed description of the test strip target area, refer to the Test Strips section of...
- Page 67 If an error is detected during and display the test result. the assay, the assay is terminated and no When using FreeStyle Precision Pro result is displayed. Once the assay begins, test strips the countdown will begin at 5 all key presses are ignored until the assay is seconds.
- Page 68 What You See on the Display What You Do Comments 11. You may select one of the following: The display shows: Press 1 – Next Level. Level (Low, Mid, High) Comment Code (Number in box) Press 2 – Repeat Test. Test Type (Glucose) Press Menu to return to the Date and Time of test...
-
Page 69: Control Test Procedure - Ketone
Control Test Procedure - Ketone Use the following procedure to perform ketone control tests if ketone testing is enabled. Note: The following section illustrates some common settings. If the meter does not display the screens shown, please refer to Chapter 11, Troubleshooting. What You See on the Display What You Do Comments... - Page 70 What You See on the Display What You Do Comments 3. Wait for the meter to analyse the sample The meter counts down then displays the and display the test result. test result. If an error is detected during the assay, the assay is terminated and no result is displayed.
- Page 71 What You See on the Display What You Do Comments 5. You may select one of the following: The display shows: Press 1 – Next Level. Level (Low, Mid, High) Comment Code (Number in box) Press 2 – Repeat Test. Test Type (Ketone) Press Menu to return to the Menu Date and Time of test...
-
Page 72: Data Review
Data Review Data Review for Patient by Operator ID Data Review for Patient by Patient ID Data Review for All Patient Data Data Review for Control Data Data Review for Proficiency Data Data Review for Linearity Data... - Page 73 Data Review The FreeStyle Precision Pro meter stores the results of up to 2,500 patient tests, 1,000 control tests, 20 proficiency tests and 2 linearity panels. This data can be retrieved by the following categories: Patient by Operator ID (OperID): This will show test results performed by a particular operator, starting with the most recent test.
- Page 74 What You See on the Display What You Do Comments 1. Press the On/Off button to turn the The Abbott logo screen will appear in black for a few seconds and then will meter on. appear in grey to ensure that the display is functioning properly.
- Page 75 What You See on the Display What You Do Comments 3. Press 1 to select Data Review. 4. Press Scan to scan the Operator ID While the Operator ID may be up to 30 barcode or manually enter the Operator digits, not all digits will fit on the display.
-
Page 76: Data Review For Patient By Operator Id
Data Review for Patient by Operator ID Pl ease refer to the beginning of this Data Review chapter for step-by-step instructions to access the Data Review menu. Note: The following section illustrates some common settings. Depending on your facility’s specific settings, some screens will display differently or not at all. - Page 77 What You See on the Display What You Do Comments 2. You can select one of the following The number that appears to the right of 1-Previous and 2-Next on the meter options: indicates the number of tests available for Press 1–Previous review.
-
Page 78: Data Review For Patient By Patient Id
Data Review for Patient by Patient ID Please refer to the beginning of this Data Review chapter for step-by-step instructions to access the Data Review menu. Note: The following section illustrates some common settings. Depending on your facility’s specific settings, some screens will display differently or not at all. - Page 79 What You See on the Display What You Do Comments 3. You can select one of the following The number that appears to the right of 1-Previous and 2-Next on the meter options: indicates the number of tests available for Press 1–Previous review.
-
Page 80: Data Review For All Patient Data
Data Review for All Patient Data Please refer to the beginning of this Data Review chapter for step-by-step instructions to access the Data Review menu. Note: The following section illustrates some common settings. Depending on your facility’s specific settings, some screens will display differently or not at all. If the meter does not display the screens shown, please refer to Chapter 11, Troubleshooting. - Page 81 What You See on the Display What You Do Comments 2. You can select one of the following The number that appears to the right of 1-Previous and 2-Next on the meter options: indicates the number of tests available for Press 1–Previous review.
-
Page 82: Data Review For Control Data
Data Review for Control Data The meter stores the last 1,000 control test results. Please refer to the beginning of this Data Review chapter for step-by-step instructions to access the Data Review menu. Note: The following section illustrates some common settings. Depending on your facility’s specific settings, some screens will display differently or not at all. - Page 83 What You See on the Display What You Do Comments 2. You can select one of the following The number that appears to the right of 1-Previous and 2-Next on the meter options: indicates the number of tests available Press 1–Previous for review.
-
Page 84: Data Review For Proficiency Data
Data Review for Proficiency Data The meter stores the last 20 pro ficiency test results. Please refer to the beginning of this Data Review chapter for step-by-step instructions to access the Data Review menu. Note: The following section illustrates some common settings. Depending on your facility’s specific settings, some screens will display differently or not at all. - Page 85 What You See on the Display What You Do Comments 2. You can select one of the following The number that appears to the right of 1-Previous and 2-Next on the meter options: indicates the number of tests available for Press 1–Previous review.
-
Page 86: Data Review For Linearity Data
Data Review for Linearity Data The meter stores the last linearity panel that includes a maximum of 4 replicates for 5 levels (20 tests). Please refer to the beginning of this Data Review chapter for step-by-step instructions to access the Data Review menu. Note: The following section illustrates some common settings. - Page 87 What You See on the Display What You Do Comments 2. You can select one of the following The number that appears to the right of 1-Previous and 2-Next on the meter options: indicates the number of tests available for Press 1–Previous review.
-
Page 88: Proficiency Test
Proficiency Test Proficiency Test - Glucose Proficiency Test - Ketone (Beta-Hydroxybutyrate) -
Page 89: Proficiency Test - Glucose
Proficiency Test Proficiency Test - Glucose Please use the following procedures to perform a proficiency test. The Proficiency Test menu enables you to perform unknown sample test challenges if required by your facility's policy. This functionality may or may not be available depending on the configuration of the meter through the data management system. - Page 90 What You See on the Display What You Do Comments 1. Press the On/Off button to turn on the The Abbott logo screen will appear in black for a few seconds and then will meter. appear in grey to ensure that the display is functioning properly.
- Page 91 What You See on the Display What You Do Comments 4. Press Scan to scan the Operator ID While the Operator ID may be up to 30 digits, not all digits will fit on the display. barcode or manually enter the Operator ID via the keypad, then press Enter.
- Page 92 What You See on the Display What You Do Comments 7. Make sure your hands or gloves are clean and dry before opening the foil packet. Open the foil test strip packet at the notch and tear down to remove the test strip.
- Page 93 If an error is detected during and display the test result. the assay, the assay is terminated and no When using FreeStyle Precision Pro result is displayed. Once the assay begins, test strips the countdown will begin at 5 all key presses are ignored until the assay is seconds.
- Page 94 What You See on the Display What You Do Comments 11. If required, scan or manually enter the If the comment code option is enabled in comment code and press Enter. the patient test configuration through the data management system, the meter will If there is no prompt to enter a be enabled to scan or enter a 1 or 2 digit comment code, skip down to step 12.
-
Page 95: Proficiency Test - Ketone (Beta-Hydroxybutyrate)
Proficiency Test - Ketone (Beta-Hydroxybutyrate) Please use the following procedures to perform a ketone proficiency test. What You See on the Display What You Do Comments Prior to inserting the test strip, ensure that Follow steps 1 to 8 in the last section on the Glucose Proficiency Test. - Page 96 What You See on the Display What You Do Comments 3. Wait for the meter to analyse the sample The meter counts down then displays the test result. If an error is detected during and display the test result. the assay, the assay is terminated and no result is displayed.
- Page 97 What You See on the Display What You Do Comments 5. You can select one of the following The display shows: options: Sample ID (s: prompt) Comment Code (Number in box) Press 1 – Next Test. Test Type (Ketone) Press Menu to return to Menu Mode Date and Time of test menu.
-
Page 98: Linearity Test
Linearity Test... - Page 99 Linearity Test ® The Linearity Test menu enables you to verify method linearity using an RNA Medical brand Calibration Verification Control (CVC) kit. These kits contain assayed materials for use in confirming the calibration and linearity of glucose and ketone at the upper and lower limits of the reportable range and at three (3) points within the range.
- Page 100 What You Do Comments 1. Press On/Off to turn on meter. The Abbott logo screen will appear in black for a few seconds and then will appear in grey to ensure that the display is functioning properly. Next, the software version will briefly appear.
- Page 101 What You See on the Display What You Do Comments 4. Press Scan or manually enter the While the Operator ID may be up to 30 Operator ID via the keypad, then press digits, not all digits will fit on the display. Enter.
- Page 102 What You See on the Display What You Do Comments 7. If the New Panel screen appears you If the CVC kit lot number that was entered is different from the previous one, the meter may either: will prompt you to do one of two actions: Press 1 –...
- Page 103 What You See on the Display What You Do Comments 9. Press Scan to scan the test strip barcode Scanning the barcode identifies the strip type, calibrates the meter, ensures the or manually enter the test strip lot number via the keypad, then press expiry date has not passed, records the strip Enter.
- Page 104 What You See on the Display What You Do Comments 11. With the contact bars facing up, insert Prior to inserting the test strip, ensure that the strip port module is installed and that it the test strip into the test strip port until it stops and Strip Inserted is displayed.
- Page 105 If an error is detected during and display the test result. the assay, the assay is terminated and no When using FreeStyle Precision Pro result is displayed. Once the assay begins, test strips the countdown will begin at 5 all key presses are ignored until the assay is seconds.
- Page 106 What You See on the Display What You Do Comments 15. You can select one of the following The display shows: options: Level (Test level 1 to 5) Test (Replicate 1 to 4 for that level) Press 1–New Level. Comment Code (Number in box) Press 2–Same Level.
-
Page 107: Review Setup
Review Setup Meter Configuration Review Setup Review Test Setup for All Tests Review Test Setup for Test Type Review Test Setup for Patient Test Review Test Setup for Control Test Review Test Setup for Security System Status... -
Page 108: Meter Configuration
Meter Configuration The FreeStyle Precision Pro meter configuration settings are enabled via the data management system. These settings can be viewed on the hand-held device, but cannot be changed on it. Settings that are configured through the data management system... - Page 109 • Decide acceptable formats for the Operator ID barcode. Refer to the Barcode Types in Chapter 13 for available formats. • The meter can truncate (ignore) the leading digits and/or the last digits of an Operator ID. The meter can be set to select specific digits of an Operator ID.
- Page 110 Control Tests • Set which levels of control solution are required, optional or not used by your facility. The meter can be configured to run any combination of low, mid and high control solution tests. • Set whether control solution test results display as numeric or as Pass/Fail. • Determine whether a comment code is required, optional or not used for control tests that are within the acceptable range for the facility and the test strip.
- Page 111 The maximum number of strip lots that can be downloaded to the FreeStyle Precision Pro meter is 36: 18 Glucose and 18 Ketone.
- Page 112 The following features are configured through the optional Wireless Set-Up Utility CD only. Configuration can not be changed through the data management system. Feature status can be viewed on the FreeStyle Precision Pro meter. • View wireless network server information • View signal strength and frequency information...
- Page 113 What You Do Comments 1. Press On/Off to turn on the meter. The Abbott logo screen will appear in black for a few seconds and then will appear in grey to ensure that the display is functioning properly. Next, the software version will briefly appear.
- Page 114 What You See on the Display What You Do Comments 3. Press 2 to select Review Setup. Questions? Refer to Page 11-22 For Technical Support Instructions. Chapter 8: Review Setup...
-
Page 115: Review Test Setup For All Tests
Review Test Setup for All Tests Note: This section illustrates some representative settings. If the meter does not display these screens, please refer to Chapter 11, Troubleshooting. What You See on the Display What You Do Comments 1. Press 1 for Test Setup. 2. - Page 116 What You See on the Display What You Do Comments 3. Press 1-Next to continue to the All Tests Operator ID screen. 4. Press 1-Next to continue to the All Tests Operator ID Truncation screen. Questions? Refer to Page 11-22 For Technical Support Instructions. Chapter 8: Review Setup...
- Page 117 What You See on the Display What You Do Comments 5. Press 1-Next to continue to the All Tests Operator ID Prompt screen. 6. Press 1-Next to return to the Test Setup menu. 8-10 Questions? Refer to Page 11-22 For Technical Support Instructions. Chapter 8: Review Setup...
-
Page 118: Review Test Setup For Test Type
Review Test Setup for Test Type Note: This section illustrates some representative settings. If the meter does not display these screens, please refer to Chapter 11, Troubleshooting. What You See on the Display What You Do Comments 1. Press 1 for Test Setup. 2. - Page 119 What You See on the Display What You Do Comments 3. Press 1-Next to continue to the Test Type Glucose Action Range screen. 4. Press 1-Next to continue to the Test Type Glucose Critical Range screen. 8-12 Questions? Refer to Page 11-22 For Technical Support Instructions. Chapter 8: Review Setup...
- Page 120 What You See on the Display What You Do Comments 5. If Ketone testing is enabled, press 1-Next to continue to the Test Type Ketone Action Range screen, otherwise, press 1-Next to continue to the Test Setup menu. 6. Press 1-Next to continue to the Test Type Ketone Critical Range screen.
-
Page 121: Review Test Setup For Patient Test
Review Test Setup for Patient Test Note: This section illustrates some representative settings. If the meter does not display these screens, please refer to Chapter 11, Troubleshooting. What You See on the Display What You Do Comments 1. Press 1 for Test Setup. 2. - Page 122 What You See on the Display What You Do Comments 3. Press 1-Next to continue to the Patient Test Patient ID Truncation screen. 4. Press 1-Next to continue to the Patient Test Comment Code If In-Range screen. 5. Press 1-Next to continue to the Patient Test Comment Code If Out-of-Range screen.
- Page 123 What You See on the Display What You Do Comments 6. Press 1-Next to continue to the Patient Test Patient ID Prompt screen. 7. Press 1-Next to continue to the Patient Test Repeat Manual ID Entry screen. 8. Press 1-Next to return to the Test Setup menu.
-
Page 124: Review Test Setup For Control Test
Review Test Setup for Control Test Note: This section illustrates some representative settings. If the meter does not display these screens, please refer to Chapter 11, Troubleshooting. What You See on the Display What You Do Comments 1. Press 1 for Test Setup. 2. - Page 125 What You See on the Display What You Do Comments 3. Press 1-Next to continue to the Control Test Glucose Result screen. 4. If Ketone testing is enabled, press 1-Next to continue to the Control Test Ketone Levels screen, otherwise, press 1-Next to skip down to step 7.
- Page 126 What You See on the Display What You Do Comments 6. Press 1-Next to continue to the Control Test Comment Code If In-Range screen 7. Press 1-Next to continue to the Control Test Comment Code If Out-of-Range screen. 8. Press 1-Next to return to the Test Setup menu.
-
Page 127: Review Test Setup For Security
Review Test Setup for Security Note: This section illustrates some representative settings. If the meter does not display these screens, please refer to Chapter 11, Troubleshooting. What You See on the Display What You Do Comments 1. Press 1 for Test Setup. 2. - Page 128 What You See on the Display What You Do Comments If Ketone testing is enabled, press 1-Next to continue to the Security Ketone QC Interval screen, otherwise, press 1-Next to skip down to step 5. 4. Press 1-Next to continue to the Security Operator ID Not Certified screen.
- Page 129 What You See on the Display What You Do Comments 6. Press 1-Next to continue to the Security Patient Data Not Confirmed screen. 7. Press 1-Next to continue to the Security Confirm Patient Data screen. 8. Press 1-Next to continue to the Strip Port Quality screen 8-22 Questions? Refer to Page 11-22 For Technical Support Instructions.
- Page 130 What You See on the Display What You Do Comments 9. Press 1-Next to return to the Test Setup screen 8-23 Questions? Refer to Page 11-22 For Technical Support Instructions. Chapter 8: Review Setup...
-
Page 131: System Status
What You Do Comments 1. Press On/Off to turn on the meter. The Abbott logo screen will appear in black for a few seconds and then will appear in grey to ensure that the display is functioning properly. Next, the software version will briefly appear. - Page 132 What You See on the Display What You Do Comments 3. Press 2 to select Review Setup. 4. Press 2 to continue to the System Status Battery Power screen. 5. Press 1-Next to continue to the System Status Temperature screen. 8-25 Questions? Refer to Page 11-22 For Technical Support Instructions.
- Page 133 What You See on the Display What You Do Comments 6. Press 1-Next to continue to the System Status Time screen. 7. Press 1-Next to continue to the System Status Date screen. 8. Press 1-Next to continue to the System Status Software Version and Serial Number screen.
- Page 134 What You See on the Display What You Do Comments 9. Press 1-Next to continue to the The number that appears on your meter Wireless Communication Timeout may be different from the number that Menu (optional). appears here. 10. Press 1-Next to return to the Review Setup screen.
-
Page 135: Review Setup For Wireless Communication (Optional)
Review Setup for Wireless Communication (Optional) Meter Wireless Configuration... -
Page 136: Meter Wireless Configuration
Meter Wireless Configuration The FreeStyle Precision Pro meter wireless configuration settings are enabled via the Wireless Set-up Utility (optional). These settings can be viewed on the hand-held device, but cannot be changed on it except for the Enable/Disable meter wireless module. - Page 137 What You See on the Display What You Do Comments 1. Press 5 for Wireless Menu. is displayed when the meter is wireless enabled. is displayed when there is stored data in the meter pending transmission. 2. Press 1 to disable the meter wireless Screen displays the wireless and network information menu.
- Page 138 What You See on the Display What You Do Comments Press 2 for additional network settings. Screen displays the wireless network settings configured through the Wireless Set-Up Utility CD. The timeout interval is set through the data management system. This value indicates that the meter will go into wireless stand-by mode to save energy.
- Page 139 What You See on the Display What You Do Comments 4. Signal status screen. Screen displays the wireless band frequency (Freq), the received signal strength (RSS) and the signal noise ratio (SNR) at the time of the last wireless transmission. Press to refresh the screen for the current signal status.
-
Page 140: 10. Data Upload
10. Data Upload Docking Station Upload Wireless Transfer (if enabled) Docking Station Mounting Instructions Enabling Data Upload... -
Page 141: Docking Station Upload
Docking Station Upload To start the upload of data, simply place the FreeStyle Precision Pro meter into the docking station. The meter will first turn on if it isn't already, and then automatically upload data to the data management system. -
Page 142: Wireless Transfer (If Enabled)
If a problem occurs with the data upload, an error message may appear on the meter. If the meter is removed from the docking station while an upload is in process, the meter will display Last upload incomplete, Redock meter, Turning Off. The meter will then shut down. - Page 143 Wireless Hardware Error hardware module. Turn the meter off and back on again to re-establish wireless connectivity. If the problem persists, contact your local Abbott Diabetes Care Inc. office or distributor. The following applies if the optional Wireless Communication is enabled: When the meter turns off with test results still pending to send (Data Transmission Pending), it will automatically attempt to send those results.
-
Page 144: Docking Station
Docking Station The FreeStyle Precision Pro System offers a docking station that provides means for hands-free, automatic data transfer (upload/download) between the FreeStyle Precision Pro meter and a PC running the data management application software. Set up the docking station outside patient vicinity. The docking station has a hinged base that allows it to sit on a desktop or to be mounted to a wall using the included mounting plate. -
Page 145: Enabling Data Upload
2. Ensure that the computer has power, and if desired, a working network connection. 3. Ensure that the local data management system or Abbott Data Repeater (for a networked connection) is operational and correctly configured. This software and its installation instructions are available separately. - Page 146 Figure 2 - Data Upload via Terminal Server AC Adapter 1. Connect the terminal server AC adapter to a power source. Data Networking Cable 2. Connect the serial cable to the terminal server and to the docking station data transfer port. Alternatively, connect the data upload cable to the terminal server and to the data port of the FreeStyle Precision Pro meter.
-
Page 147: 11. Troubleshooting
11. Troubleshooting Troubleshooting Patient Test Results Troubleshooting Out-of-Range Control Test Results Troubleshooting Out-of-Range Linearity Test Results Troubleshooting Wireless (if enabled) Troubleshooting Barcode Scanning Error Messages Technical Support Instructions Returning a Meter Contacting Abbott for Service... -
Page 148: Troubleshooting Patient Test Results
• Water or alcohol remaining on the puncture site. • Venous or arterial whole blood sample not tested within 30 minutes after collection. • Arterial or capillary blood is tested in venous mode when using FreeStyle Precision Pro test strips. 11-1 Questions? Refer to Page 11-22 For Technical Support Instructions. -
Page 149: Troubleshooting Out-Of-Range Control Test Results
If test results appear higher or lower than expected for reasons not described above, please repeat the test using a new test strip. If the results still appear higher or lower than expected, contact your local Abbott Diabetes Care Inc. office or distributor. -
Page 150: Troubleshooting Out-Of-Range Linearity Test Results
If test results are out-of-range despite meeting the above criteria, please repeat the test using a new box of control solutions and/ or test strips. If the results are still out-of-range, contact your local Abbott Diabetes Care Inc. office or distributor. -
Page 151: Troubleshooting Wireless (If Enabled)
Wireless Set-Up Utility CD (optional). Troubleshooting Barcode Scanning If you are using an Abbott isolation bag, it must be pulled taut over the meter’s barcode scan window for proper scanning. 11-4 Questions? Refer to Page 11-22 For Technical Support Instructions. -
Page 152: Error Messages
Error Messages In this section, you will find information relating to error messages that appear on the display when the FreeStyle Precision Pro meter detects errors. For each corresponding message, an explanation is given and appropriate responses are described. In many situations, it may be possible to proceed with some of the functions, at least temporarily, before attending to the problem. - Page 153 Symptom/Error Message Explanation How To Respond Battery power is getting low. Testing will be Install new batteries. See Chapter 12, available for a limited time. Maintenance, for more information. Press 1 to turn meter off. The strip port module is not detected by the Re-install strip port module.
- Page 154 The meter is shipped from the factory Use PrecisionWeb or other Abbott-supplied without configuration. This screen will software to configure the device to your appear the first time you turn on the meter specific facility’s requirement prior to using...
- Page 155 1-Turn Off 3. If the problem still persists, record the 4-digit error code and contact Abbott Technical Support. The test strip was inserted at the wrong Remove the test strip from the test strip time.
- Page 156 Symptom/Error Message Explanation How To Respond 1. Press 1. The strip inserted is a Glucose strip, while the meter was expecting a Ketone strip. 2. Remove test strip. 3. Insert new test strip. 1. If “Glucose QC Due in xx min.” If glucose QC is due soon, the message “Glucose QC Due in xx min."...
- Page 157 3. Contact your system administrator if the messages continue to display after running the required QC tests. 1. Place the meter in the Abbott Docking If the meter requires an upload to the data management system, “Upload Due Now” Station and wait for the meter to will display on the main screen.
- Page 158 Wireless Set-Up Utility CD. Note: Check the FreeStyle Precision Pro meter display for proper performance before every test. If at any time the display screen becomes difficult to read, discontinue use of meter and call your local Abbott Diabetes Care Inc.
- Page 159 When a Test is Selected: Symptom/Error Message Explanation How To Respond The Glucose QC Interval Controls Expired Perform the remaining glucose control tests option is set to Warn or Lockout and one or indicated in the message. more control tests is past due. (The menu item 2–Continue appears only if this option is set to Warn.
- Page 160 Symptom/Error Message Explanation How To Respond The Ketone QC Interval Controls Expired Perform the remaining ketone control tests option is set to Warn or Lockout and one or indicated in the message. more control tests is past due. (The menu item 2–Continue appears only if this option is set to Warn.
- Page 161 During Any Test: Symptom/Error Message Explanation How To Respond 1. Rescan the barcode or manually enter the The barcode just scanned was not accepted. Possible reasons are: ID or lot number. • T he green scanner beam did not pass across 2. Notify the system administrator. The all the bars of the code.
- Page 162 Symptom/Error Message Explanation How To Respond 1. Verify and re-enter the ID or lot number The ID or lot number just scanned or entered is too long or too short, according using the barcode scanner or keypad. to format defined during the setup of this 2.
- Page 163 Press 2 to Exit. This test strip is not compatible with the Repeat the scan with a FreeStyle Precision FreeStyle Precision Pro meter. Pro compatible test strip. 1. Press 1 to ReEnter the ID using the The Operator ID just entered is not on the list of acceptable Operator IDs defined for barcode scanner or keypad.
- Page 164 Symptom/Error Message Explanation How To Respond 1. Press 1 to ReEnter the Operator ID. The Operator ID entered is not on the list of acceptable Operator IDs defined for this 2. If the problem persists, contact the meter. system administrator for further information on operator certification.
- Page 165 Symptom/Error Message Explanation How To Respond 1. Repeat the test with a new test strip. The test result is below the measuring limit of the system. 2. If the result persists, follow your facility's policy. <20 mg/dL 1. Repeat the test with a new test strip. The test result is above the measuring limit of the system.
- Page 166 These codes provide Abbott personnel additional information about the 2. If the error occurs again, record the problem. Errors include: 4-digit error code and contact Abbott Technical Support. 4327 - The strip was removed during Repeat the test with a new test strip.
- Page 167 Symptom/Error Message Explanation How To Respond When a Control Test is Selected: Press 1 to ReEnter the lot. A control solution lot number has been entered for a different level of control test from the one that the meter expected to Press 2 to run the level of test that matches run (in the usual low-to-high sequence).
- Page 168 Symptom/Error Message Explanation How To Respond When Data Review is Selected: Press 1 to Exit and return to the Data There are no stored test results for the type Review Menu. of data requested. Press 1 to view the Previous result. The meter is not able to recall a previous test result.
-
Page 169: Technical Support Instructions
When you call, an Abbott representative will address the problem and/or instruct you to return the meter, test strips, control solution and/or linearity kit. Do not return the FreeStyle Precision Pro meter or any part of the system for repair until you receive authorisation from an Abbott representative. -
Page 170: Returning A Meter
5. Describe the problem and the conditions when it occurred: _____________________________________________________ _____________________________________________________________________________________________________ _____________________________________________________________________________________________________ 6. Have the FreeStyle Precision Pro meter and testing materials available when calling. Returning a Meter You must follow the instructions provided in the return kit when returning used meter. -
Page 171: Contacting Abbott For Service
Contacting Abbott for Service Abbott is committed to helping you resolve any problems with the FreeStyle Precision Pro system. For technical assistance, please contact your local office or distributor listed below. ASIA EUROPE MIDDLE EAST Hong Kong Ireland Saudi Arabia 美國雅培製藥有限公司... -
Page 172: 12. Maintenance
12. Maintenance Cleaning the Exterior Surface Replacing the Strip Port Module Replacing the Batteries... -
Page 173: Cleaning The Exterior Surface
Plus, Super Sani-Cloth , Hype-Wipe and Virox 5 Cleaning solutions not listed have not been tested and may damage the meter. Contact your local Abbott Diabetes Care Inc. office or distributor for the most up-to-date information on cleaning solutions. IMPORTANT: Abbott Diabetes Care Inc. - Page 174 Turn off the meter prior to cleaning. Wipe all surfaces until the meter is visibly clear of soil. Do not apply cleaning solution directly to the meter. If using a pre-packaged wipe, squeeze out excess fluid prior to use. Do not immerse or autoclave the meter or flood it with any liquid.
-
Page 175: Replacing The Strip Port Module
Make sure the area around the strip port is completely dry prior to installing the replacement strip port module. Removal 1. Turn the FreeStyle Precision Pro meter off by pressing the On/Off button on the keypad. - Page 176 Replacement 1. Obtain a replacement strip port module. 2. Slide the replacement strip port module into position on the meter. (Fig. 3) 3. Insert strip port module firmly into place. (Fig.4) Figure 3 4. Use a small cross head (Phillips) screwdriver to insert the new screw. This will secure the strip port module in place.
-
Page 177: Replacing The Batteries
Replacing the Batteries Use the following procedure to install new batteries in the FreeStyle Precision Pro meter. The FreeStyle Precision Pro meter requires two (2) AA alkaline, lithium or nickel cadmium (NiCad) batteries or nickel-metal hydride (NiMH) rechargeable batteries. 1. Turn the FreeStyle Precision Pro meter off by pressing the On/Off button on the keypad. - Page 178 7. Insert the new batteries on top of the tab, using the + and - symbols in the battery compartment to position the new batteries with the correct polarity. (Fig. 5) 8. Align the battery compartment cover with the slots on the FreeStyle Precision Pro meter, then slide the cover into place. (Fig. 6)
-
Page 179: 13. Specifications
13. Specifications FreeStyle Precision Pro Meter Symbols Barcode Types... -
Page 180: Freestyle Precision Pro Meter
Specifications FreeStyle Precision Pro Meter Dimension and Weight Specifications: Length: 19.94 cm ± 2 mm (7.85 in ± .08 in) Thickness: 4.92 cm ± 2 mm (1.92 in ± .08 in) Width: 7.45 cm ± 2 mm (2.93 in ± .08 in) Weight: 300 grams ±... -
Page 181: Environmental Specifications
Rated Pollution Degree: Wireless Specifications The optional wireless function requires a WiFi enabled facility. If your agreement with Abbott Diabetes Care Inc. includes wireless functionality on the FreeStyle Precision Pro system, your system administrator must enable both the data management system and the individual meters for wireless functionality. -
Page 182: Symbols
Symbols There are special symbols that appear on the FreeStyle Precision Pro meter, test strips and docking station. Please note: Some of the symbols listed below will not appear on your FreeStyle Precision Pro system due to differences in local regulatory requirements. - Page 183 This product must not be disposed of via municipal waste collection. Separate collection for electrical and electronic equipment waste per Directive 2002/96/EC in the European Union is required. The European Battery Directive requires separate collection of spent batteries, aiming to facilitate recycling and to protect the environment. The batteries in this product should be removed and disposed in accordance with local regulations for separate collection of spent batteries.
- Page 184 Manufacturer. Consult instructions for use. Recyclable. In vitro diagnostic medical device. FCC Registration. Contains FCC ID: N6C-SXSDCAG, IC: 4908B-SXSDCAG Biohazard 13-5 Questions? Refer to Page 11-22 For Technical Support Instructions. Chapter 13: Specifications...
-
Page 185: Barcode Types
Barcode Types The FreeStyle Precision Pro system is compatible with both one dimensional (1D) barcodes (Codabar, Code 128, Code 39, Code 93, I 2 of 5, EAN, RSS) and two dimensional (2D) barcodes (Data Matrix, Aztec, PD-417, Micro PDF, QR Code, Maxicode, CODABLOCK F, RSS Composite). - Page 186 EP1101111B1; CA2302448C; CA2337019C; CA2346415C; CA2351796C; CA2353670C; CA2305800C. Additional patents may be issued and/or pending. FreeStyle and related brand marks are trademarks of Abbott Diabetes Care Inc. in various jurisdictions. Other trademarks are the property of their respective owners. ©2012 Abbott ART25413_Rev-A 03/13 Abbott Diabetes Care Ltd.
Need help?
Do you have a question about the FreeStyle Precision Pro and is the answer not in the manual?
Questions and answers
Can Operator ID numbers be less or more than 9 digits? Our Pt ID's are 9 digits as well. We've had instances where Op ID's are scanned instead of pt ID's. This creates a lag uploading into the pt's chart due to an incident report that must be filed. Thank you so much for any suggestions to circumvent or prevent this issue.
Yes, the Operator ID numbers for the Abbott FreeStyle Precision Pro can be between 1 and 30 digits, so they can be less or more than 9 digits.
This answer is automatically generated