Advertisement
Table of Contents
- 1 Table of Contents
- 2 What's in the Box
- 3 Camera Overview
- 4 Installation
- 5 Formatting the Microsd Card
- 6 Starting Video Recording
- 7 Icon Introduction
- 8 Setup Menu
- 9 Gestures
- 10 Switching Recording Display Modes
- 11 Using the "Roadcam" App
- 12 Specifications
- 13 Caution
- 14 Contact Us
- Download this manual
Advertisement
Table of Contents

Related Manuals for KingSlim D4


Summary of Contents for KingSlim D4
- Page 1 USER MANUAL KingSlim D4 Dash Cam V1.0...
-
Page 2: Table Of Contents
CONTENTS What’s in the Box Camera Overview Installation Formatting the microSD Card Starting Video Recording Icon Introduction Setup Menu Gestures Switching Recording Display Modes Using the “Roadcam” App Specifications Caution Contact Us... -
Page 3: What's In The Box
WHAT'S IN THE BOX Waterproof D4 Dual Dash Cam * 1 GPS Bracket * 1 Rear Camera * 1 7m Rear Camera Car Charger with 3.5m Static Sticker *2 Extension Cable * 1 Power Cable * 1 Double-sided Adhesive Double-sided Adhesive... -
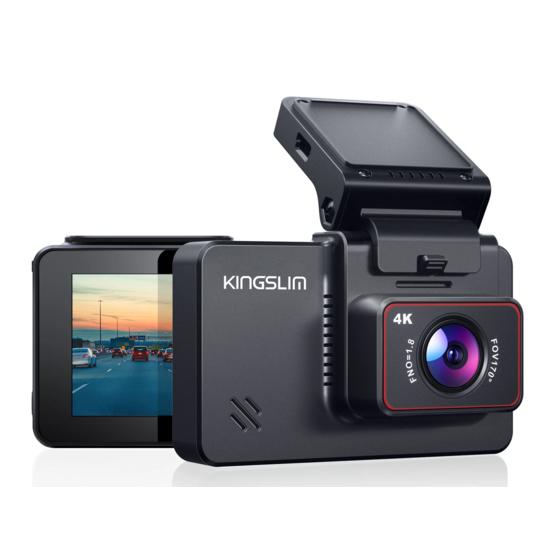
Page 4: Camera Overview
CAMERA OVERVIEW Bracket Slot Rear Camera IN Front Camera Speaker Mini USB Power Port (for data transmission) MicroSD Card Slot Working Indicator Power Button... - Page 5 Vent Mini USB Power Port (for connecting GPS) Screen...
-
Page 6: Installation
INSTALLATION 1. Insert the microSD card. Warm Tips: A Class 10 or above microSD card is highly recommended for the D4 dash cam (microSD card is not included). D4 dash cam supports an up to 256GB microSD card. Please format your card in the camera before using this dash cam. - Page 7 D4 dash cam. ④ Peel off the other film on the adhesive tape, press the D4 dash cam to secure it on the static sticker. (If you want to remove the dash cam, please take off the static sticker.)
- Page 8 7. Install the Rear Camera. Position 1: Install the rear camera on the rear windshield. The installation is easier. Position 2: Install the rear camera near the license plate. Position 2 is highly recommended. The rear image is crisp and clear for both rear viewing and reversing guide.
-
Page 9: Formatting The Microsd Card
Note: ① Pay attention to the connector position when connecting the rear camera with the extension cable, please refer to the below details. ② Please clean the position to ensure the adhesive quality before installing the rear camera. ③ Please clean the rear windshield regularly to ensure the image quality if you choose the position 1. -
Page 10: Starting Video Recording
2. Loop recording is already enabled on the D4 dash cam, the default setting is 3 mins. 3. G-sensor is already enabled on the D4 dash cam, the default setting is low. If an impact or sudden braking is detected, it will automatically start recording and save footage to either the “Front Urgent Album”... -
Page 11: Setup Menu
SETUP MENU 1. Resolution You can choose front camera resolution. Options: 4K25/2K30 Default Setting: 4K25 The rear camera resolution is 1080P. 2. Video Encode H.265 can minimize the footage size, meaning you can store more video files in the microSD card. H.264 has better compatibility. Options: H.264/H.265 Default Setting: H.264 3. - Page 12 6. Parking The camera will be turned on automatically and start the 20s recording and lock if there is an impact to the car during parking. The higher level you select, the easier it is to trigger the recording. Options: Off/Low/Middle/High Default Setting: Off...
- Page 13 10. Loop Recording The files will be saved every 3 MIN if you choose the 3 MIN option. When the microSD card is full, the new files will cover the old one if loop recording is on. If it is off, the camera will not record anymore when the card is full. You will then need to format the SD card or change to a new one.
- Page 14 14. Format SD Format the microSD card. Note: ① All data will be deleted. Before formatting your microSD card, please remember to back up your important data on your other devices. ② When the microSD card is inserted for the first time, please format it in the camera to ensure that the microSD card is compatible with the camera.
-
Page 15: Gestures
17. About Check the version of the camera. 18. Album You can check your videos and photos. If you want to download content, please use the “RoadCam” app, or back up data on your computer. GESTURES Taking a Photo In the video recording mode, slide from left to right to take photos. 00:00:34 2020-07-17 13:47... -
Page 16: Switching Recording Display Modes
SWITCHING RECORDING DISPLAY MODES Click the right side of the screen to switch recording display modes. 00:00:34 2020-07-17 13:47 USING THE “ROADCAM” APP CONNECT WITH ON THE APP 1. Stop video recording on the dash cam. 2. Tap the Wifi icon on the dash cam. 00:00:34 2020-07-17 13:47 WiFi Info WiFi SSID:... - Page 17 6. Tap the switch icon to switch to the front or rear camera display. Recording instrument Exit KINGSLIM840AAF 2020 07 17 13:47 Video Photo Connecting camera Video Add Recorder DOWNLOAD OR DELETE VIDEOS AND PHOTOS 1. Tap the icon to stop the recording. Video 2.
- Page 18 Movie Select Movie Select Exit KINGSLIM840AAF Loop video Emergency video Loop video Emergency video 2020/07/17 14:00 2020/07/17 14:00 13:32:26 13:35:47 13:32:26 13:35:47 150.00MB 81.00MB 150.00MB 81.00MB 2020 07 17 13:47 Video Photo Video CHANGE RECORDING SETTINGS You can change recording settings in the app. Settings Microphone Cycle record time...
-
Page 19: Specifications
SPECIFICATIONS Front Camera: 5MP, f/1.8, 170° FOV Rear Camera: 2MP, f/2.0, 150° FOV Video: 4K+1080P@25fps/2.5k+1080P@30fps Screen: 3-inch IPS touchscreen Video Coding: H.264/H.265 Input: 5V DC Working Temperature: -20°C~60°C (-4°F~140°F) If your dashcam does not appear to be working properly, please follow these troubleshooting steps: 1. -
Page 20: Caution
3. Avoid leaving the device in direct sunlight for extended periods of time. 4. Do not dismantle or expose the internal battery. CONTACT US For any inquiries with KingSlim products, please feel free to contact us, we will respond within 24 hours. E-mail: cs@kingslim.net Tel: 888-811-1140 (US) Mon-Fri (except holiday) 9am-5pm (EST) Official website: www.kingslim.net...
Need help?
Do you have a question about the D4 and is the answer not in the manual?
Questions and answers