Chapters
Table of Contents

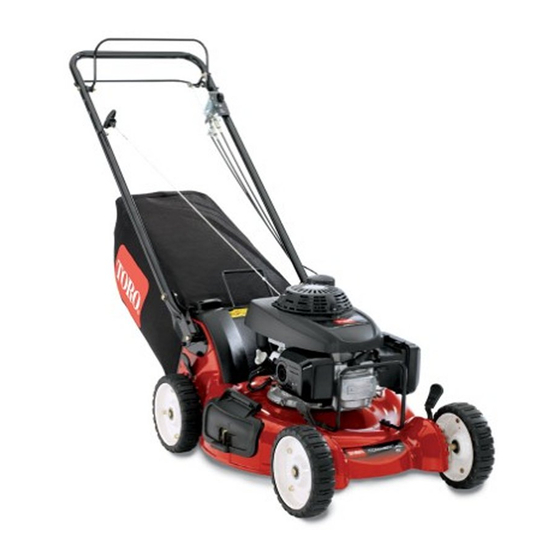
Related Manuals for Toro 22186TE


Summary of Contents for Toro 22186TE
- Page 1 Form No. 3368-850 Rev B Commercial 53cm Lawn Mower Model No. 22186TE—Serial No. 311000001 and Up To register your product or download an Operator's Manual or Parts Catalog at no charge, go to www.Toro.com. Original Instructions (EN)
-
Page 2: Table Of Contents
You are responsible for General Safety ............3 operating the machine properly and safely. Sound Pressure............. 5 You may contact Toro directly at www.Toro.com for Sound Power ............5 machine and accessory information, help finding a Hand-Arm Vibration..........5 dealer, or to register your machine. -
Page 3: Safety
To reduce the potential for injury, Troubleshooting............25 comply with these safety instructions. Toro designed and tested this machine for reasonably safe service; however, failure to comply with the following instructions may result in personal injury. To ensure maximum safety, best performance, and... - Page 4 • If gasoline is spilled, do not attempt to start the – Do not mow excessively steep slopes. engine but move the machine away from the area – Exercise extreme caution when on slopes. of spillage and avoid creating any source of ignition –...
-
Page 5: Sound Pressure
• To ensure the best performance and safety, purchase only genuine Toro replacement parts and accessories. Do not use will fit parts and accessories; they may cause a safety hazard. -
Page 6: Safety And Instructional Decals
Safety and Instructional Decals Safety decals and instructions are easily visible to the operator and are located near any area of potential danger. Replace any decal that is damaged or lost. Manufacturer's Mark 1. Indicates the blade is identified as a part from the original machine manufacturer. - Page 7 114-2820 1. Warning—read the 4. Cutting/dismemberment Operator's Manual. hazard of hand or foot, mower blade—stay away from moving parts. 2. Thrown object 5. Cutting/dismemberment hazard—keep bystanders hazard of hand or foot, a safe distance from the mower blade—remove machine. the ignition key and read the instructions before servicing or performing maintenance.
-
Page 8: Setup
Loose Parts Use the chart below to verify that all parts have been shipped. Procedure Description Qty. Oval-head bolt (5/16 x 1-1/2 inches) Bolt (5/16 x 1-1/2 inches) Spacer Install the handle. Locknut (5/16 inch) Cable tie SAE 30W detergent oil with an API 20 oz. -
Page 9: Filling The Engine With Oil
Figure 5 Figure 7 1. Higher handle position 2. Lower handle position 6. Install the back cover with the 2 screws you removed Note: Torque all bolts to 120 in-lb (13.6 N-m). in step 1. 3. Route the self-propel drive cable down the inside of the handle, thread the cable through the opening on the left hand side of the housing, and attach the cable end (Figure 6). -
Page 10: Install The Recycle Plug Or Grass Bag
3. Remove the dipstick and check the oil level. prevents the mower from operating without a recycle Figure 9 shows how to read the dipstick. plug or grass bag. This prevents the machine from throwing debris at the operator through the rear chute. For the switch to detect the presence of the recycle plug, the top of the recycle plug lever must lie fully in the bottom of the channel (Figure 10). -
Page 11: Product Overview
Product Overview 2. Squeeze the button on the lever with your thumb and fully insert the recycle plug into the opening (Figure 11). 3. Release the button on the lever and ensure that the top of the lever is lies fully in the switch channel. If the top of the lever is not in the switch channel, your machine will not start! Note: If the lever does not latch properly,... -
Page 12: Controls
Controls Operation Note: Determine the left and right sides of the machine from the normal operating position. Checking the Engine Oil Level Service Interval: Before each use or daily Important: To read the dipstick in this machine correctly, do not screw it in to the oil fill tube. Insert the dipstick until the threads on the cap just touch the threads in the oil fill tube. -
Page 13: Filling The Fuel Tank With Gasoline
Filling the Fuel Tank with Gasoline DANGER Gasoline is extremely flammable and explosive. A fire or explosion from gasoline can burn you and others. • To prevent a static charge from igniting the gasoline, place the container and/or mower directly on the ground before filling, not in a vehicle or on an object. -
Page 14: Stopping The Engine
Figure 22 1. Recoil start handle 5. If the machine does not start in 1 or 2 pulls, repeat steps 3 and 4. Note: If the machine still does not start, contact an Authorized Service Dealer. Stopping the Engine Service Interval: Before each use or daily To stop the engine, release the blade control bar (Figure 23). -
Page 15: Adjusting The Cutting Height
Figure 24 1. Self-propel drive bar Note: The maximum self-propel drive speed is fixed. To reduce the speed, increase the space between the self-propel drive bar and the handle. 2. To disengage the self-propel drive, release the self-propel drive bar. Note: The machine comes with freewheeling Figure 25 clutches which make it easier to pull the machine... -
Page 16: Bagging The Clippings
(Figure 28). serious personal injury or death to the operator or bystanders. Check the grass bag frequently. If it is damaged, install a new Toro replacement bag. WARNING The blade is sharp; contacting the blade can result in serious personal injury. -
Page 17: Side-Discharging The Clippings
2. Lift open the side discharge door (Figure 31). Figure 31 3. Install the side discharge chute and close the door onto the chute (Figure 32). Figure 29 Side-discharging the Clippings Use the side discharge for cutting very tall grass. If the bag is on the machine, remove it and insert the recycle plug before side-discharging the clippings;... -
Page 18: Operating Tips
If the finished lawn appearance is unsatisfactory, try one or more of the following: • Replace the blade when necessary with an original Toro replacement blade. • Sharpen the blade. • Mow only dry grass or leaves where feasible. Wet •... -
Page 19: Maintenance
Maintenance Recommended Maintenance Schedule(s) Maintenance Service Maintenance Procedure Interval • Change the engine oil. After the first 5 hours • Check the engine oil level. • Ensure that the engine stops within 3 seconds after releasing the blade control bar. Before each use or daily •... -
Page 20: Engine Maintenance
Engine Maintenance Servicing the Air Cleaner Service Interval: Before each use or daily Yearly 1. Press down on the latch tabs on top of the air cleaner cover and remove the cover (Figure 35). Figure 36 3. Tip the machine onto its side, with oil fill tube down, to drain the used oil out through the oil fill tube into a pan (Figure 37). -
Page 21: Drive System Maintenance
Drive System Maintenance Adjusting the Self-propel Drive Cable Whenever you install a new self-propel cable or if Figure 38 the self-propel drive is out of adjustment, adjust the self-propel drive cable. 1. Center electrode insulator 2. Side electrode 1. Loosen the cable support nut (Figure 39). 3. -
Page 22: Blade Maintenance
Blade Maintenance Maintaining the Cutting Blade Service Interval: Yearly Examine the blade whenever you run out of gasoline. If the blade is damaged or cracked, replace it immediately. If the blade edge is dull or nicked, have it sharpened or replace it. -
Page 23: Cleaning
Cleaning Storage To prepare the machine for off-season storage, perform Cleaning under the Machine the recommended maintenance procedures; refer to Maintenance. Service Interval: Before each use or daily Store the machine in a cool, clean, dry place. Cover the WARNING machine to keep it clean and protected. -
Page 24: General Information
General Information 1. Clean under the machine; refer to Cleaning under the Machine (page 23). 2. Clean any dirt and chaff from the cylinder, cylinder head fins, and blower housing. 3. Remove grass clippings, dirt, and grime from the external parts of the engine, the shrouding, and the top of the machine. -
Page 25: Troubleshooting
Troubleshooting Problem Possible Cause Corrective Action Engine does not start 1. The fuel tank is empty or the fuel 1. Drain and/or fill the fuel tank with system contains stale fuel. fresh gasoline. If the problem persists, contact an Authorized Service Dealer. 2. - Page 26 Problem Possible Cause Corrective Action Mower does not self-propel 1. The self-propel drive cable is out of 1. Adjust the self-propel drive cable. adjustment or is damaged. Replace the cable if necessary. 2. There is debris under the belt cover. 2.
- Page 27 Spypros Stavrinides Limited Cyprus 357 22 434131 Surge Systems India Limited India 91 1 292299901 T-Markt Logistics Ltd. Hungary 36 26 525 500 Toro Australia Australia 61 3 9580 7355 Toro Europe BVBA Belgium 32 14 562 960 374-0269 Rev B...
- Page 28 Instructions for Obtaining Warranty Service The Toro® Company and its affiliate, Toro Warranty Company, pursuant to If you think that your Toro Product contains a defect in materials or an agreement between them, jointly promise to repair the Toro Product...